
Agentforce Marketing (aka: Marketing Cloud Next) introduced marketing teams to Salesforce Flow for the first time. While flows provide increased capabilities over tools like Engagement Studio in Account Engagement and Journey Builder in Marketing Cloud Engagement, building them can be time-consuming and even intimidating to new users.
In this post, we’ll explore how to create and use templates to increase efficiency while taking full advantage of the power of Flow.
Non-Admin Flow Types
“Non-admin” flows power Agentforce Marketing and allow marketers to automate key processes without needing administrator-level permissions. Common use cases include sending emails, delivering SMS messages, and creating Salesforce records.
There are two primary Flow types within Agentforce Marketing:
- Form-Triggered: These have a 1-to-1 relationship with a marketing form. They are used to create or update Salesforce records, manage consent, and handle immediate post-submission tasks.
- Segment-Triggered: These are primarily used to send individual or a series of emails and SMS messages. They also power Path Experiment (available in the Advanced Edition) and provide access to additional flow elements allowing marketers to build customized journeys.
Flow is extremely powerful, but getting started can be tough. The Flow canvas is a “blank slate” that requires thought and configuration.
Let’s take a look at how marketers can simplify and scale their efforts using flow templates with a real-world scenario.
Example Scenario
The marketing team has a high volume of assets that they would like to gate on the website using Agentforce Marketing forms. They need to ensure that existing contacts or leads are updated when a form is submitted before creating any new lead records. Additionally, they must generate consent records whenever a user opts in to marketing communications and add them to the correct Salesforce campaign for tracking purposes.
User Setup and Permissions
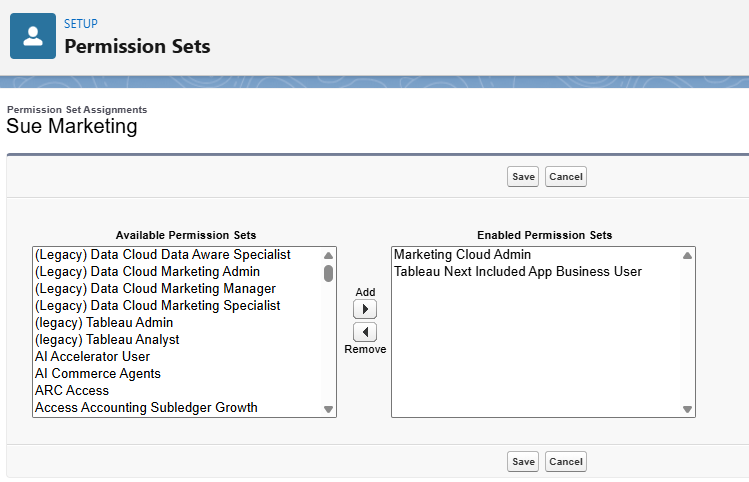
To replicate the experience of a marketing user, all flows and images in this post were created with a Salesforce user with the following profile and permissions. These are reflective of a standard marketing user.
- Profile
- Standard User
- Permission Sets
- Marketing Cloud Admin
- Tableau Next Included App Business User (This provides access to the Marketing Performance Dashboards)
- CMS Contributor Role
- Content Manager
Form and Flow Templates
The first step is determining the fields that need to be included on the form. The best approach is to take a minimalistic approach and only ask for information that will be used or is needed for lead routing.
Hidden fields on forms are very useful for capturing form-specific data for use in your flow. For example, you can use them to automatically pass the Campaign ID and Campaign Member Status.
Creating the Form Template
- Select the “Marketing” app from the App Launcher.
- Click the “Content” tab to enter the Salesforce CMS.
- Click on the “Content Workspace for Marketing Cloud” workspace.
- Click the “Add” button and select “Content”.
- Choose the “Form” CMS content type.
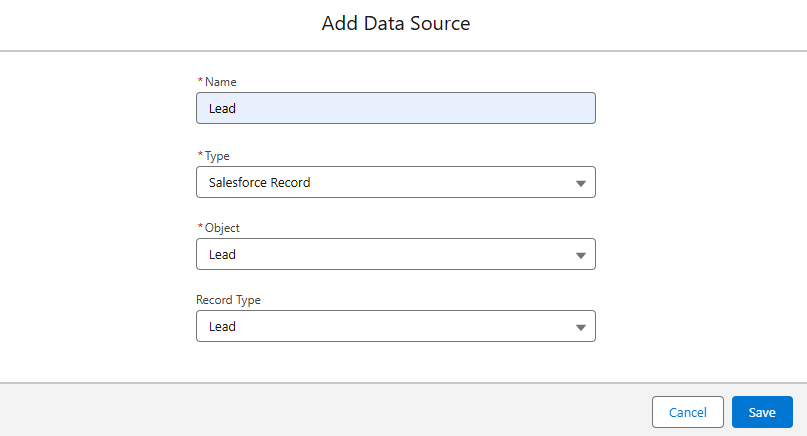
- Add Data Source as “Lead”.
- Drag the input fields into the form, and configure the labels, unique names, and determine if the field should be required or hidden.
- Set the desired action at form submission (show thank you message or redirect).
- Add a title, API Name, and description and then save.
Here’s an example of my form. Note that all fields have been set to required (with the exception of the opt-in checkbox). It’s important to know that Flow will overwrite data in Salesforce if a submission is received with blank data. If optional fields are needed, formulas can be created in the flow to protect data.

Creating A Flow
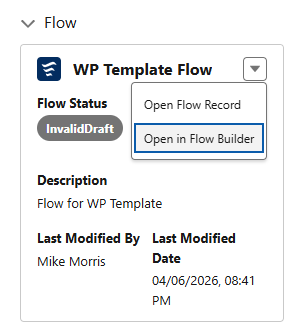
- From the form you just created, click “New Flow” in the flow section.
- Select “Open Flow in Flow Builder”.
- Customize the flow as needed and save.
Customizing the Flow
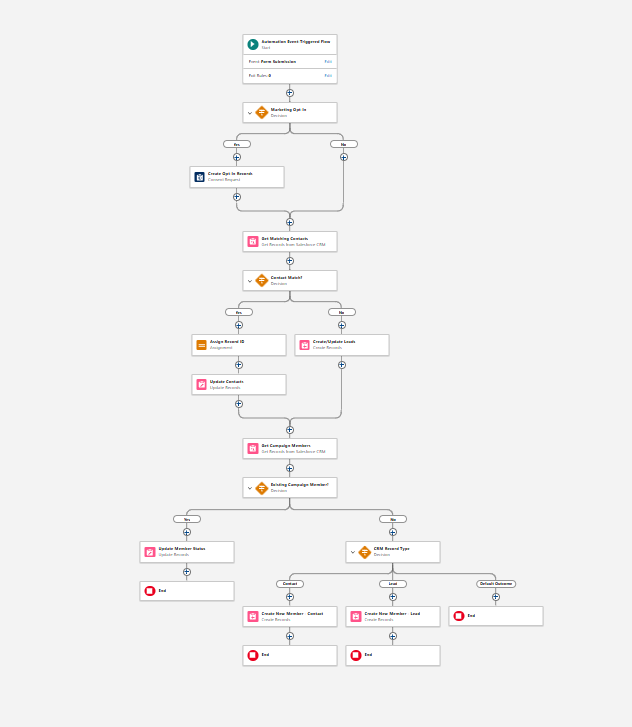
The flow needed to meet our requirements is a little complicated, but that’s the whole point of this post. We don’t want the marketing team building this logic repeatedly.
This flow was built by a user with the “Marketing Cloud Admin” permission set. The “Marketing Cloud Manager” role lacks access to certain required elements. If you’d prefer, your Salesforce Administrator can also set up this template for you.
Flow Summary
Here’s a summary of the actions being performed in the flow.
- Creates an opt-in consent record if the consent box on the form is checked.
- Finds existing Salesforce contacts based on the email address and last name in the form submission.
- Updates existing contact records, if found.
- Finds existing Salesforce leads based on the email address and last name in the form submission.
- Updates existing lead records, if found.
- Created new leads, if matching records are not found.
- Retrieves campaign members based on the CRM ID of the person who submitted the form and the campaign ID included in the hidden field on the form.
- Updates the campaign member status of existing members to the value included in the Campaign Member Status hidden field from the form.
- Created new campaign members using the hidden fields from the form.
Saving the Flow as a Template
We can now complete the creation of the flow template.
Save As Template
- From the Flow tab, open the latest version of the flow.
- Delete the associated form from the “Start” element.
- Click “Edit” next to “Event: Form Submission”.
- Click the “X” to delete the form.
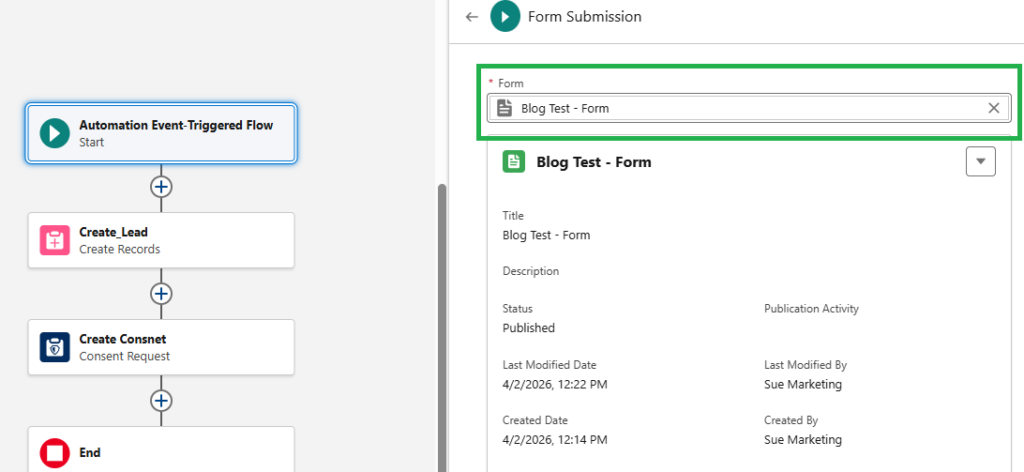
- Click “Save As New Flow”.
- Add the flow label and a detailed description of what the flow does and when it should be used. The API Name will automatically populate based on the flow label.
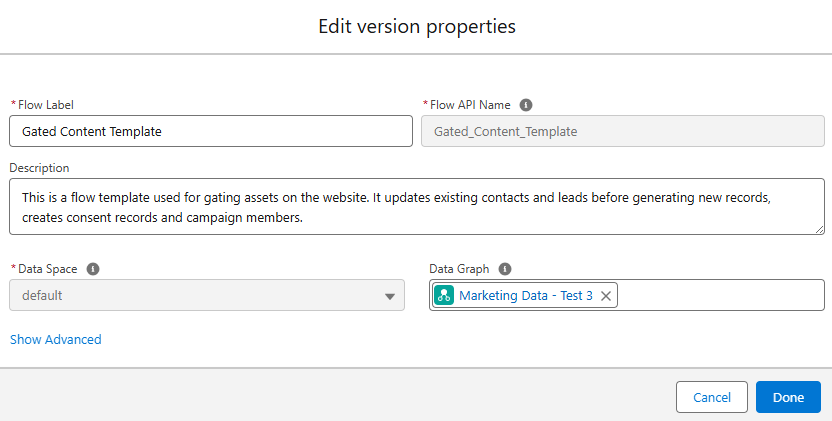
- Note: You may run into an issue saving due to the presence of the Consent Request element. If this happens, delete the field reference in the Contact Point value and save.
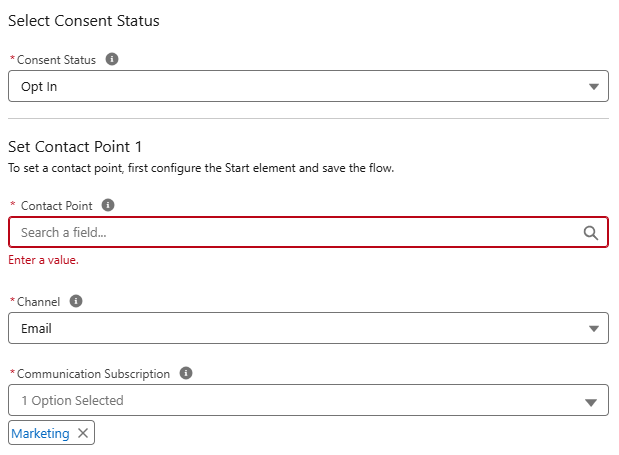
- Click “Save As New Version”.
- It’s important to create a new version of the flow before saving as a template. The initial version of the flow will be v0.
- Saving a new version will increment the version number and ensure your updates are available in the flow template.
- Click the dropdown to the right of the “Save As New Version” button and select “Save as Template”.
- Confirm that the template has been created by completing the following steps:
- Click the Flows tab.
- Click the “New” button.
- Enter the template name in the search box..
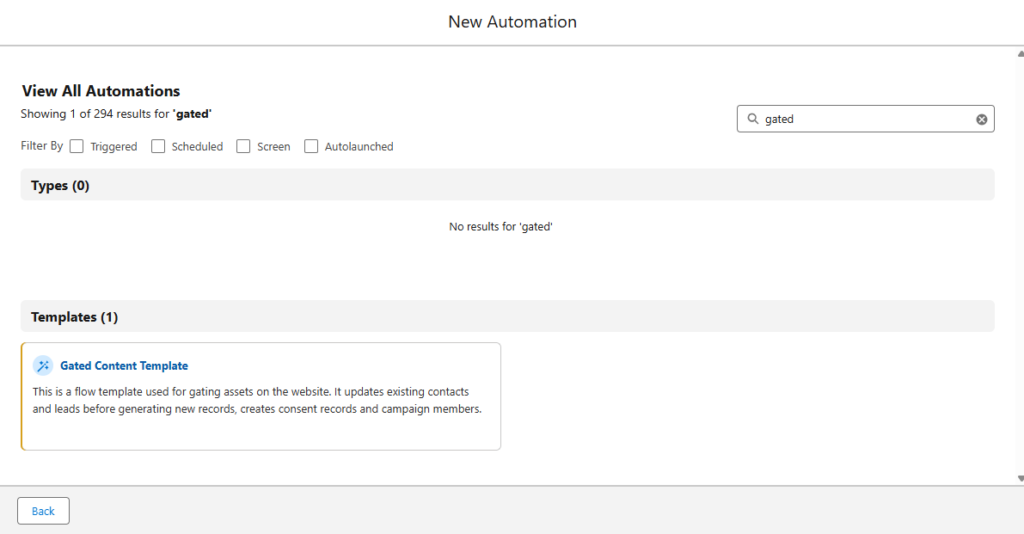
Using Your Templates
Now that all the heavy lifting is done, you or your team can use your form and flow templates to quickly support additional assets. Here’s how.
Repeat the following steps for all new assets
- Create the Salesforce campaign that will be used for the form and the campaign members.
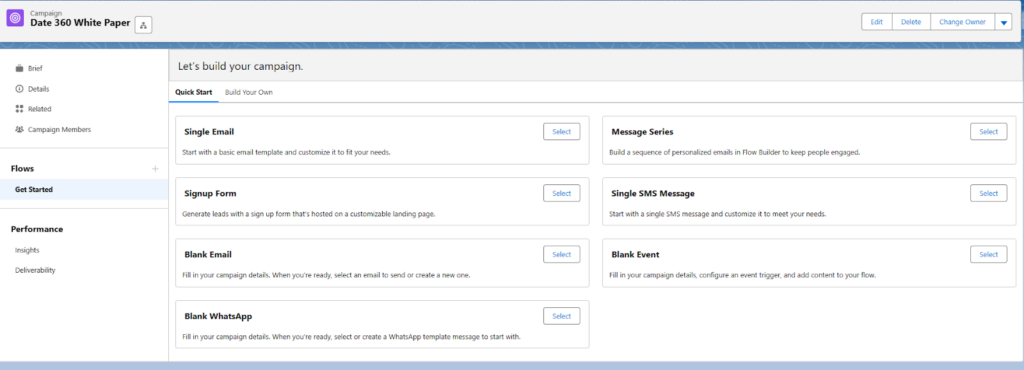
- When creating the campaign from the Marketing App, do not select a campaign template.
- Selecting a template will result in an additional flow being created.
Do not select a template at the following screen.
- Navigate to the form template in the CMS.
- Select the “Clone” from the dropdown menu to the right of the form name.

- Name the new form based on the asset name.
- Update the Campaign ID and Campaign Member Status (hidden field values) and Form Submission action.

- From the Flow tab, click the “New” button.
- Search for and select the gated content template.
- Click “Edit” next to “Event: Form Submission” and select the cloned form.
- Update the Contact Point value in the Consent Request element to reference the email address from the associated form.
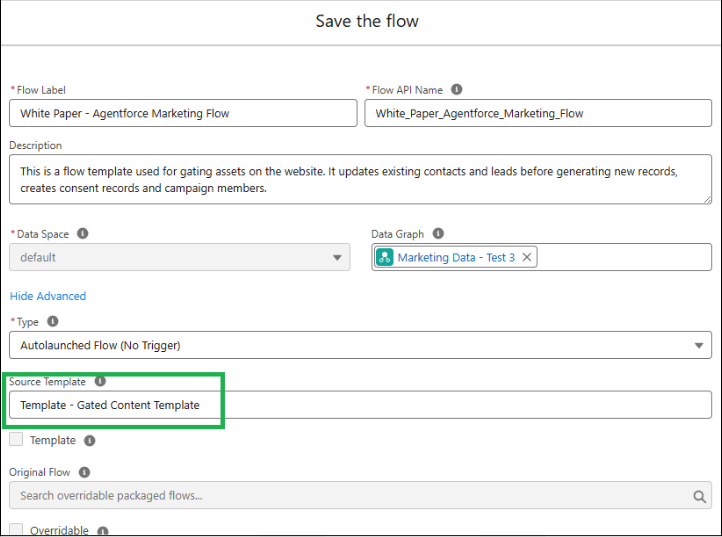
- Click “Save” and name the new flow.
- Click “Show Advanced” and delete the value in the “Source Template” field.
- Non-admin users will not be able to activate the flow if this step is omitted.
- Click “Show Advanced” and delete the value in the “Source Template” field.
- The Consent Request element can be a bit finicky. If you see an error after updating the Contact Point, just delete the element and add it back.
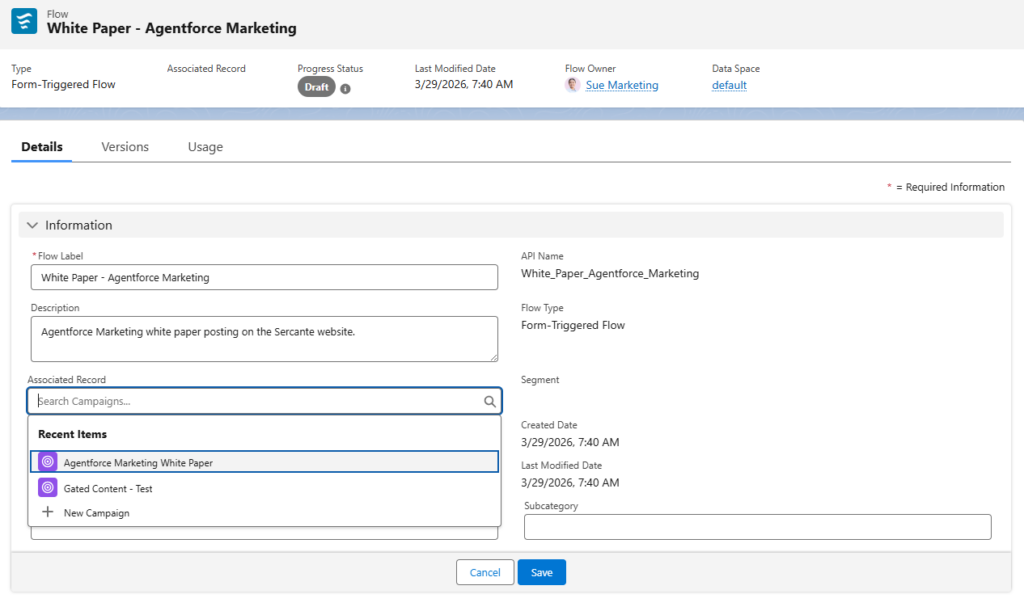
- Exit the flow details page and associate the flow to the correct campaign using the “Associated Record” lookup.
- Return to the CMS and publish the form (this will also activate the flow).
- Add the embed code to the web page promoting the asset.
Save Time and Increase Efficiency with Templates
Building the initial form and flow template featured in this post took approximately one hour. Because the logic is quite involved, I spent a portion of that time testing to ensure everything functioned exactly as intended.
Once the templates were ready, I put them to the test with a stopwatch. While the steps in the “Using Your Template” section might look detailed, I was able to create a brand-new form and flow in just 4 minutes and 1 second. That is a massive 93% time savings!
Beyond just saving time, templates ensure accuracy and process consistency. Asking multiple people to manually replicate the complex requirements stated in this post would almost certainly result in errors.
If you frequently build forms and flows with similar structures, do yourself a favor and templatize. Your future self (and coworkers) will thank you.
Sercante is recognized as a Marketing Cloud Growth and Advanced Implementation Expert and has the expertise to support your Agentforce Marketing needs. If you’re interested in support with Agentforce Marketing, reach out to us and let us know how we can help.