Category

Jenna Molby

In this tutorial, I will show you how to show/hide dynamic content based on URL parameters for any web page. This solution uses HTML, CSS and JavaScript instead of backend coding, so you will be able to use it with Marketo, Pardot, or any other system that allows a bit of custom code.

The HTML

Wrap each one of your dynamic content sections in a DIV and add a class called dynamic-content. Also, give each DIV a unique ID. We will reference these later in the JavaScript.

<!-- Default Dynamic Section -->
<div id="default-content" class="dynamic-content">
  This is the default content
</div>
<!-- Dynamic Section 1 -->
<div id="apples" class="dynamic-content">
  I like apples
</div>
<!-- Dynamic Section 2 -->
<div id="oranges" class="dynamic-content">
  I like oranges
</div>
<!-- Dynamic Section 3 -->
<div id="bananas" class="dynamic-content">
  I like bananas
</div>

The CSS

There’s only one line of CSS needed to hide all the elements on the page since JavaScript will be used to show/hide the content.

.dynamic-content {
    display:none;
}

The JavaScript

This is the complicated part. First, we need to parse the URL and check for a specific parameter. For this example I will be using the parameter name “dc”, so in this case, my URL would look like this:

https://jennamolby.com/my-webpage?dc=mycontent

This is the piece of code to parse the URL. You can change “dc” to be whatever parameter name you want.

// Parse the URL parameter
function getParameterByName(name, url) {
    if (!url) url = window.location.href;
    name = name.replace(/[\[\]]/g, "\\$&");
    var regex = new RegExp("[?&]" + name + "(=([^&#]*)|&|#|$)"),
        results = regex.exec(url);
    if (!results) return null;
    if (!results[2]) return '';
    return decodeURIComponent(results[2].replace(/\+/g, " "));
}
// Give the parameter a variable name
var dynamicContent = getParameterByName('dc');

Use jQuery to show/hide dynamic content

To make things easier, we’ll use jQuery to show/hide the content, in conjuction with the javascript. You can add in as many conditions as you want, just make sure you always include default content just in case parameters are misspelled or not in the URL.

<script src="//code.jquery.com/jquery-1.12.0.min.js"></script>
<script type="text/javascript">
 $(document).ready(function() {
	// Check if the URL parameter is apples
	if (dynamicContent == 'apples') {
		$('#apples').show();
	} 
	// Check if the URL parameter is oranges
	else if (dynamicContent == 'oranges') {
		$('#oranges').show();
	} 
	// Check if the URL parameter is bananas
	else if (dynamicContent == 'bananas') {
		$('#bananas').show();
	} 
	// Check if the URL parmeter is empty or not defined, display default content
	else {
		$('#default-content').show();
	}
});
</script>

The full JavaScript code

Here’s the full piece of javascript and jQuery code.

<script src="//code.jquery.com/jquery-1.12.0.min.js"></script>
<script type="text/javascript">
	// Parse the URL parameter
	function getParameterByName(name, url) {
	    if (!url) url = window.location.href;
	    name = name.replace(/[\[\]]/g, "\\$&");
	    var regex = new RegExp("[?&]" + name + "(=([^&#]*)|&|#|$)"),
	        results = regex.exec(url);
	    if (!results) return null;
	    if (!results[2]) return '';
	    return decodeURIComponent(results[2].replace(/\+/g, " "));
	}
	// Give the parameter a variable name
	var dynamicContent = getParameterByName('dc');
 
	 $(document).ready(function() {
 
		// Check if the URL parameter is apples
		if (dynamicContent == 'apples') {
			$('#apples').show();
		} 
		// Check if the URL parameter is oranges
		else if (dynamicContent == 'oranges') {
			$('#oranges').show();
		} 
		// Check if the URL parameter is bananas
		else if (dynamicContent == 'bananas') {
			$('#bananas').show();
		} 
		// Check if the URL parmeter is empty or not defined, display default content
		else {
			$('#default-content').show();
		}
	});
</script>

Questions?

Send me a tweet @jennamolby, or contact the Sercante team for help.

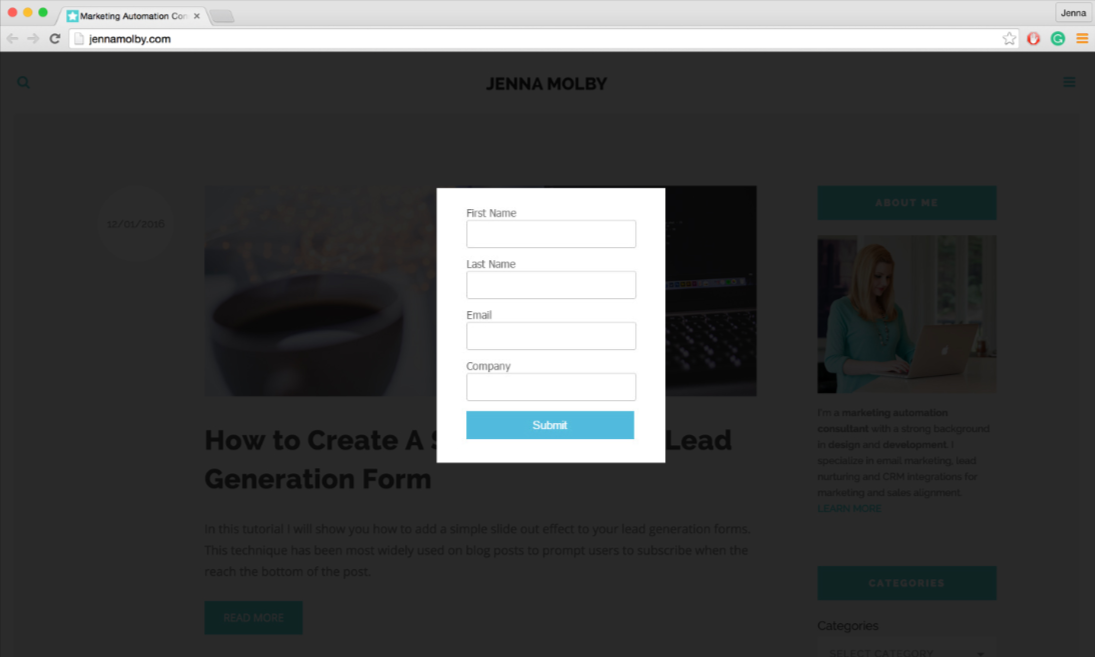
In this tutorial, I will show you how to create a pop-up form that can be placed on a Pardot landing page. I will go over 2 methods, opening the pop-up form when a link is clicked and opening the pop-up on page load.

Getting Started

Before you get started, make sure you have a form and a landing page created.

Get the pages and files ready

We will be using Magnific Pop-up jQuery Plugin to create the pop-up in Pardot.

Step 1: Download the Files

Download the Javascript File and the CSS file by pressing CTRL + S on your keyboard and saving it to your desktop.

Step 2: Upload files to Pardot

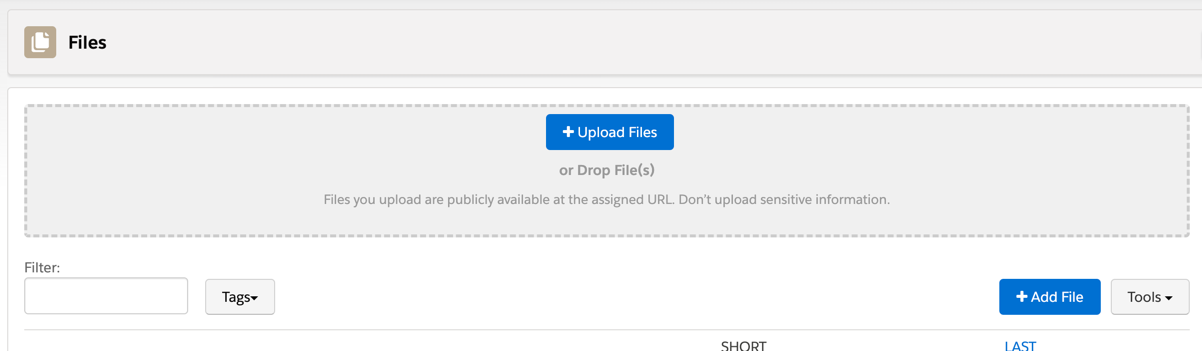
Now you will need to upload the 2 files you just downloaded to Pardot under Content > Files.

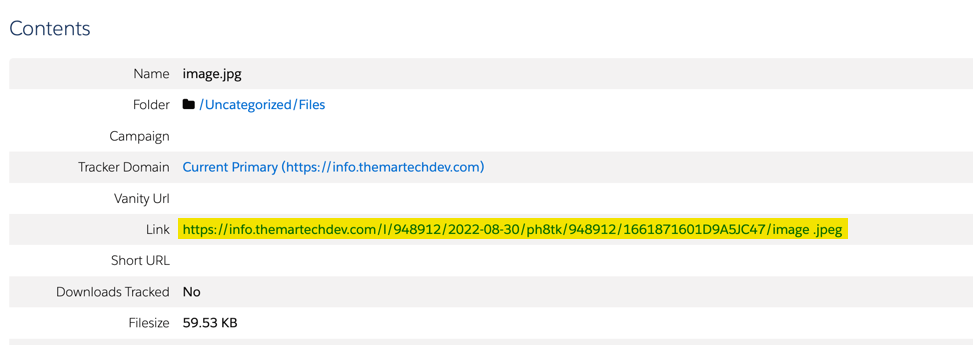
Copy and paste the URLs of the uploaded files into a word or text document. You will need these in step 3.

Step 3: Add the files to your layout template

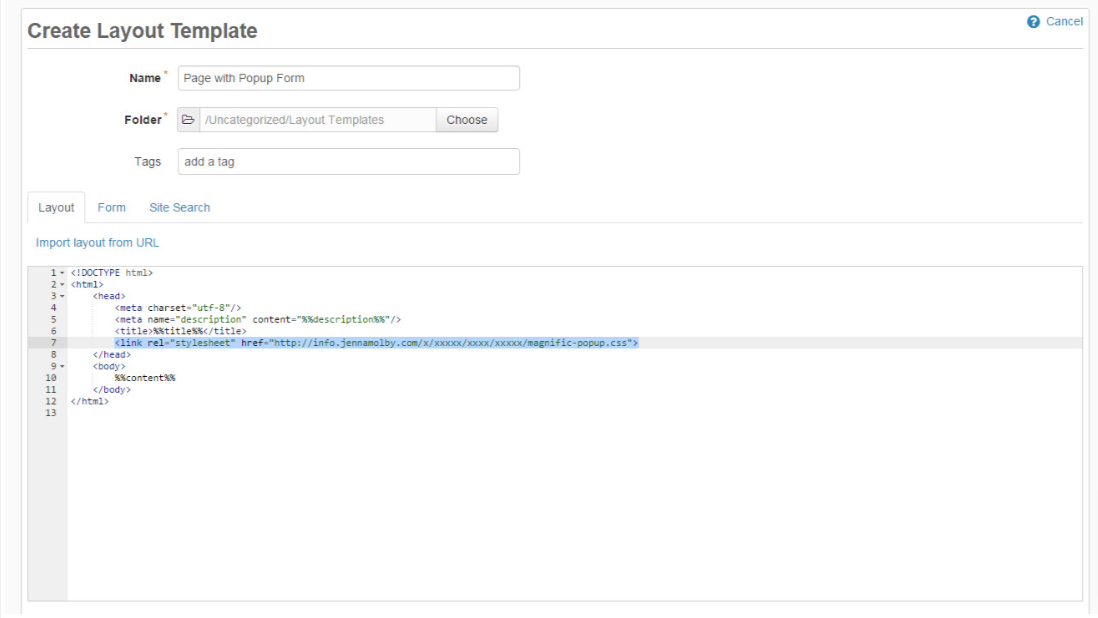
Add the CSS file

At the top of the page, somewhere within the <head> </head> tags, link the CSS file.

<style type="text/css">
    .white-popup-block{background:#FFF;padding:20px 30px;text-align:left;max-width:350px;margin:40px auto;position:relative}
</style>

Make sure you change the pop-up CSS URL to the Pardot content URL.

Add the JavaScript Files

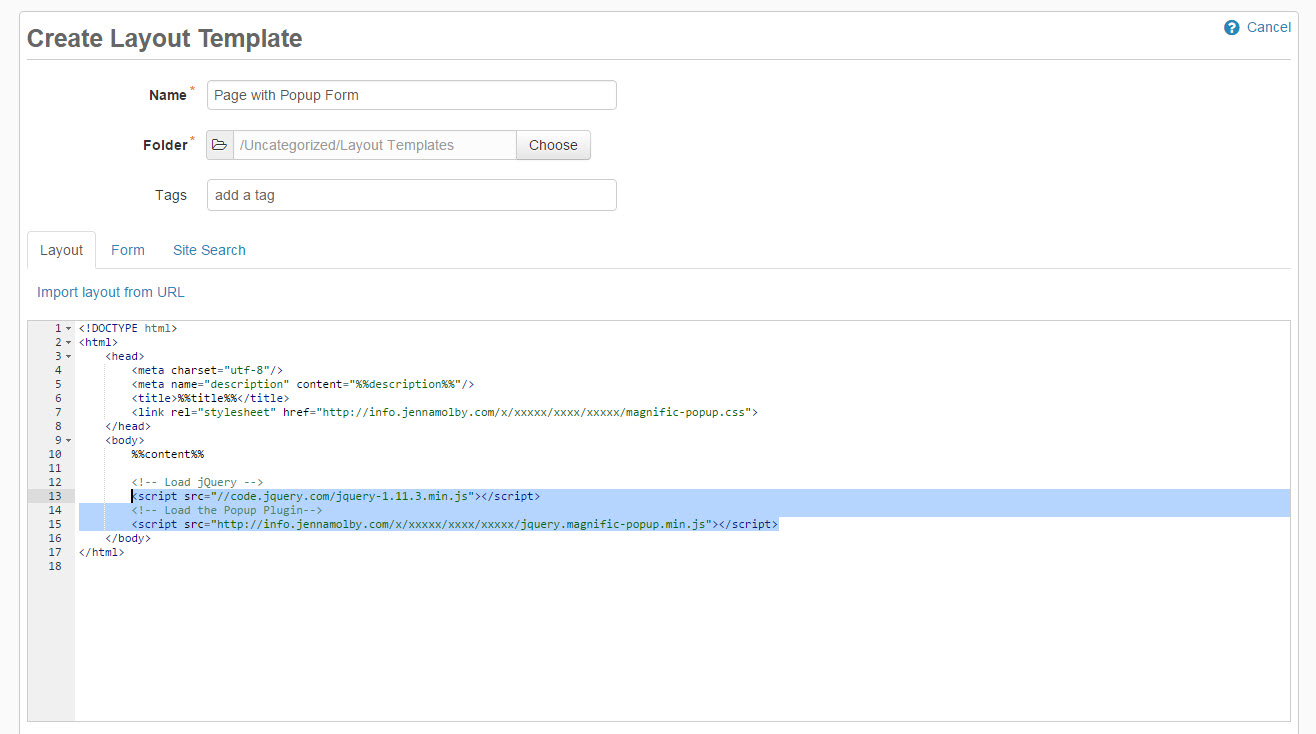
Open up your layout template, scroll down to the bottom of the page and add the following script right before the closing </body> tag.

<!-- Load jQuery -->
<script src="//code.jquery.com/jquery-1.11.3.min.js"></script>
<!-- Load the Pop-up Plugin-->
<script src="http://info.jennamolby.com/l/xxxx/xxxxxx/xxxx/xxx/xx/jquery.magnific_popup.min.js"></script>

Make sure you change the pop-up plugin URL to the Pardot content URL.

Open The Pop-up on Click

To open the pop-up form on click add this piece of code where you want the link or button to appear.

<a class="popup-with-form" href="#my-form">Open form</a>
%%content%%

Add this javascript code right before the closing </body> tag.

$(document).ready(function() {
$('.popup-with-form').magnificPopup({
type: 'inline',
});
});

Open The Pop-up on Page Load

To open the pop-up form when the page loads add this HTML anywhere in the body of your page.

%%content%%

add this javascript code right before the closing </body> tag.

$(document).ready(function() {
     $.magnificPopup.open({items: {src: '#my-form'},type: 'inline'}, 0);
});

You can remove the ability to close the pop-up, so the user has to input their information to continue, by adding modal:true to the JavaScript.

$(document).ready(function() {
    $.magnificPopup.open({items: {src: '#my-form'},type: 'inline', modal:true}, 0);
});

Questions?

Send me a tweet @jennamolby, or contact the Sercante team for help.
In this tutorial, you will learn how to turn any landing page into a Pardot Layout Template that can be used across all your Pardot marketing campaigns. You can use an existing landing page, a free template, a paid template from a marketplace like ThemeForest, or an existing page on your website.

Step 1: Create a new layout template in Pardot

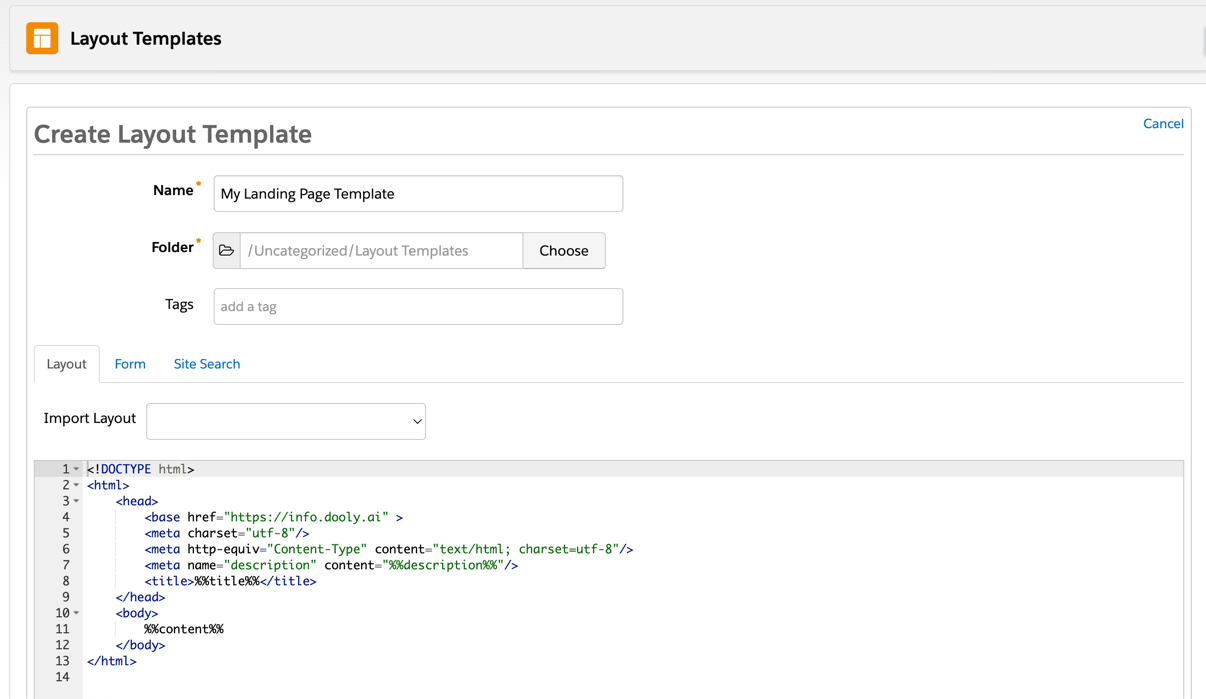
Create a new layout template in Pardot (Content > Layout Template > Add Layout Template). Give your layout template a descriptive name and add your desired tags.

Step 2: Import Your Own Landing Page

For this tutorial I will be using this landing page as an example, but you can follow along with whatever landing page you want.

There are 2 ways you can import your landing page into Pardot

  1. Copy & pasting the HTML source code directly into the editor
  2. Using the Import layout from URL option that Pardot offers

Both ways are pretty similar. Let’s break down the 2 ways.

1. Copy & pasting the HTML source code directly into the editor

You can view the source code of the landing page in Chrome by navigating your landing page > right click > view page source. Copy all the code that is there and paste it into your layout template editor.

pardot-landing-page-template-view-source

2. Using the Import layout from URL option that Pardot offers

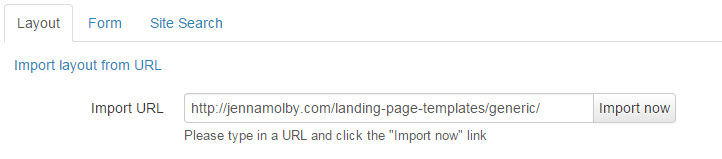
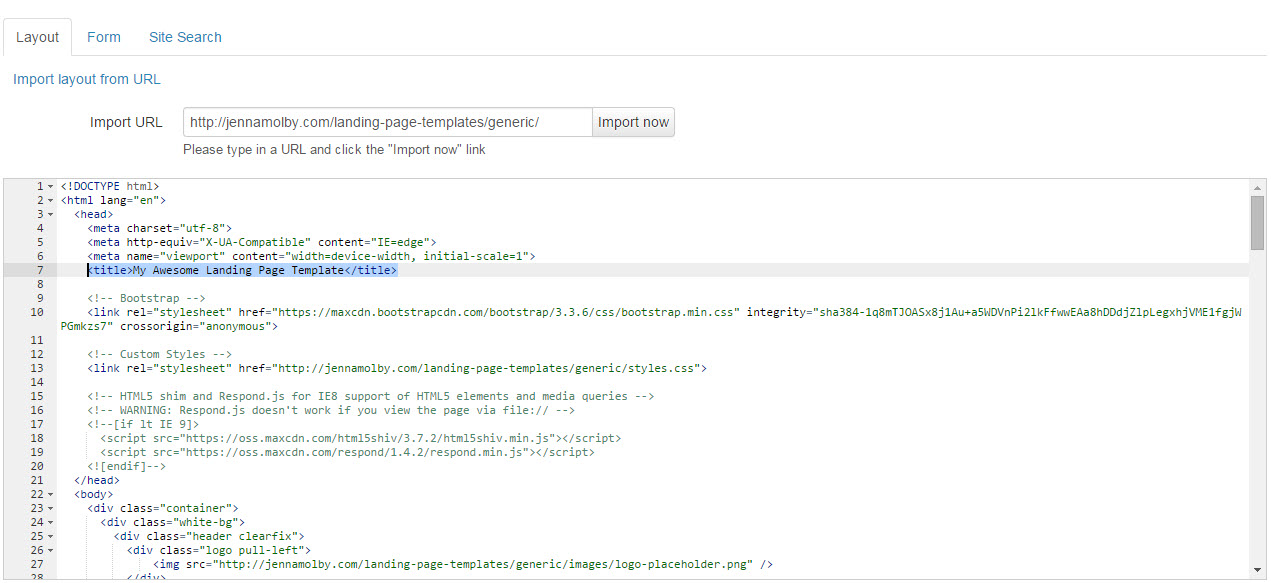
Copy your landing page URL, then navigate to your Pardot layout template. Click on import layout from URL and paste in the landing page URL.

pardot-landing-page-template-import-url

Both ways will give you the same result.

Step 3: Upload Your Images and Files

Now that all the landing page HTML is loaded into Pardot, the images and files linked on the page are not imported yet.

There are a couple different types of files that will need to be imported into Pardot

  • All images (.jpg, .gif, .png, etc)
  • All CSS files (.css)
  • All Javascript files (.js)

In my landing page template there are 3 files that I need to download.

  1. Styles.css
  2. logo-placeholder.png
  3. feature-image.jpg

Download these files, if you haven’t already, and save them on your computer. Upload them into Pardot under Content > Files > Add File

Replace the URL to the old files in your page template by copy and pasting the URL that Pardot generates when you upload the files

Repeat this process until all your images and files are in Pardot.

Step 4: Create editable Text

The next step is where you choose what content should be editable within the Pardot landing page editor. You can create as many editable sections as you want, but I recommend limiting it so your layout and branding is consistent across all Pardot landing pages. For this example, I’m going to make the main content area editable and the call-to-action title editable as shown below in yellow.

To create an editable section, wrap a DIV around the content like this:

<!-- Start Pardot Editable Section -->

For my example, I’m left with this HTML for my main content section:

<!-- Start Pardot Editable Section -->

INSERT YOUR HEADLINE HERE

Lorem ipsum dolor sit amet, consectetur adipiscing elit. Duis facilisis elit ex, at condimentum leo varius porttitor. Ut sed malesuada enim. Cras eget tristique diam. Nam eget accumsan sem, eu pulvinar nisl. Donec quis aliquet dolor, quis finibus leo. Fusce commodo enim est, quis porttitor enim molestie vel. Sed quis sapien egestas nulla rutrum accumsan.

  1. This is an important pointNullam eget sapien fringilla, cursus lectus ac, ullamcorper sapien. Cras dolor nisi, blandit venenatis sapien at, elementum luctus arcu. Pellentesque.
  2. This is another important pointDonec a diam at quam pellentesque commodo et sed felis. Nulla efficitur erat eu tortor aliquet semper. Vestibulum aliquet sollicitudin dui id cursus metus.
  3. This is an important pointEtiam cursus consectetur lacinia. Donec vehicula dui quam, sit amet facilisis felis tincidunt in. Sed ac eleifend velit, sit amet rutrum nullam.
<!-- Start Pardot Editable Section -->

And my call-to-action title looks like this

CALL TO ACTION TITLE

Repeat this process for all the sections you want to make editable.

Step 5: Add the Form

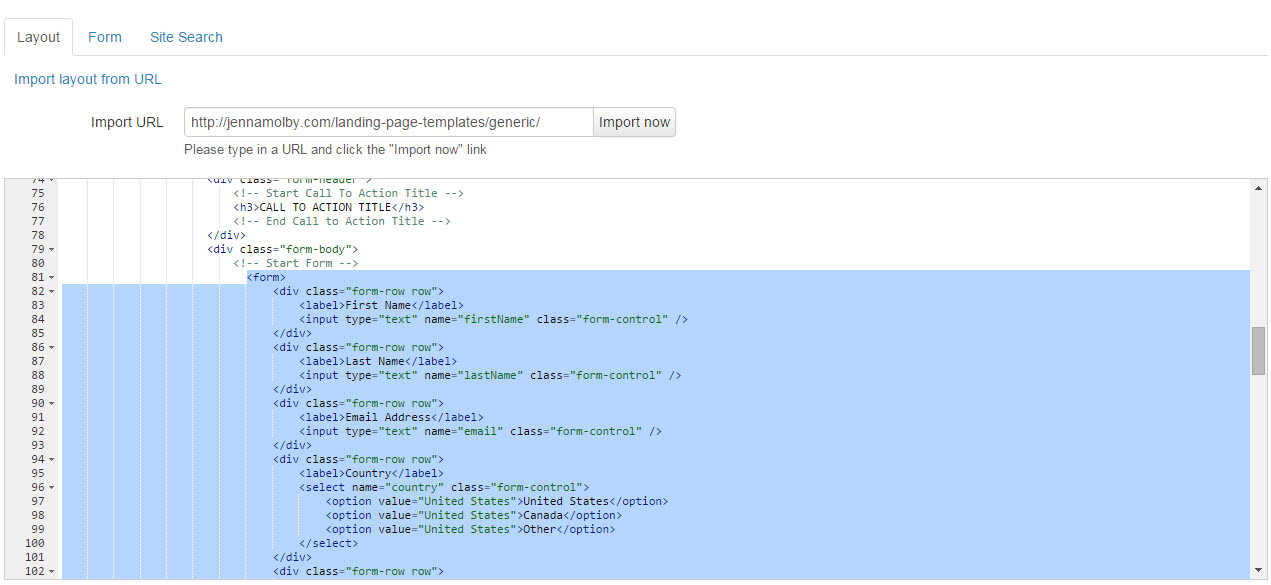
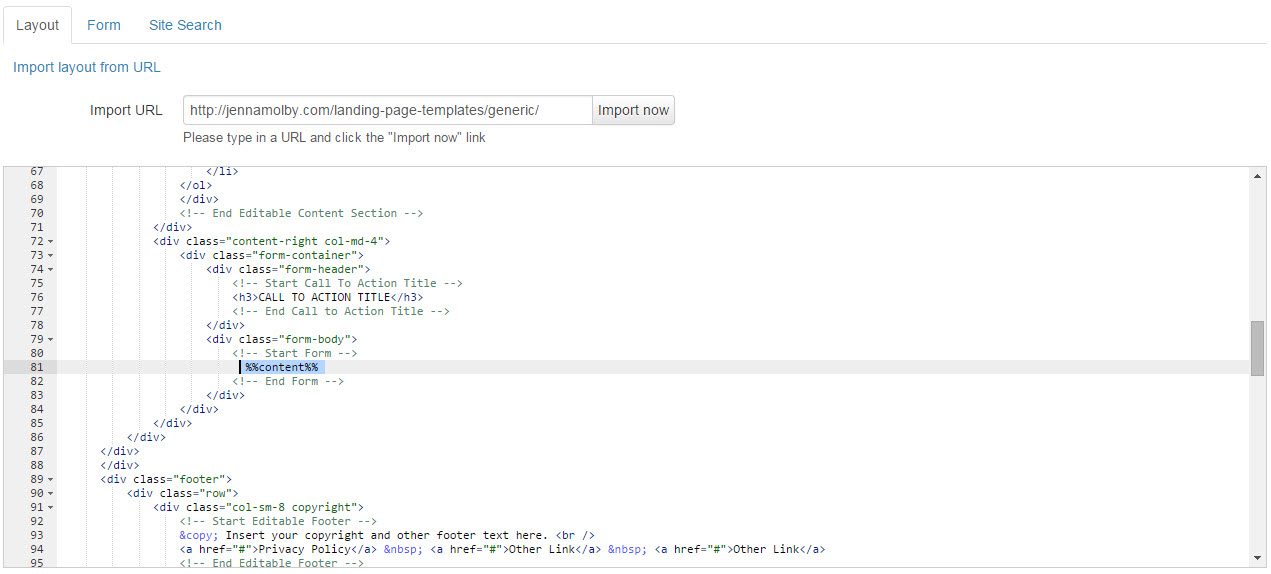
If you want to have the ability to add a Pardot form on the page, you will need to add this tag to your page where you want the form to go.

%%content%%
pardot-landing-page-template-replace-form-1
pardot-landing-page-template-replace-form

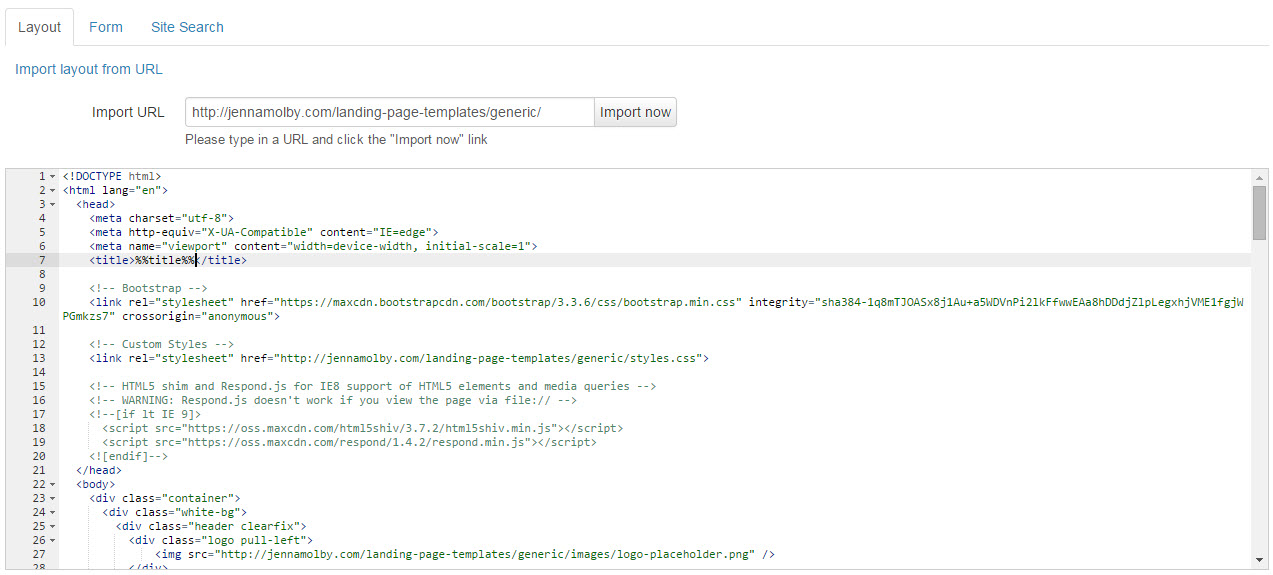
Step 6: Edit the Title

Lastly, replace the title in the HTML of your template to this to dynamically display the name of the landing page in the browser.

XHTML

1
pardot-landing-page-template-replace-title
pardot-landing-page-template-replace-title-2

Testing

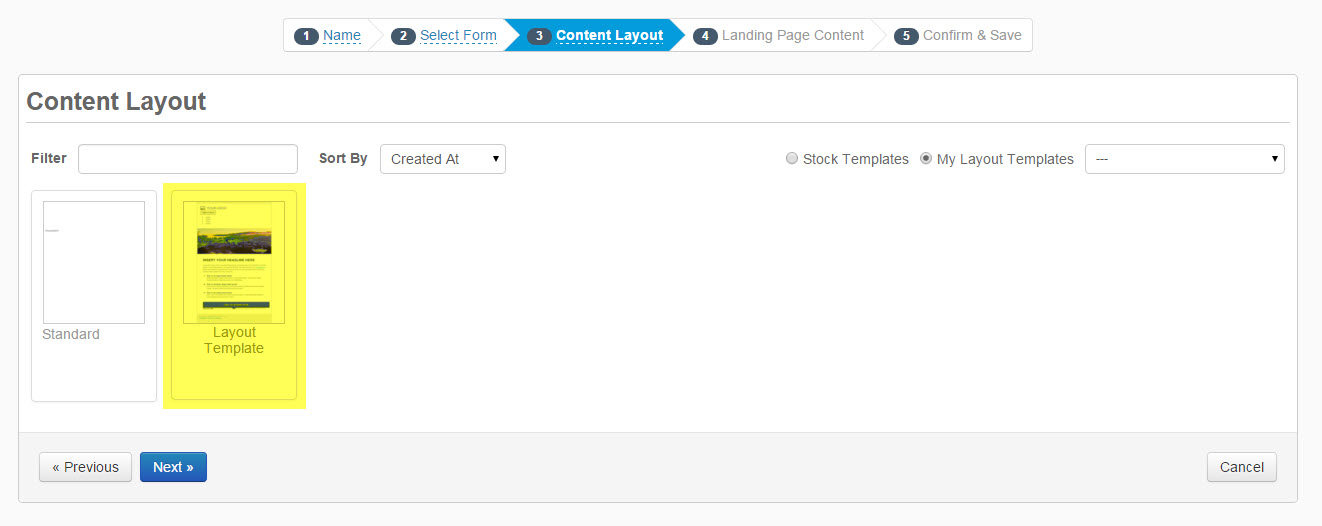
Create a landing page to test your new Pardot layout template by going to Content > Landing Pages > New Landing Page and select the new page template.

pardot-landing-page-creation

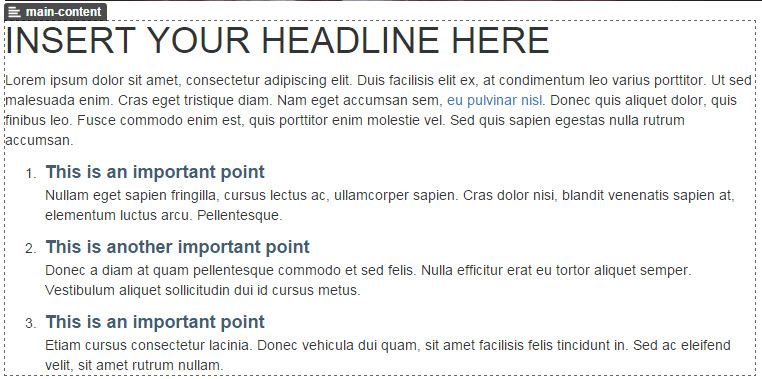
If you have setup the Pardot editable regions correctly, you should see a dotted box around everything that is editable.

pardot-landing-page-edit-content-1

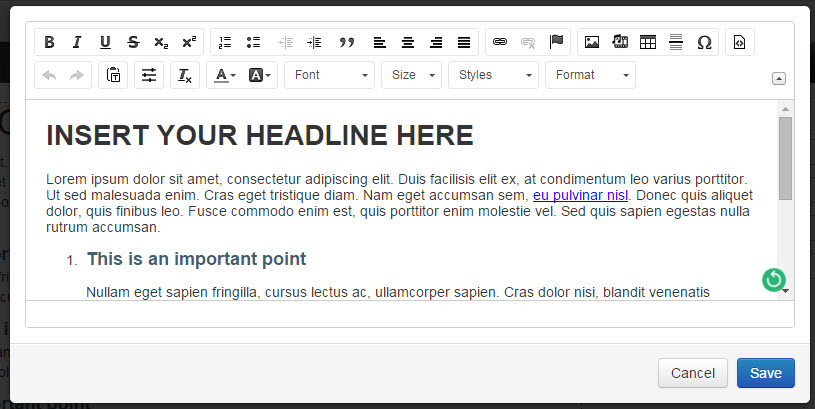
If you double-click into the editable section to make sure the WYSIWYG editor pops up.

pardot-landing-page-edit-content-2

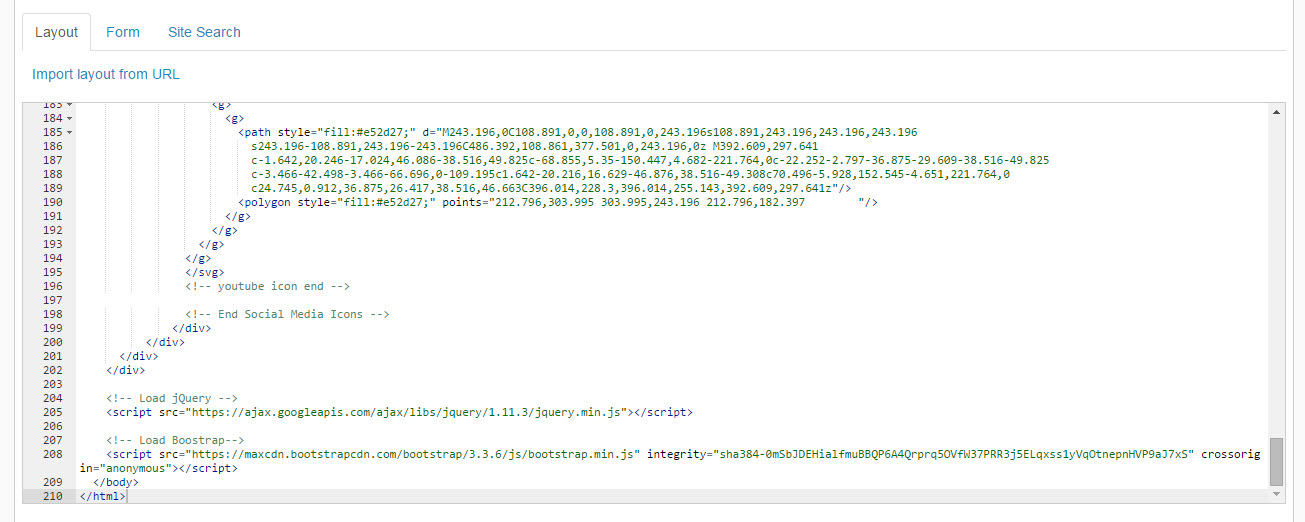
My Final Code

Here’s a peak at my final code after turning my sample landing page into a Pardot layout template.

Toggle navigation

INSERT YOUR HEADLINE HERE

Lorem ipsum dolor sit amet, consectetur adipiscing elit. Duis facilisis elit ex, at condimentum leo varius porttitor. Ut sed malesuada enim. Cras eget tristique diam. Nam eget accumsan sem, eu pulvinar nisl. Donec quis aliquet dolor, quis finibus leo. Fusce commodo enim est, quis porttitor enim molestie vel. Sed quis sapien egestas nulla rutrum accumsan.

  1. This is an important pointNullam eget sapien fringilla, cursus lectus ac, ullamcorper sapien. Cras dolor nisi, blandit venenatis sapien at, elementum luctus arcu. Pellentesque.
  2. This is another important pointDonec a diam at quam pellentesque commodo et sed felis. Nulla efficitur erat eu tortor aliquet semper. Vestibulum aliquet sollicitudin dui id cursus metus.
  3. This is an important pointEtiam cursus consectetur lacinia. Donec vehicula dui quam, sit amet facilisis felis tincidunt in. Sed ac eleifend velit, sit amet rutrum nullam.

CALL TO ACTION TITLE

%%content%%

© Insert your copyright and other footer text here.
Privacy Policy  Other Link  Other Link

    <!-- Load jQuery -->
    
<script src="https://ajax.googleapis.com/ajax/libs/jquery/1.11.3/jquery.min.js">
</script>

    <!-- Load Bootstrap-->
    
<script crossorigin="anonymous" integrity="sha384-0mSbJDEHialfmuBBQP6A4Qrprq5OVfW37PRR3j5ELqxss1yVqOtnepnHVP9aJ7xS" src="https://maxcdn.bootstrapcdn.com/bootstrap/3.3.6/js/bootstrap.min.js">
</script>

Make your life easier by using these Pardot code snippets to kickstart your next Pardot landing page, email template or form project.

Catalogue

  • Landing Pages & Landing Page Templates
    • Variable Tags
      • title
      • Content
    • Content Regions
      • Link Region
      • Image Region
      • HTML Region
      • Simple Region
      • WYSIWYG Editor
  • Emails
    • View in Browser
    • Unsubscribe
  • Email Templates
    • Editable Content Regions
    • Editable Content
    • Repeatable Content
  • Forms
    • Change a form submit button to an image
    • Trigger a download after successful form submission

Landing Pages & Landing Page Templates

Landing Page Variable Tags

Title

Use this snippet to populate the name of the Pardot landing page.

%%title%% 

Content

Place this snippet where you would like the form, site search results, or landing page general content to appear within your design.

%%content%% 

Content Regions

A Link

Use this snippet to make a link in your landing page template editable.

<a href="https://jennamolby.com" pardot-region="editable-link" pardot-region-type="link">My Link</a>

An Image

Use this snippet to make an image in your landing page template editable.

<img src="image/my-image.png" pardot-region="editable-image" pardot-region-type="image" />

HTML

Use this snippet to display HTML code on you landing page.

	
&lt; your code here&gt;

Simple

Use this snippet to make HTML elements editable. You can use it on the following tags: address, b, big, blockquote, caption, cite, del, dfn, em, h1, h2, h3, h4, h5, h6, i, ins, kbd, p q, s, samp, span, small, strike, strong, sub, sup, u var

<p pardot-region="simple-text" pardot-region-type="simple">Your text here</p>

WYSIWYG Editor

Use this snippet to make HTML elements editable. You can use it on the following tags: article, aside, div, dt, dd, figure, figcaption, li, footer, header, main, section, td.

<div pardot-region="pardot"><h3>My Header</h3></div>

Emails

View in Browser

To add a view in browser link to your email add the following snippet.

%%view_online%%

Unsubscribe

To add a unsubscribe link to your email add the following snippet.

%%unsubscribe%%

Email Templates

Email Content Regions

Pardot will automatically make every table cell or paragraph editable, however, if you want to “lock down” your template so only some areas are editable, you can use these snippets.

Editable Content

Add this snippet to a table cell to make it editable.

<td pardot-region></td>

Repeatable Content

Pardot allows you to specify repeatable content blocks within an email template. This is great for scenarios where you need 3 content sections for 1 email but only 2 for another email.

<div pardot-repeatable>
	<div pardot-region>
	<h1>Title</h1>
	A paragraph of text
		<a href="#">Read More</a>
		</div>
	</div>

Forms

Change a form submit button to an image

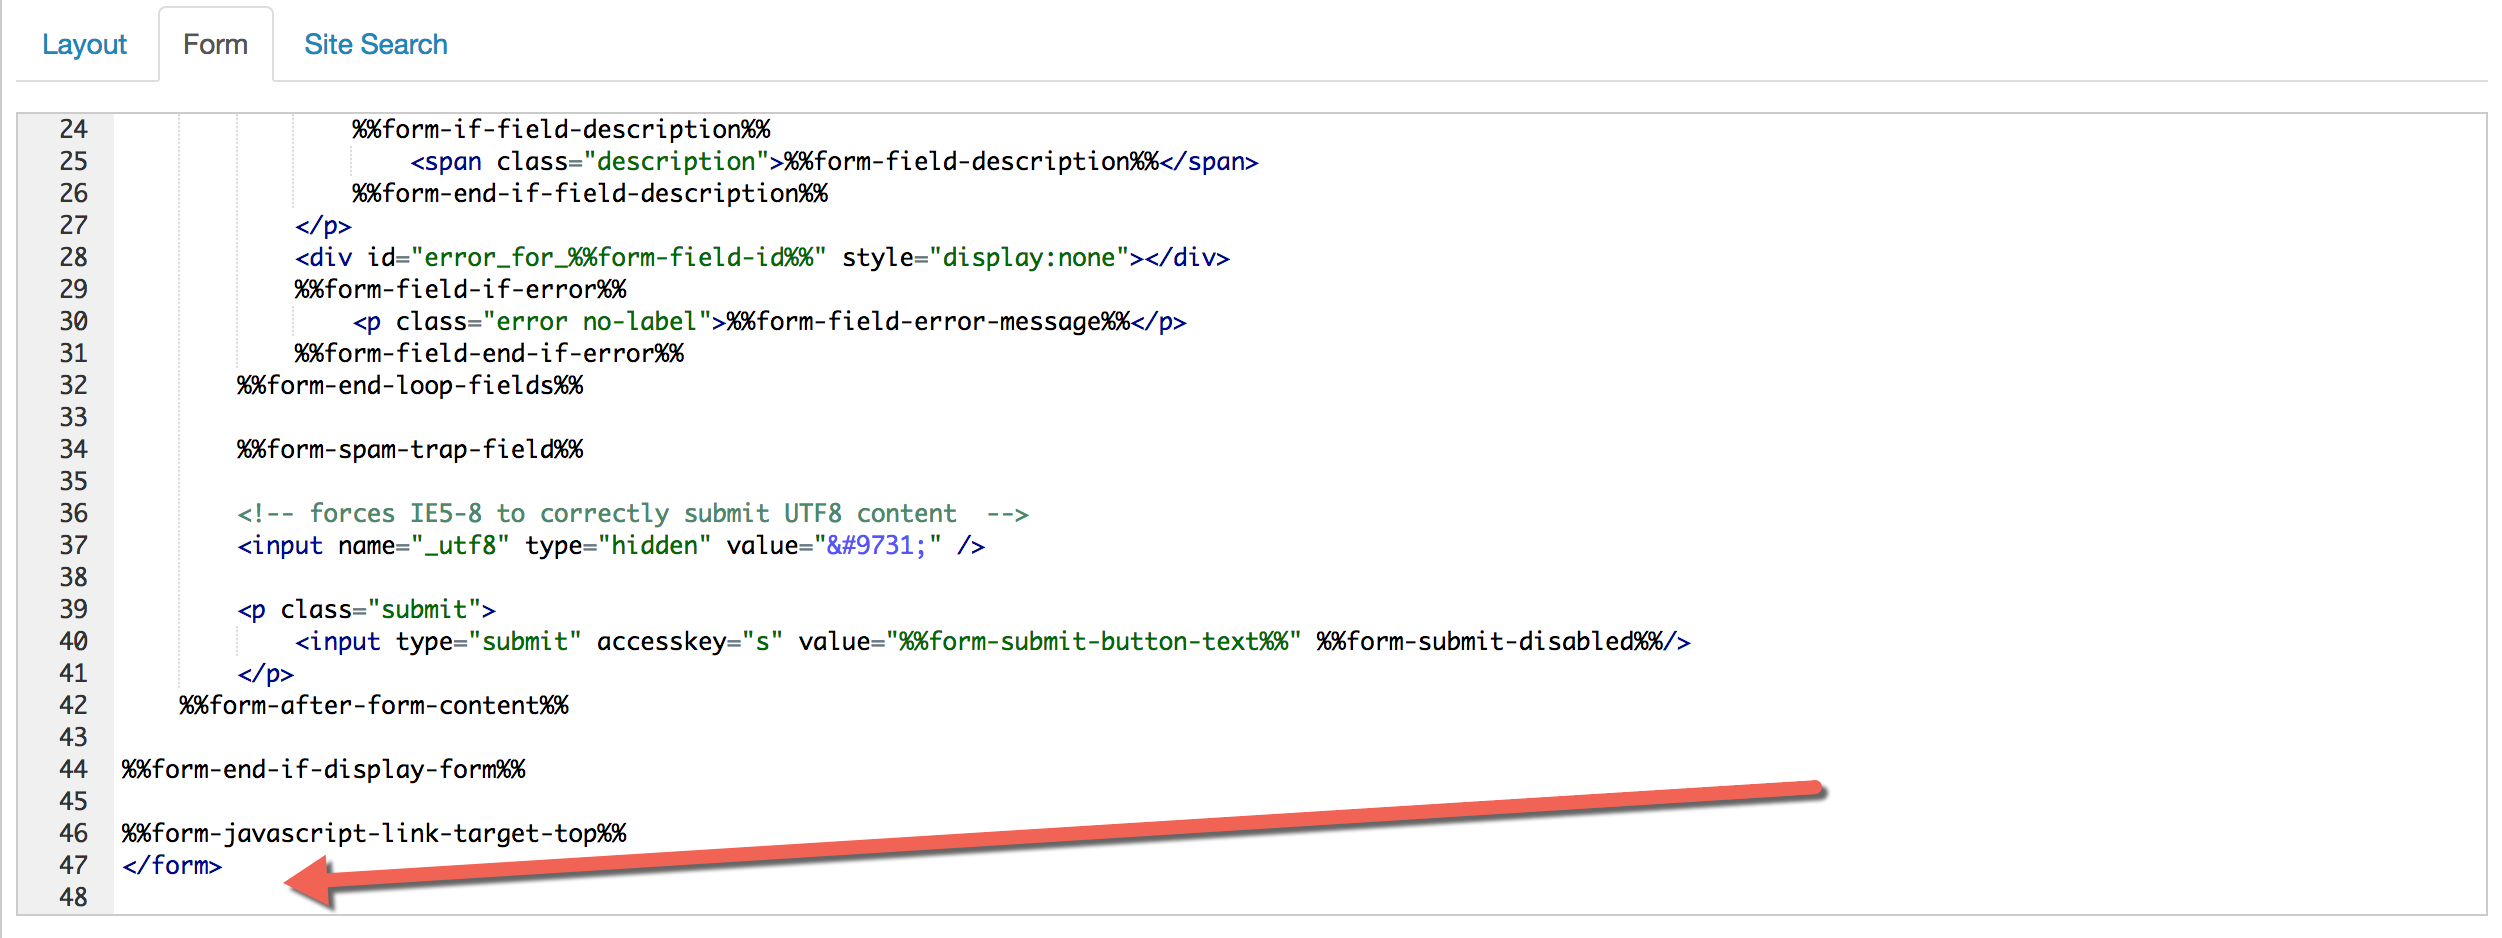
Place this snippet in the Look and Feel step in the form wizard to change it to a image. Remember to remove all the text in the Submit Button field.

<style type="text/css">
  form.form p.submit input {
  margin: 0;
  padding: 0;
  text-align: right;
  border: none;
  background: url(https://www.site.com/submit.gif) no-repeat left top;
  width:100px;
  height:100px;
  cursor: pointer; }
</style>

Trigger a download after successful form submission

Use this snippet to automatically start an asset (like a whitepaper) to download upon successful form submission. Place this code under the Thank You Code tab in the form wizard.

<script type="text/javascript">
  var howLongToWait = 10; //number of seconds to wait
  var urlOfDownloadContent = 'http://www.example.com/whitepaper.pdf'; // URL of your piece of content
  function triggerDownload() {
  window.location = urlOfDownloadContent;
  }
  setTimeout('triggerDownload()', howLongToWait * 1000);
</script>

What are your favorite Pardot snippets?

Send me a tweet @jennamolby to tell me about your favorites, or contact the Sercante team for help.
Ace your Pardot Certified Consultant exam by using these flashcards to test your Pardot knowledge. This set of flashcards contains 100 practice questions that cover all the topics on the Pardot Certified Consultant exam, including administration, email management, lead generation, lead qualification, reporting, Salesforce integration, prospect management and more.

Test your Pardot Knowledge

Some sample questions are:

  • Will an automation rule ever match a prospect more than once?
  • A client submits their Pardot form to test the form’s completion actions. After they submit the form, none of the completion actions are applied to their prospect record. What explanation do you give as to why the actions did not occur?
  • How often does Pardot check for changes in Salesforce?
  • What does not cause a prospect record to sync between Pardot and your CRM?
  • What report will offer you insight into how your recipients read your emails or what devices or browsers they use to view them?
  • What is the difference between a submission and a conversion?
  • If a prospect clicks on a custom redirect after filling out a form, will the prospects assigned Pardot campaign change?

View the full set of questions on Quizlet

Take the practice test

Was this post helpful?

Let me know by Emailing me, sending me a tweet, or by leaving a comment.

There’s currently no feature for Pardot forms that allow you to use placeholder text instead of the label text. So, in this tutorial, I will show you how to add a bit of JavaScript to your Pardot forms to use the field labels as placeholders.

Step 1: Add the JavaScript

Navigate to Marketing > Forms > Layout Templates and select the layout you want to add the placeholder text to. Paste this JavaScript at the bottom of the form tab and save.

<script>
var labels = document.querySelectorAll("p.pd-text label, p.pd-select label, p.pd-textarea label");
var i = labels.length;
while (i--) {
var label = labels.item(i);
var text = label.textContent;
label.parentNode.classList.contains("required") && (text += " *");
var nextElement = label.nextElementSibling;
if (nextElement) {
if (nextElement.tagName == 'SELECT') {
nextElement.options[0].text = text;
} else {
nextElement.setAttribute("placeholder", text);
}
label.parentNode.removeChild(label);
}
}
</script

Step 2: Add the CSS

If you want to use placeholder text instead of the form field labels, you will need to add some CSS that will hide the labels on the form.

Navigate to Marketing > Forms > Layout Templates and select the layout you added the JavaScript to. Paste this CSS at the top of the form tab and save.

<style>
p.pd-text label, p.pd-select label, p.pd-textarea label {display:none !important;}
</style>

Questions?

Send me a tweet @jennamolby, or contact the Sercante team for help.
No more posts to show