Ace your Salesforce Certified Pardot Specialist exam by using this practice exam to test your Pardot knowledge. This practice test contains 50 multiple choice questions and covers most of the topics on the Salesforce Certified Pardot Specialist exam, including administration, scoring, lead management, email marketing, and engagement programs.
Quiz: Salesforce Certified Pardot Specialist Practice Exam
Note: These are the types of questions to expect on the certification exam and they cover the topics outlined in the official study guide, but these aren’t the exact questions you will see on the exam. I highly recommend a combination of on-the-job experience, and self-study to maximize your chances of passing the exam.
The campaign member object in Salesforce represents the association between a campaign and a lead or a contact. While some standard lead and contact fields are available for the campaign member object, if you want to view or pull a report for custom fields, you will need to create a new field. This post will show you how to create a formula field on the campaign member object that will pull in the custom field value for a lead or a contact.
Create a formula field
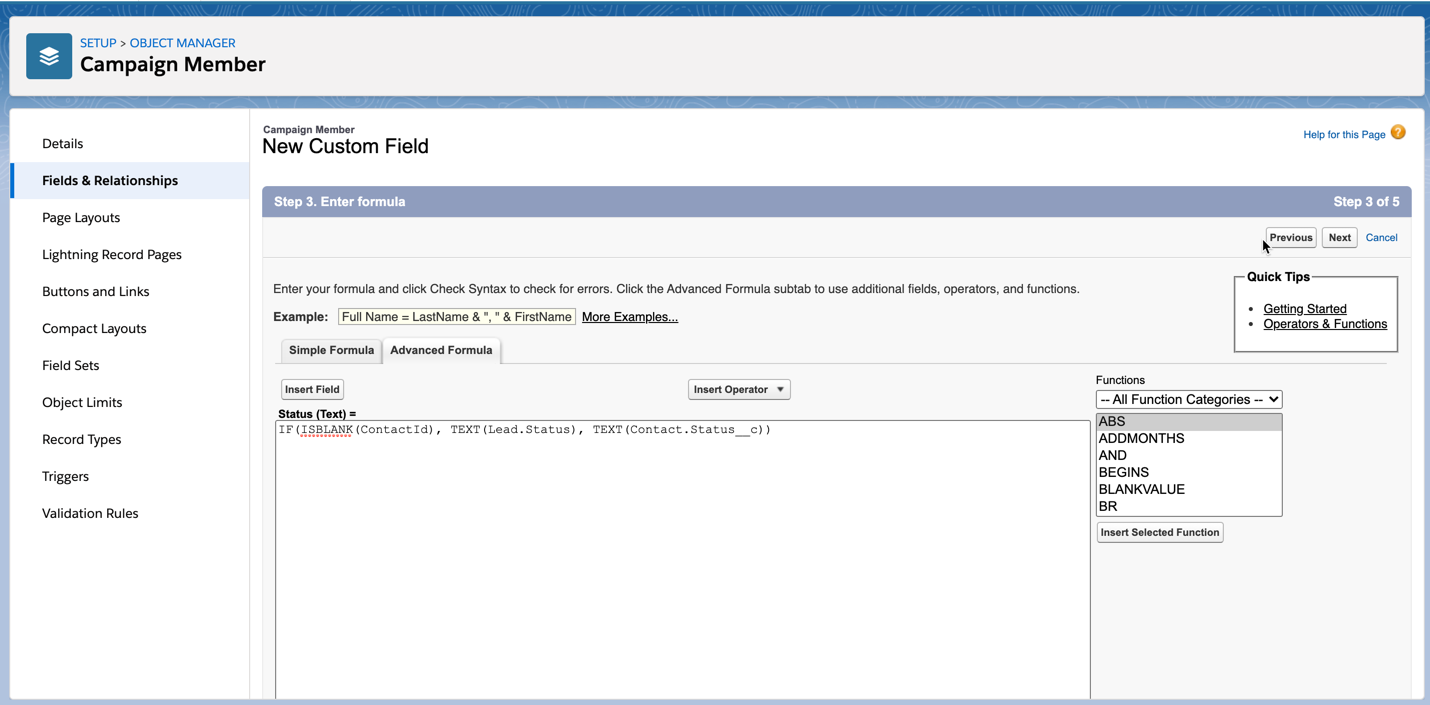
Create a formula field on the campaign member object that will check if the campaign member is a Lead or a Contact and populate the field with the custom field value.
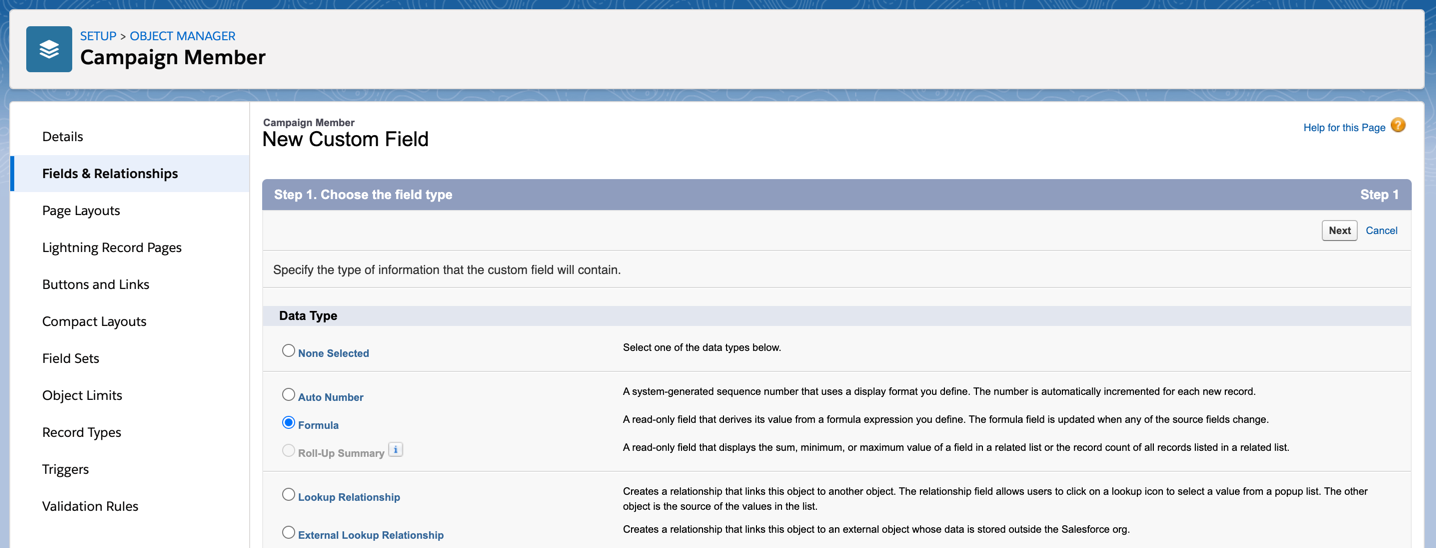
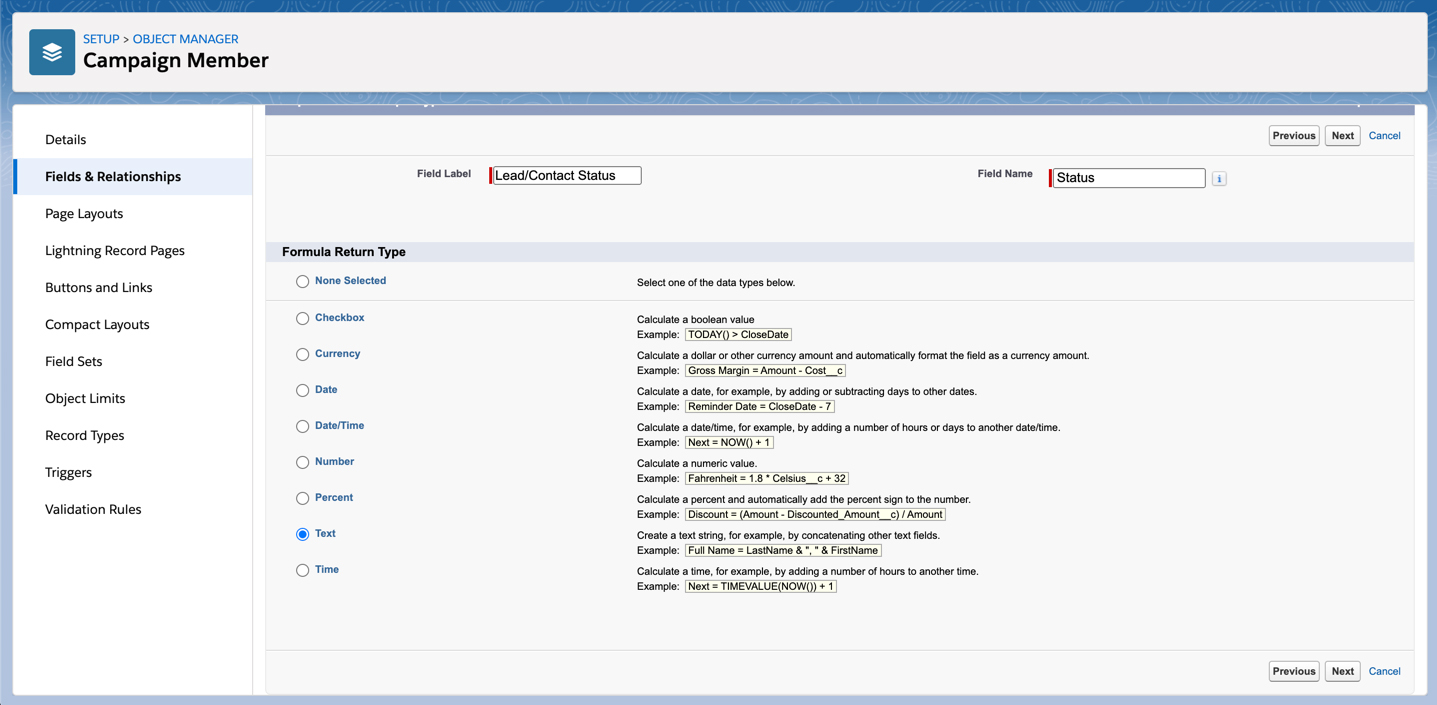
Navigate to the campaign member object within the object manager and create a new formula field.
If your lead and contact fields are picklists, use this syntax for the formula.
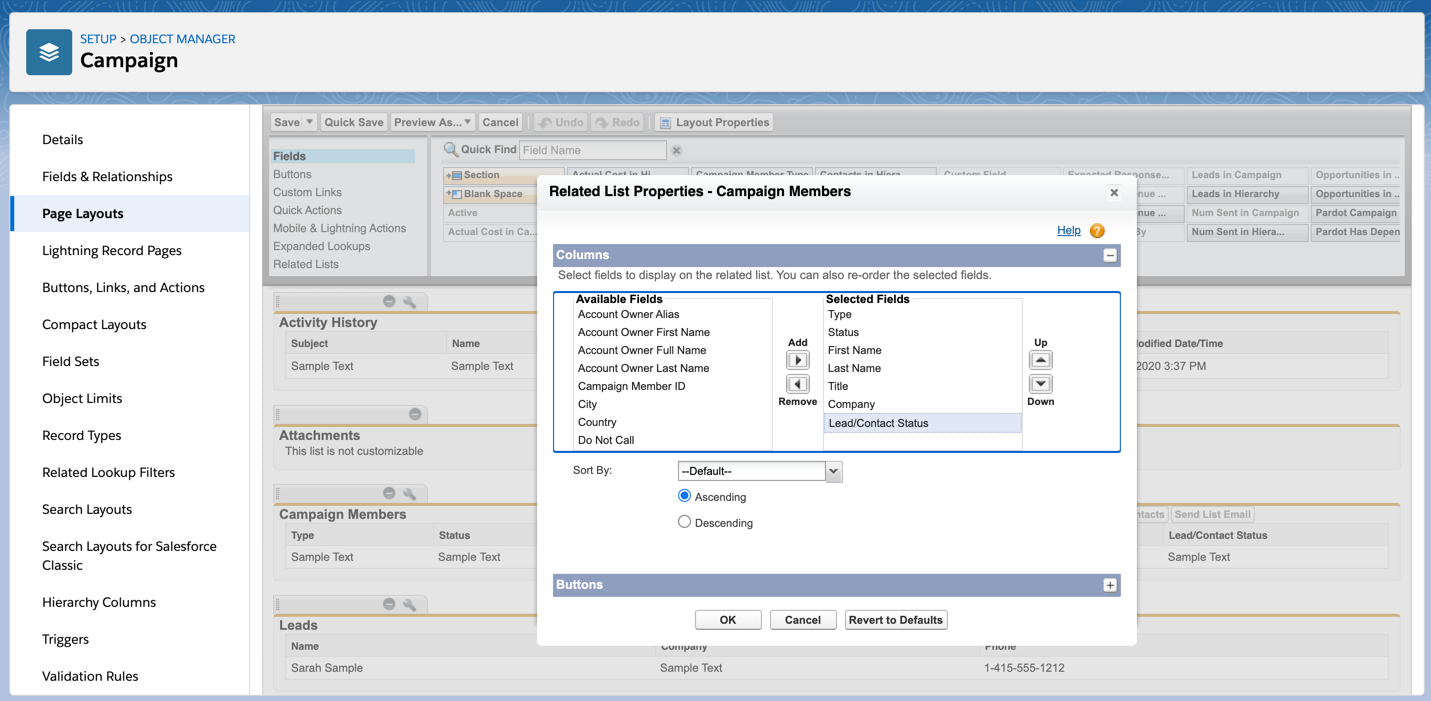
You can add the new custom field to the campaign member related list by navigating to the campaign object in the campaign manager and selecting your page layout. Scroll to the campaign member related list and click on the wrench icon to select your fields.
Now the custom field displays in the related list for campaign members.
Use the fields within reports
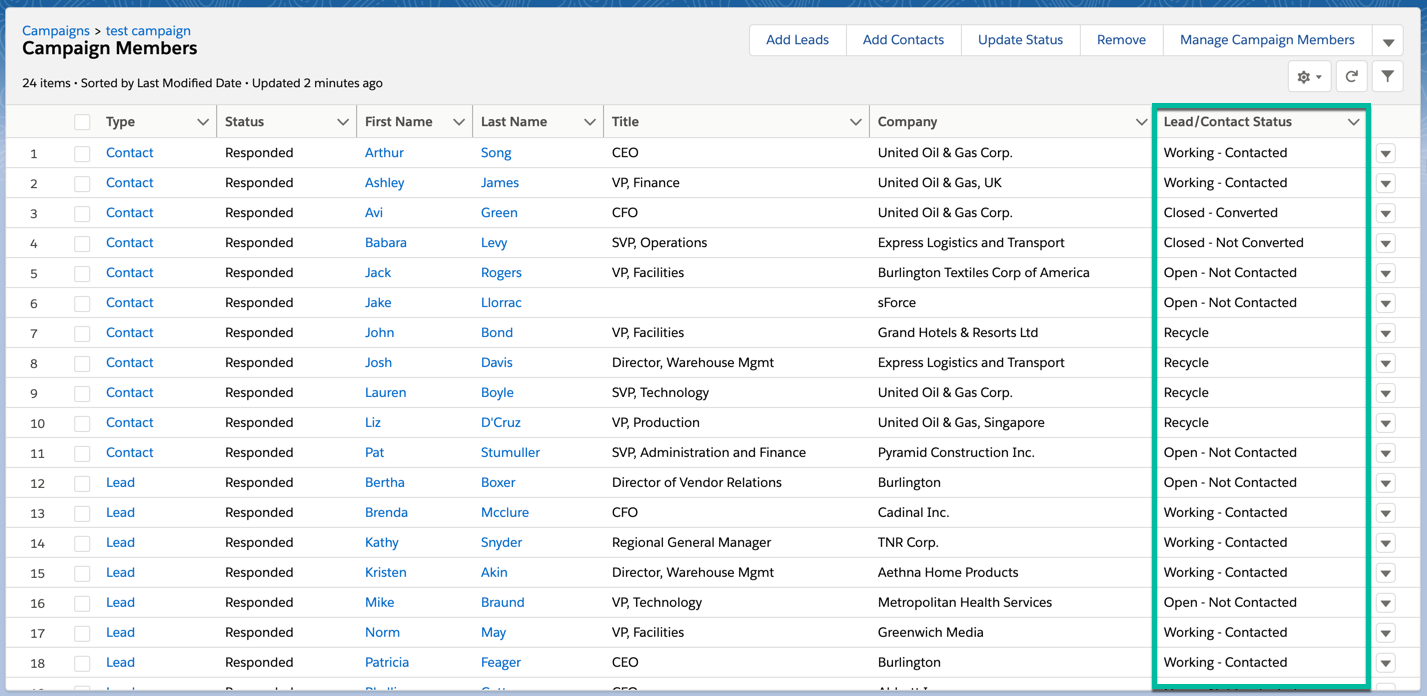
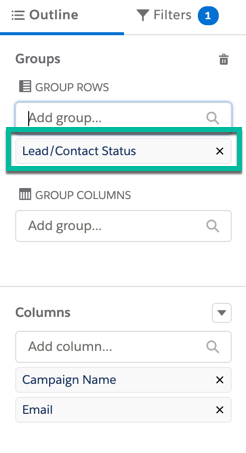
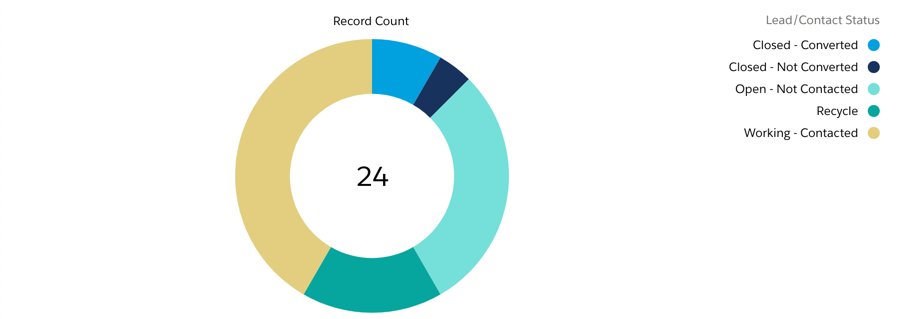
The custom field is also available within the campaigns with campaign members report.
Flex fields are custom fields that can be used repeatedly to limit the number of one-time-only fields within Pardot and Salesforce. They contain data that is required temporarily to execute a specific event or campaign. Once the data is no longer needed, the fields can be reset to blank using an Engagement Program or Automation Rule.
How to Use Flex Fields in Pardot
Since these are meant to be temporary fields, I recommend creating these fields only in Pardot. I use custom fields named ‘Flex Field 1’, ‘Flex Field 2’, ‘Flex Field 3’, etc.
Once the fields are created, you can use them in your forms. Update the label for the field to include the question(s) or response(s) you want to collect.
Clearing the field data
Once your event or campaign is finished and you have exported the data or added these prospects to a list, you can clear out the values for the fields by running an Engagement Program or an Automation Rule.
Using an Automation Rule
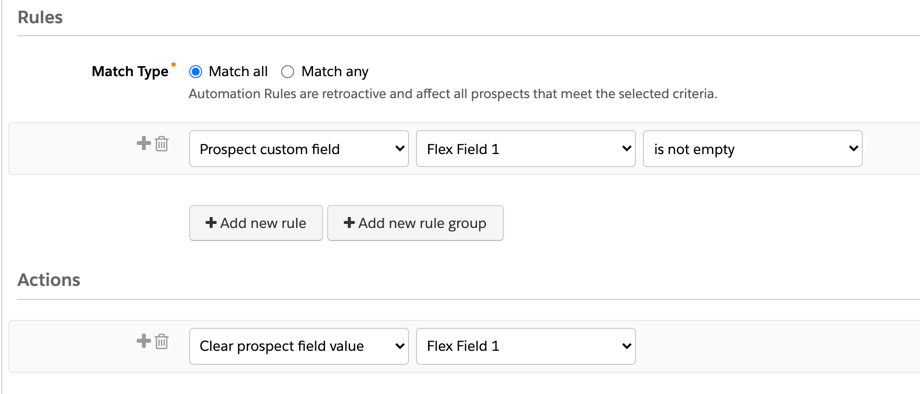
To clear the values for your flex field using an Automation Rule, select clear prospect field value as the action and select your flex field from the dropdown
Using an Engagement Program
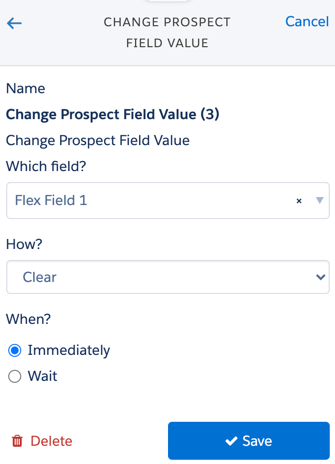
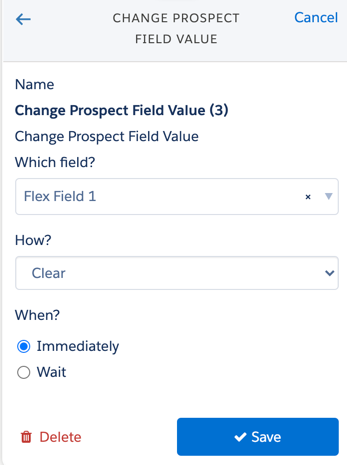
To clear the values for your flex field using an Engagement Program, select the change prospect field valueaction and set the value to clear.
Let’s take a look at some examples…
Now that you know how to create flex fields, let’s take a look at how they can be used.
For an event
Let’s say you are running an event where attendees need to register for a specific roundtable or session. You can use a flex field within your form to capture what session they would like to attend. Based on the response, you can add the prospects to a list and then set the flex field value back to NULL to use again in the future.
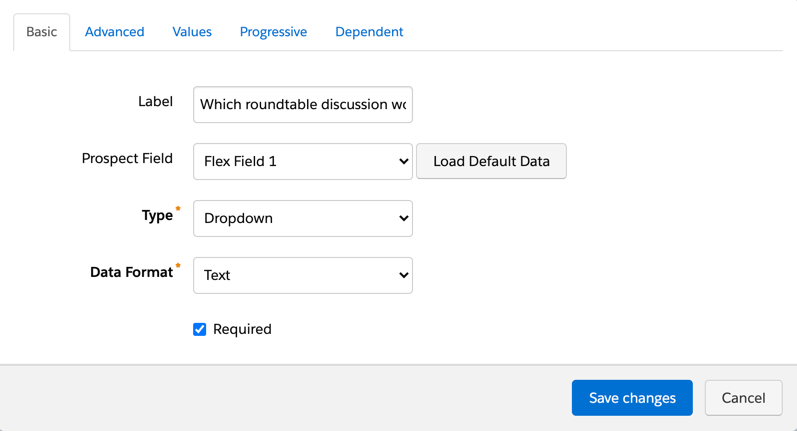
The flex field is added to the form with a dropdown of all the available sessions.
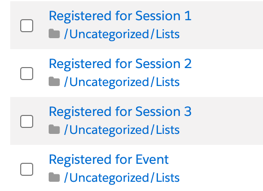
Lists are set up to track registrations for each one of the sessions. Note: these are NOT dynamic lists. since we will be clearing out the data for the flex fields.
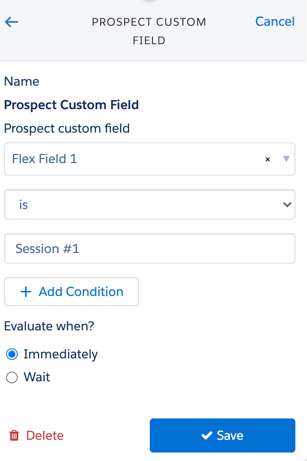
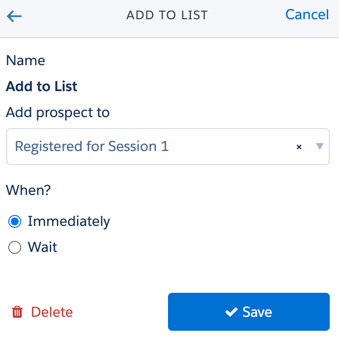
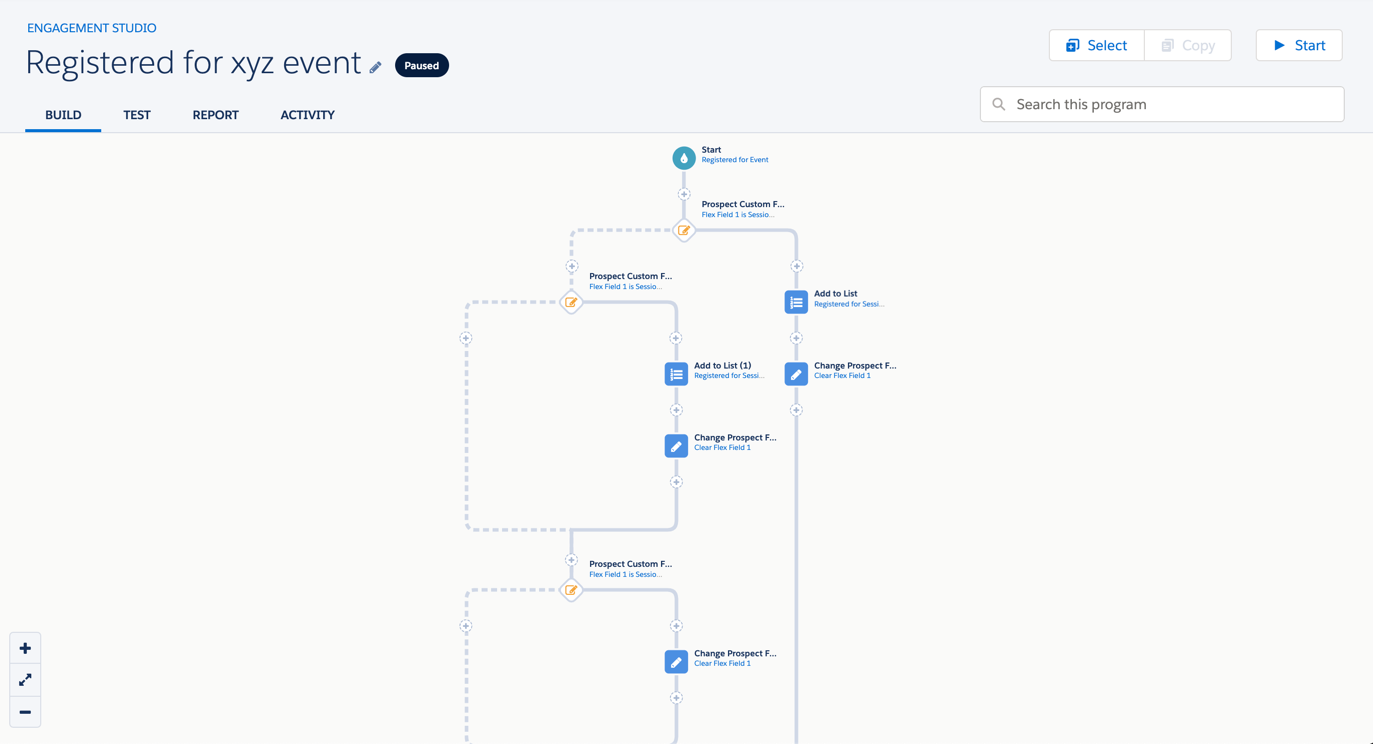
An Engagement Program is set up to add prospects to each of the lists based on their selected session. Once the prospect is added to the list, the value for the flex field is set to NULL.
Once the prospects have run through the Engagement Program, they should be added to the list for the session, and the field value for the flex field should be empty.
For a webinar
Another example is to use a flex field to allow prospects to submit a questionw when registering for a webinar.
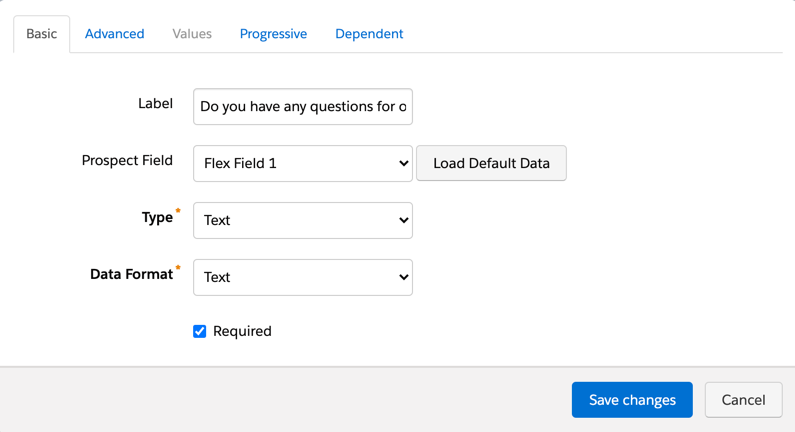
The flex field can be added to the webinar registration form.
Once the webinar is over, you can run an automation rule to set the flex field value back to NULL.
Other use cases
These are just two examples of how to use flex fields in Pardot, but there are endless use cases. Get creative and make sure to do plenty of testing.
Tips
Keep track of which flex fields are currently being used. This can be in a Google Sheet, within Slack, etc.
Not sure where the fields are being used? Check the usage table in the prospect field settings.
You don’t have to clear the data right away. You can wait until the event or campaign is over and run an Automation Rule to clear out the values.
If you find that you frequently use these fields, you can create more and keep it specific to the event type. (Ex. Webinar Flex Field 1, Webinar Flex Field 2, etc..)
Automatically Create Campaign Member Statuses: The Example
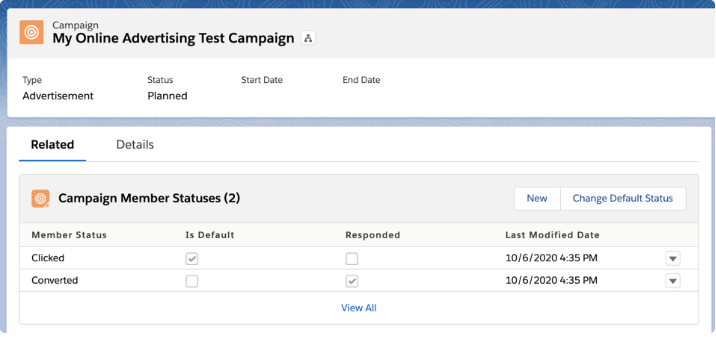
In this post, I’ll be using Salesforce Flow to create the following statuses based on campaign type.
Campaign Type
Campaign Member Status
Online Advertising
Clicked Converted
Email
Sent Opened Clicked Unsubscribed
Webinar
Invited Registered Attended No Show
Automatically Create Campaign Member Statuses: The Example
In this post, I’ll be using Salesforce Flow to create the following statuses based on campaign type.
Prerequisites
I recommend you map out what status values you want to use for each campaign type as well as which statuses should be marked as default and responded before creating your flow.
Create the Salesforce Flow
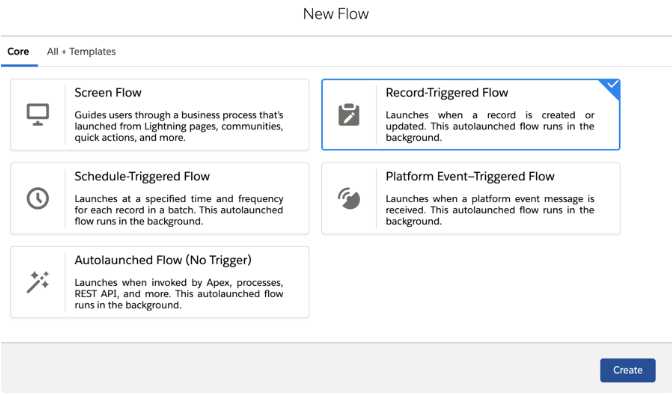
Navigate to Setup > Process Automation > Flows and select new flow. Select Record-Triggered Flow from the wizard.
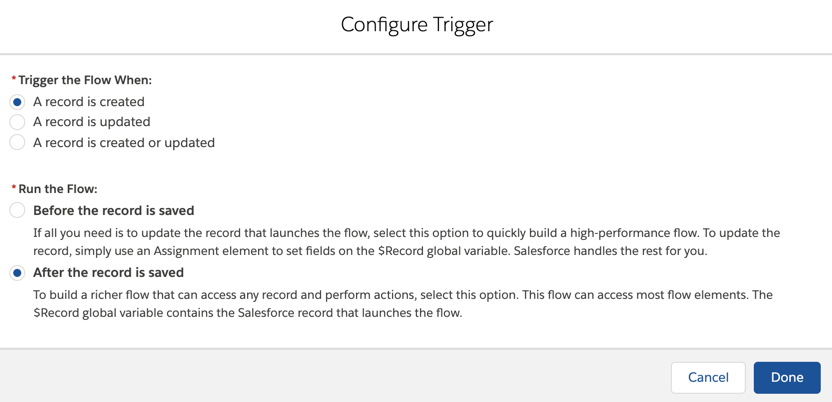
Configure the Trigger to occur when a record is created, and after the record is saved.
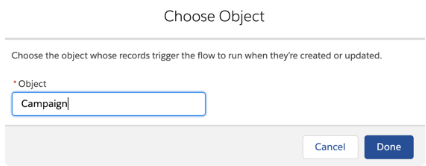
Select Campaign as the trigger object.
Add a Decision element to the flow
Drag and drop a decision element onto the page. This is where we will set up the logic to determine what campaign statuses to create for each campaign type.
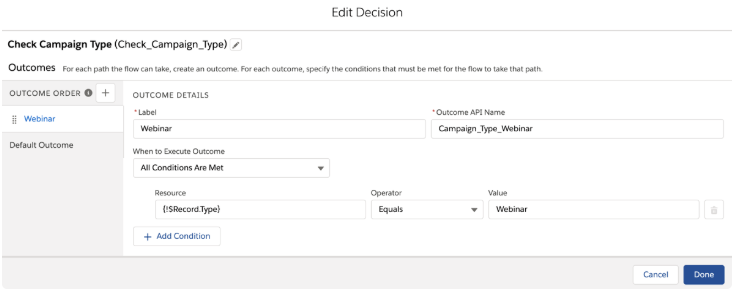
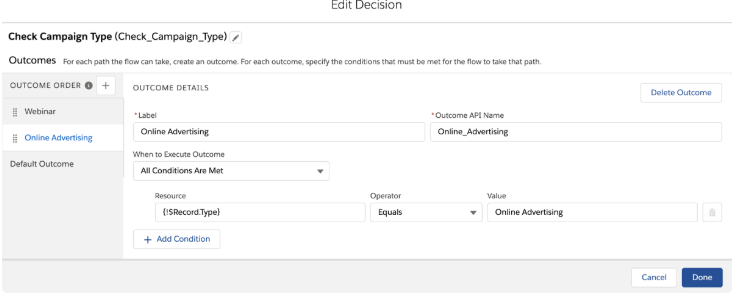
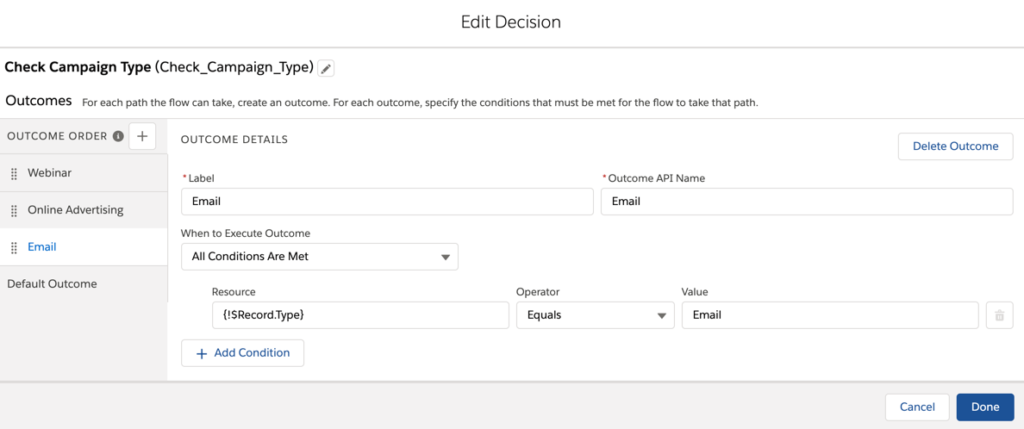
In this example, I will be creating three outcomes:
Campaign type = Webinar
Campaign type = Online Advertising
Campaign type = Email
Each outcome will use the {!$Record.Type} resource and use the value of the campaign type.
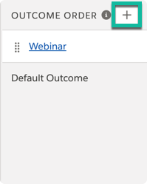
Click the plus sign to add each outcome.
Example: Campaign type = Webinar
Example: Campaign type = Online Advertising
Example: Campaign type = Email
Add create record elements to the Salesforce Flow
Once your decision outcomes have been created, you can add actions to create each campaign member status. Each status for the campaign will use a Create Records element. For example, if you want to create four campaign member statuses for webinars, you will need add four Create Record elements to the flow.
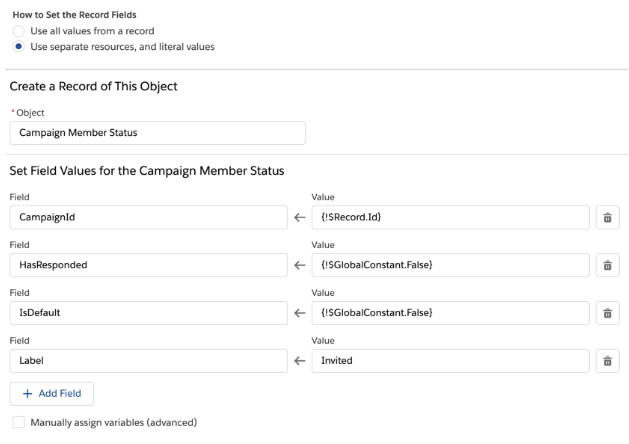
Each create records element will set the following values:
Create one record
Use separate resources, and literal values
Set the value for CampaignId to {!$Record.Id}
Set a field label
Setting these values are optional:
HasResponded: I highly recommend setting this as it is helpful for reporting
IsDefault: There can only be one default campaign status.
SortOrder: I recommend not setting this value. If your campaign already has values, it can sometimes cause a flow error.
Using my webinar campaign type as an example, here is what my create record steps look like.
Example: Create a campaign member status for invited
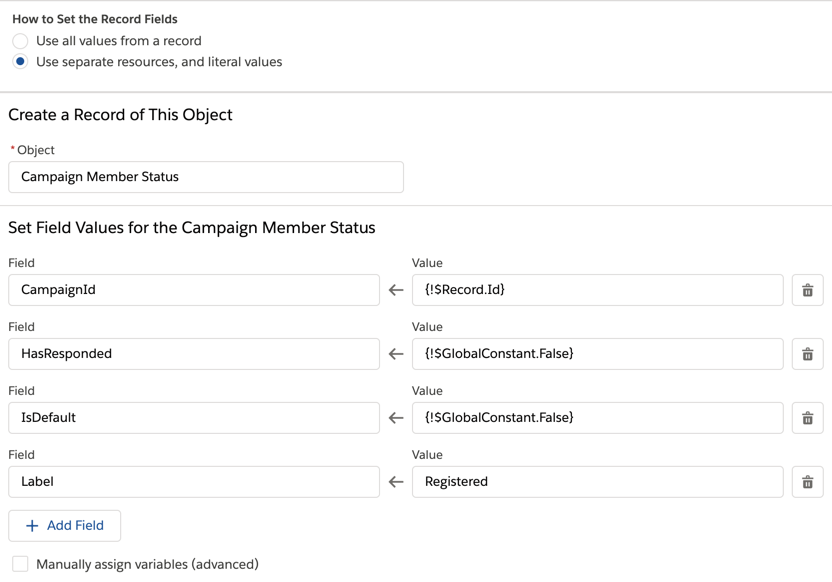
Example: Create a campaign member status for registered
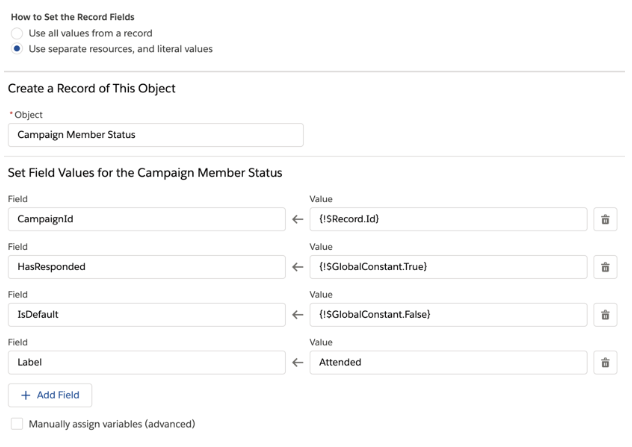
Example: Create a campaign member status for attended
Example: Create a campaign member status for no show
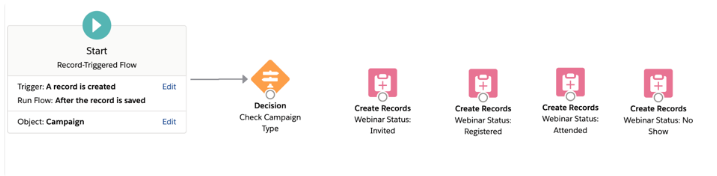
Example: All webinar statuses
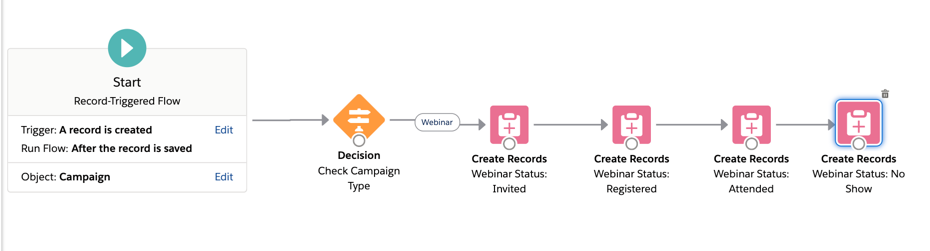
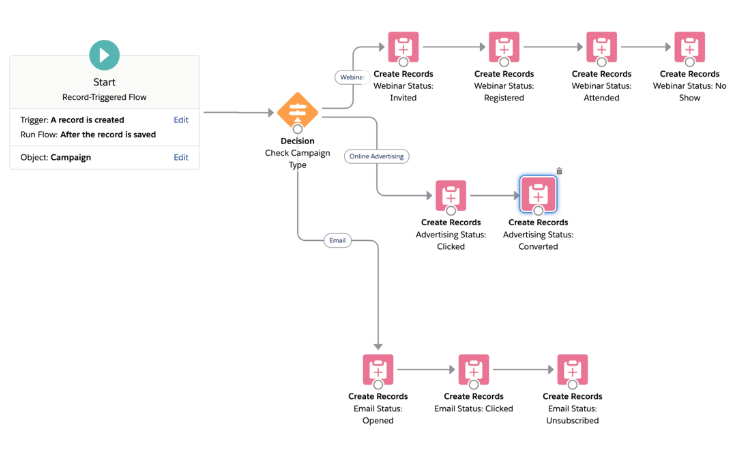
Here’s what my flow looks like once all my webinar statuses have been added.
Note: There is more than one way to create campaign member statuses using Flow. I’ve chosen to create them using separate create record elements, but you can also create them by using an assignment element paired with a loop element. While this method works and eliminates some steps, you cannot assign HasResponded and IsDefault values to individual statuses.
Connect the decision element
Connect the decision element to the first create record element and select webinar as the outcome.
Connect the rest of your elements. Now, we are left with a flow that looks like this.
Repeat for the rest of your campaign statuses
Repeat the process above by adding more create record elements to your flow for the rest of your campaign types.
Here’s what my flow looks like once I added the Online Advertising and the Email statuses.
Optional: Delete the default status values
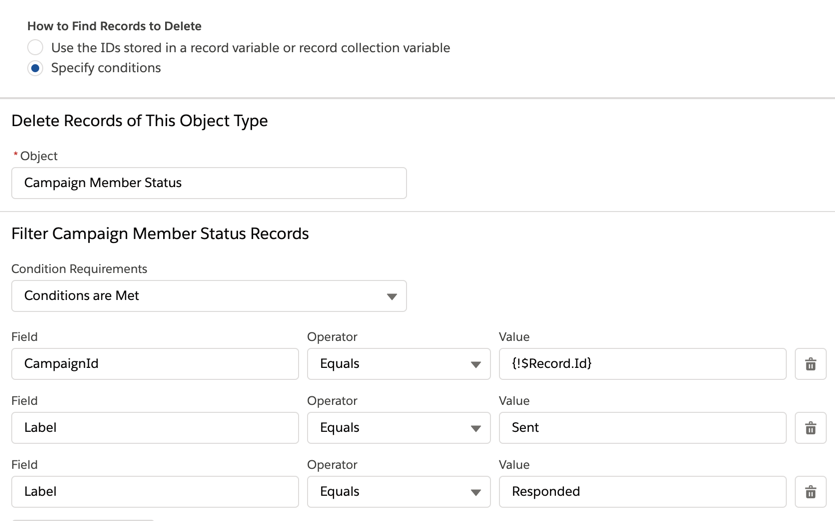
Optionally, you can delete the two default status values (sent and responded) from campaigns automatically by adding a delete record action to your flow.
Drag and drop the delete records element to your flow, select the Campaign Member Status object, and add the criteria.
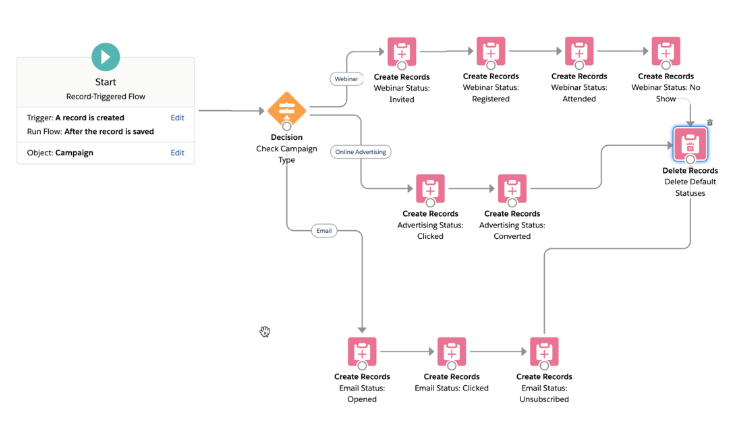
Connect the delete records element to the last element of each of the flow steps.
Note: Use caution when deleting these statuses. Campaigns must have one status set to responded and one status set to default. If you remove the ‘Sent’ and ‘Responded’ statuses from campaigns you must set these values for one of your custom custom statuses.
Test, test, test
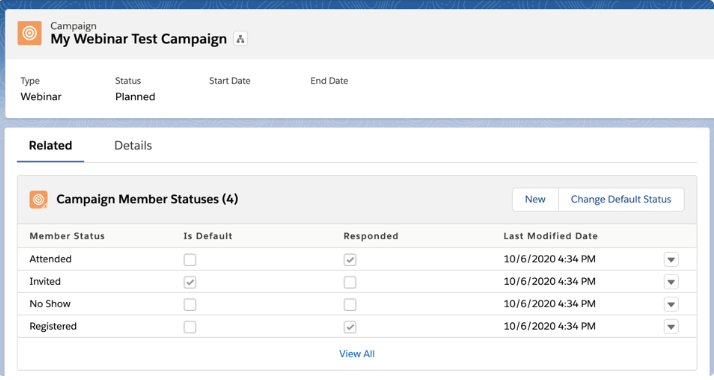
Save and activate your flow. Create new campaigns for each of the campaign types to ensure the statuses are correct.
Pardot offers 2 methods for embedding forms on your website; embedding using an iframe, and form handlers. While the embedded iFrame forms allow marketers to have control over updating and configuring the forms, using an iFrame isn’t always ideal for website usability. In this tutorial, I will show you how to take advantage of the Pardot iFrame forms and make it look great embedded on your website.
Why Use Embedded Pardot Forms?
Using Pardot forms over Pardot form handlers have many benefits including:
Allowing for progressive profiling
Built-in email validation
The ability to use the drag and drop editor to modify form fields
Add/remove form fields easily and have the changes show up on your website instantly
Embedding Pardot forms on your website
The problem
The embedded Pardot form (which is in an iFrame) has to have a set height. This means that when you embed the form you have to calculate the height (in pixels) and update the code Pardot provides accordingly.
If you add any additional fields to the form, the height of the form will need to change. You also need to accommodate for the built-in validation messages which can cause the height of the form to change as well.
The solution
Automatically resize the iFrame using Javascript. Even if you’re not a developer, it’s pretty easy to implement since is just copy and paste.
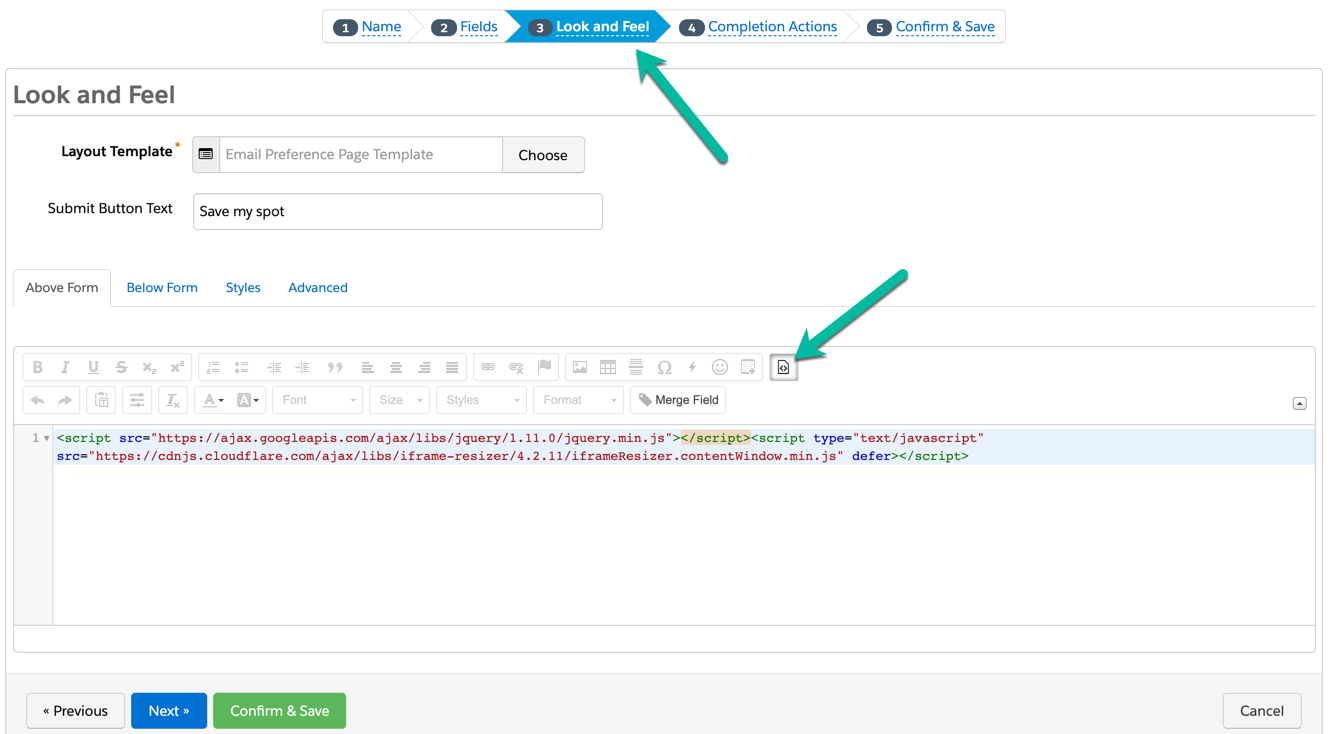
Step 1: Add some code to your Pardot form
Navigate to your form in Pardot and paste this code in the look in feel section by clicking on the HTML icon.
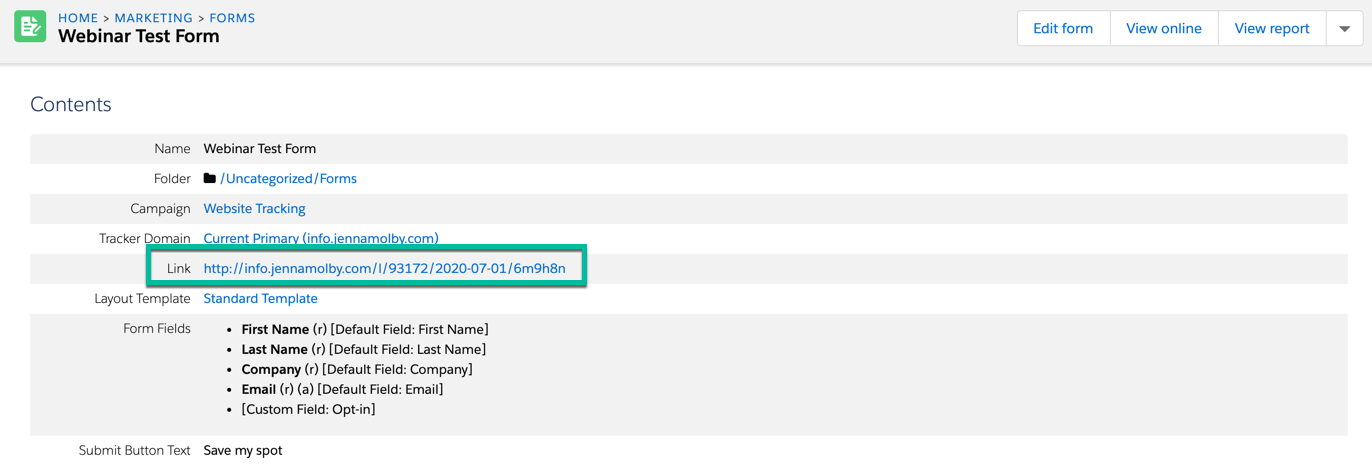
In order to embed the Pardot form on your website, you will need to grab the form URL from Pardot. Navigate to the form overview page and copy the link provided
Add this piece of code where you want the form to appear on the page. Replace the URL with the URL you copied above.
Already have lead scoring set up and want to take it a step further? Lead scores can be summarized for all related Leads and Contacts to the Account with some help from an App from the Salesforce App Exchange. You can then create reports in Salesforce, lists, and triggers within your marketing platform to target these Accounts based on the Account Score.
A prerequisite for summarizing lead score on the Account
In order to populate Account Lead Score on the Account, you will need to create a relationship between Leads and Accounts. This is not available in Salesforce without custom configuration or help from an App on the Salesforce AppExchange. Want to set this up without installing an App? Learn how to set this up using Process Builder and Flow.
If you do not create a relationship between Leads and Accounts, you can still follow along to learn how to create an Account Score field to summarize Contact scores.
Create the Account fields
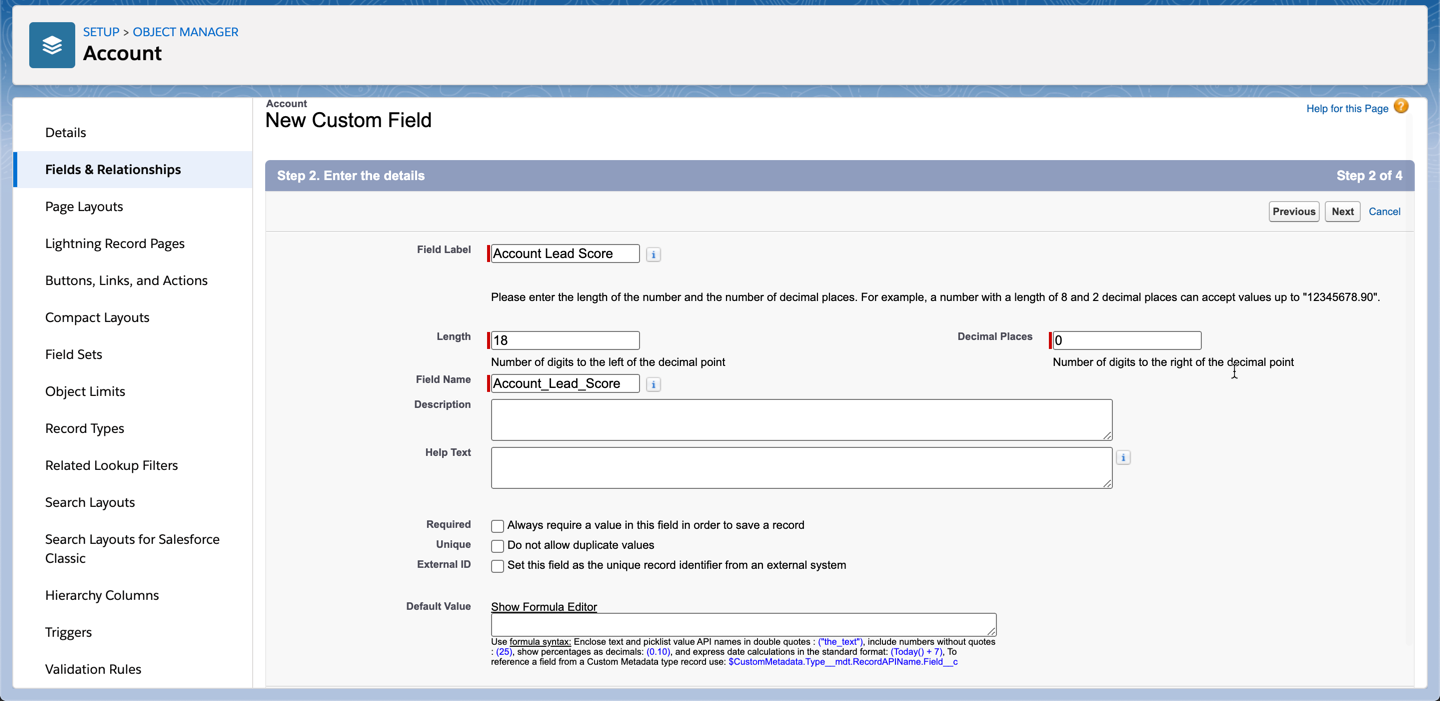
To populate the account score for leads and contacts within the account, you will need to create 3 fields:
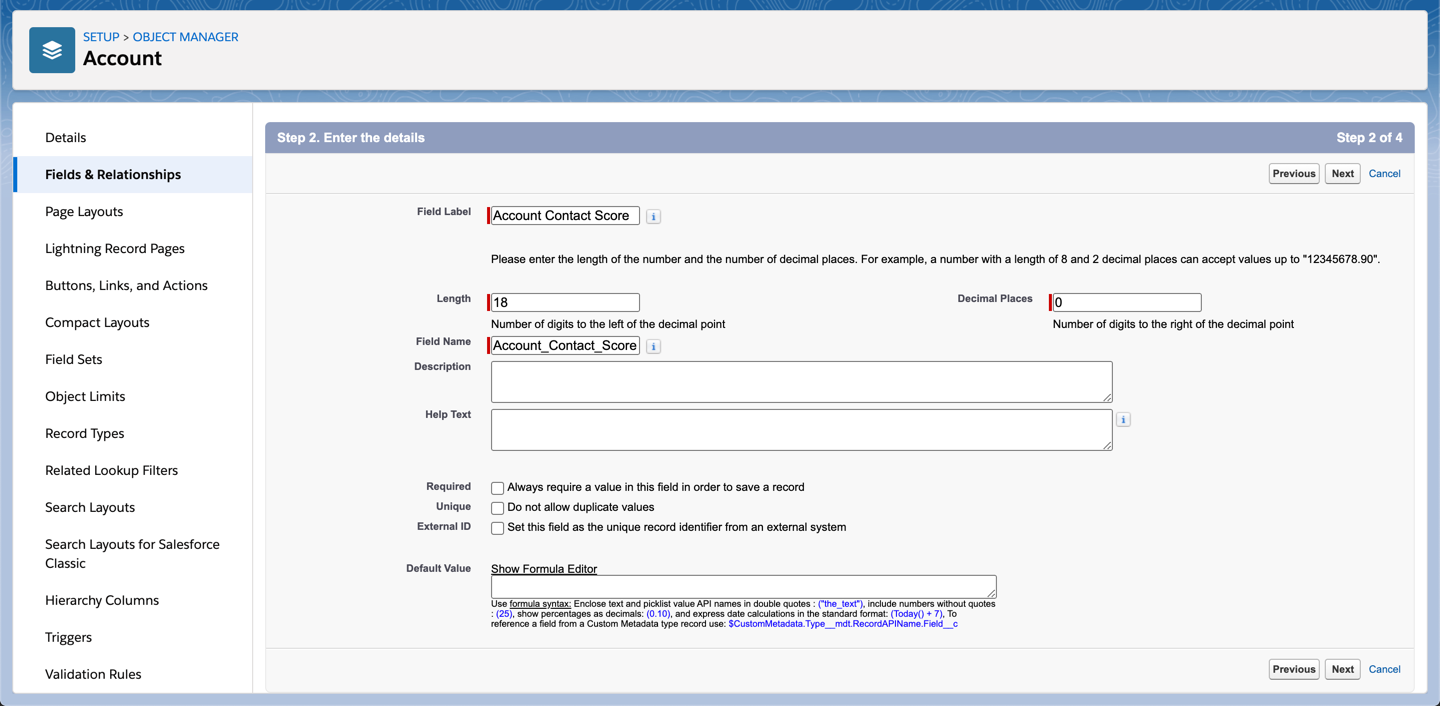
Account Contact Score: A number field that will display the sum of the score for all Contacts within the Account.
Account Lead Score **: A number field that will display the sum of the score for all Leads within the Account. ** see post prerequisite
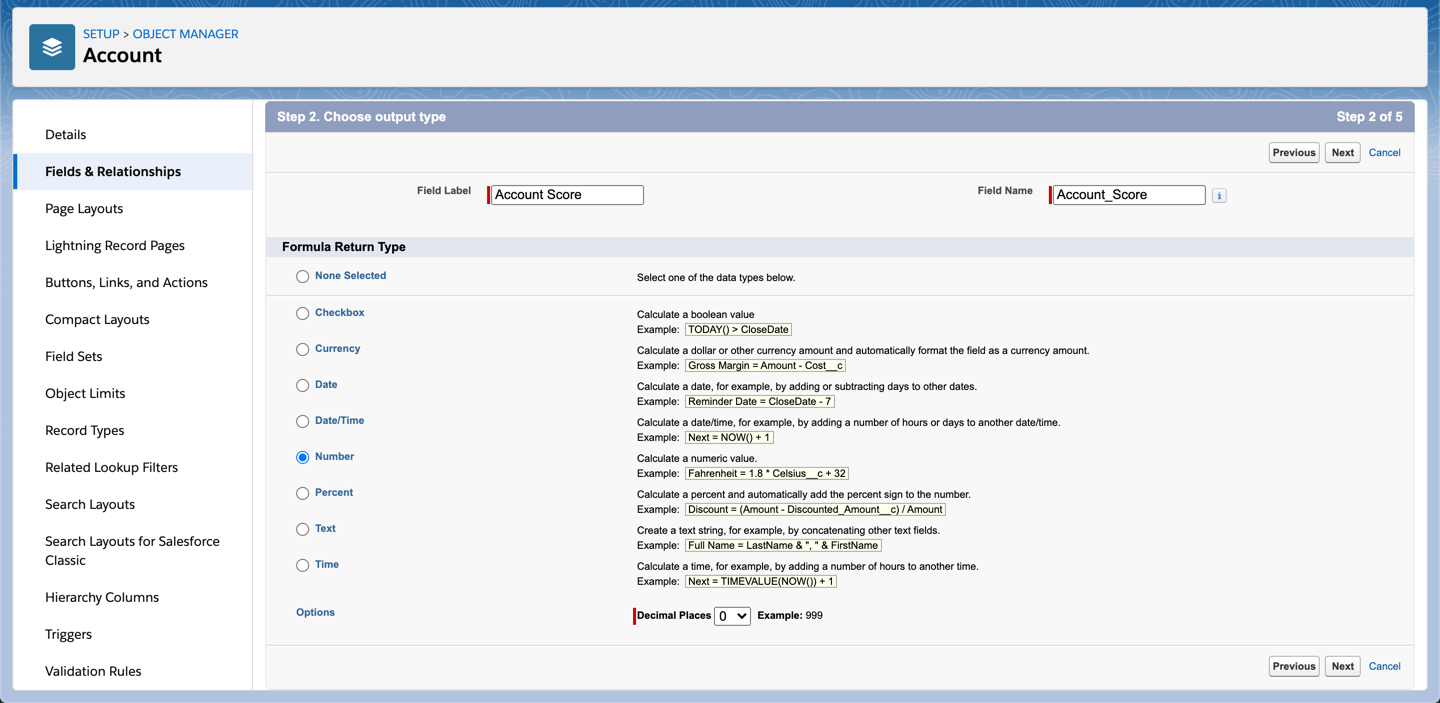
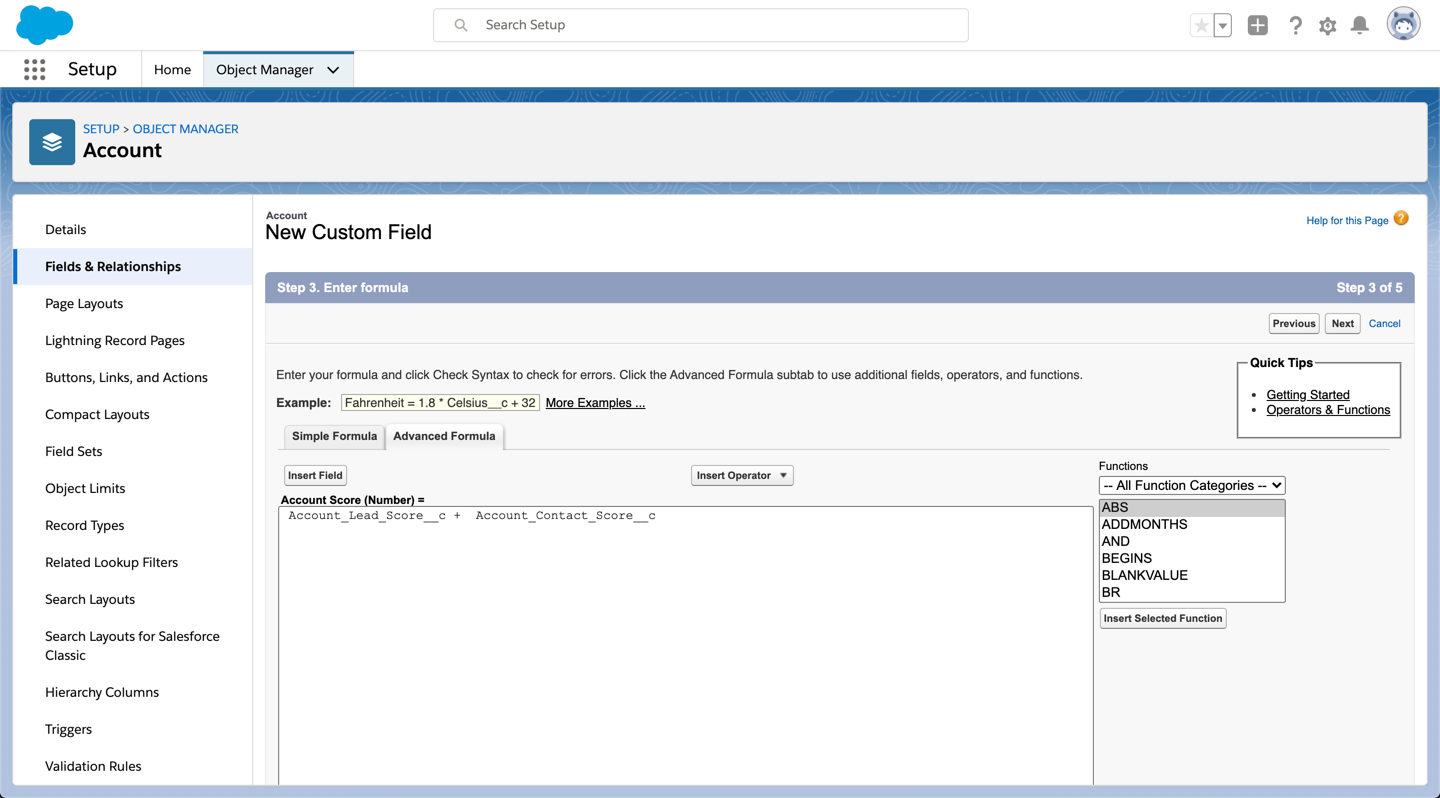
Account Score: A formula field that will calculate the sum of the Account Contact Score and the Account Lead Score.
Account Contact Score field creation
Account Lead Score field creation
Account Score field creation
Note: I recommend making all 3 of these fields read-only.
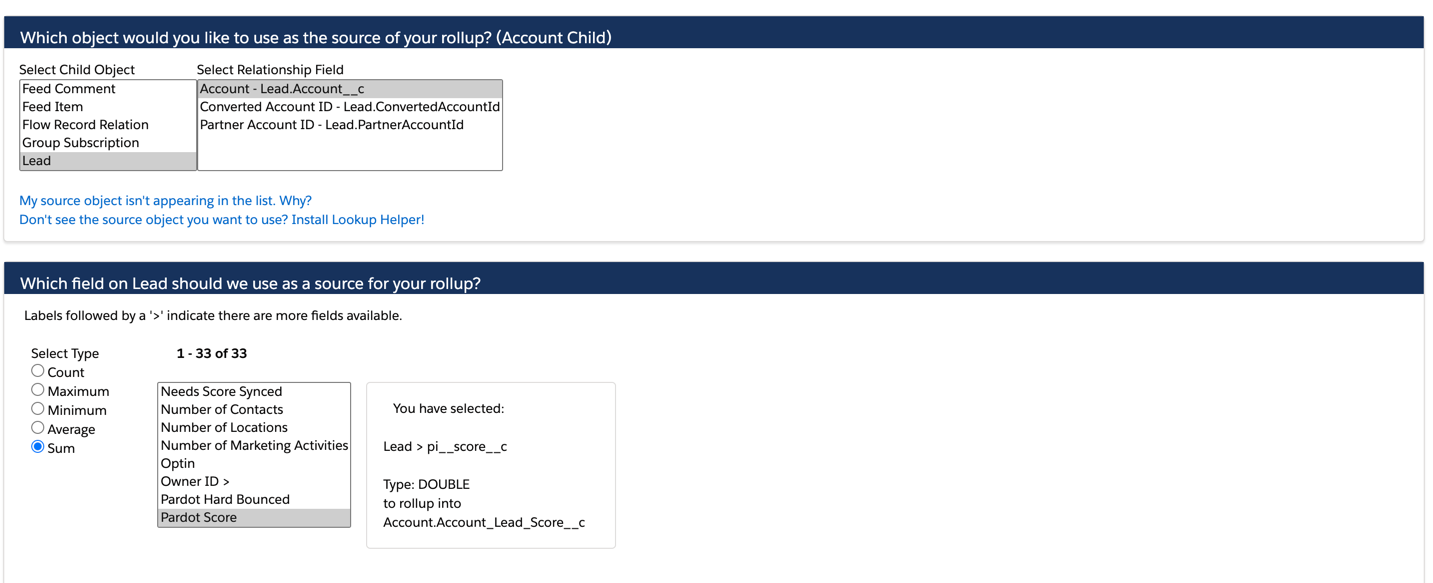
Navigate to the Rollup Helper app and click on create a new rollup. Select Account for where you would like your rollup results to reside.
Select Lead as your child object and select your related field. Select sum for the field type and select the score field you want to summarize.
Optionally, add some custom filters to exlcude leads from this rollup. For example, you might want to exclude certain email domains (employees) or certain lead statuses (rejected, bad data, etc).
Create a roll-up helper for contact score
Naviate to the Rollup Helper app and click on create a new rollup. Select Account for where you would like your rollup results to reside.
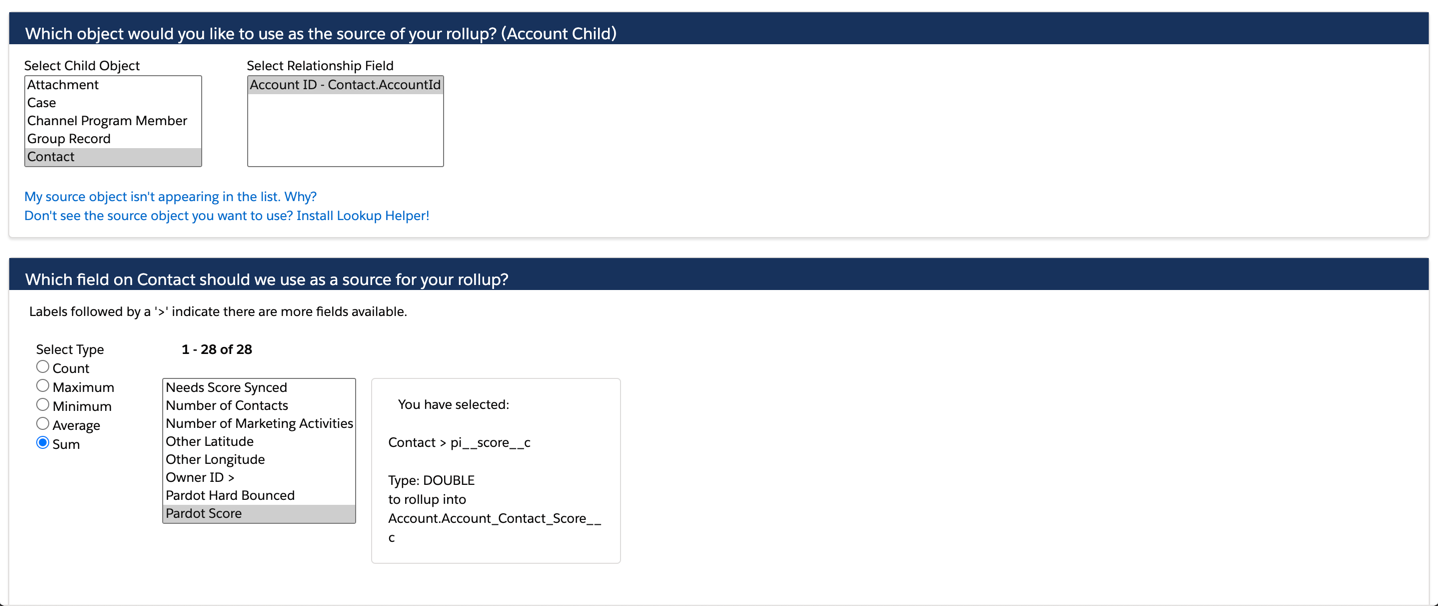
Select Contact as your child object and select your relationship field. Select sum for the field type and select the score field you want to summarize.
Optionally, add some custom filters to exlcude contacts from this rollup. For example, you might want to exclude certain email domains (employees) or certain statuses (rejected, bad data, etc).
Create Account Score Reports
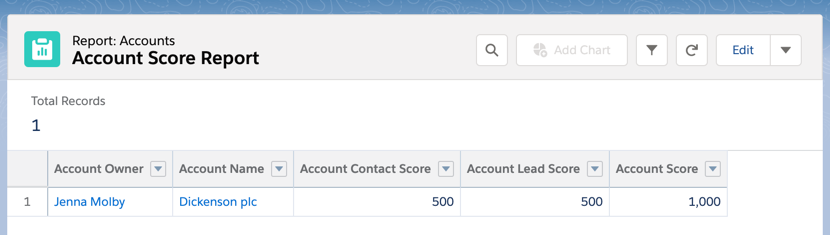
Once the roll-ups have finished running. You can now create Account score reports by selecting the Account report type and pulling in your new custom fields. You also might want to create a bucket column using Account Score, to categorize the Account Scores into warm and hot Accounts.