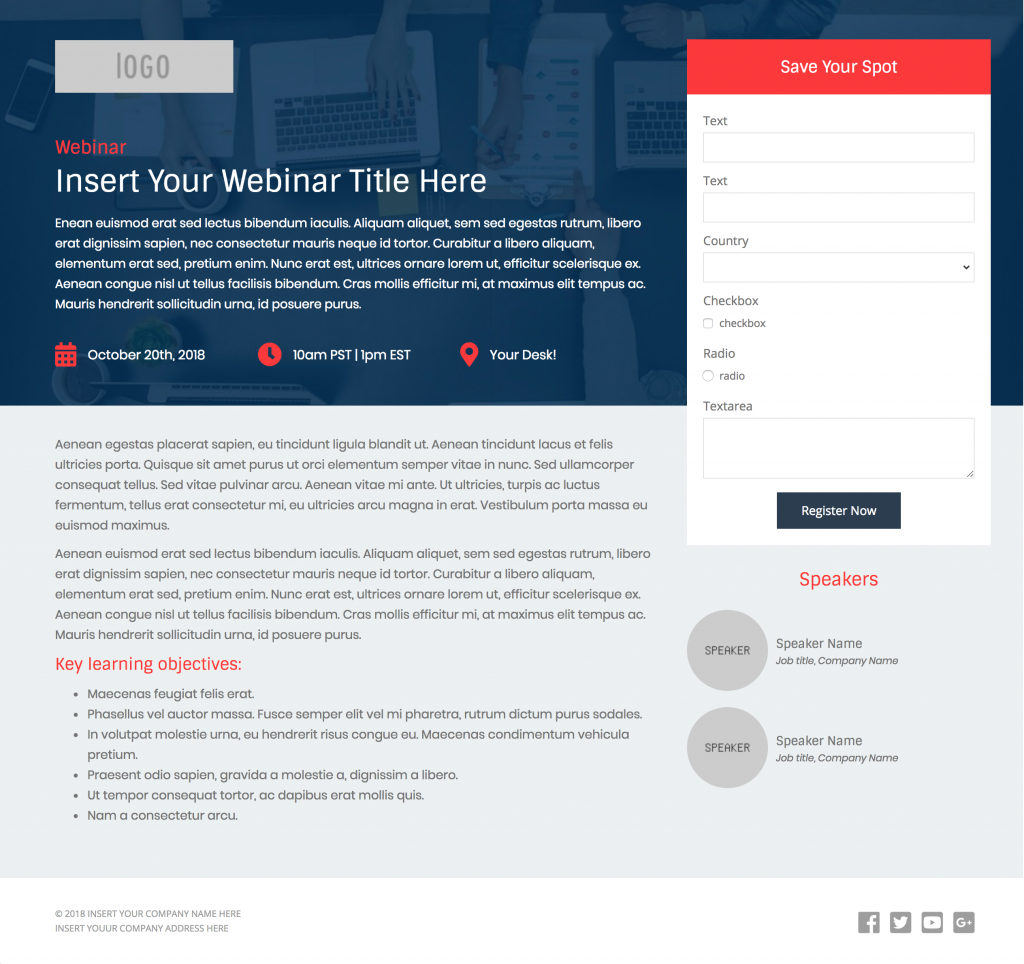
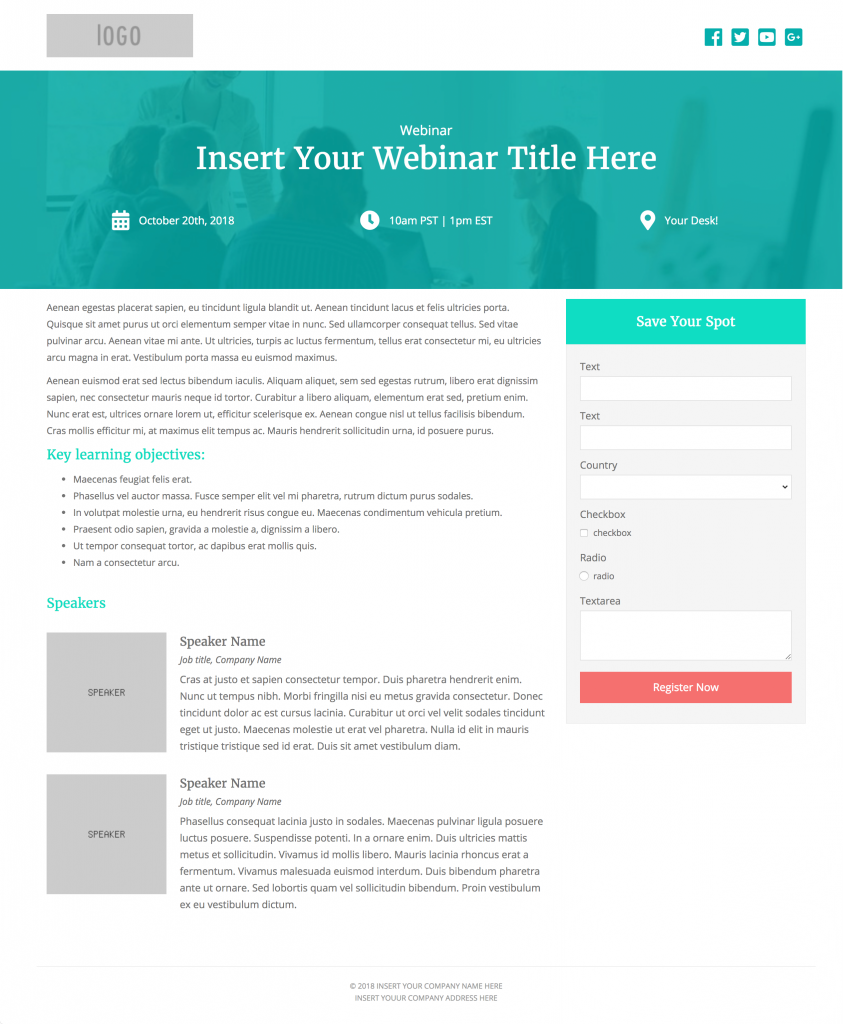
Create beautiful, responsive landing pages in Pardot by using one of these 2 free Pardot layout templates. These landing page templates are designed specifically for events such as webinars or trade shows, but they will work well with any landing page that contains a form.
Terms
These templates are free for both commercial and personal projects. No attribution is required. However, if you use them, we would love to see how you customize them. Share your templates with us through Twitter, email, or in the comments below.
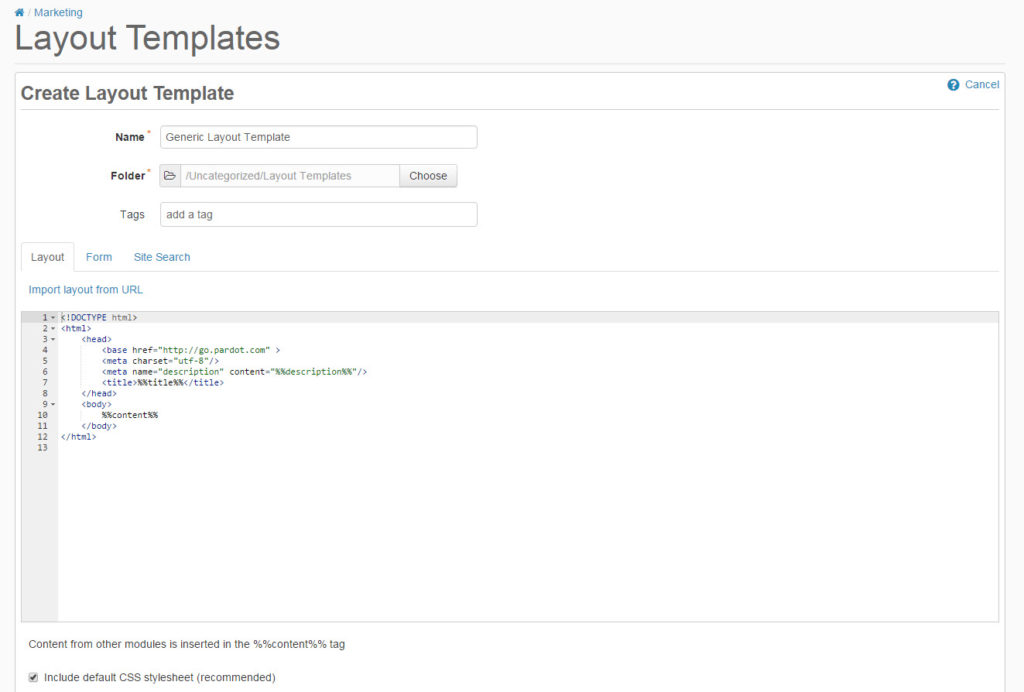
1. Create a new layout template in Pardot (Marketing > Landing Pages > Layout Template > Add Layout Template). Give your layout template a descriptive name and add your desired tags.
2. Copy the link to the template by clicking on one of the ‘copy link’ buttons below. This will copy the URL to your clipboard.
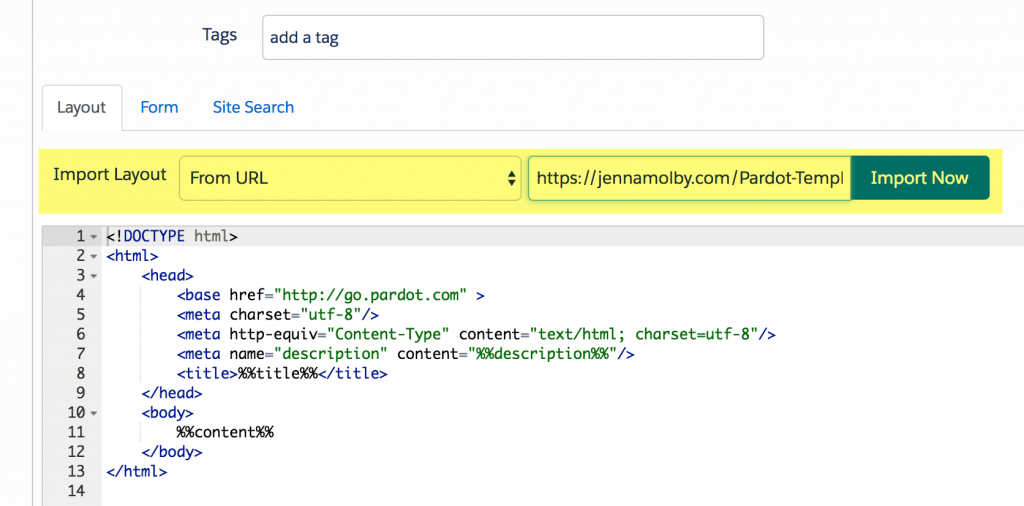
3. Navigate to the import layout drop down and select from URL. Paste the URL to the template into the text field and click import now.
Customizing Basics
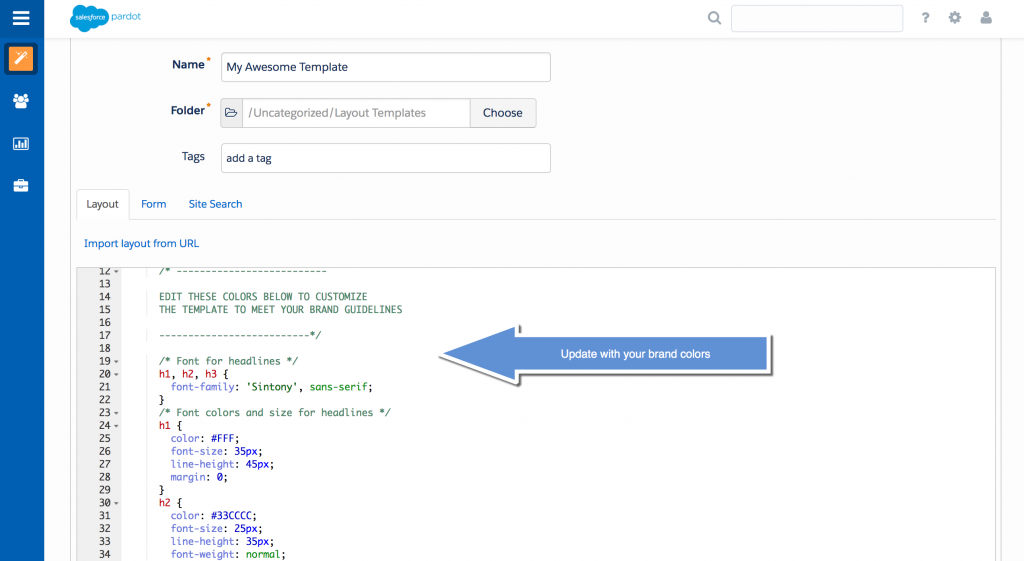
All templates use the Bootstrap Framework and use Font Awesome for the social media icons. The CSS is directly in the template (no external CSS files are referenced other than the Bootstrap and FontAwesome library). You can easily modify the template to meet your branding requirements by modifying the hex codes directly in the template which are commented clearly within the template file.
In this tutorial, I’ll show you the best way to create a two-column Pardot form. This is a follow up on my original post How to Create a 2 Column Pardot Form. By popular request, this new method includes a way to make certain form fields full width and is fully responsive. All you have to do is add CSS classes to your form fields and copy & paste the CSS provided into Pardot.
Add CSS classes to your form fields
The first step is to add CSS classes to your form fields. We will be using three different classes within the forms:
form-col-1: Add this to form fields that will be in the left column.
form-col-2: Add this to form fields that will be in the right column.
form-col-full: Add this to form fields that you want in a single, full-width column.
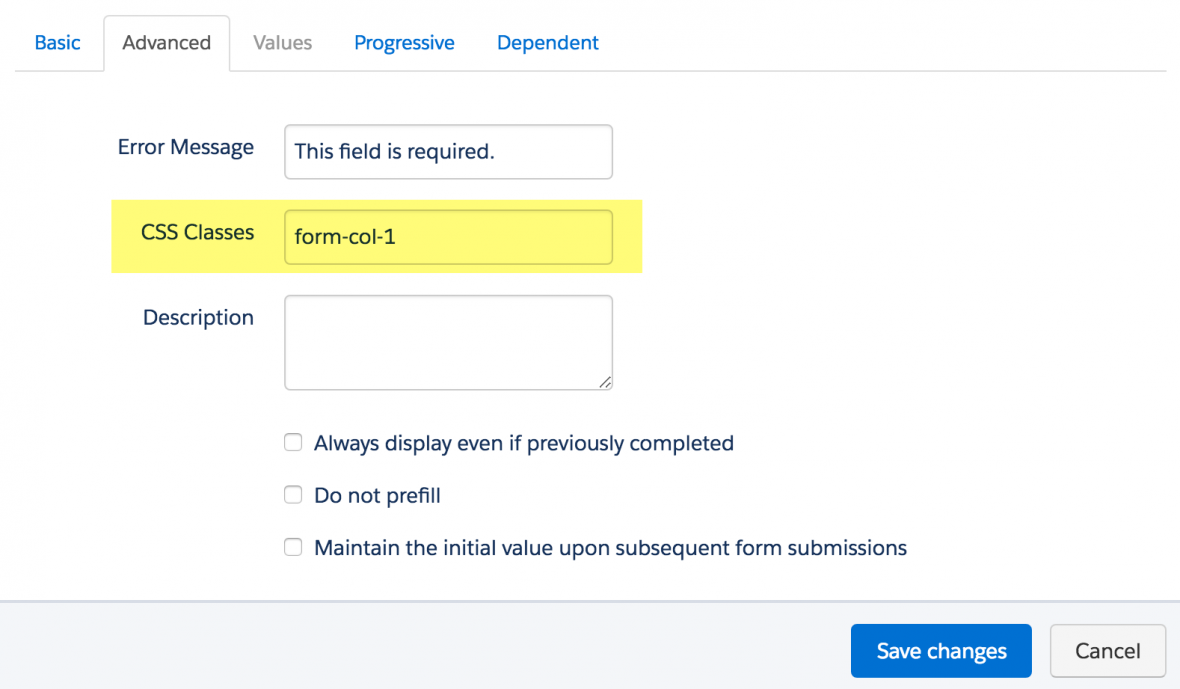
To add a class to a form field, navigate to the fields tab of your form, click on the pencil icon to edit the form field. Then, click on the advanced tab and enter the class name in the CSS classes field.
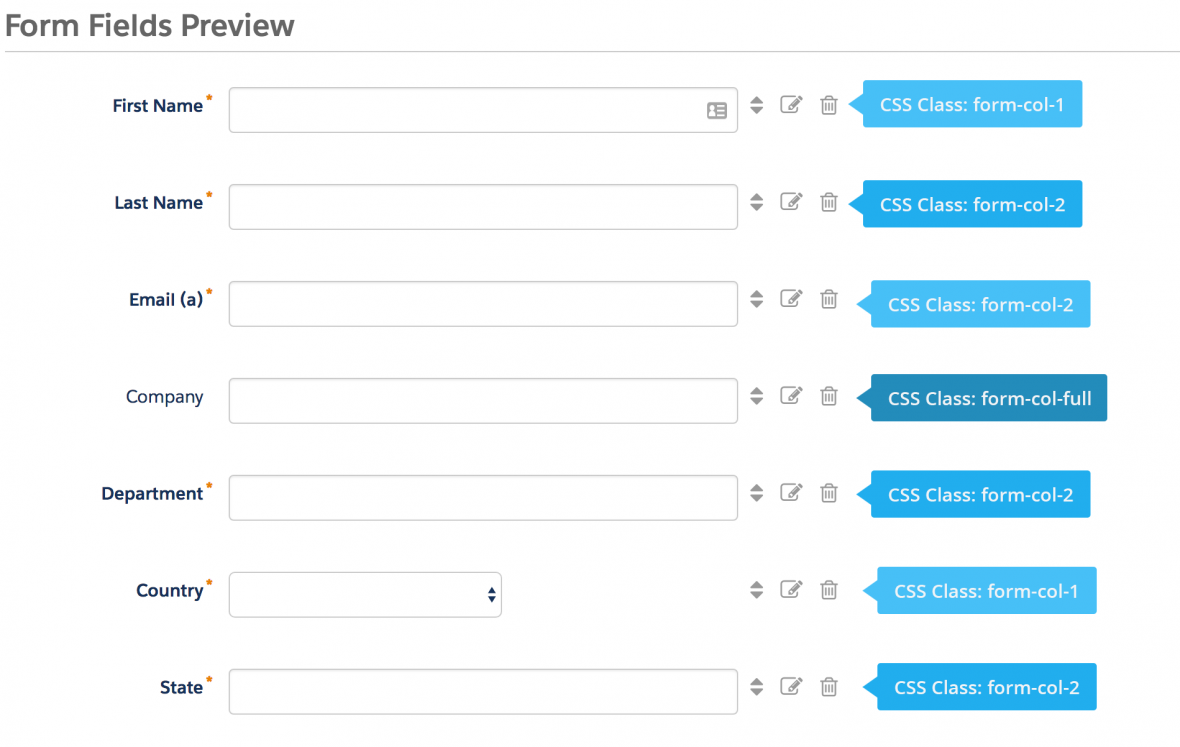
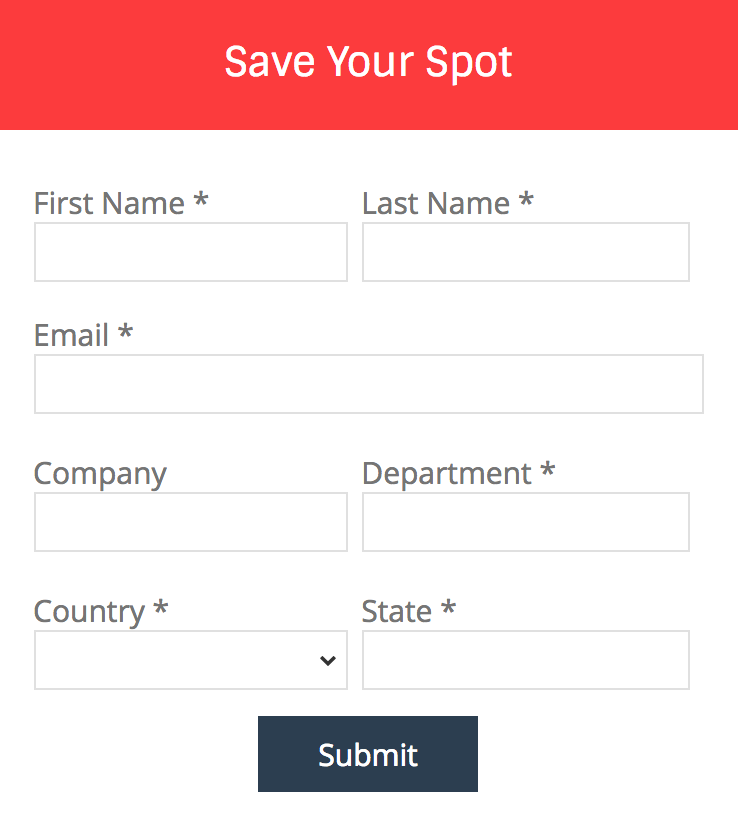
Repeat this process until all form fields have one of the three classes. Here’s an outline of what my sample form looks like, where all the fields are in two columns except for the email field which is full width.
Edit the Form HTML
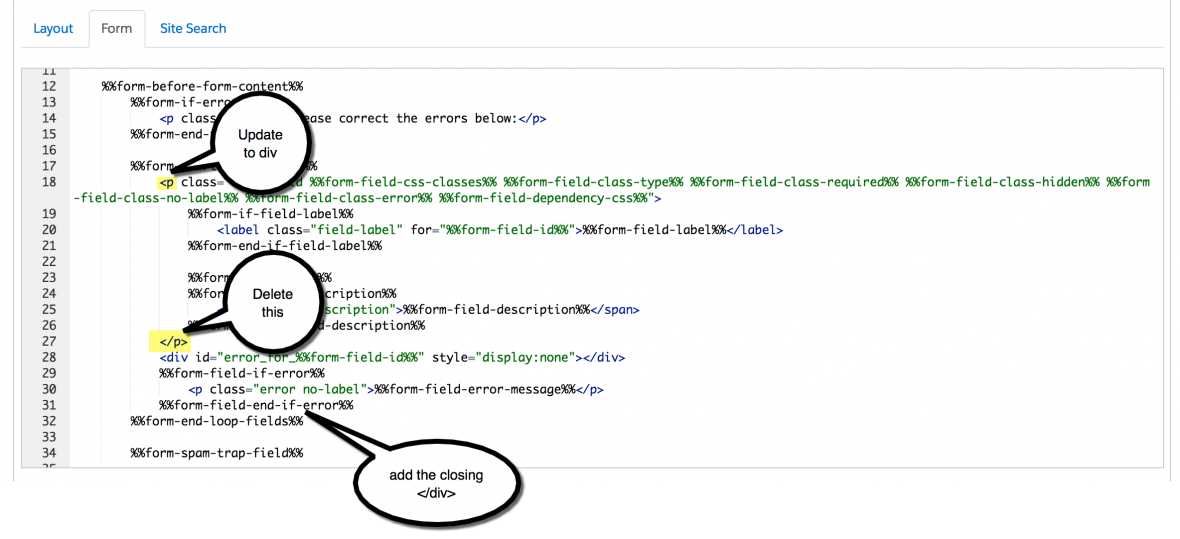
By default, every form field within your form will be wrapped in paragraph tags (<p></p>). This is not ideal when it comes to creating two-column forms, but it’s easy to update.
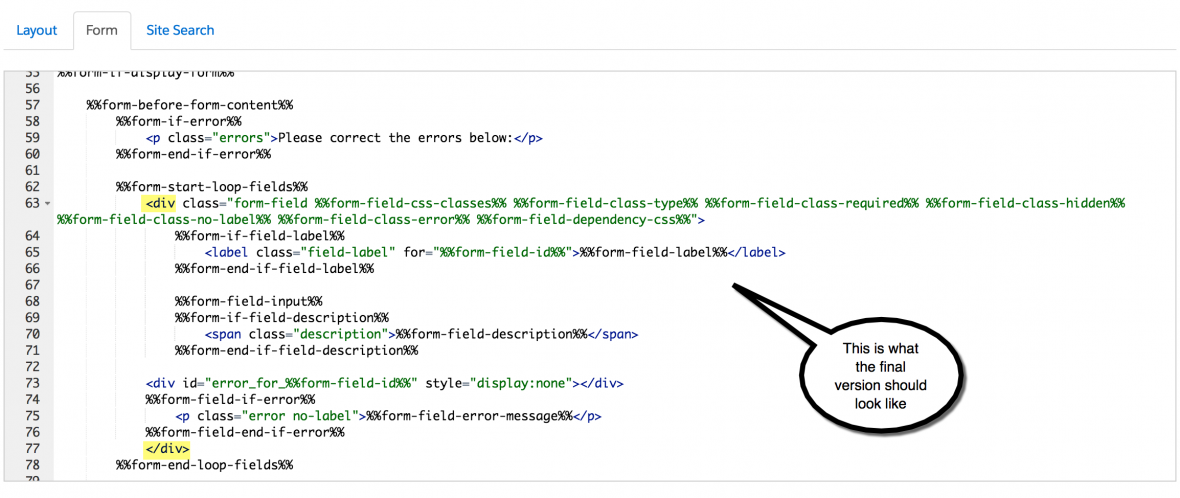
Navigate to your layout template and click on the Form tab. Change the paragraph tag to a DIV and close it right after the error message fields, as illustrated below.
Alternatively, replace the ENTIRE content within the form tab with the code below.
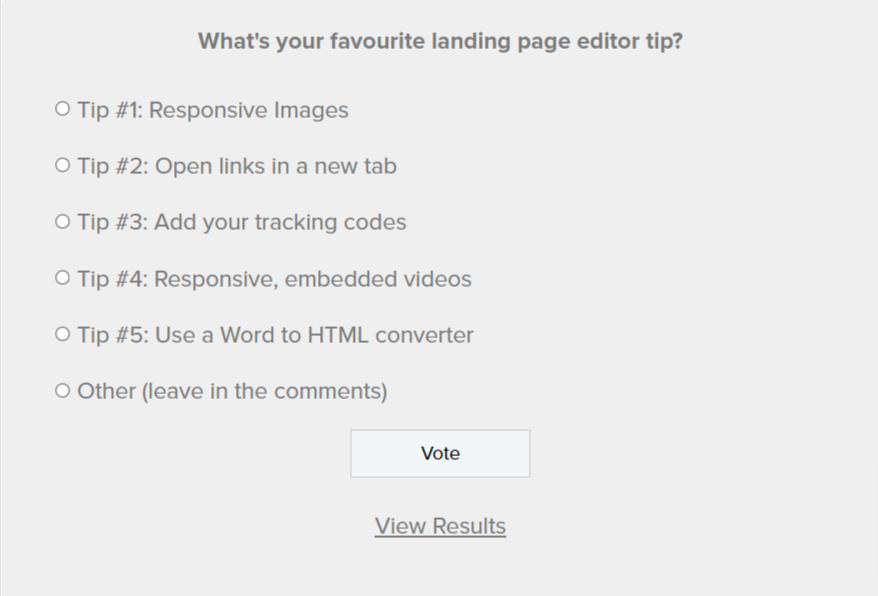
Become a pro at editing and creating Pardot landing pages, by using these 5 tips. These tips come from questions that are frequently asked within the Trailblazer Community and tips that I have come across while editing landing pages within Pardot.
Have some Pardot landing page tips of your own? Write them in the comments.
Note: These tips are specific to the Pardot Classic landing page editor. Check out this post to learn about using the Lightning landing page editor.
Tip #1: Responsive Images
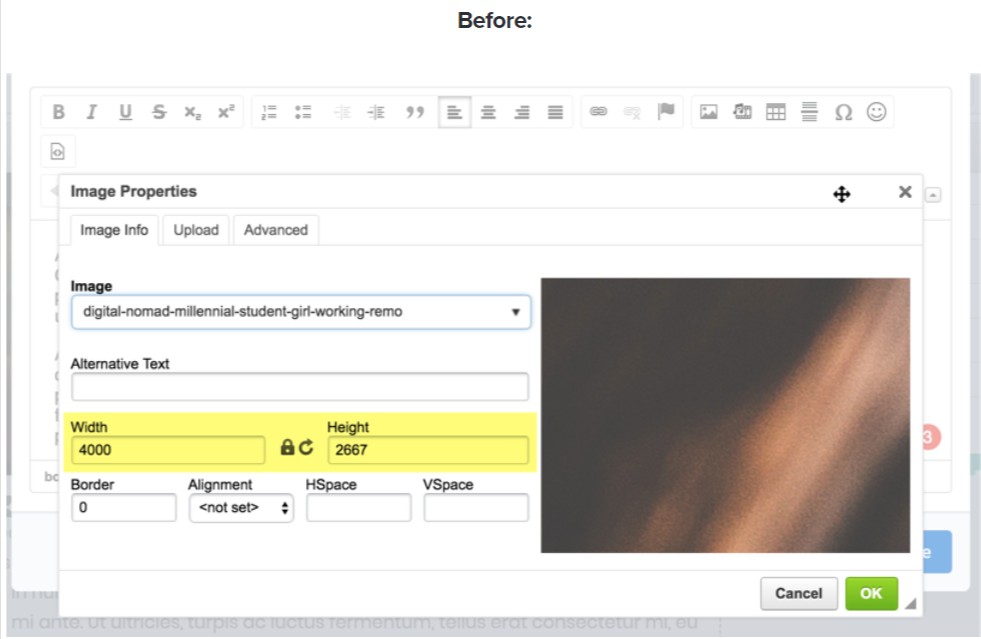
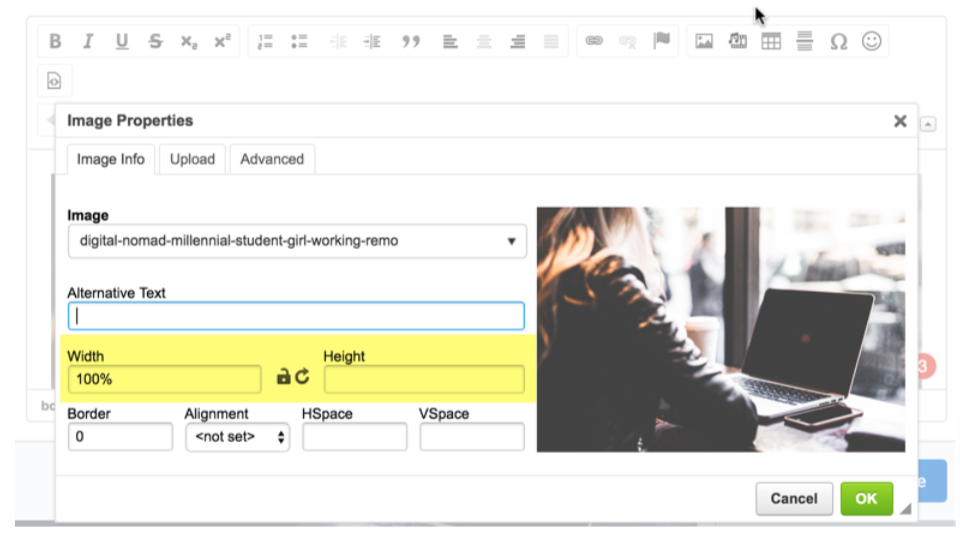
If you have responsive landing page templates, check your image heights and widths. Inserting an image through the WYSIWYG editor can add a fixed width & height automatically. To fix this you can update the width value to 100% and leave the height blank.
After:
Tip #2: Open links in a new tab
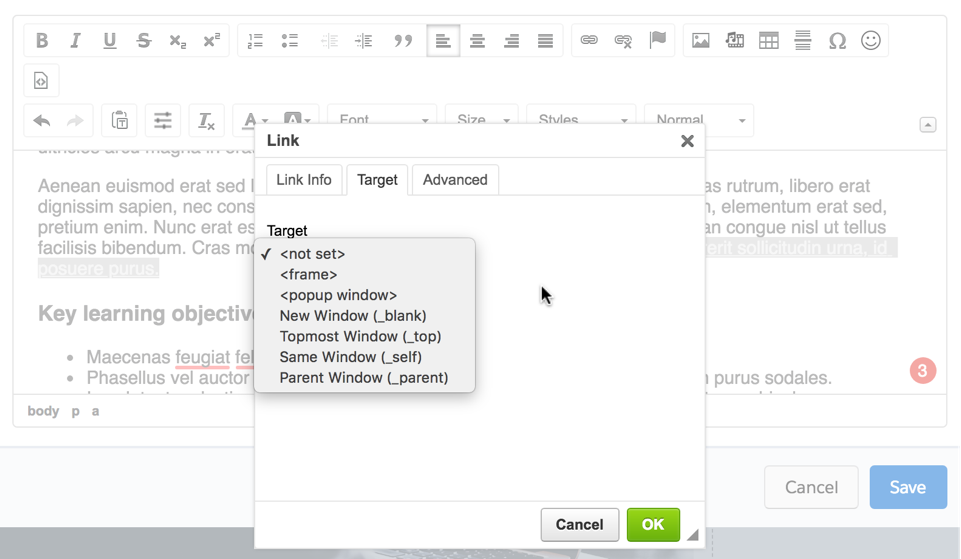
Specify the way a link should opened by selecting the link, clicking the link icon and navigating to the Target tab.
Tip #3: Add your tracking codes
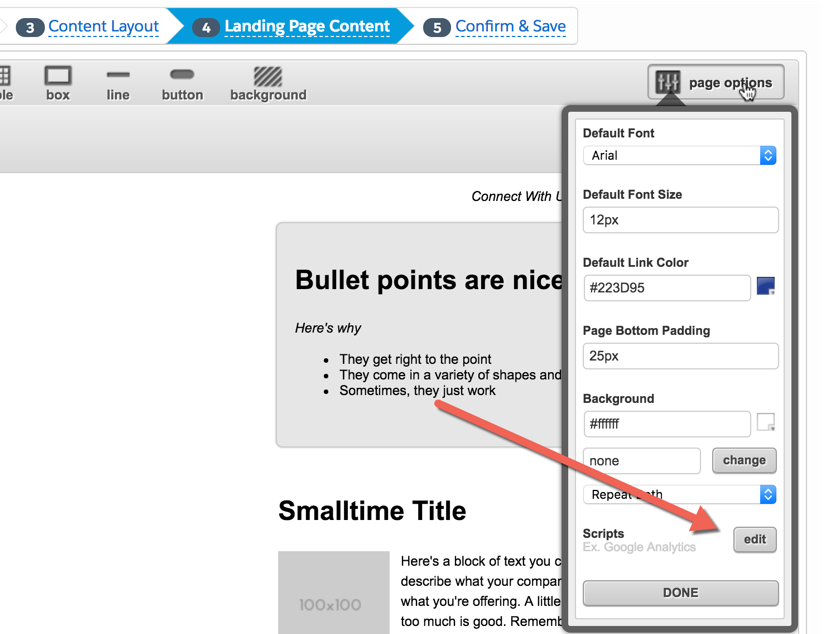
Don’t forget to add your Google Analytics tracking codes and any other tracking codes to your templates. If you created your own layout template, you can add the tracking codes directly in the template. If you are using one of the out-of-the-box templates Pardot provides, follow these steps:
Edit your landing page
Navigate to the landing page content tab
Click on page options in the top right corner of the editor
Under scripts click edit
Paste in your scripts (don’t forget to add your <script> tags!)
Tip #4: Responsive, embedded videos
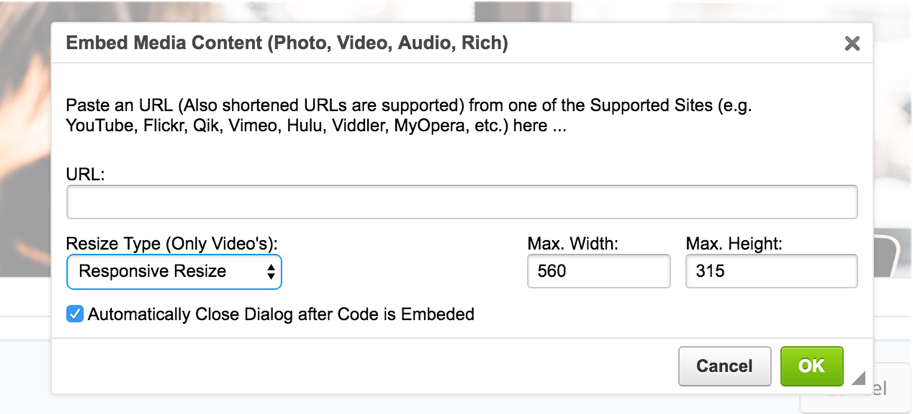
Click on the embed media button within the WYSIWYG editor, paste your video URL and select responsive embed as your video type. Optionally, you can update the max with and min height.
Tip #5: Use a Word to HTML converter
Easily take the copy from a Word doc and use it within your Pardot landing pages without reformatting. Copy & paste the content from your Word doc into an online converter, like this one. Then, simply copy the generated HTML and paste it into the Pardot editor.
Customized experiences are key — even if they’re for customers opting out of your messages. Learn how to customize your Pardot unsubscribe page in this post.
You can also take it a step further and use Pardot to create an email preference center. Read this blog post to learn more about that.
Step 1: Create a layout template
By default, the unsubscribe page uses the “Standard” layout template. You can edit the “Standard” template or create a brand new layout template. I recommend creating a brand new layout template that’s only used for the unsubscribe page.
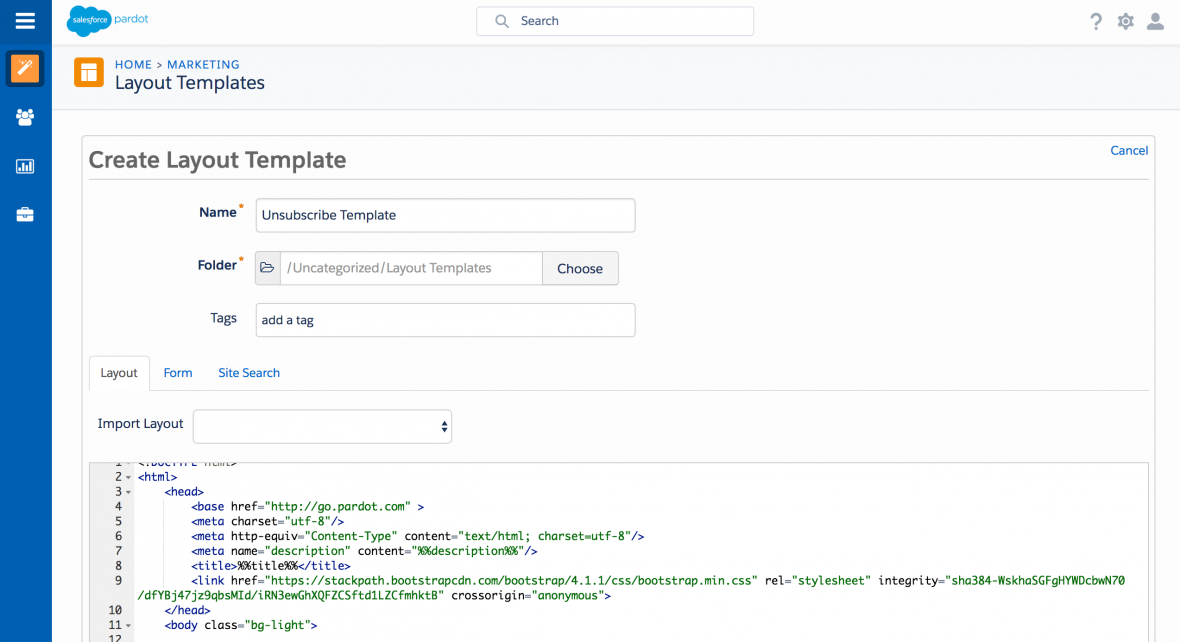
Create a new layout template (Marketing > Landing Page > Layout Templates > New Layout Template). Name the template something descriptive, I’ve named mine “Unsubscribe Template” and paste your HTML into the template. Add the tag %%content%% where you want the unsubscribe text and button to appear.
Next, add some CSS to your page to style the unsubscribe form. By default, there’s a 160px margin to the left of the re-subscribe button. To get rid of this you can add this CSS to your layout template:
body form.form p.submit {
    margin-left:0;
}
You might also want to style the button and the text within the unsubscribe page. I’ve added the following styles for the button:
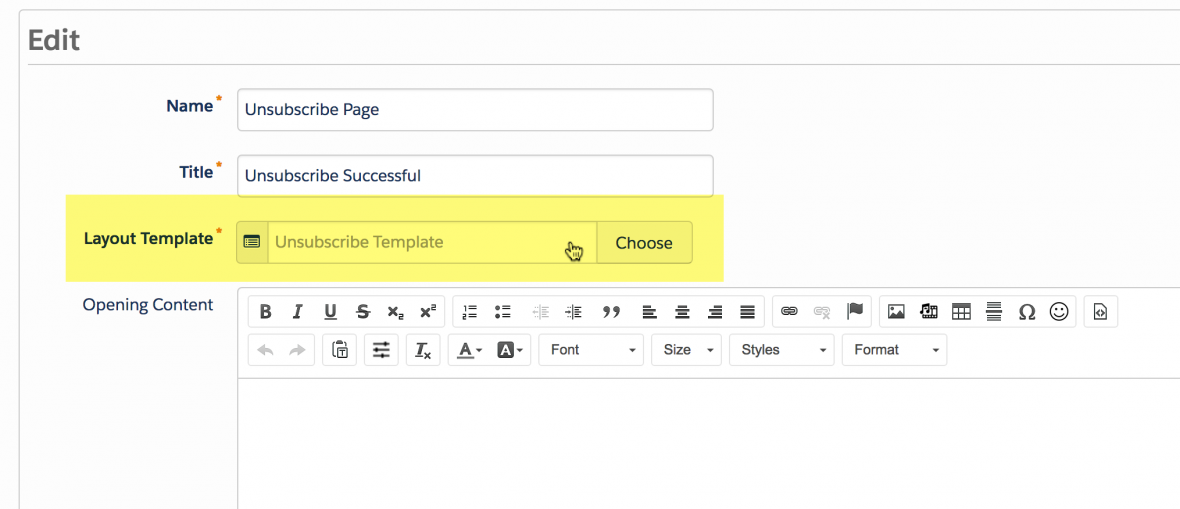
Once your page layout is ready, edit the unsubscribe page to push it live. To do this, navigate to Marketing > Emails > Unsubscribe Page, click edit and update the layout template.
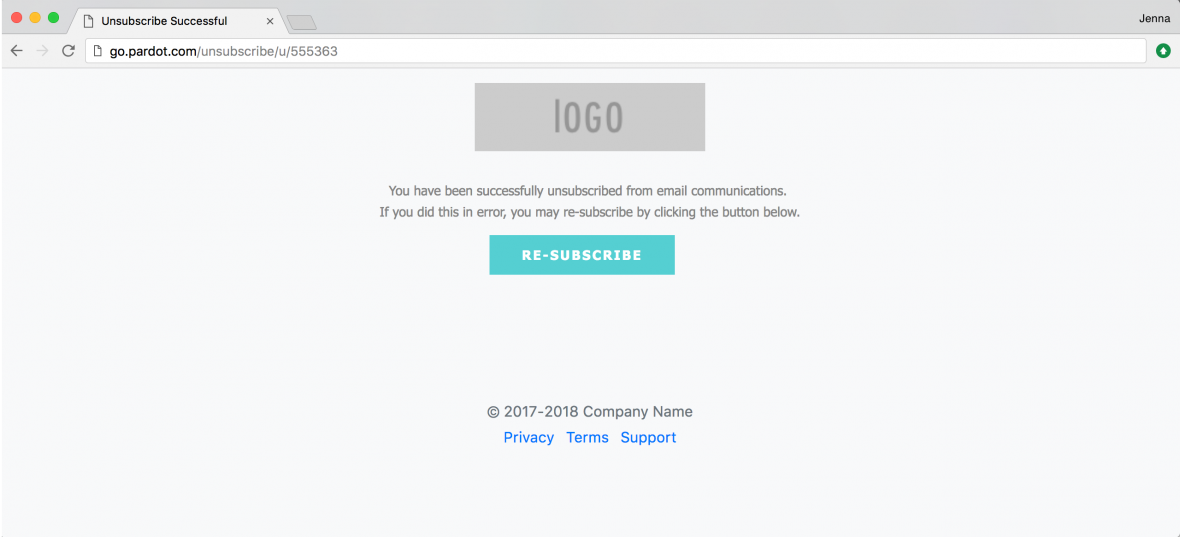
Here’s what my finished unsubscribe page looks like.
Optional: Add your own copy
Optionally, you can update the copy for the unsubscribe text. This can be updated in the layout template under the form tab.
To update the message from “You have been successfully unsubscribed from email communications. If you did this in error, you may re-subscribe by clicking the button below.” to your custom message, replace %%form-before-form-content%% with your custom text.
To update this message “You have successfully resubscribed to email communications.” to your custom message, replace %%form-thank-you-content%% with your custom text.
Ace your Salesforce Certified Platform App Builder exam by using this practice exam to test your knowledge. This practice exam contains 45 multiple choice questions and covers most of the topics on the Salesforce Certified Platform App Builder exam, including data modeling, security, process automation and business logic.
Note: These are the types of questions to expect on the certification exam and they cover the topics outlined in the official study guide, but these aren’t the exact questions you will see on the exam. I highly recommend a combination of on-the-job experience, completing the Trailhead modules and self-study methods to maximize your chances of passing the exam.
Quiz: Salesforce Certified Platform App Builder Practice Exam
Ace your Salesforce Certified Platform App Builder exam by using this practice exam to test your knowledge. This practice exam contains 45 multiple choice questions and covers most of the topics on the Salesforce Certified Platform App Builder exam, including data modeling, security, process automation and business logic.
Note: These are the types of questions to expect on the certification exam and they cover the topics outlined in the official study guide, but these aren’t the exact questions you will see on the exam. I highly recommend a combination of on-the-job experience, completing the Trailhead modules and self-study methods to maximize your chances of passing the exam.
Quiz: Salesforce Certified Pardot Specialist Practice Exam