Category

Forms & Form Handlers

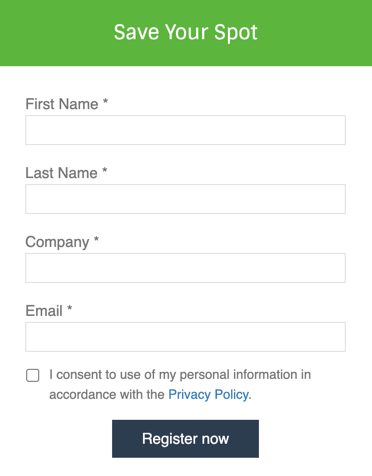
Want your Pardot form to match your brand? This can be done by using the Pardot form CSS generator or by writing some custom CSS. If you add custom CSS it can be difficult to know which CSS selectors to use. That’s why I created a CSS framework that you can use to style every aspect of your Pardot forms easily.

Adding Custom CSS to Pardot Forms

Before we dive into some tips and examples, it’s important to know how to update the custom CSS within Pardot. CSS for your form can be placed in your layout template or in the look & feel section of your form.
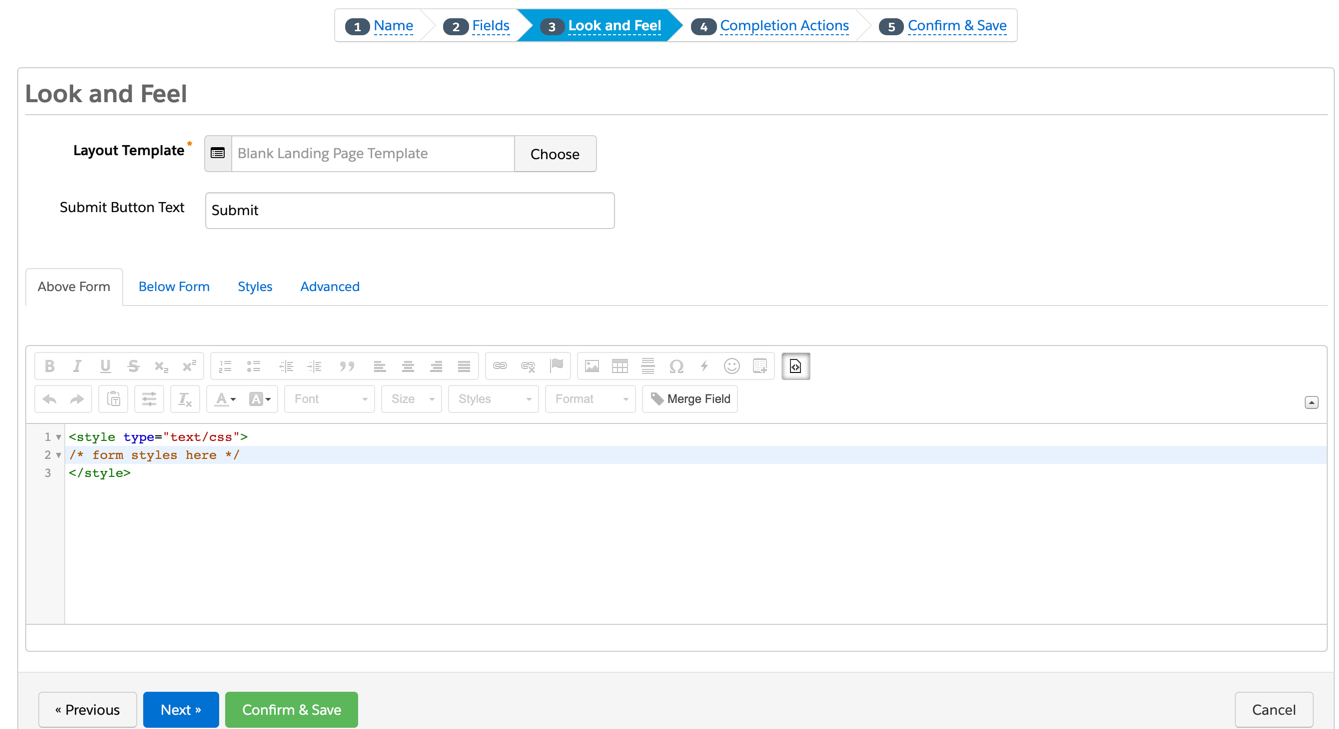
Default form settings

There are a couple of default settings that you can set within your form to make it easier to style. These settings can be found by navigating to your form > look and feel > styles.
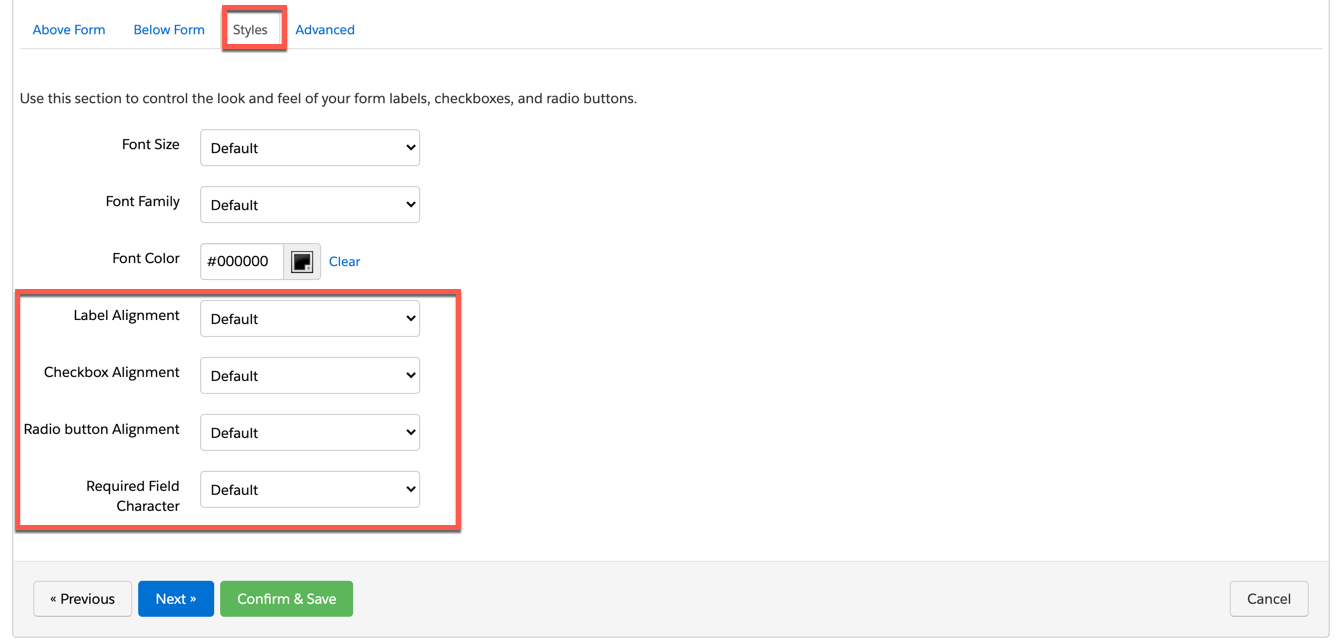
One setting I always select is changing the required field character from default to a *. I also like to change the label alignment to above. For the rest of the settings (font color, size, etc) I prefer to use custom CSS.

CSS Framework to Style Pardot Forms

Below is the CSS framework you can use to style your Pardot forms. It contains all the CSS classes needed to style all the elements of your form. Copy & paste the framework and add your custom CSS. Optionally, remove any of the classes that you won’t be using.

/* Form background, width etc */
#pardot-form {
 
}
 
/* ------ Styles for all the fields  ------*/
/* Text */
#pardot-form input.text,
/* Dropdown */
#pardot-form select,
/* Date */
#pardot-form input.date,
/* Textarea */
#pardot-form textarea.standard {
 
}
 
/* Text input fields */
#pardot-form input.text {
 
}
 
/* Textarea fields */
#pardot-form textarea.standard {
 
}
 
/* Dropdown fields */
#pardot-form select {
 
}
 
/* Date fields */
#pardot-form input.date {
 
}
 
/* Checkbox fields */
#pardot-form .pd-checkbox input {
 
}
 
/* Radio buttons */
#pardot-form .pd-radio input {
 
}
 
/* Captcha */
#pardot-form .g-recaptcha {
 
}
 
/* Description field */
#pardot-form p span.description {
 
}
 
/* The field labels */
#pardot-form p label {
 
}
 
/* Required field labels */
#pardot-form p.required label, #pardot-form span.required label {
 
}
 
/* The submit button */
#pardot-form p.submit input {
 
}
 
/* The container around the submit button */
#pardot-form p.submit {
 
}
 
/* Error message header */
.red-background, #pardot-form p.errors {
 
}
 
/* Error message field text */
#pardot-form p.error.no-label {
 
}
 
/* Error message label text */
#pardot-form p.required label,
#pardot-form span.required label {
 
}

Pardot Form Styling Examples

Styling the text inputs

/* Text input fields */
#pardot-form input.text {
border:solid 1px #ccc;
border-radius:3px;
-moz-border-radius:3px;
-webkit-border-radius:3px;
padding:8px;
color:#333;
font-size:15px;
}

Styling the labels

Non-required field labels
/* The field labels */
#pardot-form p label {
   color:#333;
   font-size:15px;
   padding-bottom:5px;
}

Centering the form, adding a background color or border

Setting a width for the form
/* Form background, width etc */
#pardot-form {
width:400px;
}
Centering the form
/* Form background, width etc */
#pardot-form {
width:400px;
margin:0 auto;
}
Adding a background color
/* Form background, width etc */
#pardot-form {
background-color:#efefef;
}
Styling the submit button
/* The submit button */
#pardot-form p.submit input {
    background-color: #2C3E50;
    border: 0;
    color: #FFF;
    font-size: 15px;
    padding: 10px 30px;
    margin-right: 0;
    margin-left: 0;
}
/* The submit button on mouse hover */
#pardot-form p.submit input:hover {
background-color:#26394d;
}
Centering the submit button
/* The container around the submit button */
#pardot-form p.submit {
text-align:center;
}

Styling the checkboxes or radio buttons

This requires a bit more explanation. Check out this post to learn how to style checkboxes and radio buttons within Pardot.

Styling select inputs (dropdowns)

/* Dropdown fields */
#pardot-form select {
   width: 100%;
   border: solid 1px #E0E0E0;
   background-color: #FFF;
   padding: 5px !important;
   font-size: 15px;
   border-radius: 0;
   -moz-border-radius: 0;
   -webkit-border-radius: 0;
   -moz-appearance: none;
   -webkit-appearance: none;
   appearance: none;
   background-position: right center;
   background-repeat: no-repeat;
   background-size: 1ex;
   background-origin: content-box;
   background-image: url("data:image/svg+xml;base64,PD94bWwgdmVyc2lvbj0iMS4wIiBlbmNvZGluZz0iVVRGLTgiIHN0YW5kYWxvbmU9Im5vIj8+CjxzdmcKICAgeG1sbnM6ZGM9Imh0dHA6Ly9wdXJsLm9yZy9kYy9lbGVtZW50cy8xLjEvIgogICB4bWxuczpjYz0iaHR0cDovL2NyZWF0aXZlY29tbW9ucy5vcmcvbnMjIgogICB4bWxuczpyZGY9Imh0dHA6Ly93d3cudzMub3JnLzE5OTkvMDIvMjItcmRmLXN5bnRheC1ucyMiCiAgIHhtbG5zOnN2Zz0iaHR0cDovL3d3dy53My5vcmcvMjAwMC9zdmciCiAgIHhtbG5zPSJodHRwOi8vd3d3LnczLm9yZy8yMDAwL3N2ZyIKICAgdmVyc2lvbj0iMS4xIgogICBpZD0ic3ZnMiIKICAgdmlld0JveD0iMCAwIDM1Ljk3MDk4MyAyMy4wOTE1MTgiCiAgIGhlaWdodD0iNi41MTY5Mzk2bW0iCiAgIHdpZHRoPSIxMC4xNTE4MTFtbSI+CiAgPGRlZnMKICAgICBpZD0iZGVmczQiIC8+CiAgPG1ldGFkYXRhCiAgICAgaWQ9Im1ldGFkYXRhNyI+CiAgICA8cmRmOlJERj4KICAgICAgPGNjOldvcmsKICAgICAgICAgcmRmOmFib3V0PSIiPgogICAgICAgIDxkYzpmb3JtYXQ+aW1hZ2Uvc3ZnK3htbDwvZGM6Zm9ybWF0PgogICAgICAgIDxkYzp0eXBlCiAgICAgICAgICAgcmRmOnJlc291cmNlPSJodHRwOi8vcHVybC5vcmcvZGMvZGNtaXR5cGUvU3RpbGxJbWFnZSIgLz4KICAgICAgICA8ZGM6dGl0bGU+PC9kYzp0aXRsZT4KICAgICAgPC9jYzpXb3JrPgogICAgPC9yZGY6UkRGPgogIDwvbWV0YWRhdGE+CiAgPGcKICAgICB0cmFuc2Zvcm09InRyYW5zbGF0ZSgtMjAyLjAxNDUxLC00MDcuMTIyMjUpIgogICAgIGlkPSJsYXllcjEiPgogICAgPHRleHQKICAgICAgIGlkPSJ0ZXh0MzMzNiIKICAgICAgIHk9IjYyOS41MDUwNyIKICAgICAgIHg9IjI5MS40Mjg1NiIKICAgICAgIHN0eWxlPSJmb250LXN0eWxlOm5vcm1hbDtmb250LXdlaWdodDpub3JtYWw7Zm9udC1zaXplOjQwcHg7bGluZS1oZWlnaHQ6MTI1JTtmb250LWZhbWlseTpzYW5zLXNlcmlmO2xldHRlci1zcGFjaW5nOjBweDt3b3JkLXNwYWNpbmc6MHB4O2ZpbGw6IzAwMDAwMDtmaWxsLW9wYWNpdHk6MTtzdHJva2U6bm9uZTtzdHJva2Utd2lkdGg6MXB4O3N0cm9rZS1saW5lY2FwOmJ1dHQ7c3Ryb2tlLWxpbmVqb2luOm1pdGVyO3N0cm9rZS1vcGFjaXR5OjEiCiAgICAgICB4bWw6c3BhY2U9InByZXNlcnZlIj48dHNwYW4KICAgICAgICAgeT0iNjI5LjUwNTA3IgogICAgICAgICB4PSIyOTEuNDI4NTYiCiAgICAgICAgIGlkPSJ0c3BhbjMzMzgiPjwvdHNwYW4+PC90ZXh0PgogICAgPGcKICAgICAgIGlkPSJ0ZXh0MzM0MCIKICAgICAgIHN0eWxlPSJmb250LXN0eWxlOm5vcm1hbDtmb250LXZhcmlhbnQ6bm9ybWFsO2ZvbnQtd2VpZ2h0Om5vcm1hbDtmb250LXN0cmV0Y2g6bm9ybWFsO2ZvbnQtc2l6ZTo0MHB4O2xpbmUtaGVpZ2h0OjEyNSU7Zm9udC1mYW1pbHk6Rm9udEF3ZXNvbWU7LWlua3NjYXBlLWZvbnQtc3BlY2lmaWNhdGlvbjpGb250QXdlc29tZTtsZXR0ZXItc3BhY2luZzowcHg7d29yZC1zcGFjaW5nOjBweDtmaWxsOiMwMDAwMDA7ZmlsbC1vcGFjaXR5OjE7c3Ryb2tlOm5vbmU7c3Ryb2tlLXdpZHRoOjFweDtzdHJva2UtbGluZWNhcDpidXR0O3N0cm9rZS1saW5lam9pbjptaXRlcjtzdHJva2Utb3BhY2l0eToxIj4KICAgICAgPHBhdGgKICAgICAgICAgaWQ9InBhdGgzMzQ1IgogICAgICAgICBzdHlsZT0iZmlsbDojMzMzMzMzO2ZpbGwtb3BhY2l0eToxIgogICAgICAgICBkPSJtIDIzNy41NjY5Niw0MTMuMjU1MDcgYyAwLjU1ODA0LC0wLjU1ODA0IDAuNTU4MDQsLTEuNDczMjIgMCwtMi4wMzEyNSBsIC0zLjcwNTM1LC0zLjY4MzA0IGMgLTAuNTU4MDQsLTAuNTU4MDQgLTEuNDUwOSwtMC41NTgwNCAtMi4wMDg5MywwIEwgMjIwLDQxOS4zOTM0NiAyMDguMTQ3MzIsNDA3LjU0MDc4IGMgLTAuNTU4MDMsLTAuNTU4MDQgLTEuNDUwODksLTAuNTU4MDQgLTIuMDA4OTMsMCBsIC0zLjcwNTM1LDMuNjgzMDQgYyAtMC41NTgwNCwwLjU1ODAzIC0wLjU1ODA0LDEuNDczMjEgMCwyLjAzMTI1IGwgMTYuNTYyNSwxNi41NDAxNyBjIDAuNTU4MDMsMC41NTgwNCAxLjQ1MDg5LDAuNTU4MDQgMi4wMDg5MiwwIGwgMTYuNTYyNSwtMTYuNTQwMTcgeiIgLz4KICAgIDwvZz4KICA8L2c+Cjwvc3ZnPgo=");
}
Changing the font color for placeholder text
::placeholder { /* Chrome, Firefox, Opera, Safari 10.1+ */
  color: #333;
  opacity: 1; /* Firefox */
}
 
:-ms-input-placeholder { /* Internet Explorer 10-11 */
  color: #333;
}
 
::-ms-input-placeholder { /* Microsoft Edge */
  color: #333;
}

Questions?

Send me a tweet @jennamolby, or contact the Sercante team for help.

You might already be using UTM parameters to track your marketing campaigns with Google Analytics, but are you capturing that information when a prospect is created in Pardot? Capturing this data is critical to assess the value of your marketing campaign and is a lead management best practice.

What are UTM Parameters?

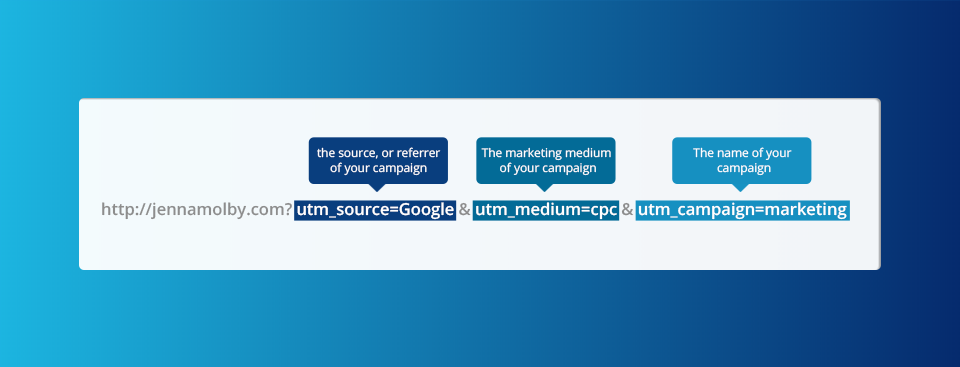
UTM parameters are tags you add to a URL. Marketers use this to track the traffic from a variety of sources such as email, social media, banner ads, etc. The tags can be sent back to Google Analytics and tracked, which can gauge the effectiveness of campaigns and identify the best ways to drive more visitors to your website.

Capturing UTM parameters in Pardot: Overview

There are two main ways to capture UTMs in Pardot. The first way is to enable the Google Analytics Connector. The connector simplifies the flow of Google Analytics data between Pardot and Salesforce. It collects data from five Google Analytics tags: campaign name, medium, source, content, and term automatically. Here are some great resources to help you get started with the Google Analytics Connector:

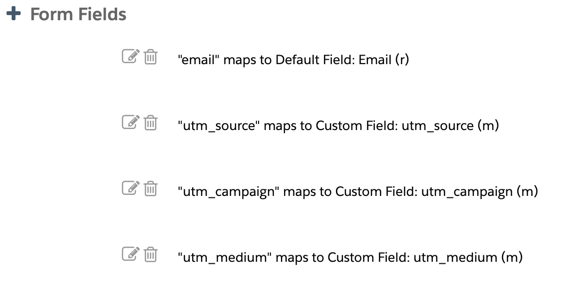
The second way to capture UTMs in Pardot is through hidden form fields. This method involves adding fields for campaign name, medium, source and content to each of your forms and then using a tracked URL within your marketing campaigns.

How are you embedding your form?

Select one of the options below to view the step-by-step guide.

On a Pardot landing page

Capture URL parameters on a Pardot landing page

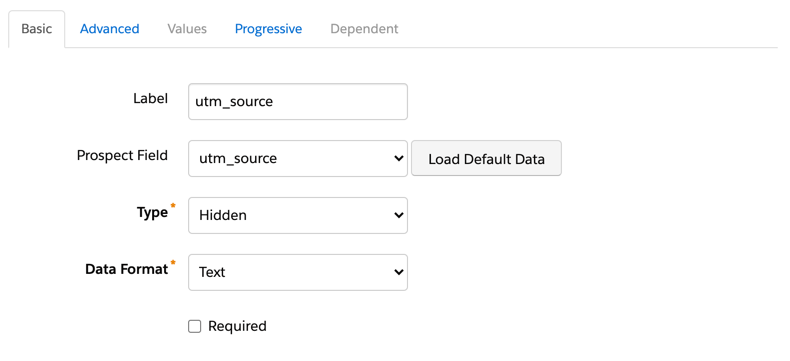
If you have an embedded form on a Pardot landing page, capturing URL parameters is easy. Add your UTM fields to your Pardot form as hidden fields with the following settings:

  • Not required
  • Type: hidden
  • Date format: Text
  • Always display even if previously completed (checked)
  • Maintain the initial value upon subsequent form submissions (checked)*
    • * checking this will ensure that the UTM parameters will not be overwritten (first touch only).

Creating URLs

In order for Pardot to automatically populate your hidden fields with the correct data, the Field ID and the parameter name in the URL MUST match. For example, if your Pardot field name is “medium” and your URL uses utm_medium, the fields will not automatically populate. Note: This is case-sensitve.

The IDs for your form fields are field ID or API name. This can be found in Administration > Prospect Fields > Custom Fields.

If your field names follow the standard naming convention recommended by Google, you can use this Campaign URL Builder to build your URLs. If your field names are different, you can create a Google Sheet to generate URLs. Here’s a Google Sheet Template to get you started. Simply update Column G with your field names.

Alternatively, you can use the script outlined in this post to have full control over the parameter names and field names.

On a web page (iFrame)

Capture URL parameters on a web page with a Pardot embedded form (iFrame)

Capturing URL parameters via an iFrame is similar to using a Pardot form on a landing page. The only difference is that you need to pass the URL parameters from the parent page (your webpage) to the embedded (iFrame) form.

Add your UTM fields to your Pardot form as hidden fields with the following settings:

  • Not required
  • Type: hidden
  • Date format: Text
  • Always display even if previously completed (checked)
  • Maintain the initial value upon subsequent form submissions (checked)*
    • * checking this will ensure that the UTM parameters will not be overwritten (first touch only).

Add the form to your web page

Grab the iFrame script for your Pardot form. Since we will be adding some JavaScript to the web page in order to pass the parameters to the iFrame, we need to give the iFrame an ID. Here’s what my iFrame code looks like after adding the ID called “myiframe”.

<iframe src="http://go.pardot.com/l/93172/xxxx-xx-xx/6mcmdj" width="100%" height="500" type="text/html" frameborder="0" allowTransparency="true" style="border: 0" id="myiframe"></iframe>

Add the JavaScript to your web page to pass the URL parameters from the parent page to the embedded Pardot iFrame form.

<script type="text/javascript">
var iframe = document.getElementById('myiframe');
iframe.src = iframe.src + window.location.search;
</script>

If you used a different ID for your iFrame, other than “myiframe”, you will need to update the ID within the JavaScript.

Creating URLs

In order for Pardot to automatically populate your hidden fields with the correct data, the Field ID and the parameter name in the URL MUST match. For example, if your Pardot field name is “medium” and your URL uses utm_medium, the fields will not automatically populate. Note: This is case-sensitve.

The IDs for your form fields are field ID or API name. This can be found in Administration > Prospect Fields > Custom Fields.

If your field names follow the standard naming convention recommended by Google, you can use this Campaign URL Builder to build your URLs. If your field names are different, you can create a Google Sheet to generate URLs. Here’s a Google Sheet Template to get you started. Simply update Column G with your field names.

Alternatively, you can use the script outlined in this post to have full control over the parameter names and field names.

A Pardot form handler

Capture URL parameters using a Pardot form handler

Add your UTM fields to you Pardot form handler and add them to your form as hidden fields.

Add some JavaScript code to your landing page or web page

Place this piece of code on your landing page or web page. This will parse the URL parameters and put the values into the hidden fields on your form.

<script type="text/javascript">
// Parse the URL
function getParameterByName(name) {
    name = name.replace(/[\[]/, "\\[").replace(/[\]]/, "\\]");
    var regex = new RegExp("[\\?&]" + name + "=([^&#]*)"),
        results = regex.exec(location.search);
    return results === null ? "" : decodeURIComponent(results[1].replace(/\+/g, " "));
}
// Give the URL parameters variable names
var source = getParameterByName('utm_source');
var medium = getParameterByName('utm_medium');
var campaign = getParameterByName('utm_campaign');
 
// Put the variable names into the hidden fields in the form.
document.getElementsByName("utm_source").value = source;
document.getElementsByName("utm_medium").value = medium;
document.getElementsByName("utm_campaign").value = campaign;
</script>

Creating URLs

Use this Campaign URL Builder to build your URLs.

Any Questions?

Send me a tweet @jennamolby, or contact the Sercante team for help.
Pardot offers 2 methods for embedding forms on your website; embedding using an iframe, and form handlers. While the embedded iFrame forms allow marketers to have control over updating and configuring the forms, using an iFrame isn’t always ideal for website usability. In this tutorial, I will show you how to take advantage of the Pardot iFrame forms and make it look great embedded on your website.

Why Use Embedded Pardot Forms?

Using Pardot forms over Pardot form handlers have many benefits including:

  1. Allowing for progressive profiling
  2. Built-in email validation
  3. The ability to use the drag and drop editor to modify form fields
  4. Add/remove form fields easily and have the changes show up on your website instantly

Embedding Pardot forms on your website

The problem

The embedded Pardot form (which is in an iFrame) has to have a set height. This means that when you embed the form you have to calculate the height (in pixels) and update the code Pardot provides accordingly.

Example

<iframe src="http://info.jennamolby.com/x/xxxxx/xxxxx/xxxx" width="100%" height="500" type="text/html" frameborder="0" allowTransparency="true" style="border: 0"></iframe>

If you add any additional fields to the form, the height of the form will need to change. You also need to accommodate for the built-in validation messages which can cause the height of the form to change as well.

The solution

Automatically resize the iFrame using Javascript. Even if you’re not a developer, it’s pretty easy to implement since is just copy and paste.

Step 1: Add some code to your Pardot form

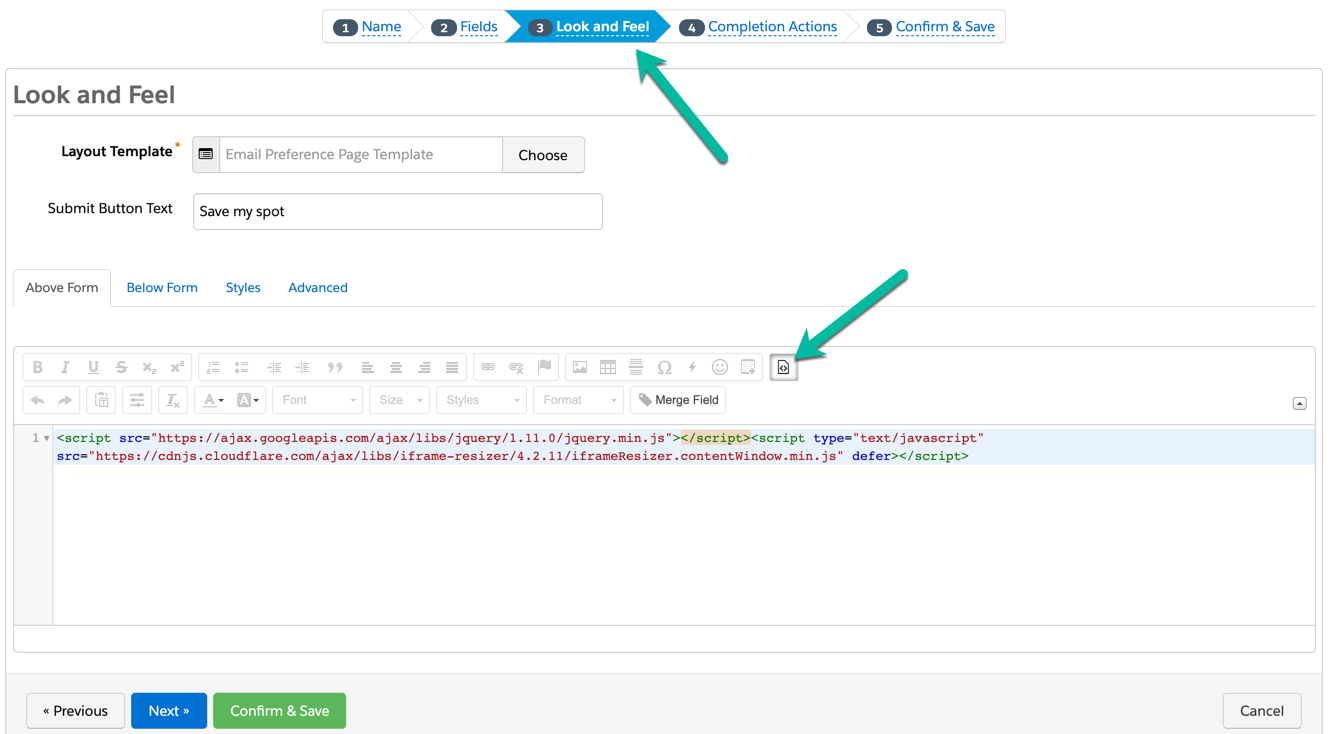
Navigate to your form in Pardot and paste this code in the look in feel section by clicking on the HTML icon.

<script src="https://ajax.googleapis.com/ajax/libs/jquery/1.11.0/jquery.min.js"></script>
<script type="text/javascript" src="https://cdnjs.cloudflare.com/ajax/libs/iframe-resizer/4.2.11/iframeResizer.contentWindow.min.js" defer></script>

Step 2: Download the plugin and add jQuery

Download this file and link the javascript on your website. Or link this hosted verison on your website like this and add the jQuery plugin.

<script src="https://ajax.googleapis.com/ajax/libs/jquery/1.11.0/jquery.min.js"></script>
<script type="text/javascript" src="https://cdnjs.cloudflare.com/ajax/libs/iframe-resizer/4.2.11/iframeResizer.min.js"></script>

Step 3: Embed the form on your website

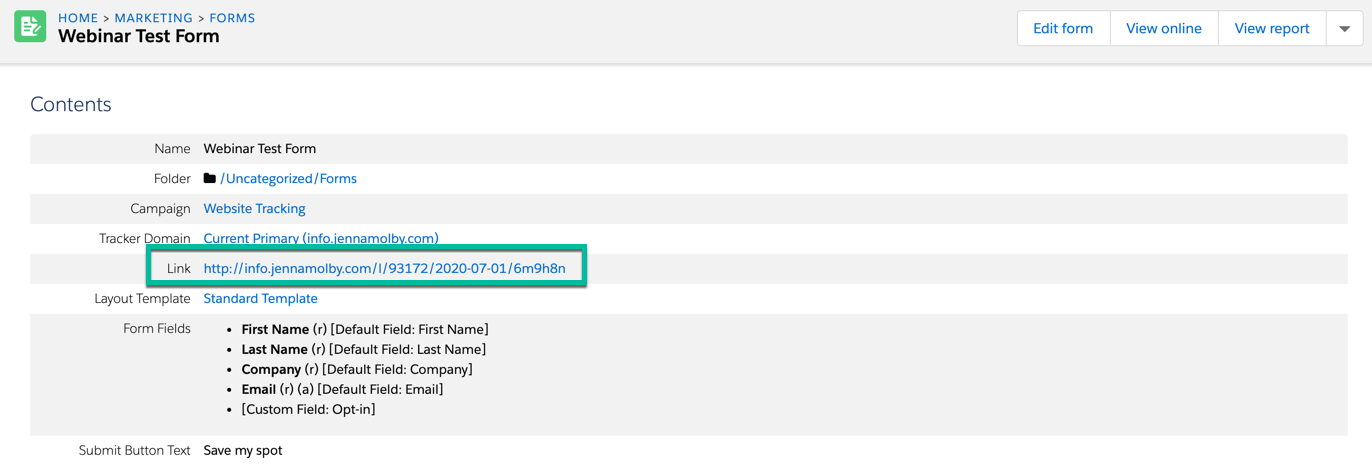
In order to embed the Pardot form on your website, you will need to grab the form URL from Pardot. Navigate to the form overview page and copy the link provided

Add this piece of code where you want the form to appear on the page. Replace the URL with the URL you copied above.

<iframe src="http://info.jennamolby.com/x/xxxxx/xxxx/xxxxx" width="100%" scrolling="no"></iframe>

Lastly, add some custom javascript to your website to initiate the iFrame resizing.

<script type="text/javascript">
      iFrameResize({log:true});
</script>

Here’s the completed website code:

<!DOCTYPE html>
<html>
<head>
<meta charset="utf-8">
<title>Pardot iFrame Resizing</title>
<meta name="description" content="iFrame message passing test">
<meta name="viewport" content="width=device-width">
<meta http-equiv="X-UA-Compatible" content="IE=edge">
<style type="text/css">
iframe {border:0;}
</style>
</head>
<body>
<iframe src="http://info.jennamolby.com/x/xxxxx/xxxx/xxxxx" width="100%" scrolling="no"></iframe>
<script src="https://ajax.googleapis.com/ajax/libs/jquery/1.11.0/jquery.min.js"></script>
<script type="text/javascript" src="https://cdnjs.cloudflare.com/ajax/libs/iframe-resizer/4.2.11/iframeResizer.min.js"></script>
<script type="text/javascript">
      iFrameResize({log:true});
</script>
</body>
</html>

Questions?

Send me a tweet @jennamolby, or contact the Sercante team for help.
GDPR and CASL compliance are just a few reasons to add an explicit opt-in message or a privacy policy to your Pardot forms. In this post, I’ll show you how to add a custom opt-in message to your form and a privacy consent message above the form submit button.

Adding an opt-in checkbox

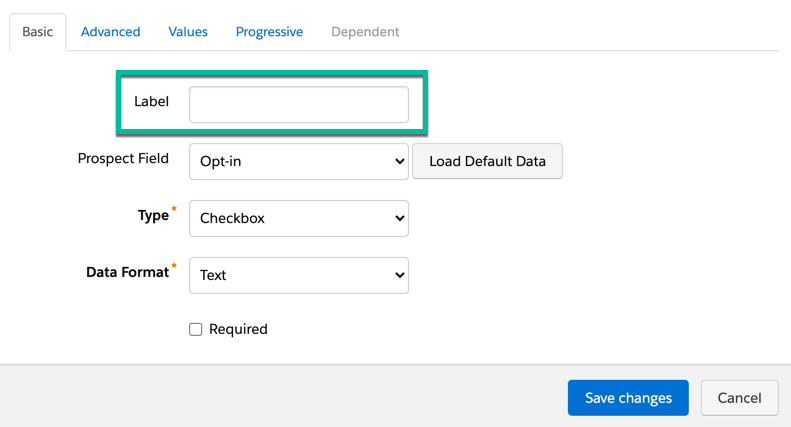
Add your opt-in field to your form and remove the label text.

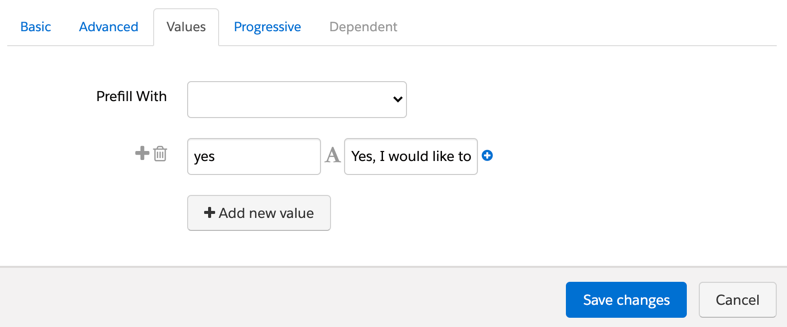
Navigate to the values tab and input the values for the checkbox. The first box contains the value that will be stored in the Pardot database (in my form the stored value is yes). The second box contains the value that will be displayed to the prospect completing the form. In this case, it’s the opt-in message.

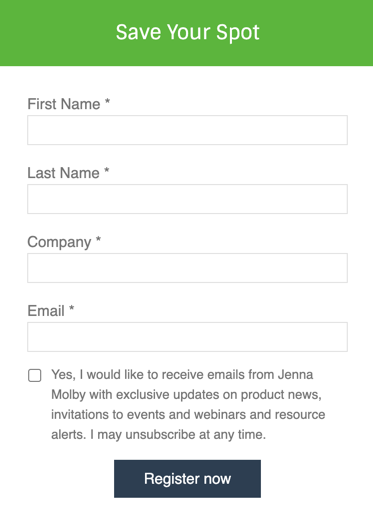
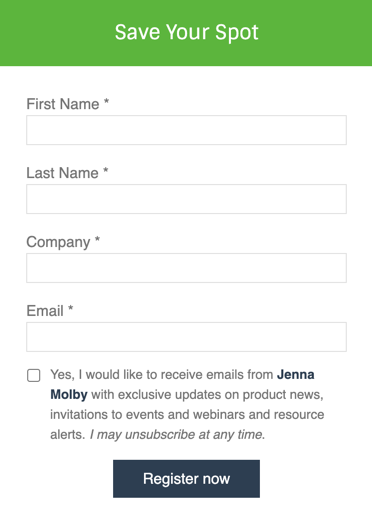
Save and preview your opt-in message. Here’s what mine looks like.

Add links and other formatting

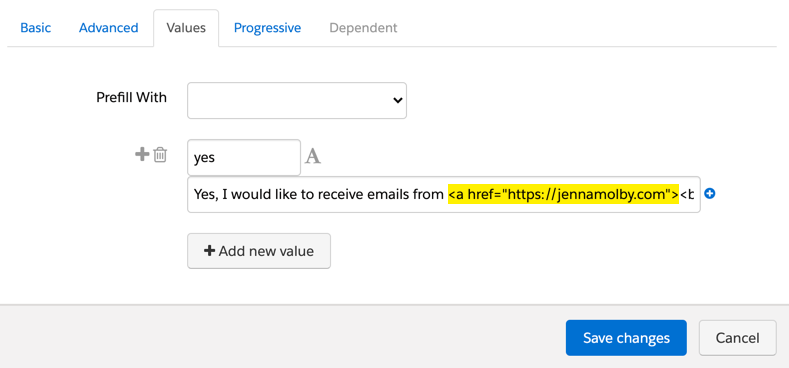
You can add HTML to your opt-in message to include links, bold text, etc, by adding it directly as the display value.

Yes, I would like to receive emails from <a href="https://jennamolby.com"><b>Jenna Molby</b></a> with exclusive updates on product news, invitations to events and webinars and resource alerts. <i>I may unsubscribe at any time</i>.

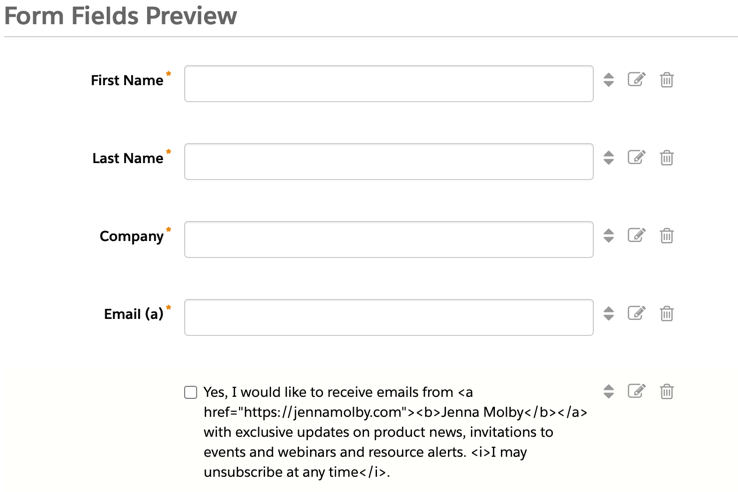
When you preview the message within the editor, it will show the HTML tags, but when you view the live form, it will display the correct HTML.

Adding a privacy policy message

Before the submit button

You can add a privacy policy above the submit button by adding javascript to your form.

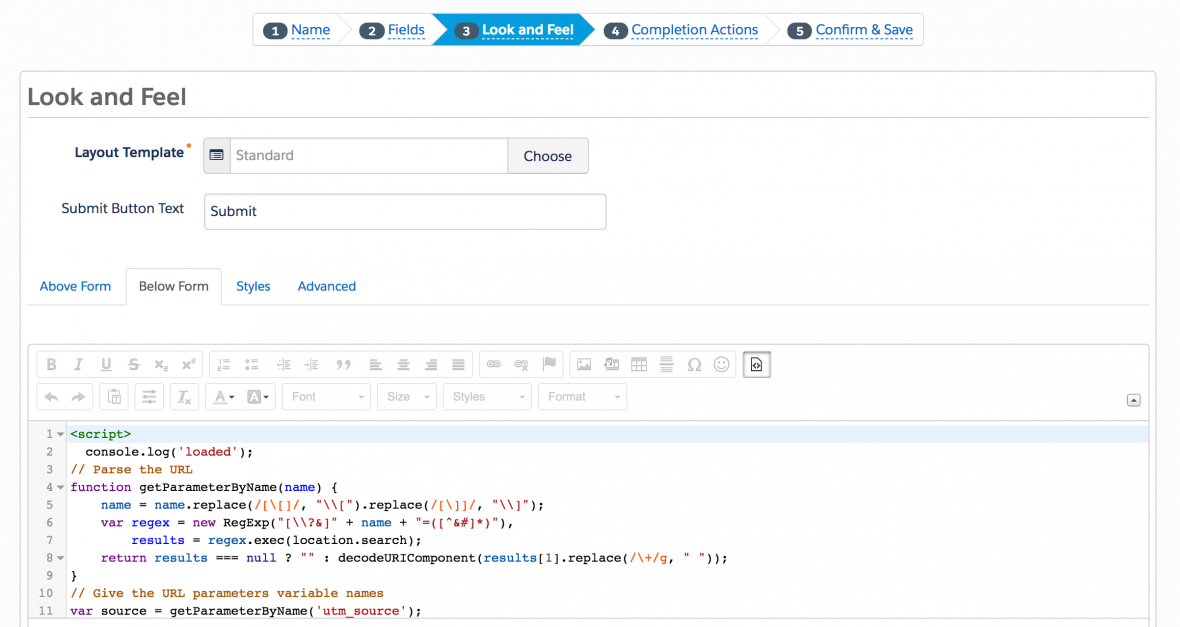
Custom JavaScript can be placed within your Pardot forms under Look and Feel > Below Form. Click on the HTML button within the WYSIWYG editor and add in the JavaScript.

Edit the javascript below to include your privacy policy message.

<script type="text/javascript">
function insertBefore(el, referenceNode) {
    referenceNode.parentNode.insertBefore(el, referenceNode);
}
var newEl = document.createElement('div');
// replace this line with your message
newEl.innerHTML = '<span id="privacy-policy-msg">By registering I confirm that I have read and agree to the <a href="https://jennamolby.com/privacy-policy/" target="_blank">Privacy Statement</a>.</span>';
var ref = document.querySelector('p.submit');
insertBefore(newEl, ref);
</script>

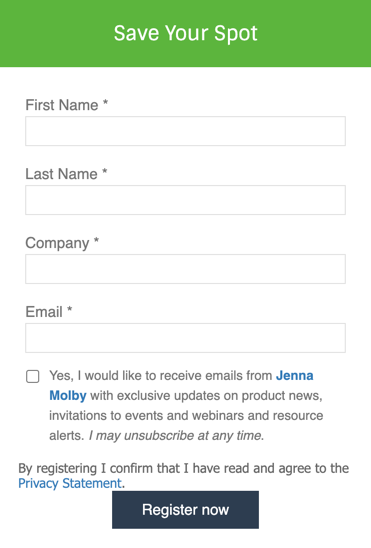
Here’s what my form looks like once the privacy policy message has been added.

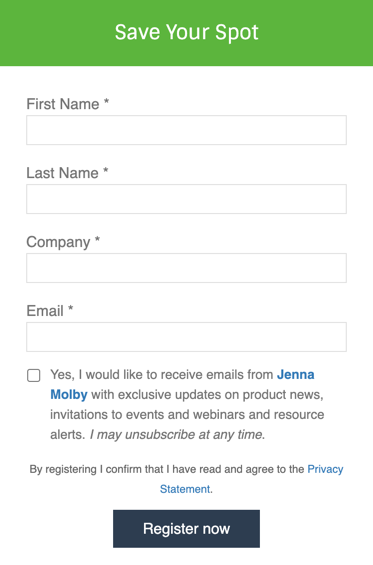
Some CSS can be added to the form to style the privacy policy message.

<style type="text/css">
#privacy-policy-msg {
    font-size:11px;
    line-height:20px;
    font-family: 'Open Sans', sans-serif;
    margin-bottom:10px;
    display:inline-block;
    text-align:center;
}
</style>

As a consent checkbox

You might require prospects to “check” a privacy consent checkbox in order to submit the form. This can be added the same way the opt-in checkbox was configured above.

Questions?

Send me a tweet @jennamolby, or contact the Sercante team for help.

Pardot form handlers allow you to use your forms to post your data to Pardot. A Form handler is a great alternative to use instead of Pardot iFrame forms. They allow you to fully customize the look of your form and submit data to more than one database. In this tutorial, you will learn how to create a form handler from scratch.

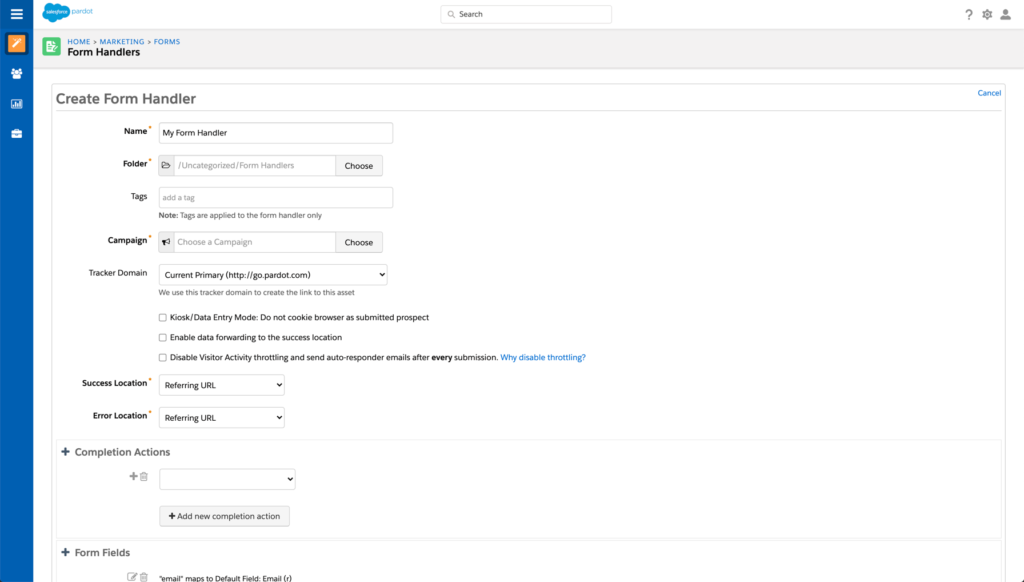
Create a new form handler in Pardot

First you need to create a new form handler in Pardot under Marketing > Forms > Form Handlers.

Add the all the standard Pardot required information.

  • Give the form handler a name
  • Select a folder and add tags
  • Choose your campaign

Choose your other custom settings.

  • Kiosk/Data Entry Mode: Do you want the prospect to be cookied when they fill out the form?
  • Enable data forwarding to the success location: Does you data need to submit to another database other than Pardot?
  • Disable Visitor Activity throttling: Do you want to disable Pardot’s spam protection and generate a distinct visitor activity and auto-responder email for all form handler submissions?
  • Success &amp Error Location: Choose an Error page and a Thank you page URL.
  • Completion Actions: Add the any actions that should happen when a prospect fills out the form.

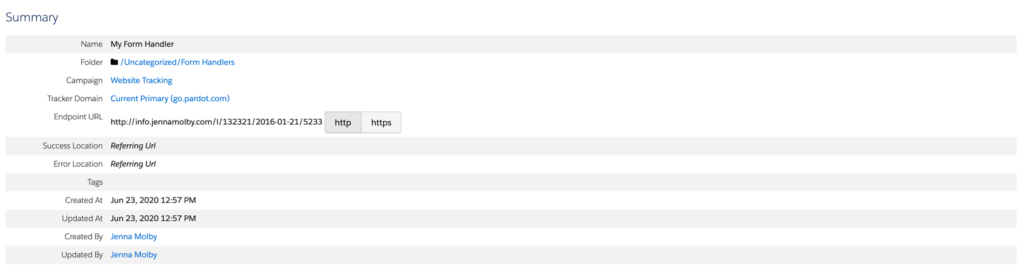
Here are the settings I have selected for this tutorial:

Add form fields

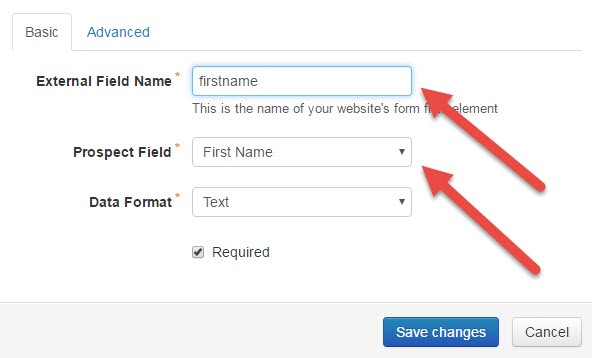
Add any fields you want to capture through your Pardot form handler.

TIP: Name the external field name the same as your prospect field name, but without the spaces, to avoid confusion in the next steps.

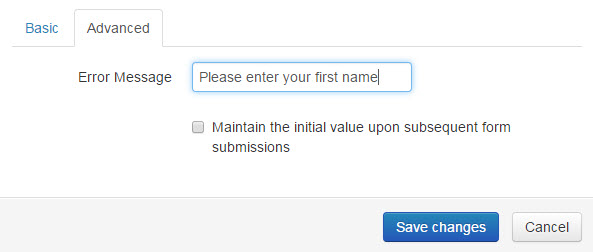
Optionally, you can add custom error message text under the advanced tab.

Create the form HTML

Now that the form handler is created, the form HTML needs to be created to embed it on your website. In this tutorial, I will be going over basic markup. Feel free to add your own styling/structure that matches your website.

Copy the endpoint URL

Navigate to your Pardot form handler summary page and copy the endpoint URL.

Basic HTML structure

Here’s the basic structure to create a Pardot form using a Pardot form handler.

<form action="http://info.jennamolby.com/l/132321/2016-01-21/52334" method="post">
    <label>First Name</label>
    <input type="text" name="firstname" />
    <label>Last Name</label>
    <input type="text" name="lastname" />
    <label>Email Address</label>
    <input type="email" name="email" />
    <label>Company</label>
    <input type="text" name="company" />
    <input type="submit" value="submit" required="required" />
</form>
  • Action: Must be the endpoint url for your Pardot form handler.
  • Method: Must = POST
  • Input: Add all the form fields you mapped while creating you Pardot form handler.
  • Name: Must equal the external field name you specified when you created the Pardot form handler.
  • Type: Specify the type (text, email, etc) to help with field validation.

Add Field Validation (Optional)

Optionally, you can add some front-end validation to your form. If you marked the fields as “required” when creating your form handler, Pardot would create some form validation to direct a user to another page. If you don’t want the prospect to leave the page, follow these instructions.

Add required=”required” to each of your required form fields. These should match what you specified in Pardot to avoid confusion.

<form action="http://info.jennamolby.com/l/132321/2016-01-21/52334" method="post">
    <label>First Name</label>
    <input type="text" name="firstname" required="required" />
    <label>Last Name</label>
    <input type="text" name="lastname" required="required" />
    <label>Email Address</label>
    <input type="email" name="email" required="required" />
    <label>Company</label>
    <input type="text" name="company" required="required" />
    <input type="submit" value="submit" required="required" />
</form>

Troubleshooting tips

Is your data not making its way into Pardot? Here are some troubleshooting tips to help you diagnose the issue.

  • Try submitting the form with just email address required. If the prospect is created in Pardot without any issues, you might have a field type or a field mapping incorrect within your form handler.
  • Check Enable data forwarding to the success location. Try checking or unchecking the option for “Enable data forwarding to the success location” within your Pardot form handler settings. Depending on how you are connecting your form handler to your web form, this may or may not need to be enabled.
  • Double-check your field names are correct. The external field name you set within your form handler needs to be the EXACT SAME as what is in your HTML. Double-check that the HTML for your form fields is using the right name and remember, the name is different than an ID or CLASS.
  • Use the HTTPS endpoint if your website is HTTPS. Using an HTTP endpoint for your form handler when your website is HTTPS will cause the browser to give security warnings. Update the form handler endpoint to HTTPS to resolve the issue.

Pardot Form Handlers + WordPress

There are many different ways to use Pardot Form Handlers with WordPress. Here are some resources to help you get started with using Pardot Form Handlers with WordPress:

Questions?

Send me a tweet @jennamolby, or contact the Sercante team for help.

Building landing pages in Pardot can be an interesting challenge because, depending on your needs and the skillset of your team, there are multiple ways to go about it.  (more…)

No more posts to show