
Automatically Create Campaign Member Statuses: The Example
In this post, I’ll be using Salesforce Flow to create the following statuses based on campaign type.
| Campaign Type | Campaign Member Status |
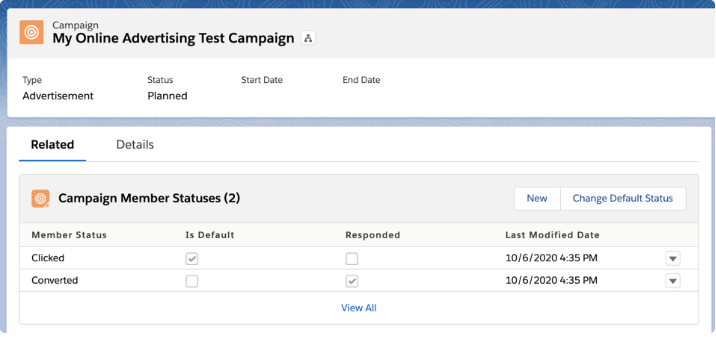
| Online Advertising | Clicked Converted |
| Sent Opened Clicked Unsubscribed |
|
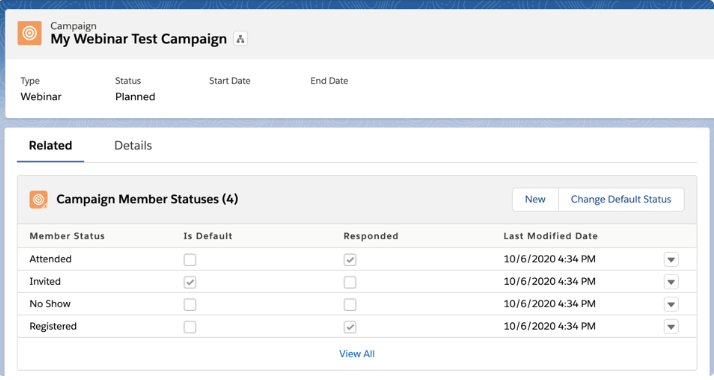
| Webinar | Invited Registered Attended No Show |
Automatically Create Campaign Member Statuses: The Example
In this post, I’ll be using Salesforce Flow to create the following statuses based on campaign type.
Prerequisites
I recommend you map out what status values you want to use for each campaign type as well as which statuses should be marked as default and responded before creating your flow.
Create the Salesforce Flow
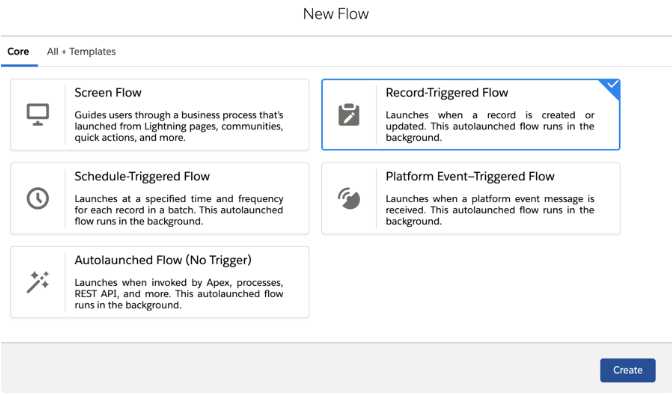
Navigate to Setup > Process Automation > Flows and select new flow. Select Record-Triggered Flow from the wizard.
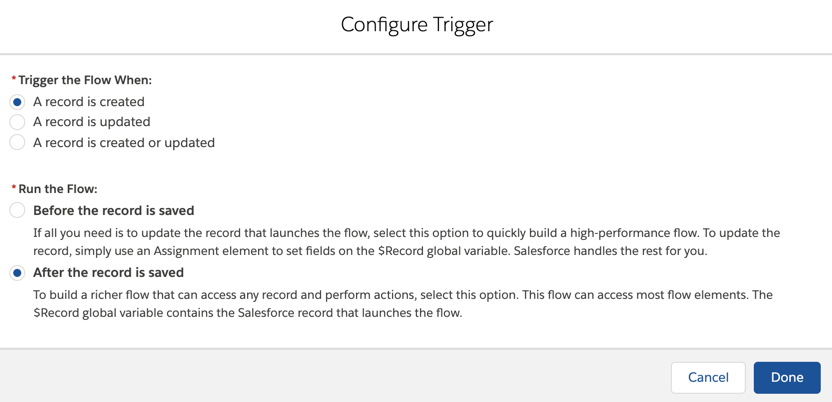
Configure the Trigger to occur when a record is created, and after the record is saved.
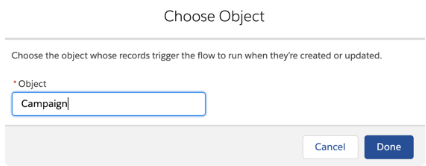
Select Campaign as the trigger object.
Add a Decision element to the flow
Drag and drop a decision element onto the page. This is where we will set up the logic to determine what campaign statuses to create for each campaign type.
In this example, I will be creating three outcomes:
- Campaign type = Webinar
- Campaign type = Online Advertising
- Campaign type = Email
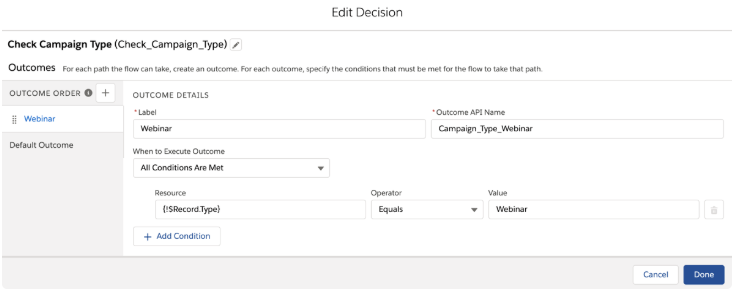
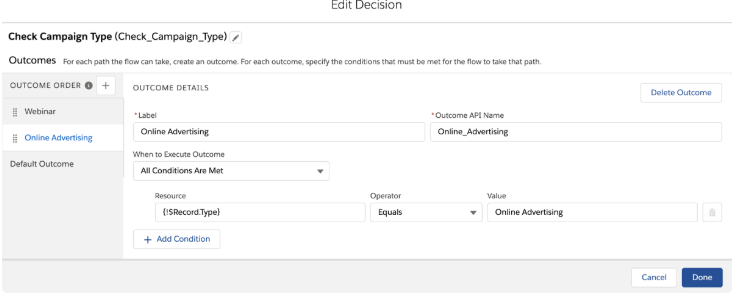
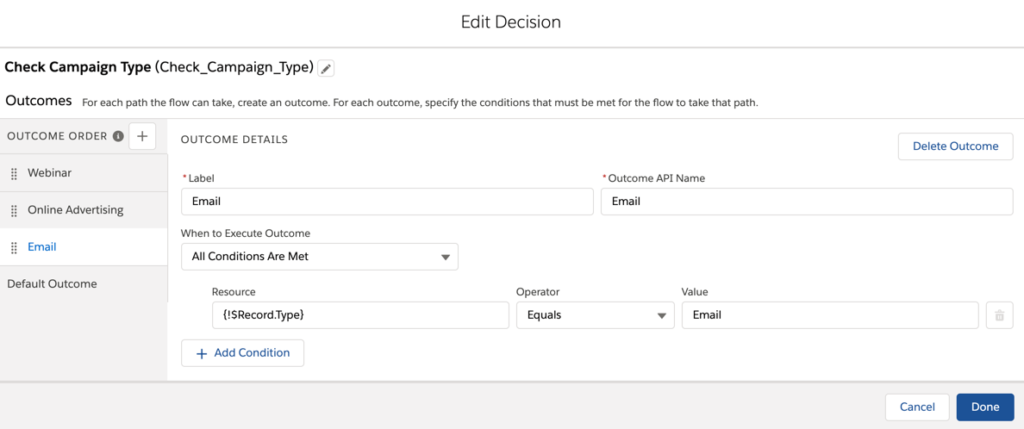
Each outcome will use the {!$Record.Type} resource and use the value of the campaign type.
Click the plus sign to add each outcome.
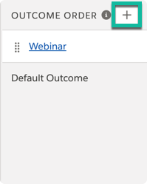
Example: Campaign type = Webinar
Example: Campaign type = Online Advertising
Example: Campaign type = Email
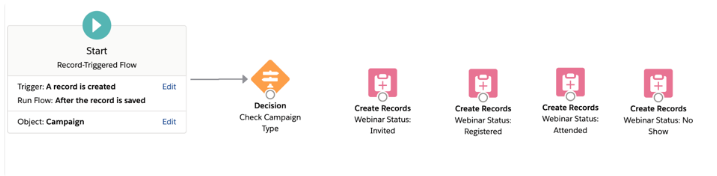
Add create record elements to the Salesforce Flow
Once your decision outcomes have been created, you can add actions to create each campaign member status. Each status for the campaign will use a Create Records element. For example, if you want to create four campaign member statuses for webinars, you will need add four Create Record elements to the flow.
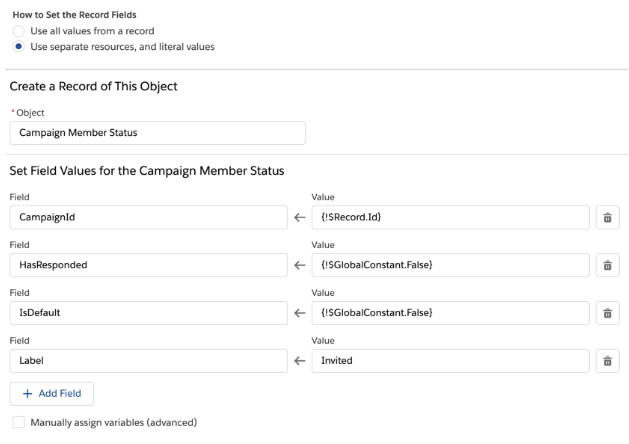
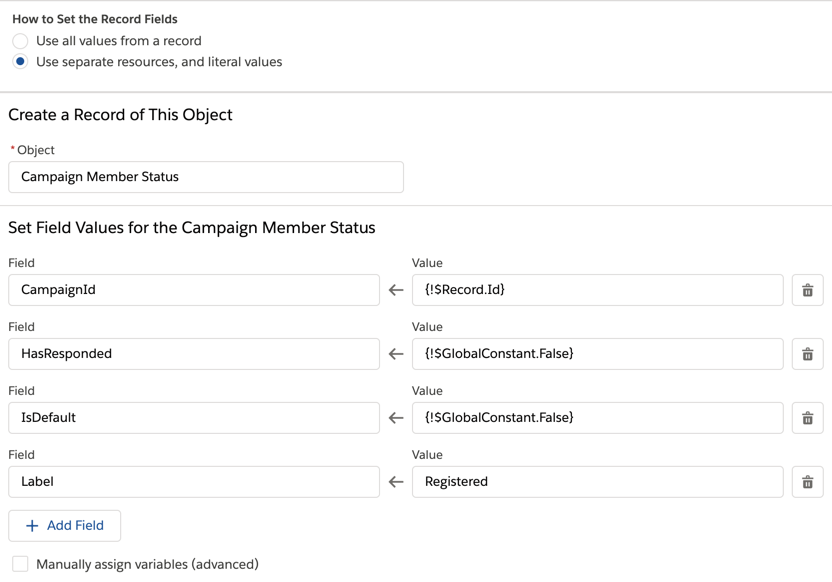
Each create records element will set the following values:
- Create one record
- Use separate resources, and literal values
- Set the value for CampaignId to {!$Record.Id}
- Set a field label
Setting these values are optional:
- HasResponded: I highly recommend setting this as it is helpful for reporting
- IsDefault: There can only be one default campaign status.
- SortOrder: I recommend not setting this value. If your campaign already has values, it can sometimes cause a flow error.
Using my webinar campaign type as an example, here is what my create record steps look like.
Example: Create a campaign member status for invited
Example: Create a campaign member status for registered
Example: Create a campaign member status for attended

Example: Create a campaign member status for no show

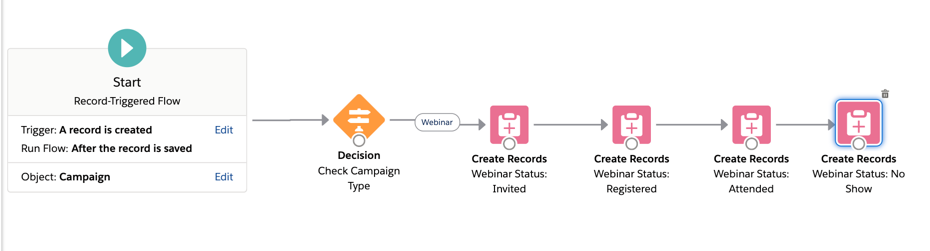
Example: All webinar statuses
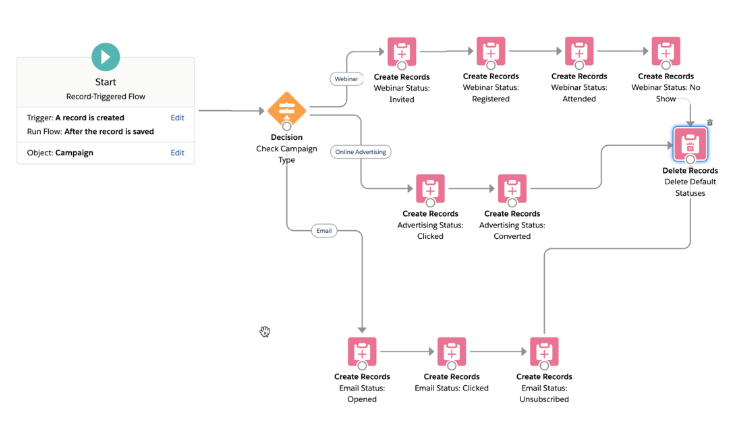
Here’s what my flow looks like once all my webinar statuses have been added.
Note: There is more than one way to create campaign member statuses using Flow. I’ve chosen to create them using separate create record elements, but you can also create them by using an assignment element paired with a loop element. While this method works and eliminates some steps, you cannot assign HasResponded and IsDefault values to individual statuses.
Connect the decision element
Connect the decision element to the first create record element and select webinar as the outcome.

Connect the rest of your elements. Now, we are left with a flow that looks like this.
Repeat for the rest of your campaign statuses
Repeat the process above by adding more create record elements to your flow for the rest of your campaign types.
Here’s what my flow looks like once I added the Online Advertising and the Email statuses.

Optional: Delete the default status values
Optionally, you can delete the two default status values (sent and responded) from campaigns automatically by adding a delete record action to your flow.
Drag and drop the delete records element to your flow, select the Campaign Member Status object, and add the criteria.
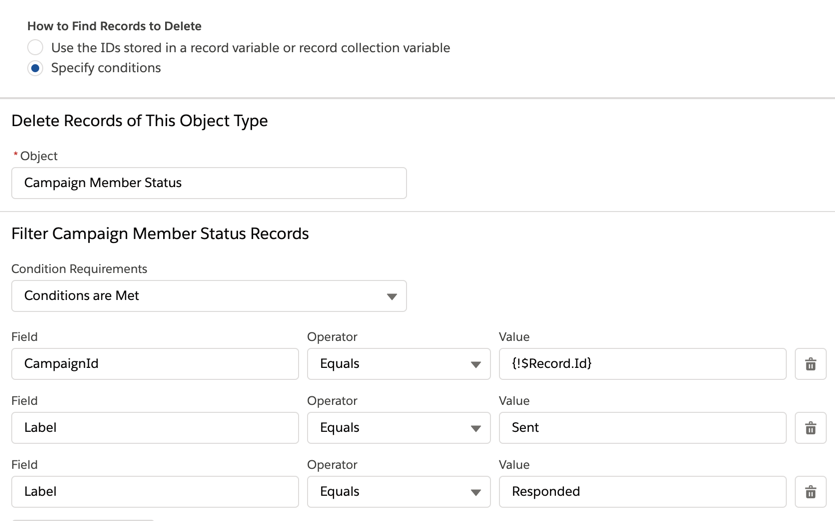
Connect the delete records element to the last element of each of the flow steps.
Note: Use caution when deleting these statuses. Campaigns must have one status set to responded and one status set to default. If you remove the ‘Sent’ and ‘Responded’ statuses from campaigns you must set these values for one of your custom custom statuses.
Test, test, test
Save and activate your flow. Create new campaigns for each of the campaign types to ensure the statuses are correct.

Questions?
Send me a tweet @jennamolby, or contact the Sercante team for help.