Category

Forms & Form Handlers

The 3rd and final part of the form customization series is finally here! In part 1, I showed you how to implement the popular floating label technique and how to create searchable, user-friendly dropdowns. In part 2, I showed you how to create a conversational, paragraph-style form and how to create a form on a single line. In this post, I will show you how to add images to your checkbox and radio buttons.

Checkboxes with images

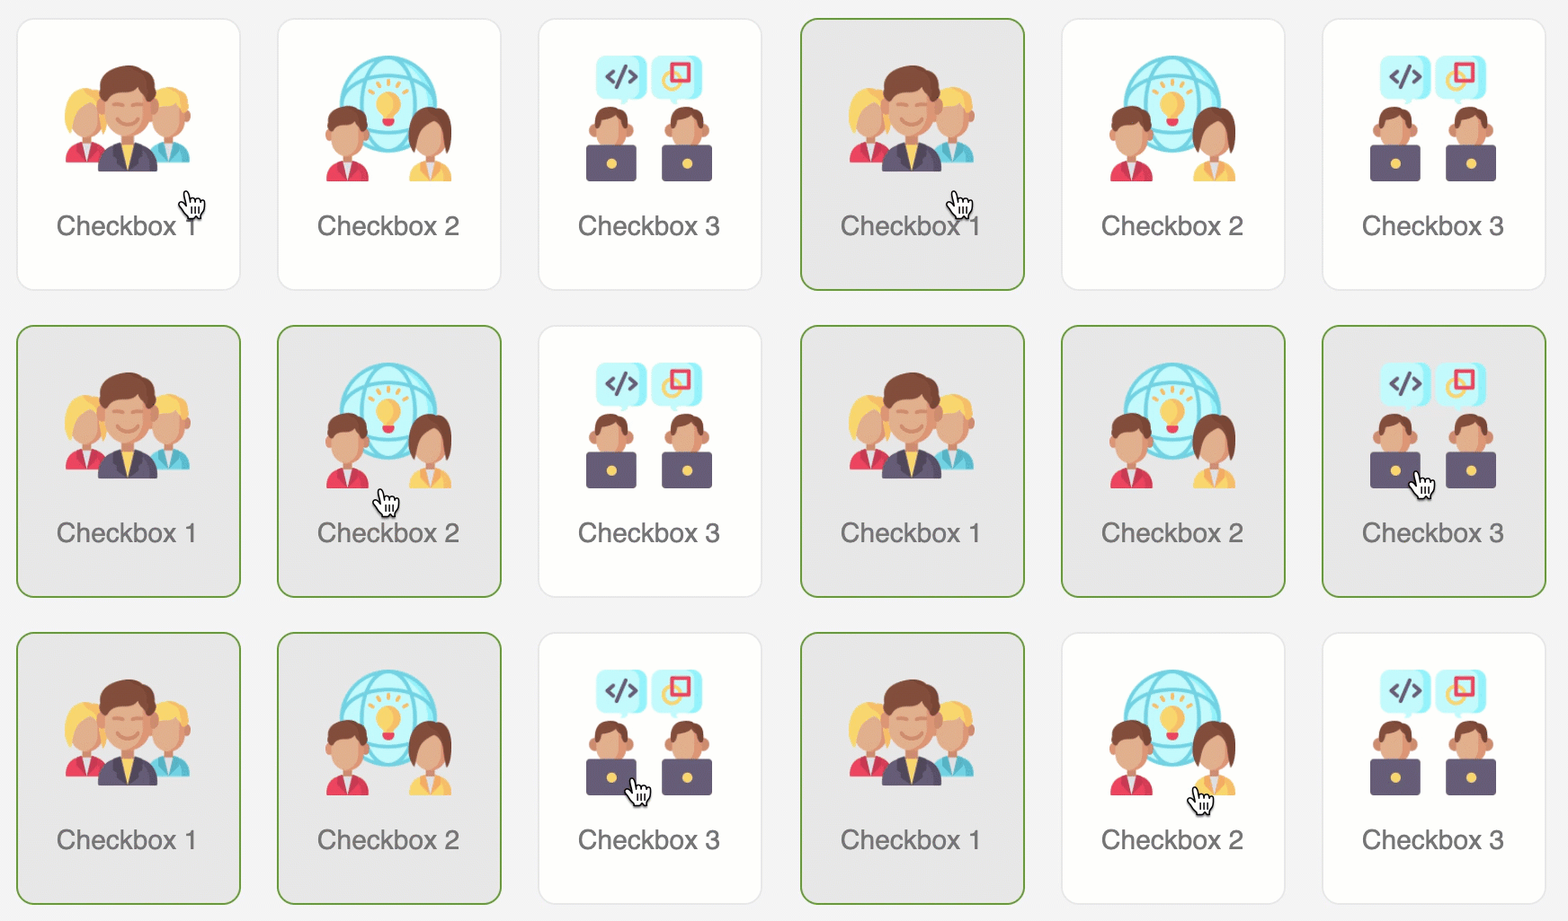
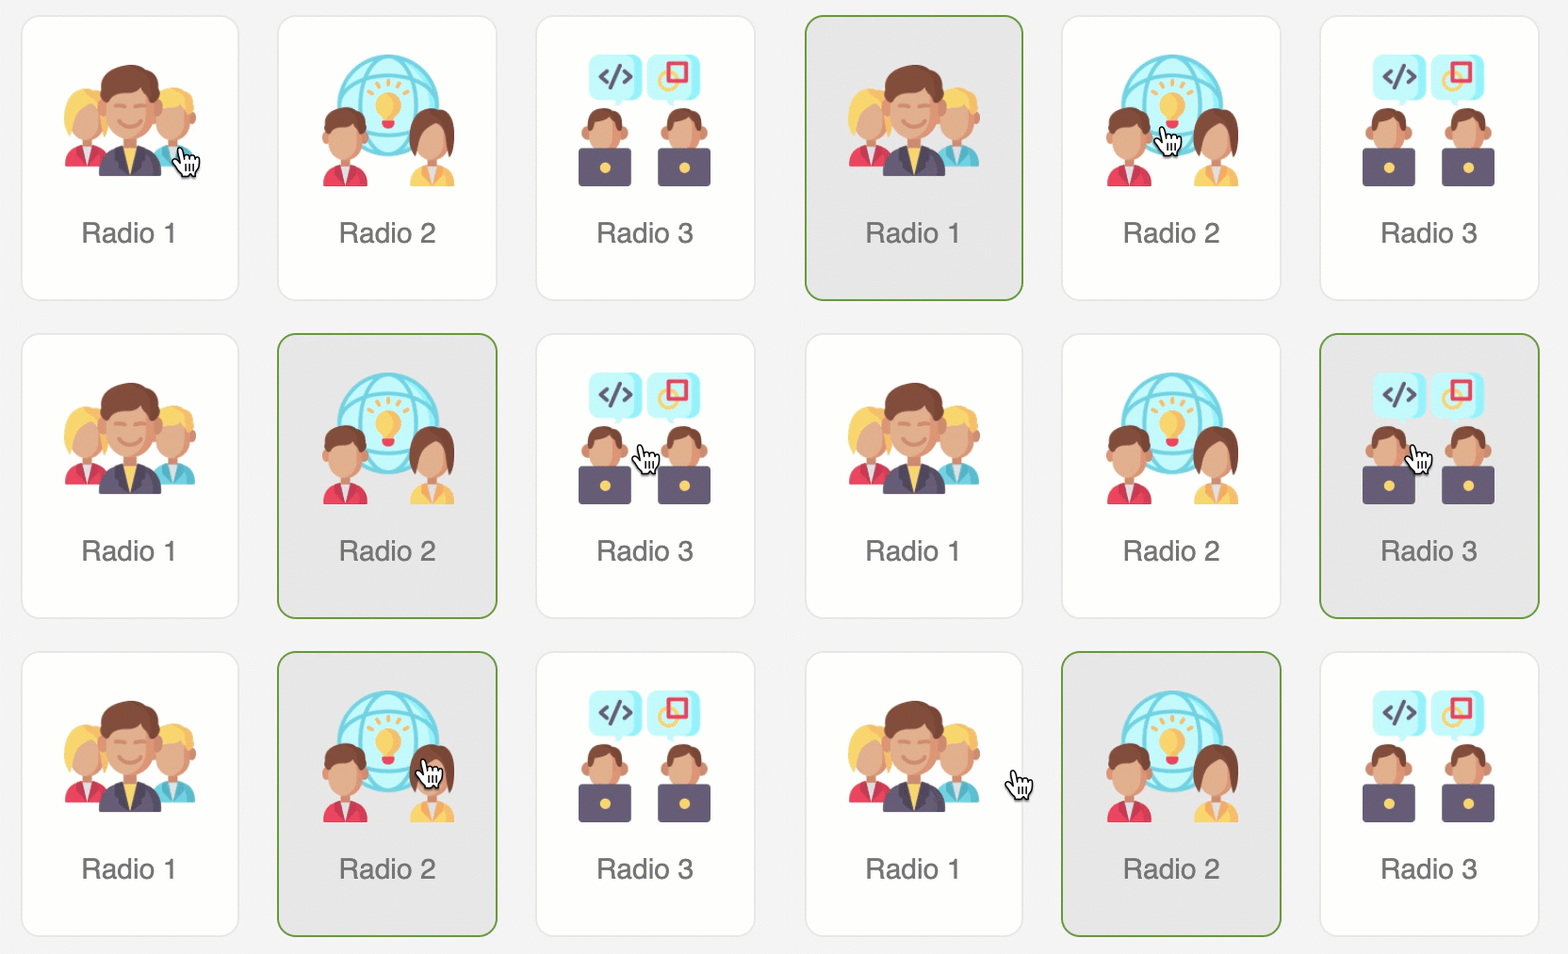
The concept is to hide the default checkboxes and replace them with images. When one of the images is selected, the border and background color of the box will change to let the prospect know the option was selected.
Step 1: Add the images and text to your form

The first step is to add the text and images to the checkboxes within your form. To do this, go to the fields tab of your form and edit or add the checkboxes field. Click on the values tab and add the values. The text in the first box is the text that will be stored in Pardot. The second box is the display text aka the text the prospect will see when completing the form. This is where you would add the images for each option.
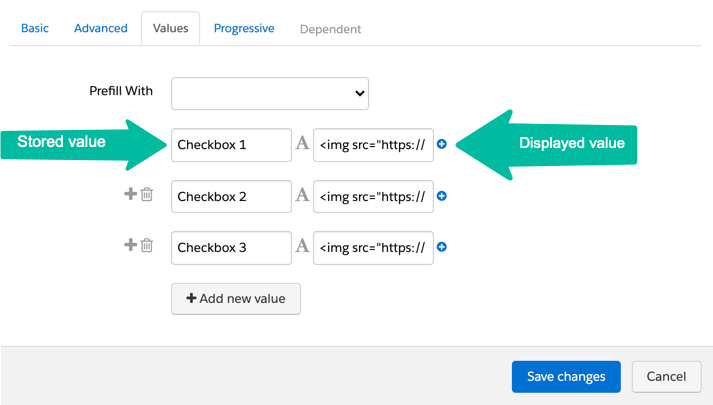
The value should look like this:

<img src="YOUR-IMAGE-URL" width="70" /> <span>Checkbox 1</span>

Add your image URL, set the image width (optional) and add your text (wrapped in a SPAN tag).

Here’s what my form looks like once I added the images to the checkboxes.
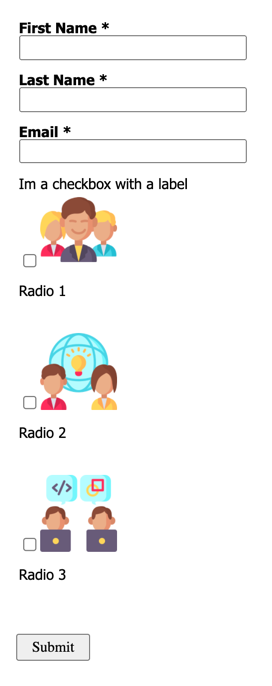
Now, let’s add some CSS to make it look better…

Step 2: Add the CSS

Add this CSS to style the checkboxes.

/* --- customize the checkboxes --- */
/* Put the checkbox text on one line */
#pardot-form .pd-checkbox label span  {
    display:block;
    float:none;
    padding-top:10px;
}
/* align the new checkboxes */
#pardot-form .pd-checkbox span.value {
  display:flex;
  width:100%;
  gap: 10px;
}
#pardot-form .pd-checkbox span.value span {
  flex-grow: 1;
  flex-basis: 0;
}
/* style the new checkboxes */
#pardot-form .pd-checkbox label.inline  {
    margin-top:5px;
    background-color:#FFF;
    display:flex;
    flex-direction:column;
    border:solid 1px #e8e8e8;
    padding:20px;
    text-align:center;
    -moz-border-radius:10px;
    -webkit-border-radius:10px;
    border-radius:10px;
    align-items:center;
    cursor:pointer;
}
/* hide the default checkbox */
#pardot-form .pd-checkbox input {
    display:none;
}
/* style the checkboxes when selected */
#pardot-form .pd-checkbox input:checked+label {
	background-color:#e8e8e8;
	border:solid 1px #539c18;
}

Note: I only have ONE checkbox in my form, but if you have MULTIPLE checkboxes in your form this will style all of them. To style only ONE checkbox, replace .pd-checkbox within the CSS to .YOURFIELDNAME

See it in action

Here’s what my example looks like in action.

Radio buttons with images

The concept is the same as the checkboxes example. We’re going to hide the default radio buttons and replace them with images. When one of the images is selected, the border and background color of the box will change to let the prospect know the option was selected.
Step 1: Add the images and text to your form

The first step is to add the text and images to the radio buttons within your form. To do this, go to the fields tab of your form and edit or add the radio field. Click on the values tab and add the values. The text in the first box is the text that will be stored in Pardot. The second box is the display text aka the text the prospect will see when completing the form. This is where you would add the images for each option. The value should look like this:

The value should look like this:

<img src="YOUR-IMAGE-URL" width="70" /> <span>Radio 1</span>

Add your image URL, set the image width (optional) and add your text (wrapped in a SPAN tag).

Here’s what my form looks like once I added the images to the radio buttons.
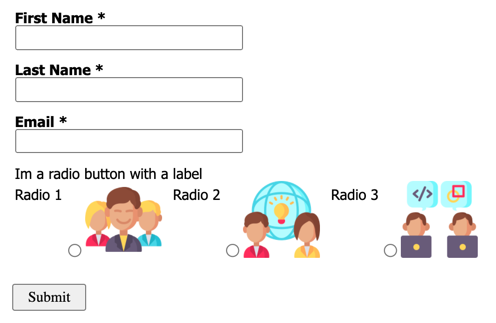
Step 2: Add the CSS

Add this CSS to style the radio buttons.

/* --- customize the radio buttons --- */
/* Put the radio button text on one line */
#pardot-form .pd-radio label span  {
    display:block;
    float:none;
    padding-top:10px;
}
/* align the new radio buttons */
#pardot-form .pd-radio span.value {
  display:flex;
  width:100%;
  gap: 10px;
}
#pardot-form .pd-radio span.value span {
  flex-grow: 1;
  flex-basis: 0;
}
/* style the new radio button */
#pardot-form .pd-radio label.inline  {
    margin-top:5px;
    background-color:#FFF;
    display:flex;
    flex-direction:column;
    border:solid 1px #e8e8e8;
    padding:20px;
    text-align:center;
    -moz-border-radius:10px;
    -webkit-border-radius:10px;
    border-radius:10px;
    align-items:center;
    cursor:pointer;
}
/* hide the default radio button */
#pardot-form .pd-radio input {
    display:none;
}
/* style the radio button when selected */
#pardot-form .pd-radio input:checked+label {
	background-color:#e8e8e8;
	border:solid 1px #539c18;
}

Note: I only have ONE radio field in my form, but if you have MULTIPLE radio fields in your form this will style all of them. To style only ONE radio field, replace .pd-radio within the CSS to .YOURFIELDNAME

See it in action

Here’s what my example looks like in action.

Questions?

Send me a tweet @jennamolby, or contact the Sercante team for help.

The life of a marketing and sales consultant is never boring at Sercante, working with companies of all shapes and sizes on tasks both large and small.

The days flow along in a sensible cadence … until …

Are you a Halloween horror story fan?

Marketing has its own kind of terror — not in the chainsaw/demonic way, but on the topics of spam, user roles, missing form follow-up, sync mishaps — you get the picture.

Read on — if you dare! (But really, you should — you’ll learn a few tricks.)

Avoid these 6 Pardot horror stories

marketing horror story no completion actions

Soothsayer Sales Team?

Picture this: You’ve placed a clean and crisp “contact us” form on your website. It’s nice and trim (not too many fields) and has prominent placement on a main page. The sales team is rubbing their hands together in anticipation of ALL of the leads.

Your worst fears come true: The sales team gets nothing, zilch, nada, zero — NO leads.  ????

You frantically look around for the culprit. Finally, the ugly truth bubbles to the surface: The beautiful “contact us” form is missing a critical step. (Are you hearing the “Psycho” sound? I am.)

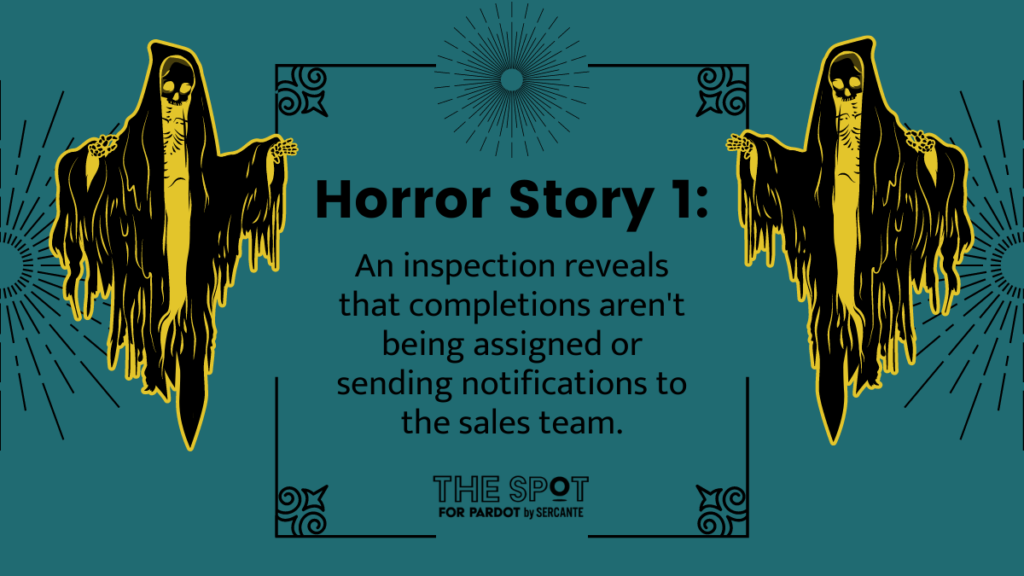
Pardot Horror Story 1: An inspection reveals that form completions aren’t being assigned or sending notifications to the sales team.

???? Of course. The sales team doesn’t have a crystal ball and can’t “see” the leads without a little form-based action.

It’s time for you to optimize your form setup so leads make it to the right people.

Read this post for more details »

marketing horror story dead link

Your day starts with an urgent note from your boss: “An email must be sent asap on ProductX because sales numbers aren’t as expected.”

Between back-to-back calls and a multitude of Slack messages, you prep the email, to get it ready for the final copy you are not-so-patiently awaiting. The copy arrives,and you review it while on yet another call, then drop it into the email you already started. Cool. Looks good ????.

You send a test to the boss, copywriter and your own inbox, and review the test email while still on a call (you are crushing the multi-tasking game ????).

You wait for approvals, then wait some more, and finally message your boss (“Please respond so I can get the email out!”). He comes back with a not-so-convincing “Yeah, it’s fine — send it” (and you never hear back from the copywriter).

You hit the “send” button — “asap” as requested — unaware of the horror to come.

Ding! The email hits your inbox. Ding! Ding! Emails from coworkers: “The button doesn’t work.” Uh-oh.

While distractedly rushing to get the email done, the link in the CTA button was forgotten.

Pardot Horror Story 2: Everyone’s messaging you to say your CTA button leads nowhere because it’s a dead link ????.

Anyone in charge of sending emails has been there — I feel you. It’s easy to miss test-clicking a link. And, as we all know, a rushed task is an invitation for errors.

Implementing a better quality assurance process can help you feel confident the next time you hit the ‘send’ button.

Read this post for more details »

marketing horror story purchased lists

The WitchWhich List Mystery

One day your database size is X, the next day it is X+5000! Where did the extra records come from? Magic? Sorcery? ????

You dig around, looking at new records trying to find the answer.

Hmmm — you see a few imports that you did not perform. Only one other user has import access — your boss. You message her: “Hey, I see you imported some lists into Pardot. Can you tell me where they are from?” She proudly comes back with, “We purchased a few small opt-in lists!”

Oh boy.

Pardot Horror Story 3: You find out that the zombie prospects in your Pardot org came from purchased lists.

Say it with me now: “Purchased lists are noncompliant with Pardot.”

Seriously, Pardot will put a hex on your account if you use those purchased prospects. Don’t do it. Just don’t.

(Learn more about Pardot’s Permission-Based Marketing Policy – which, by the way, you must agree to EVERY time you import a list!)

Read this post for more details »

marketing horror story admin user roles

Zombie Admins

There are four default Pardot user roles defined by their level of access/ability (Administrator, Marketing, Sales Manager, and Sales).

Salesforce user profiles are mapped to Pardot user roles.

You’re with me, right? Great.

According to the Thesaurus, “administrator” is also authority, commander, head, official, head honcho. You would probably agree that this would be a title reserved for the very top-most spots (I’m thinking 1-5, depending on how large the organization is).

How about 31,634 users with the Administrator role ????.

Yes, we’ve actually seen that IRL (this sounds like a Farmers Insurance® ad).

Pardot Horror Story 4: You discover that most of the users in a Pardot org have Administrator user roles.

????‍♂️ Keep the zombies at bay: Be selective with assignments to the Pardot Administrator role!

With admin access comes great power. Determine who really needs full access to everything in Pardot when assigning this role.

marketing horror story operational emails

Marketing-Killer Troll

Once upon a time, ABC Company sent out emails marketing its products and services to an opt-in list. People on the list were not a match for ABC Company, so they opted OUT of receiving emails.

Seeing this made ABC Company very angry, so they consulted the Troll living in the basement. Smashing his club into the ground, Troll decided these people MUST receive the emails ????.

Every email was then sent as an operational email. Every. Single. One.

Who knows where this story is going? ????‍♀️

An operational email is just that: operational. As in: service announcements, transactional messages, legal notices. As in: NOT marketing.

If you send an operational email and it does contain marketing information, then it is SPAM.

Pardot Horror Story 5: A quick check reveals that all emails are being sent as operational emails.

Don’t be a marketing killer, don’t send unsolicited messages and get shut down (or worse).

Read this post for more details »

marketing horror story MDS criteria mismatch

The Prospect Sync Coffin

Something is killing your synced information. Leads and contacts are dropping like flies directly into the Pardot Recycle Bin ⚰️.

No, it’s not the work of a serial killer, but it could be the work of a Marketing Data Sharing mismatch.

Pardot Horror Story 6: You realize prospects are being sent to the recycle bin because of a Marketing Data Sharing (MDS) criteria mismatch.

If you rely on specific data values to control information that syncs from Salesforce to Pardot (leads, contacts, opportunities, custom objects), then you are likely using Marketing Data Sharing (MDS).

When data values change in the field that the MDS criteria is using, the match won’t happen and prospects will be archived. If you import prospects that don’t match the MDS criteria, they’ll automatically be stuffed into the recycle bin too.

Explore the gotchas and learn how to set up MDS in this post »

Marketing Shouldn’t Spark Fear

Your daily life in marketing shouldn’t rival ghost stories or legends of monsters. With proper planning and constant education, it can be a quite happy tale. 

Here are 4 ways to start:

  1. Market with morality.
    • Make sure you understand Pardot’s stance on permission-based marketing.
    • Build a good base of GDPR knowledge.
    • Put yourself in the shoes of your recipients and send helpful email messaging, not spam.
  2. Stay on top of updates and new features.
  3. Always be learning.
    • There is a TON of free content for you to discover, from Trailhead to blogs (like this one!), and more.
    • Bookmark your favorites — or add them as startup tabs in your browser — for easy access.
    • Get certified — Salesforce offers a lengthy list of options.
  4. Join a community

Reach out to the team at Sercante if you need help along the way. Or tells us about your biggest marketing horror story in the comments section… if you dare.

Want to do something with your Pardot form that is not available in the editor? Try using JavaScript! Enhance your forms by using these 6 advanced Pardot form techniques. Learn how to add text between form fields, how to capture URL parameters in hidden fields and more.

Adding JavaScript to your Pardot forms

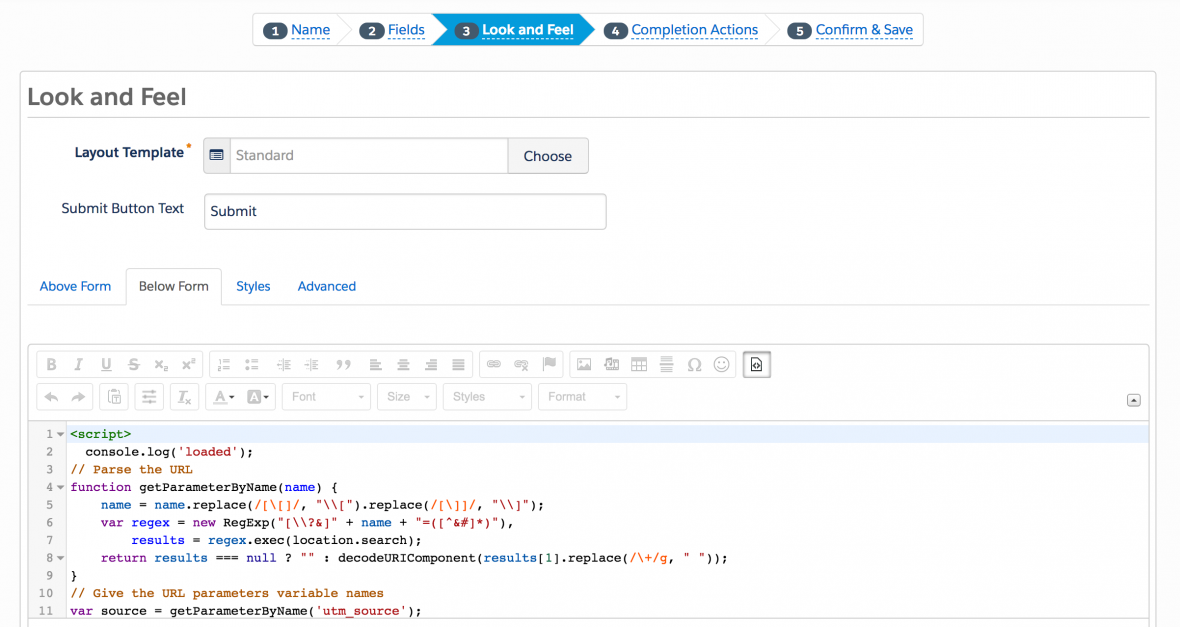
Custom JavaScript can be placed within your Pardot forms under Look and Feel > Below Form. Click on the HTML button within the WYSIWYG editor and add in the JavaScript.

1. Add text between form fields

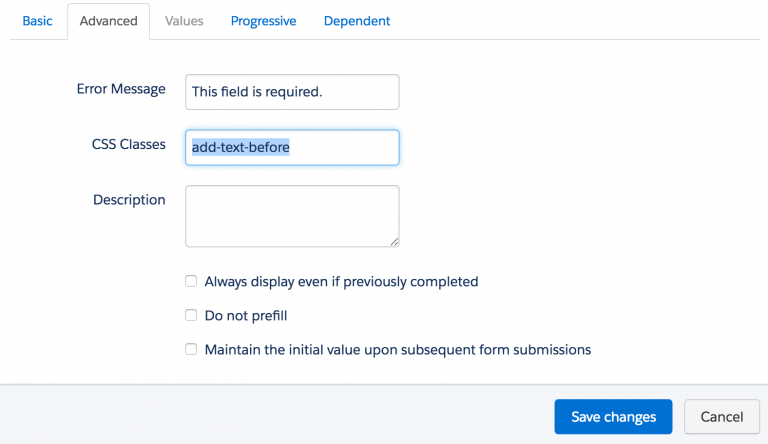
Edit the form field you want to add the text before in the form editor. Click on the advanced tab and add a CSS class with the name “add-text-before”.

Once the class has been added to the form field, you can add the following JS to your form and update the message.

<script type="text/javascript">
function insertBefore(el, referenceNode) {
    referenceNode.parentNode.insertBefore(el, referenceNode);
}
 
var newEl = document.createElement('div');
// replace this line with your message
newEl.innerHTML = 'ENTER YOUR TEXT HERE';
 
var ref = document.querySelector('.add-text-before');
 
insertBefore(newEl, ref);
</script>

2. Redirect to a thank you page based on field values

This tip is from the Pardot Help Docs, but with a couple updates. The article recommends using JavaScript-encoding for variable tags using {js}. I’ve never had success while using this method. Instead using this JavaScript does the trick.

<script type="text/javascript">
  switch('%%Free_Trial_Live_Demo%%') {
  case 'Free Trial':
  document.location='http://www.yoursite.com/thank-you-free-trial/';
  break;
  case 'Live Demo':
  document.location='http://www.yoursite.com/thank-you-live-demo/';
  break;
  }
</script>

3. Use a hidden field to capture page url

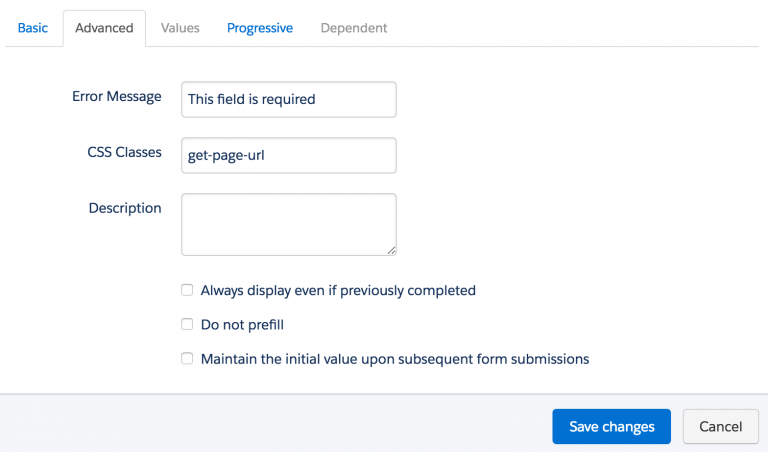
Edit the hidden form field, click on the advanced tab and add a CSS class with the name “get-page-url”.

Insert this JS into your form to capture the page url in the hidden field.

Note: This will not work if you have a iFramed form on a web page

<script>
document.querySelector(".get-page-url input").value = window.location.href;
</script>

4. Use a Hidden field to capture page name

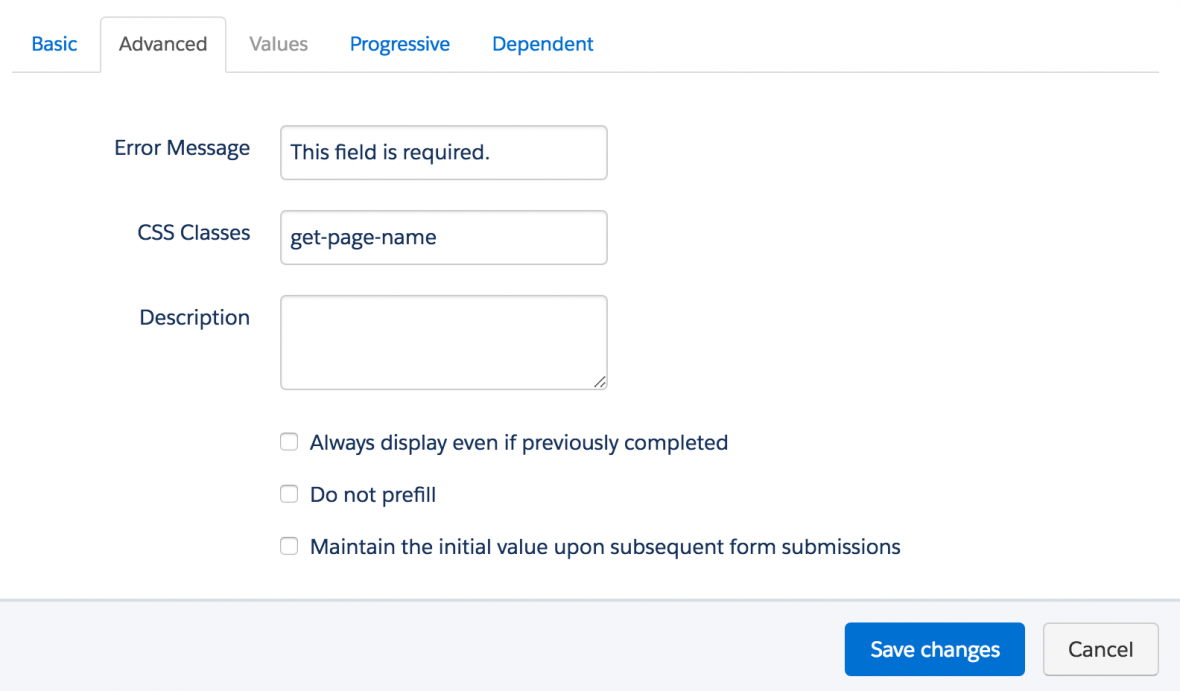
Edit the hidden form field, click on the advanced tab and add a CSS class with the name “get-page-name”.

Note: This will not work if you have a iFramed form on a web page.

Insert this JS into your form to capture the page url in the hidden field.

<script>
document.querySelector(".get-page-name input").value = document.title;
</script>

5. Pass URL parameters to a Pardot form

You can use this script to parse out URL parameters and put them into fields within your Pardot form. In this example, I’m passing utm_source, utm_medium and utm_campaign into hidden form fields.

Learn more about UTM parameters in Pardot in this post

<script>
// Parse the URL
function getParameterByName(name) {
    name = name.replace(/[\[]/, "\\[").replace(/[\]]/, "\\]");
    var regex = new RegExp("[\\?&]" + name + "=([^&#]*)"),
    results = regex.exec(location.search);
    return results === null ? "" : decodeURIComponent(results[1].replace(/\+/g, " "));
}
// Give the URL parameters variable names
var source = getParameterByName('utm_source');
var medium = getParameterByName('utm_medium');
var campaign = getParameterByName('utm_campaign');
// Put the variable names into the hidden fields in the form. selector should be "p.YOURFIELDNAME input"
document.querySelector("p.source input").value = source;
document.querySelector("p.medium input").value = medium;
document.querySelector("p.campaign input").value = campaign;
</script>

6. Turn your form labels into placeholder text

There’s currently no feature for Pardot forms that allow you to use placeholder text instead of the label text. So, in this tutorial, I will show you how to add a bit of JavaScript to your Pardot forms to use the field labels as placeholders.

Questions?

Send me a tweet @jennamolby, or contact the Sercante team for help.
Prospects now more than ever are demanding personalized content. For the last 4 years, adding the first name for personalization in emails has been the default. Unfortunately, that alone isn’t going to cut it anymore. To keep their attention, you have to make sure they know you’re thinking of them— no matter how long your list becomes.

In Pardot, the options to provide these experiences differ depending on your account tier and how you intend to use them.

If you’re a veteran to Pardot, it’s likely you know that there are several ways to accomplish the personalization you need. That’s why we’ve broken down some of the most common use cases that call for Pardot HML, Pardot Snippets, or Pardot Dynamic Content. Understanding how each of these work best in different scenarios will help you save time in your creation process. 

Content personalization using Dynamic Content 

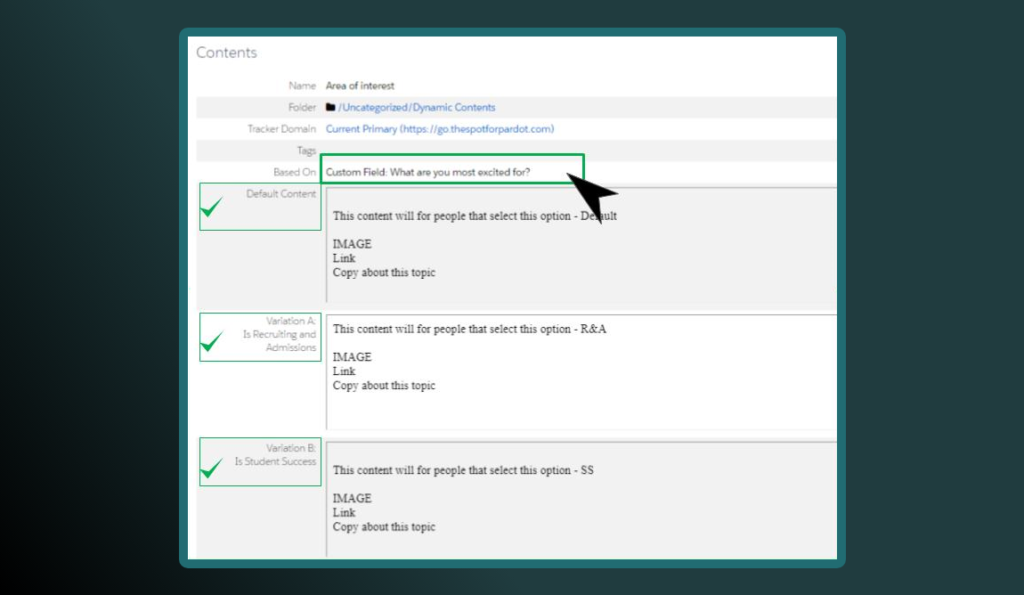
Dynamic content allows you to display custom content, via Javascript, on your company’s website or within Pardot. Think about displaying different content on forms, landing pages, layout templates, and emails based on prospect criteria.

When a prospect matches the criteria for your dynamic content, the content variation corresponding to that field value will display. With this feature, it is possible to display up to 25 variations of content. If there are no matches or that person has no data, then they see the default option.

The instant benefit is that you can use one email template to showcase different pieces of content per Dynamic Content block. This feature is available both in Pardot Classic and Lightning that have a Plus or higher edition.

Popular Use Case: Showing different images or text based on the values found in the country field within an email. See our post about use cases for Dynamic Content here.


Content personalization using Handlebar Merge Language (HML)

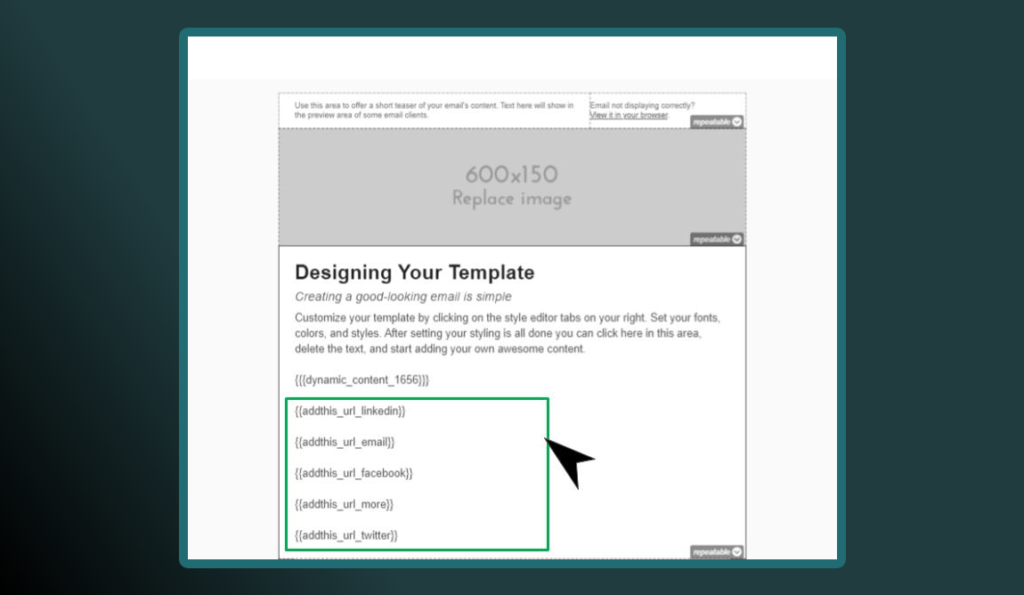
HML is a new merge language for personalizing email in Pardot. Basically it’s the representation of a field value that you can showcase anywhere you have access to the WYSIWYG editor. Think of displaying prospects data on landing pages, forms, emails, etc. based on the data found within a prospects record in Pardot.

The benefits of Pardot HML almost immediate:

  • Easy to upgrade your content.
  • Ability to search for the fields you need.
  • The same language is shared across Salesforce Lightning Templates, laying the foundation for more email compatibility down the road. 
  • HML can also be used within Dynamic Content, but not Snippets. 
  • Allows you to do IF/ELSE statements to further expand its uses.
  • HML is available across all editions of Pardot Classic and Lightning (if enabled).


How do you know you’re using HML?

The easiest way to know is to look at your tokens. Do they look like this %%first_name%% or like this {{Recipient.FirstName}}? The option with the curly brackets ({}) is the appropriate one. New accounts from 2020 (or more recent) should have HML activated already, however, if you have an older account and need help migrating over from PML to HML, just follow our guide.

Popular Use Case: Updating email signatures for both sales and marketing emails to quickly create a connection with prospects based on CRM ownership. We also wrote about use cases for HML here.


Content personalization using Pardot Snippets

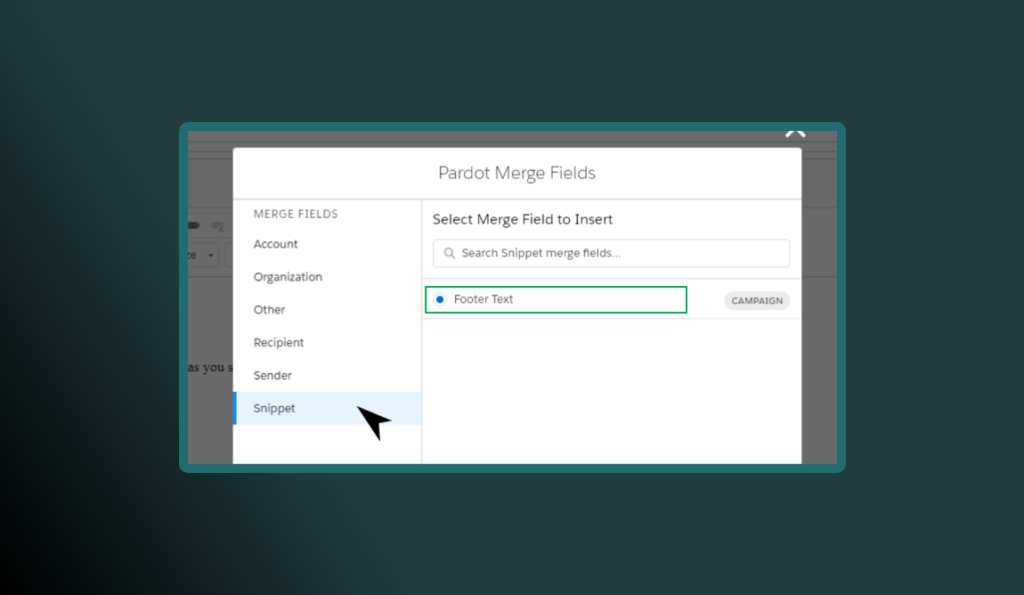
A Snippet is a reusable block of text, date, or links that can be pulled into multiple Pardot emails, forms and landing pages. These blocks are static, meaning you select the one you want and the values don’t change unless you change them. They’re best for strict text purposes as they do not support HTML/CSS. 

Snippets cannot be used with Dynamic Content. However, you can insert HML into Snippets, you just have to do it manually because there’s no HML option in the Snippet wizard. You must have Connected Campaigns and HML enabled to use them within your instance. 

Snippets are based on Business Unit or Campaign ownership. Although you can use Snippets in Pardot Classic, you cannot create them without access to Salesforce (Pardot Lightning is preferred if you intend to use this feature). Snippets are available for all versions of Pardot.

Popular Use Case: Updating event or footer information across multiple assets. We recently wrote about Snippets and answered a few frequently asked questions on this blog!


Comparing HML, Snippets, and Dynamic Content

The bottom line is that people don’t want to go through a million forms. They want personalized content and they want it now.

This begs the question, when is it appropriate to use each Pardot personalization feature? If you have used Pardot for a while , you know that Pardot allows you to do similar things in several different ways. To help the decision making process, we put together this chart to help you decide when to choose each of these options.

Dynamic Content – Used for personalizing different variations of content blocks based on prospect record informationHandlebar Mail Language (HML) – Used as values from a prospect record for personalizing content across assetsSnippets – Used to personalize assets with static content.
Pardot Lightning required NoNoYes
Available in All Pardot TiersNoYesYes
Created/updated in SalesforceNoYesYes
Association to a Salesforce campaignNoNoYes, or Business Unit
Created/Updated in PardotYesYesNo
Limited by Pardot TierYes, Plus tier or higherNoNo
Updated by changes to Pardot-Salesforce dataYesYesNo
Allows HTML/CSS for customizing contentYesNoNo
Used to personalize Pardot formsYesYes, content regions onlyYes, content regions only
Cross Business Unit SupportNoYesYes


Example Use Cases for Pardot Personalization 

Below are some scenarios you may find useful to differentiate between uses.

Scenario: You need to set up a completion action on a form that sends out an autoresponder email with specific content based on a picklist option for a field called “Area of Interest”. The picklist field on the form has four options. You don’t want to build multiple email templates. You are on the Plus edition of Pardot.

Solution: Dynamic Content shows specific content in relation to the data on the record of the prospect. This would allow you to use one email template but showcase different content based on which option the prospect chose while completing the form.


Scenario: You need to send a prospect an email receipt of the information they just submitted via a form or form handler to confirm their participation in your program. You are on the Growth edition of Pardot.

Solution: HML only shows what lies within the record of a prospect, nothing more, nothing less. You can customize the rows and order of the data in the email template to look however you want.


Scenario: Your team needs to be able to update and use a content block (with webinar information) across multiple Business Units. The information for this comes from the field marketing team and they do not have access to Pardot.

Solution: Snippets show information that is static that can be shared across different business units or locked down by campaigns. Snippets can be updated by Flows or manually by a person with the right permissions within Salesforce.


Personalization and delivering value are key to moving prospects quickly through the pipeline. Pardot provides you with a variety of features to allow you to leverage the data you already have in your CRM to your benefit.

Are you looking for ways to take your email marketing strategy to the next level with Pardot? With the guidance of our strategists, we can help you identify the fields which are and aren’t actively used by your team — it could be key to qualifying leads faster!

If you are ready to maximize your use of Pardot, give us a shout!

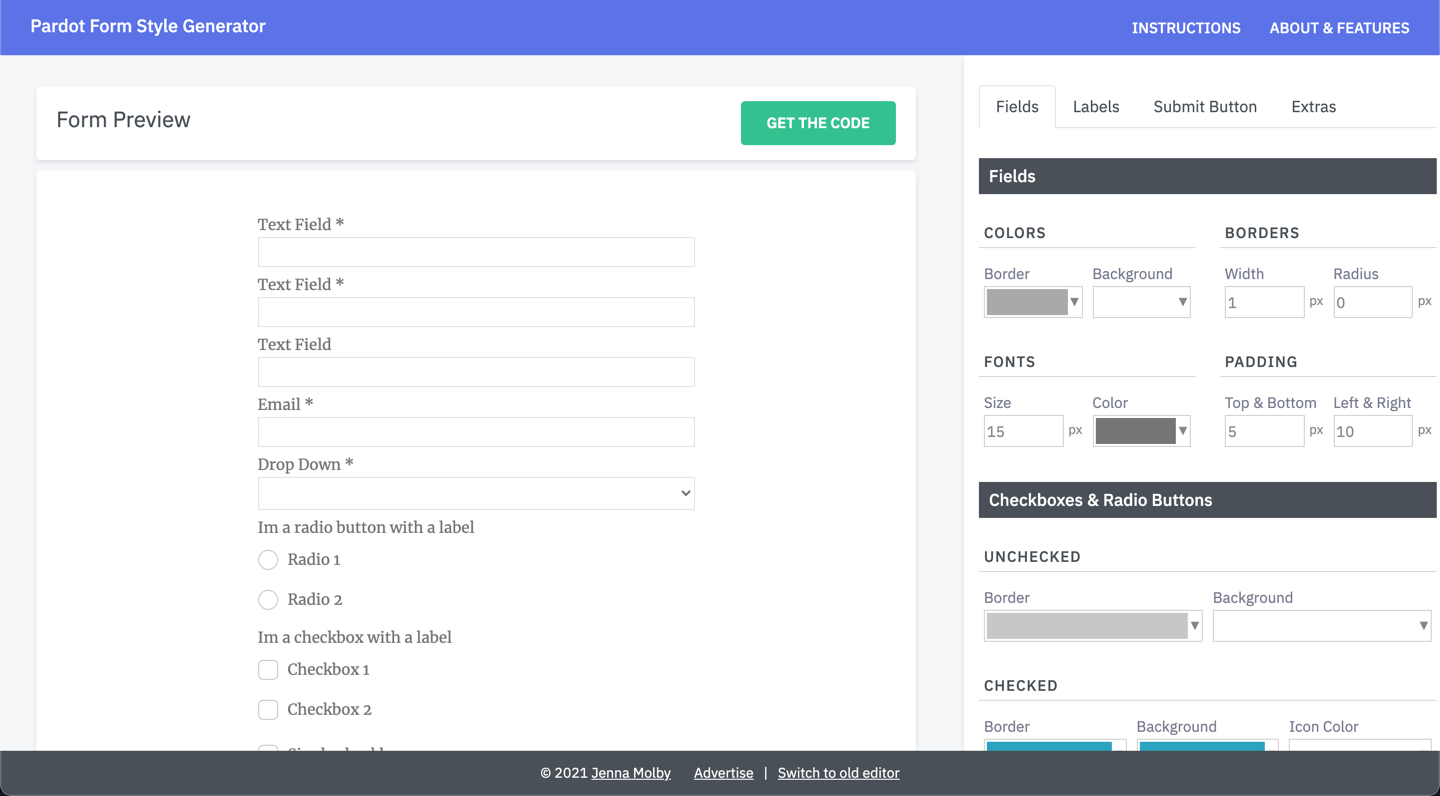
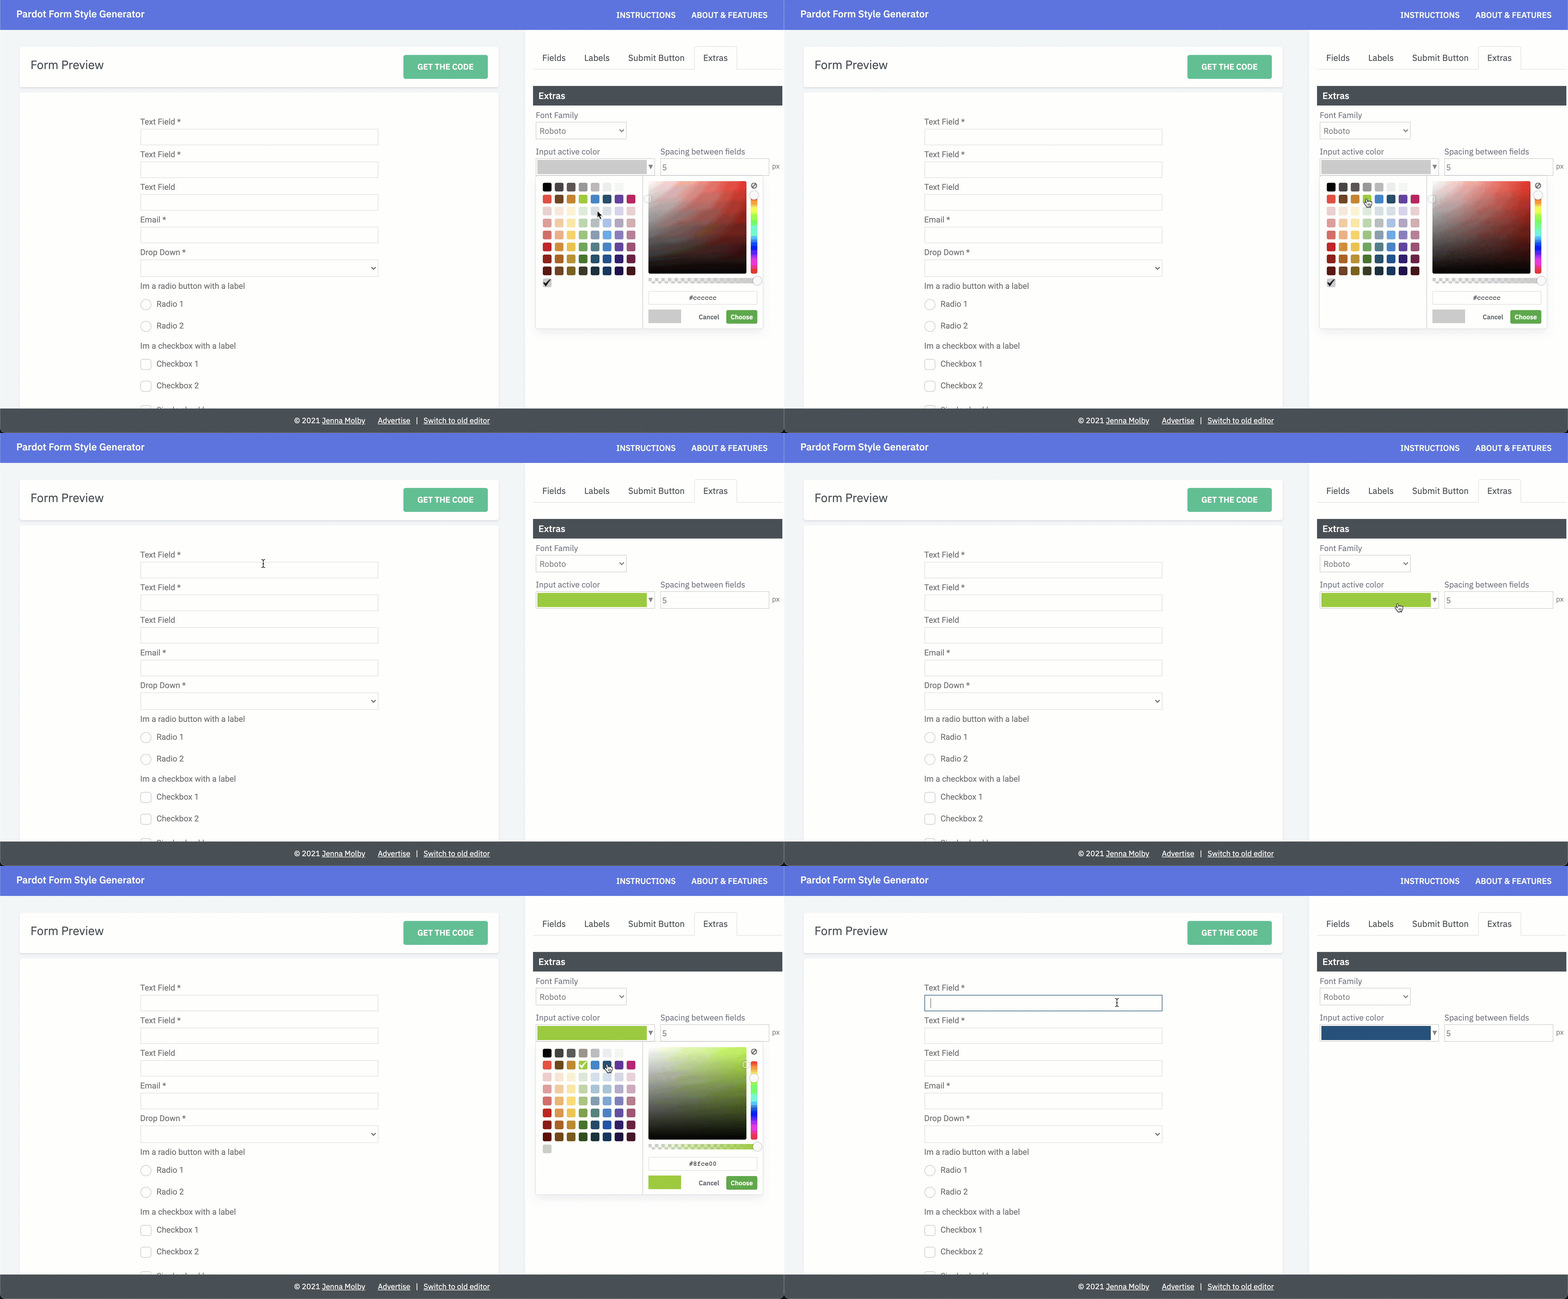
I’m so excited to finally launch version 2.0 of the Pardot Form Style Generator. With the new version comes a new UI and some cool new features, including customized checkboxes and radio buttons, embedded Google Fonts, new submit button options and more.

What is the Pardot Form Style Generator?

The Pardot Form Style Generator is a free tool you can use to easily customize your Pardot forms with no coding required. With a couple of clicks, you can customize almost every form element, including fields, checkboxes, buttons, labels and more. When you’re done customizing your form, the generator will compile custom CSS that you can copy and paste into your Layout Template within Pardot.

What’s new?

New UI

The generator has a complete new look, making it easier to customize your form.

Starts from a template

The old version started with the default Pardot form CSS. This new version starts with a template I use frequently within projects, meaning there are less tweaks needed to create a beautiful form.

Customized checkboxes & radio buttons

Change the border color, background color for radio buttons and checkboxes.

Embedded Google Fonts

The most popular Google Fonts are loaded directly within the editor, including Roboto, Lato, Open Sans and more.

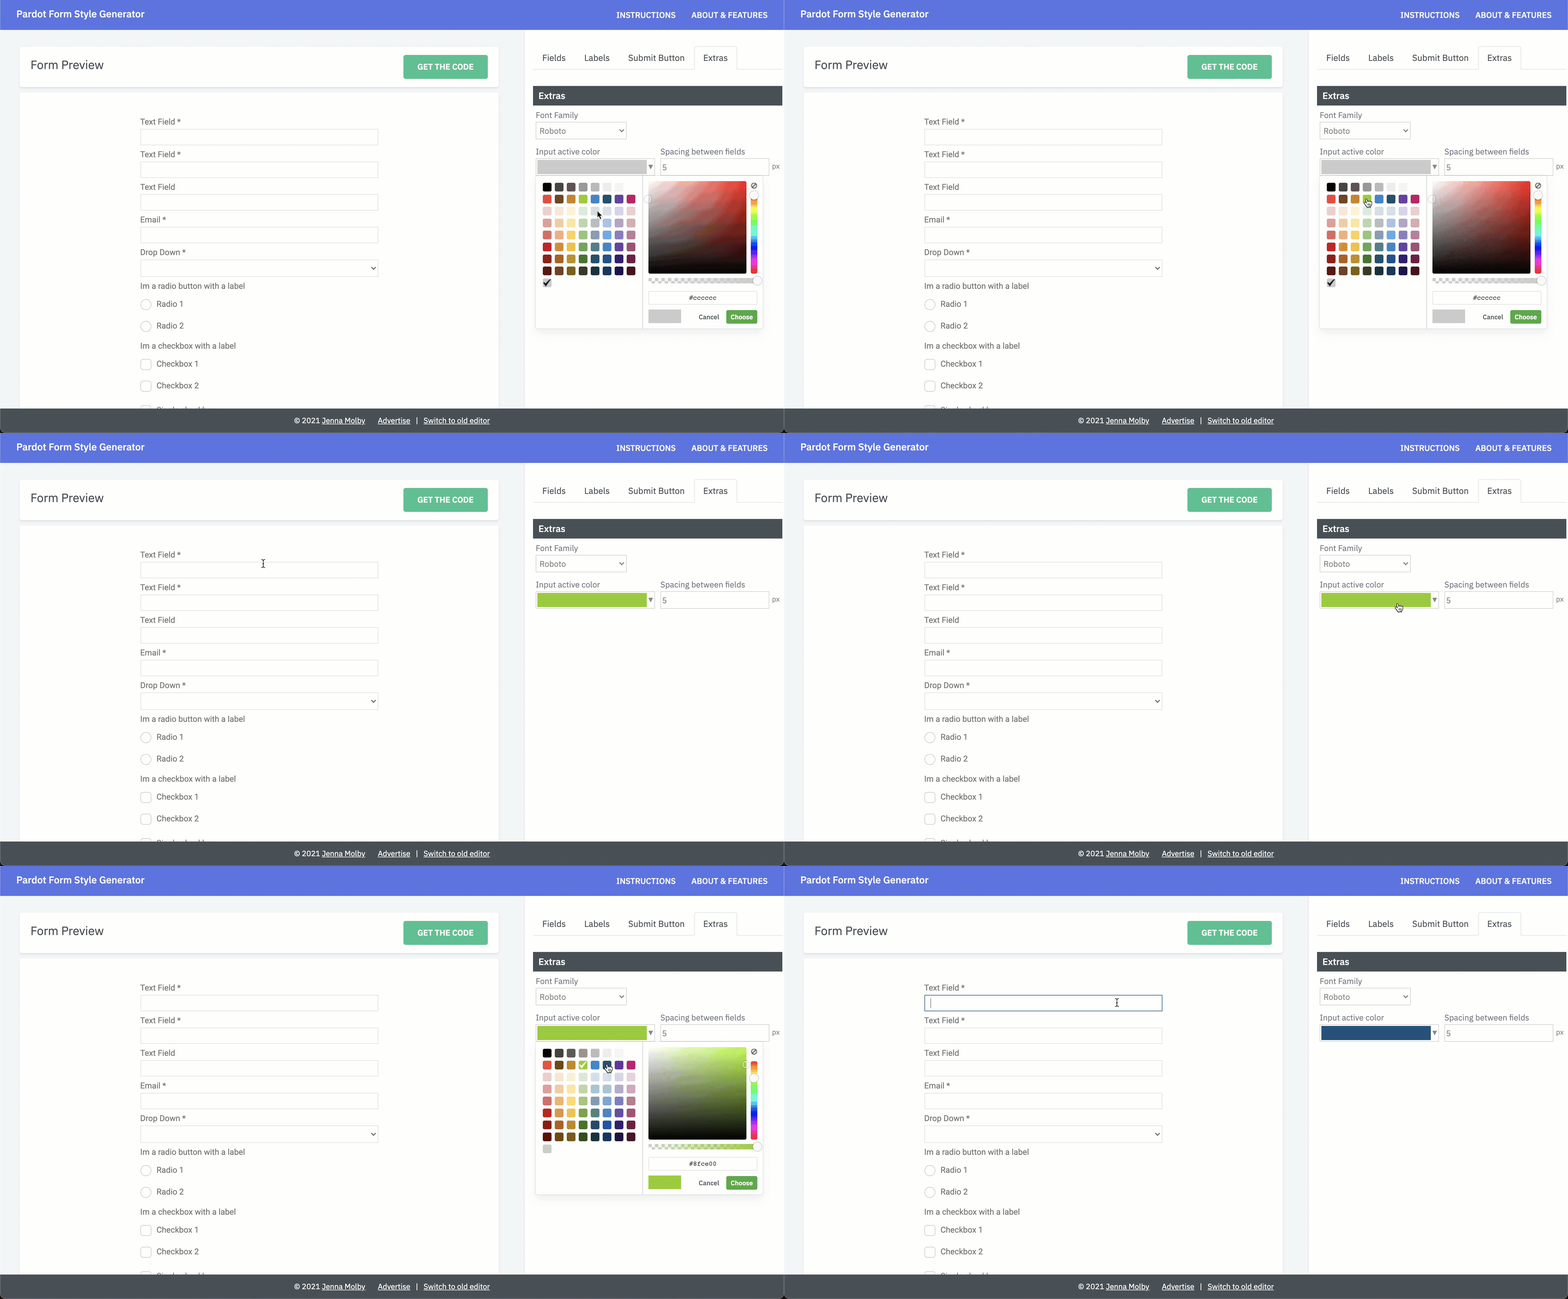
Set a border color for fields on focus

Select a border color that will be displayed when a prospect clicks into a form field.

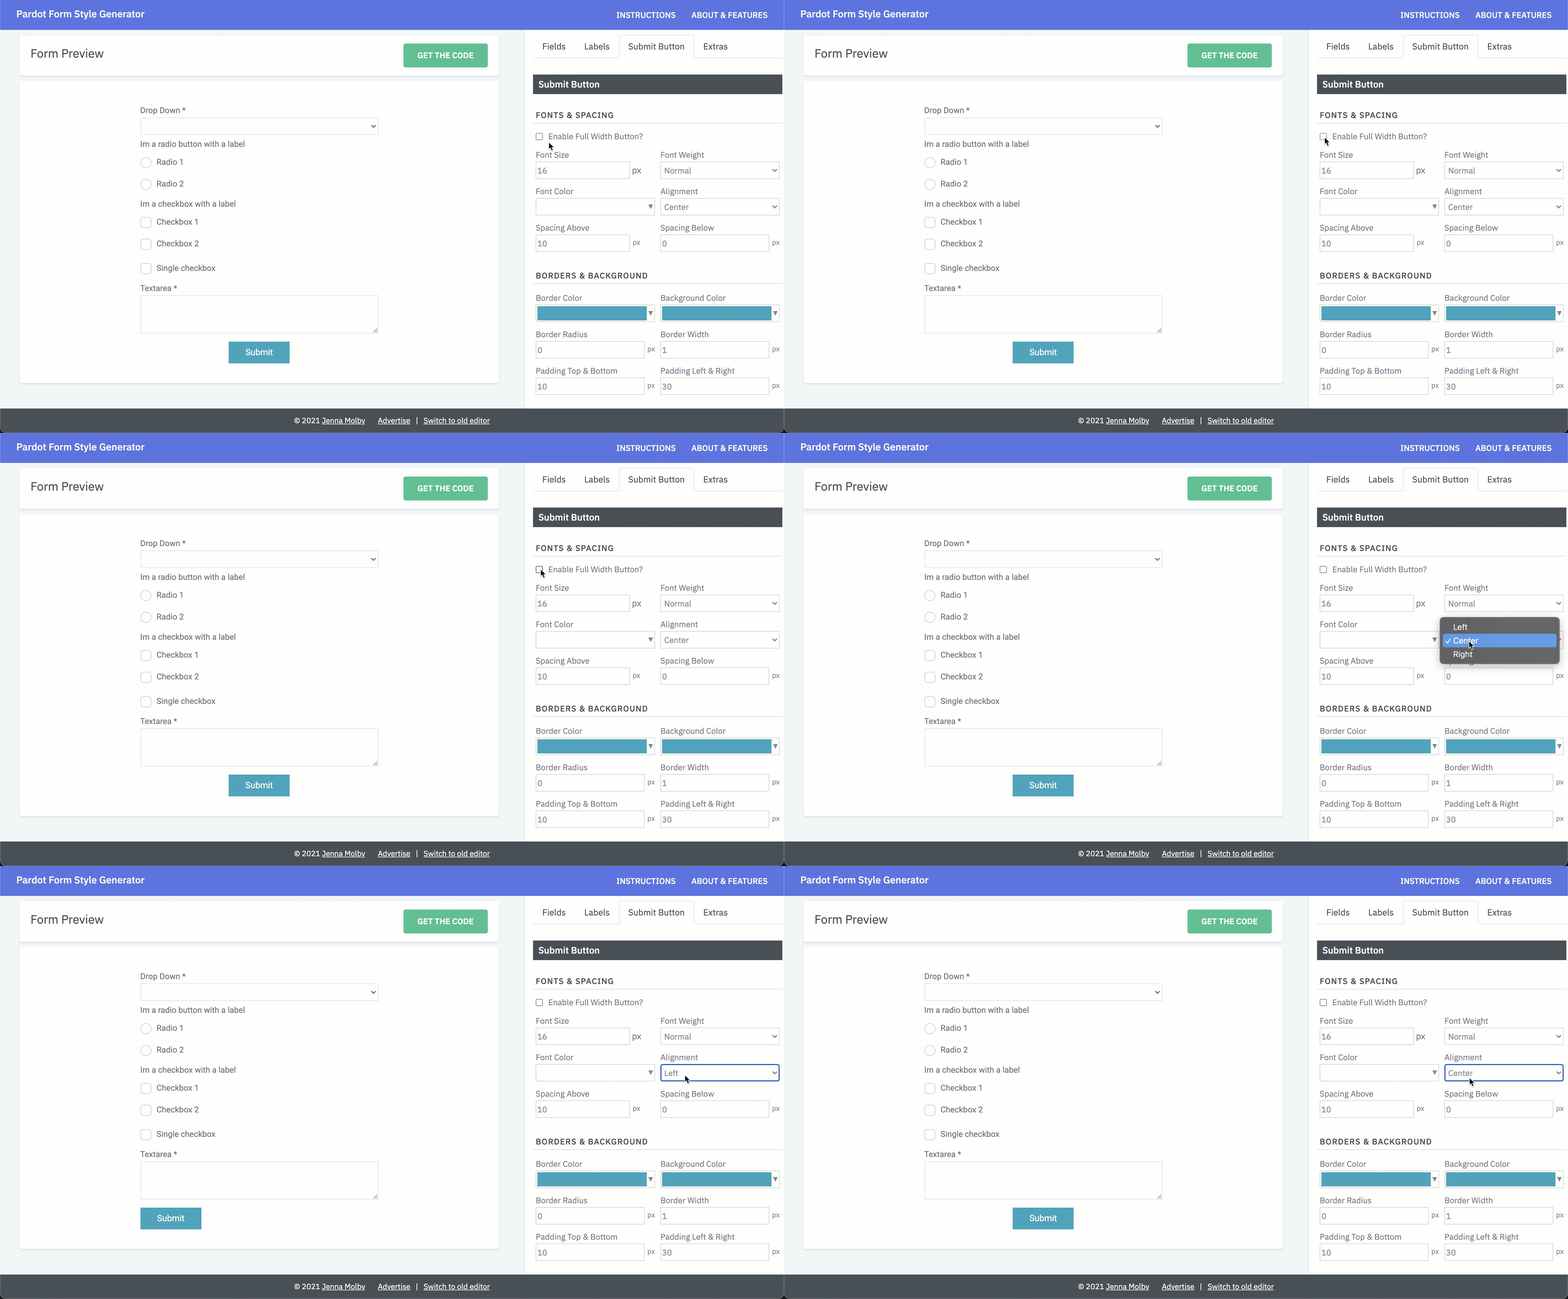
Create a full-width submit button

Check the box to enable a full-width submit button or select one of the alignment options from the dropdown.

Select hover colors for the submit button

Change the border colour, font color, and background color for the submit button.

Try it yourself

Check out all the new features and send me any questions via Twitter (@jennamolby), or leave a comment below.

Your Pardot forms don’t have to be boring. With a little extra CSS you can create beautiful Pardot forms with customized checkboxes and radio buttons. In this tutorial, I’ll show you how you can style checkboxes and radio buttons within Pardot forms with minimal coding.

Before we begin…

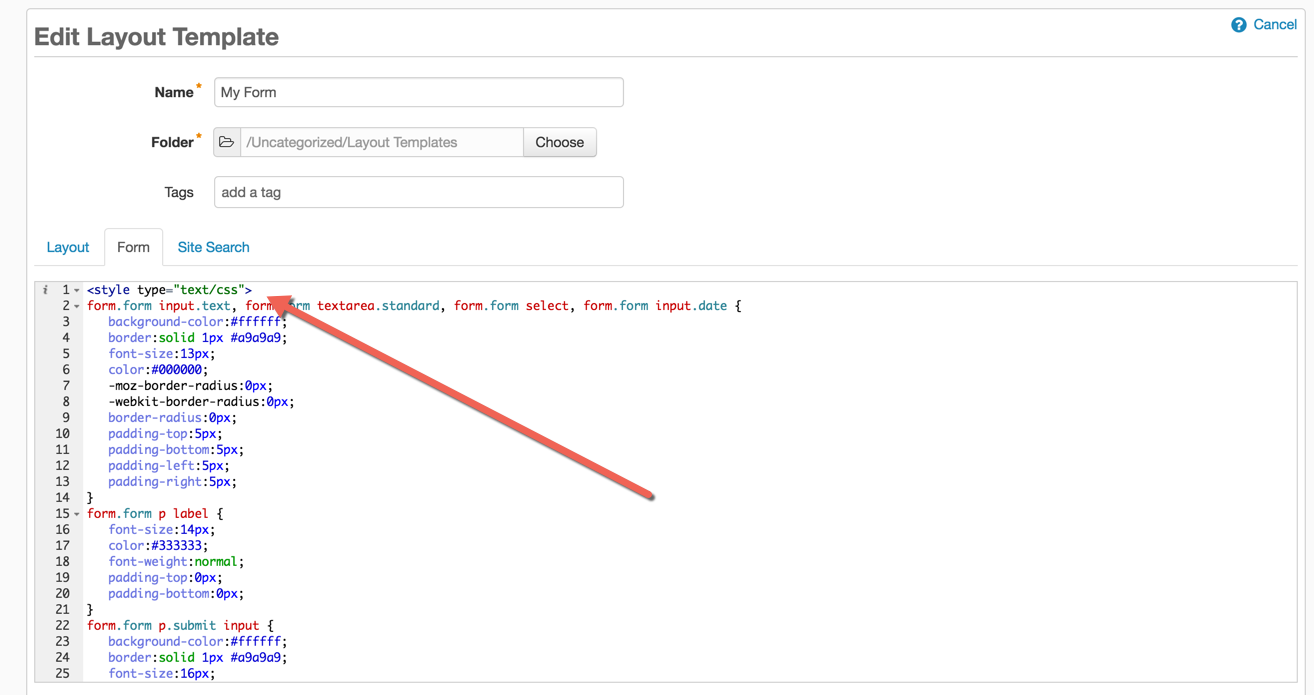
Let’s refresh on how to add custom CSS to your Pardot forms.

Navigate to Marketing > Forms > Layout Templates and select the layout to add the form styles to. Paste the CSS right above the existing code of the Form tab and save.

Styling Checkboxes

One of the downsides of using Pardot forms is the inability to modify the HTML structure of the form, so I will be leveraging the standard Pardot HTML to style the checkboxes.

The HTML

The standard HTML for a checkbox in a Pardot form looks like this:

<p class="form-field checkbox1 pd-checkbox required no-label">
<input id="checkbox1" name="checkbox1" onchange="" type="checkbox" value="">
<label class="inline" for="checkbox1">Checkbox 1</label>
</p>

Notice how the all the checkboxes are wrapped in a paragraph tag with the class pd-checkbox? This is how we will target the checkbox input and the checkbox label within the CSS.

The CSS

For the CSS, the default checkbox will be hidden and the ::before selector will be used to style the new checkbox.

<!-- Style the checkboxes -->
<style type="text/css">
/* hide the regular checkbox */
#pardot-form .pd-checkbox input {
  opacity: 0;
  position: absolute;
}
 
/* position the label */
#pardot-form .pd-checkbox input, #pardot-form .pd-checkbox label {
  display: inline-block;
  vertical-align: middle;
  margin: 5px;
  cursor: pointer;
}
#pardot-form .pd-checkbox label {
  position: relative;
}
 
/* style the unchecked checkbox */
#pardot-form .pd-checkbox input+label:before {
  content: '';
  background: #fff;
  border: 2px solid #ddd;
  display: inline-block;
  vertical-align: middle;
  width: 20px;
  height: 20px;
  padding: 0px;
  margin-right: 10px;
  text-align: center;
  font-size: 15px;
  line-height: 24px;
}
 
/* style the checked checkbox */
#pardot-form .pd-checkbox input:checked+label:before {
  content: "\2713";
  background: #2CA4BF;
  color: #fff;
  border-color: #2CA4BF
}
 
</style>

The Result

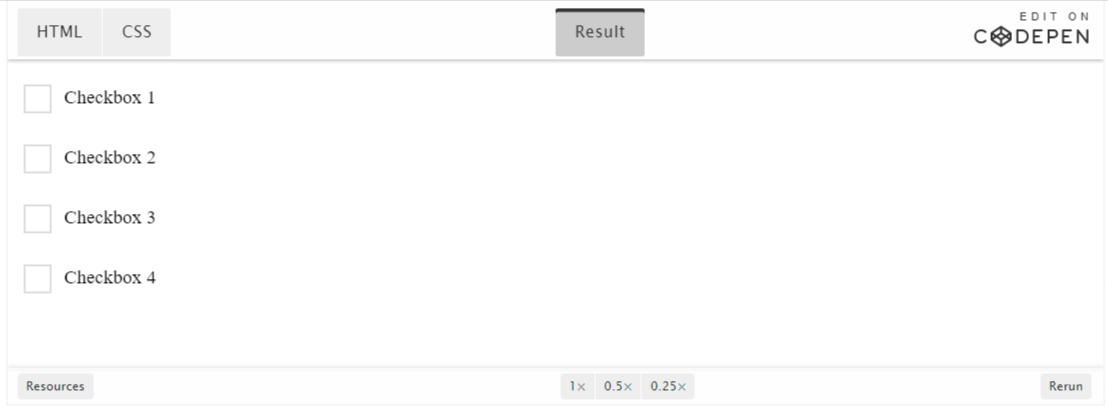
The styled checkboxes will look like this once the CSS has been added to the Pardot form.

Styling Radio Buttons

Styling radio buttons are pretty similar to the checkboxes, but with a bit of extra CSS to make them look like a radio button. Just like the checkboxes, we will leverage the HTML that Pardot provides, so all you have to do is add some CSS.

The HTML

All radio buttons in the Pardot form are wrapped in a paragraph tag with the class pd-radio. This is how we will target the radio input and the radio label within the CSS.

<p class="form-field  radio1 pd-radio required  no-label  ">
<span class="value"><span class="" style=""><input type="radio" name="93172_68805pi_93172_68805[]" id="93172_68805pi_93172_68805_722529_722529" value="722529" onchange=""><label class="inline" for="93172_68805pi_93172_68805_722529_722529">radio 1</label></span><span class="" style=""><input type="radio" name="93172_68805pi_93172_68805[]" id="93172_68805pi_93172_68805_773281_773281" value="773281" onchange=""><label class="inline" for="93172_68805pi_93172_68805_773281_773281">radio 2</label></span><span class="" style=""><input type="radio" name="93172_68805pi_93172_68805[]" id="93172_68805pi_93172_68805_773283_773283" value="773283" onchange=""><label class="inline" for="93172_68805pi_93172_68805_773283_773283">radio 3</label></span><span class="" style=""><input type="radio" name="93172_68805pi_93172_68805[]" id="93172_68805pi_93172_68805_773285_773285" value="773285" onchange=""><label class="inline" for="93172_68805pi_93172_68805_773285_773285">radio 4</label></span></span>
</p>

The CSS

Just like the CSS for the checkboxes, the default radio button will be hidden.

<!-- Style the radio buttons -->
<style type="text/css">
 
/* hide the regular radio button */
#pardot-form .pd-radio input {
  opacity: 0;
  position: absolute;
}
 
/* position the label */
#pardot-form .pd-radio input, .pd-radio label {
  display: inline-block;
  vertical-align: middle;
  margin: 5px;
  cursor: pointer;
}
 
#pardot-form .pd-radio label {
  position: relative;
}
 
/* style the unchecked radio button */
#pardot-form .pd-radio input+label:before {
  content: "";
  background: #fff;
  border: 2px solid #ddd;
  display: inline-block;
  vertical-align: middle;
  width: 20px;
  height: 20px;
  padding: 0px;
  line-height: 20px;
  margin-right: 10px;
  text-align: center;
  font-size: 20px;
}
#pardot-form .pd-radio input+label:before {
  border-radius: 50%;
}
 
/* style the selected radio button */
#pardot-form .pd-radio input:checked+label:before {
  content: "\25CF";
  color: #2CA4BF;
  border: solid 1px #2CA4BF;
}
</style>

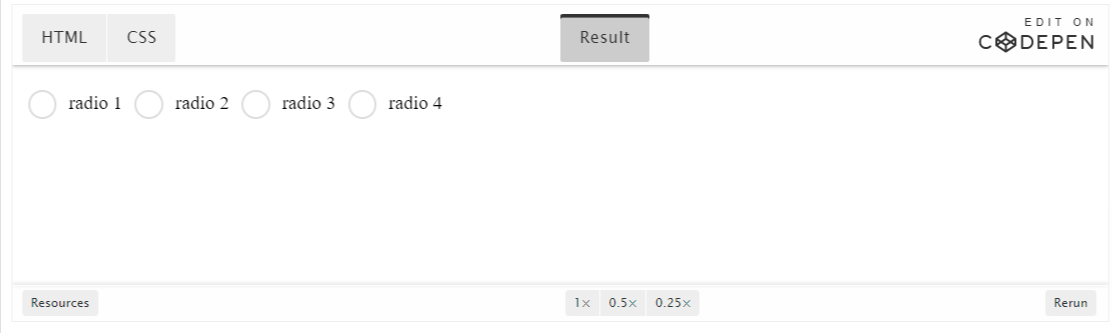
The Result

Questions?

Send me a tweet @jennamolby, or contact the Sercante team for help.
No more posts to show