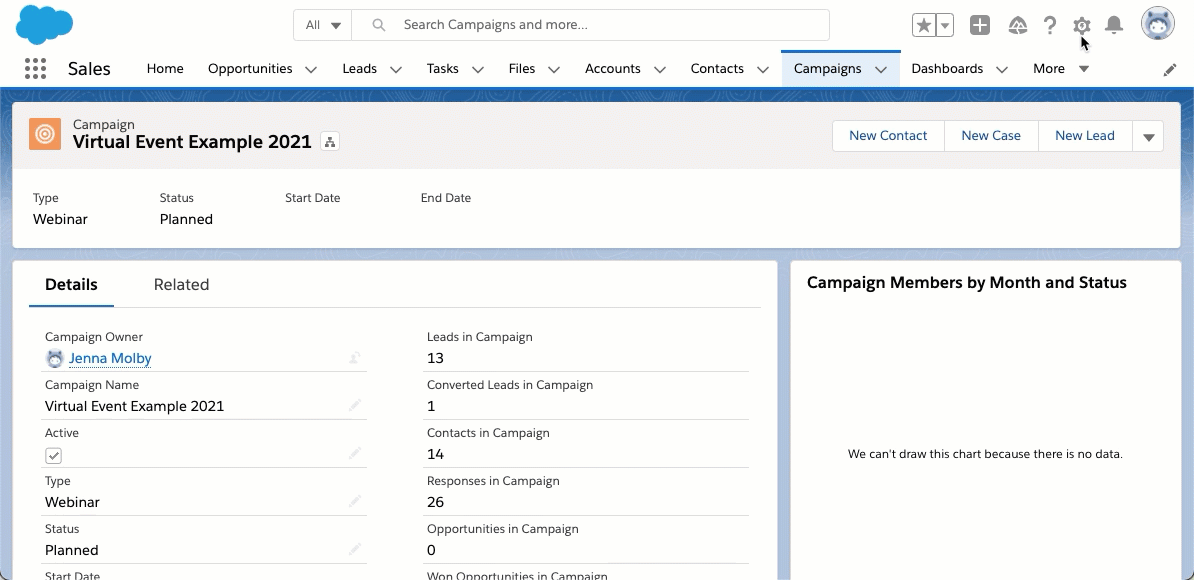
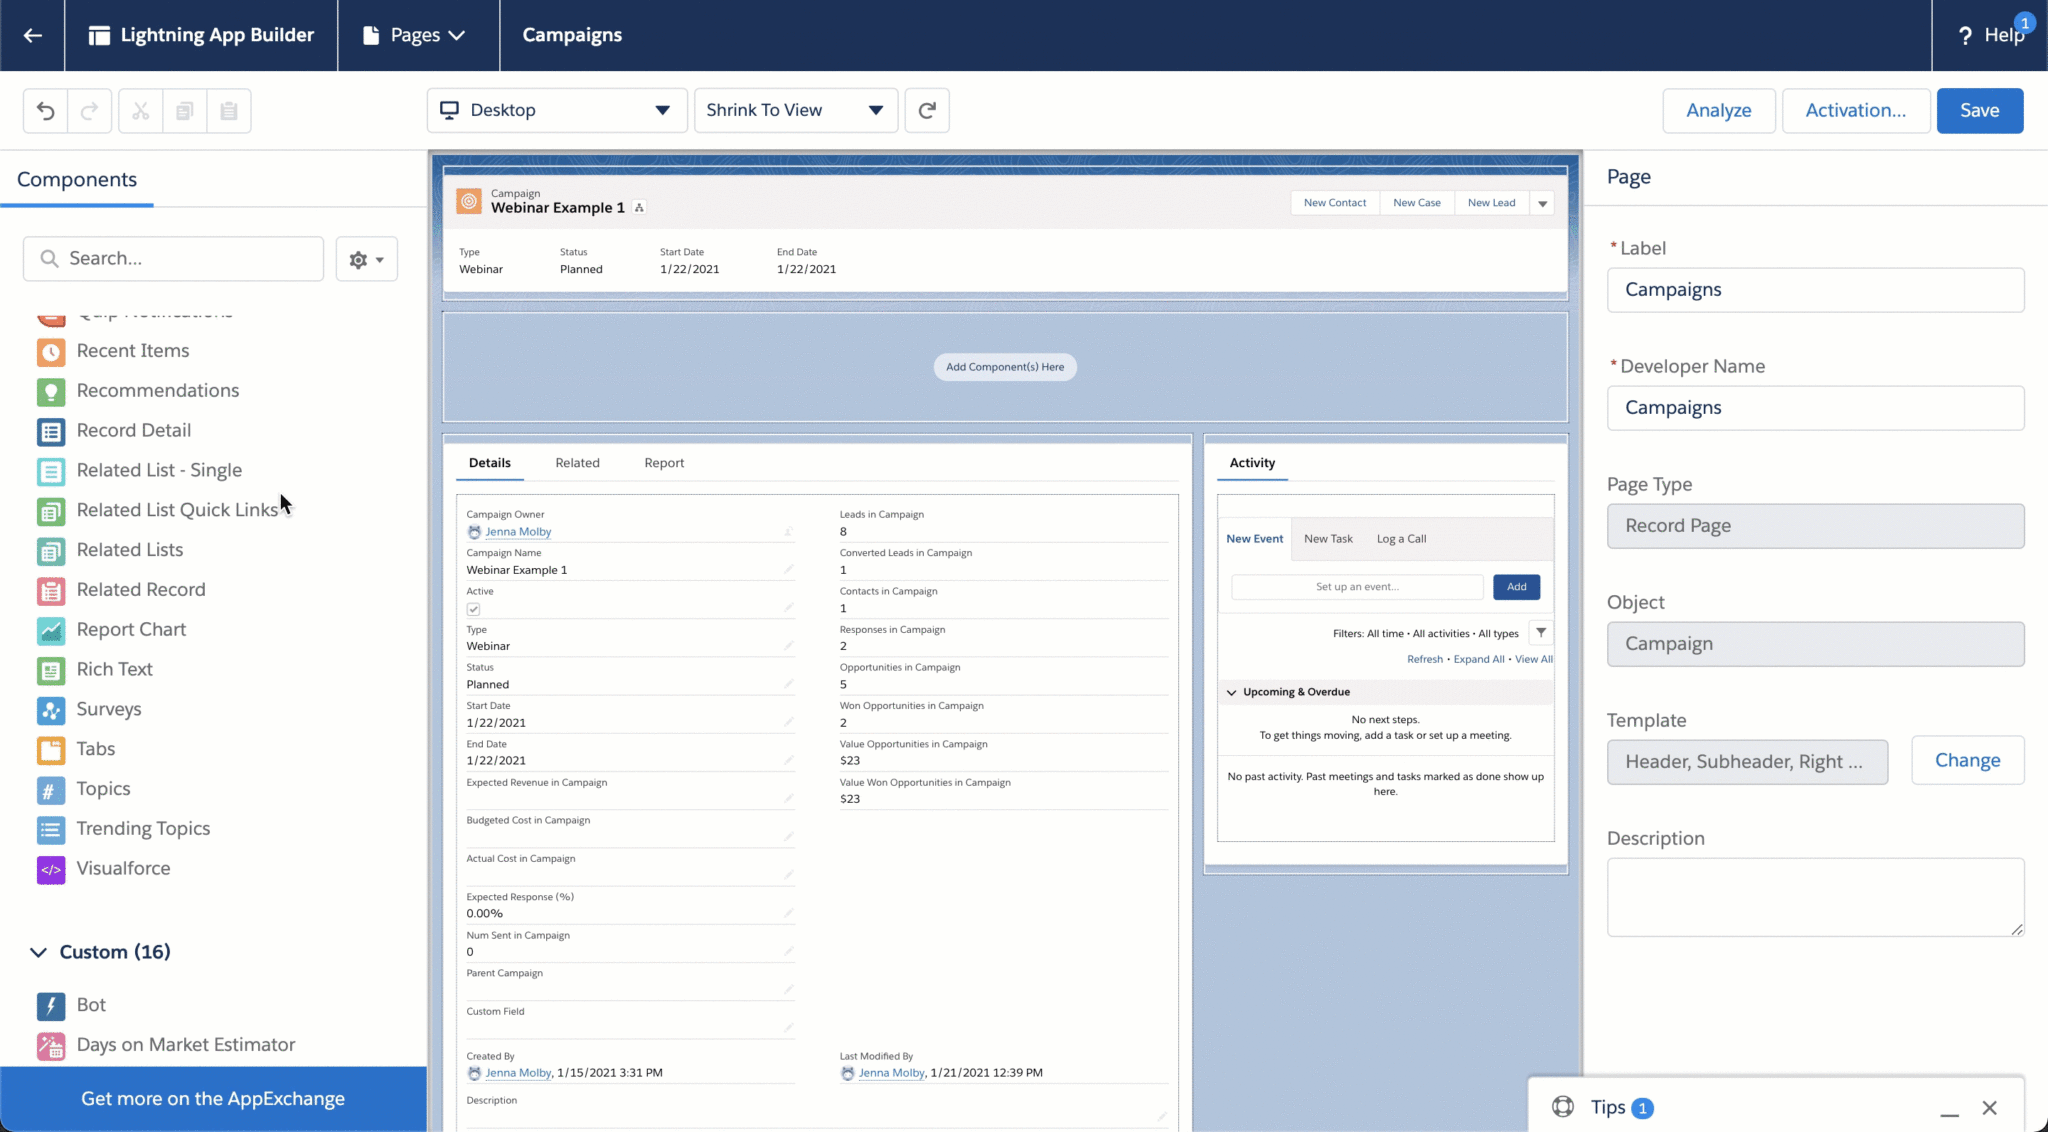
One of my favourite Lightning features is customizing the campaign page using the Lightning App Builder. The drag-and-drop App Builder allows you to add tabs, reports and instructions to your page. While there are many different ways to customize your campaign page, here are four changes that are easy to implement that will delight your marketing team.
How to customize your Salesforce campaign page
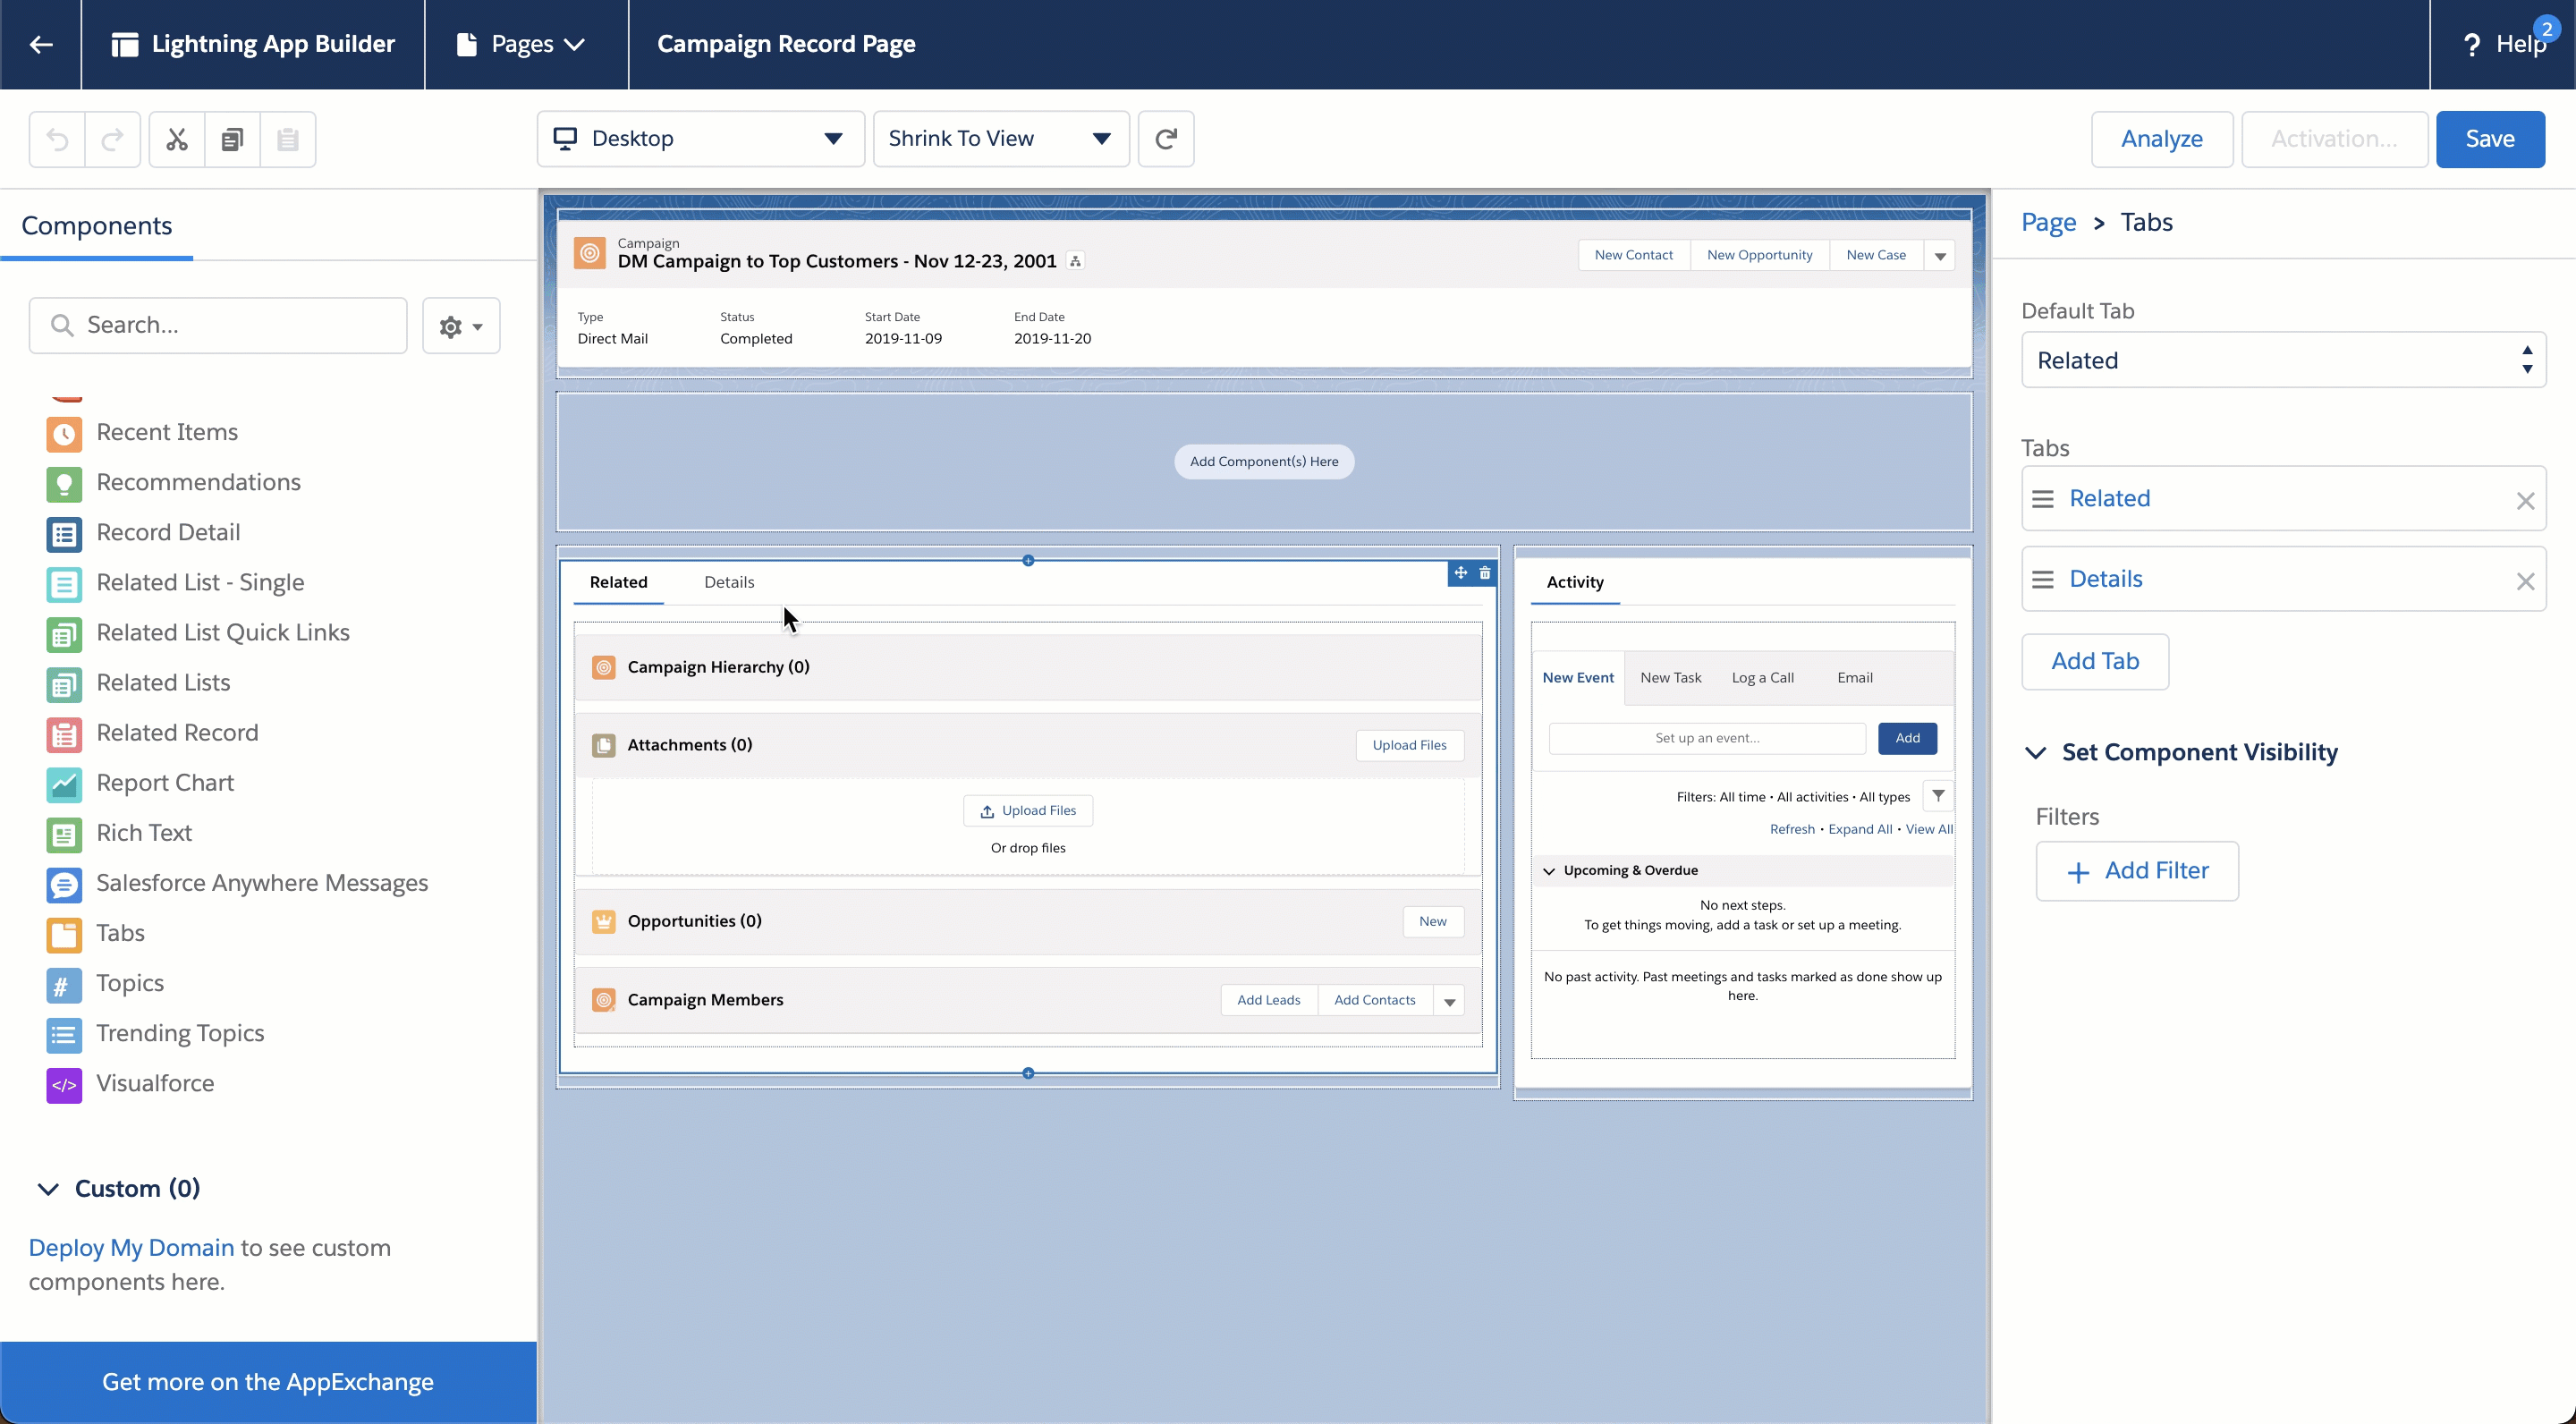
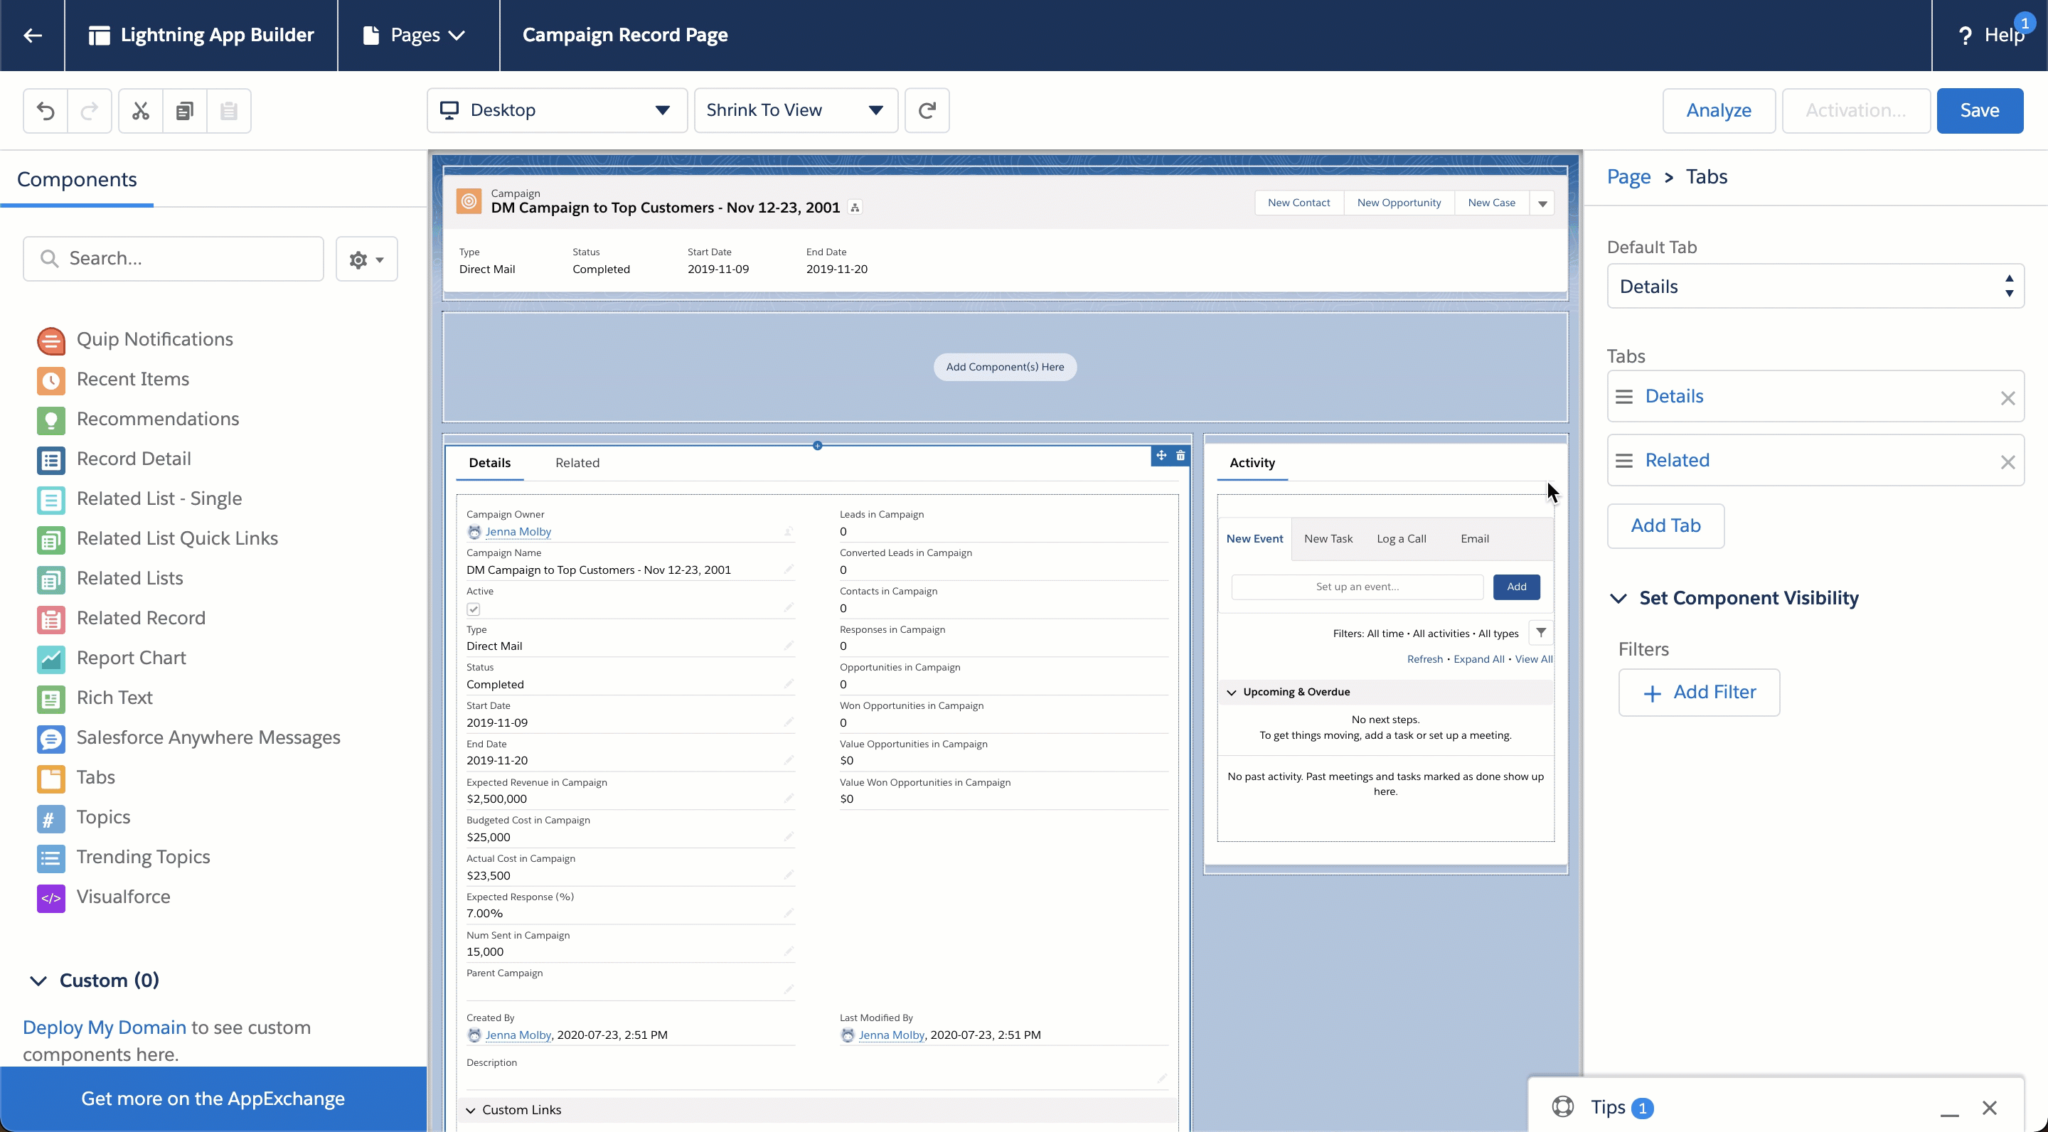
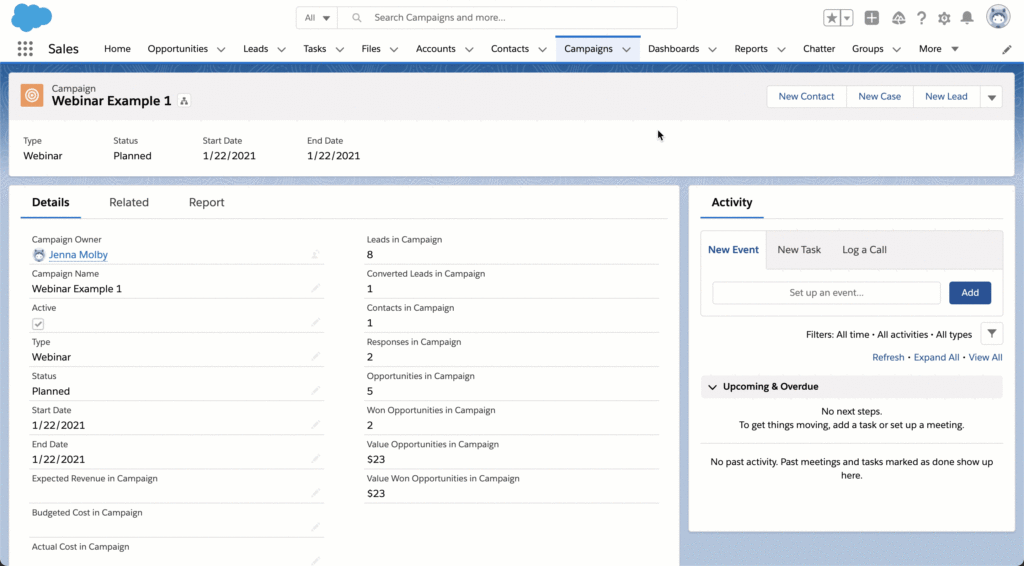
To customize your campaign page, navigate to one of your Salesforce campaigns, click on the gear icon, and click on edit page. This will take you to the Lightning Page Builder.
Note: Editing the page will overwrite the existing page. You might want to create a new custom record page instead of overwriting an existing page.
1. Change the default tab
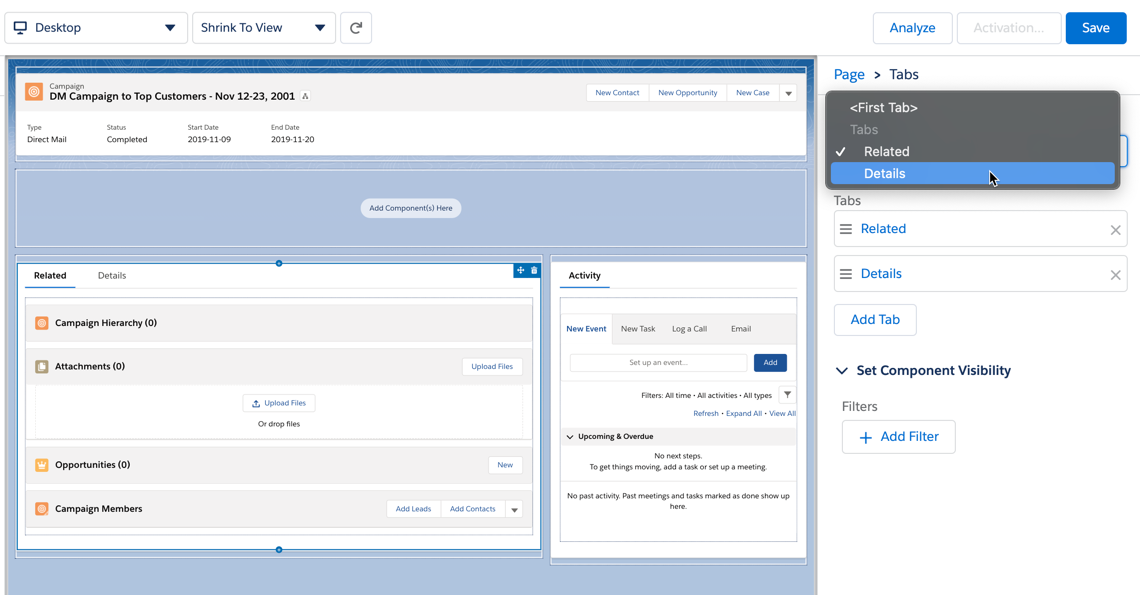
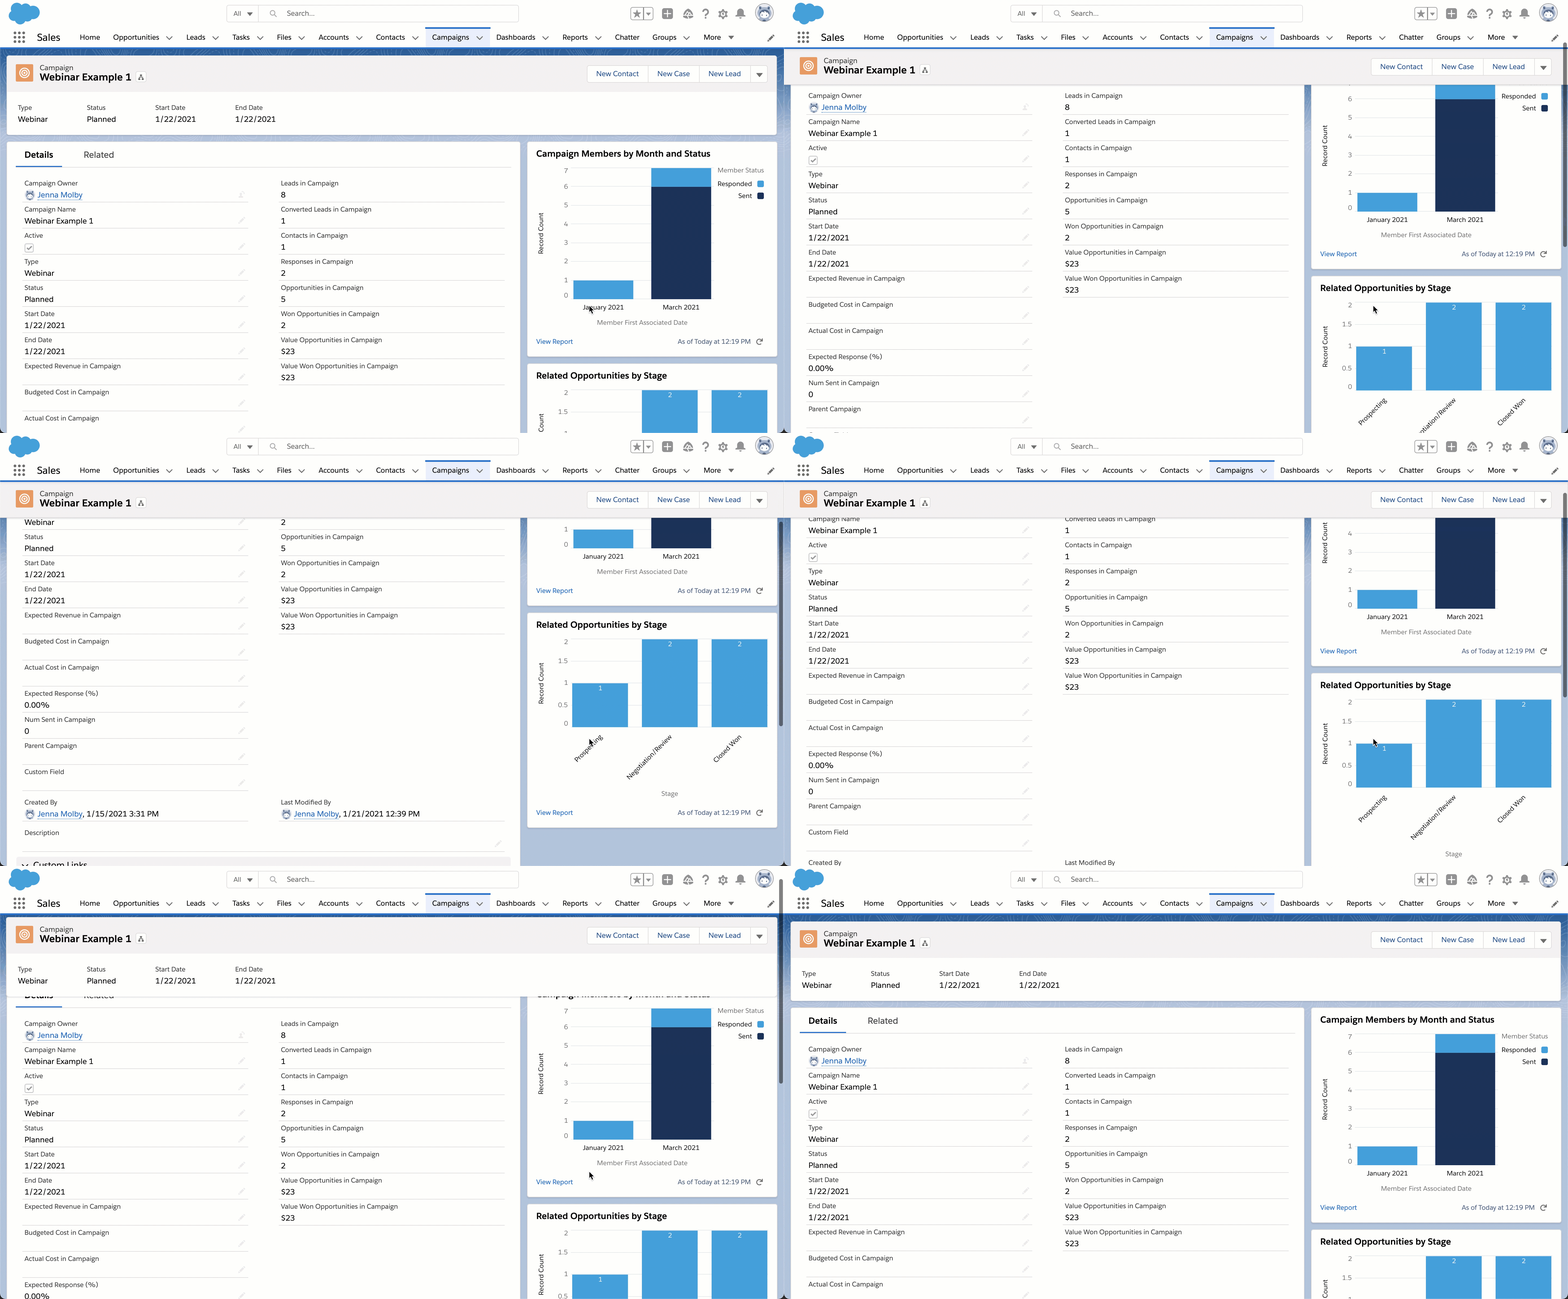
By default, when you navigate to a campaign in Salesforce, the default tab will be the Related tab. You can update the default tab to be anything you want. I recommend setting it to the Details tab. To do this, click on the tabbed section and chose the default tab from the dropdown.
2. Add custom links and instructions to your page
Add helpful links or instructions to the page that can be used by Sales or Marketing. This can include campaign checklists, best practice docs, links to report or dashboards and whatever else would be helpful when viewing or creating a campaign.
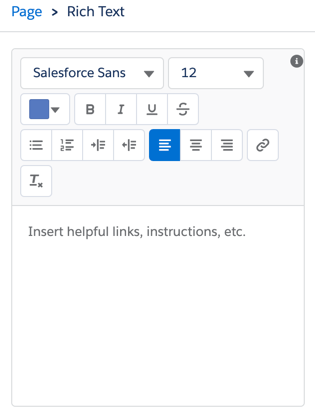
To add text sections on a page. Drag and drop the Rich Text component anywhere on your page.
Enter the text within the Rich Text editor.
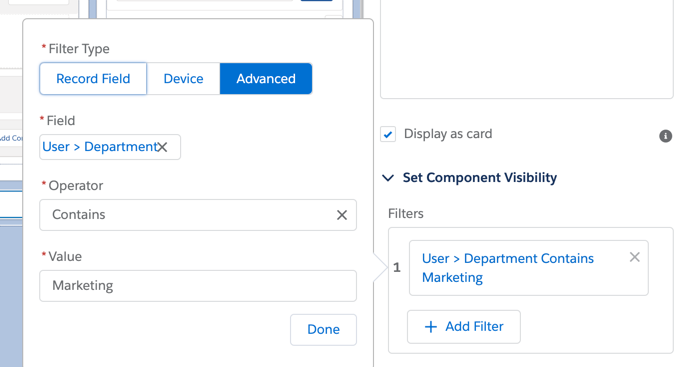
Optionally, add some visibility features to the rich text section. For example, you can show different content based on campaign type or you can show different content based on if the user is Marketing or Sales.
3. Add reports to your page
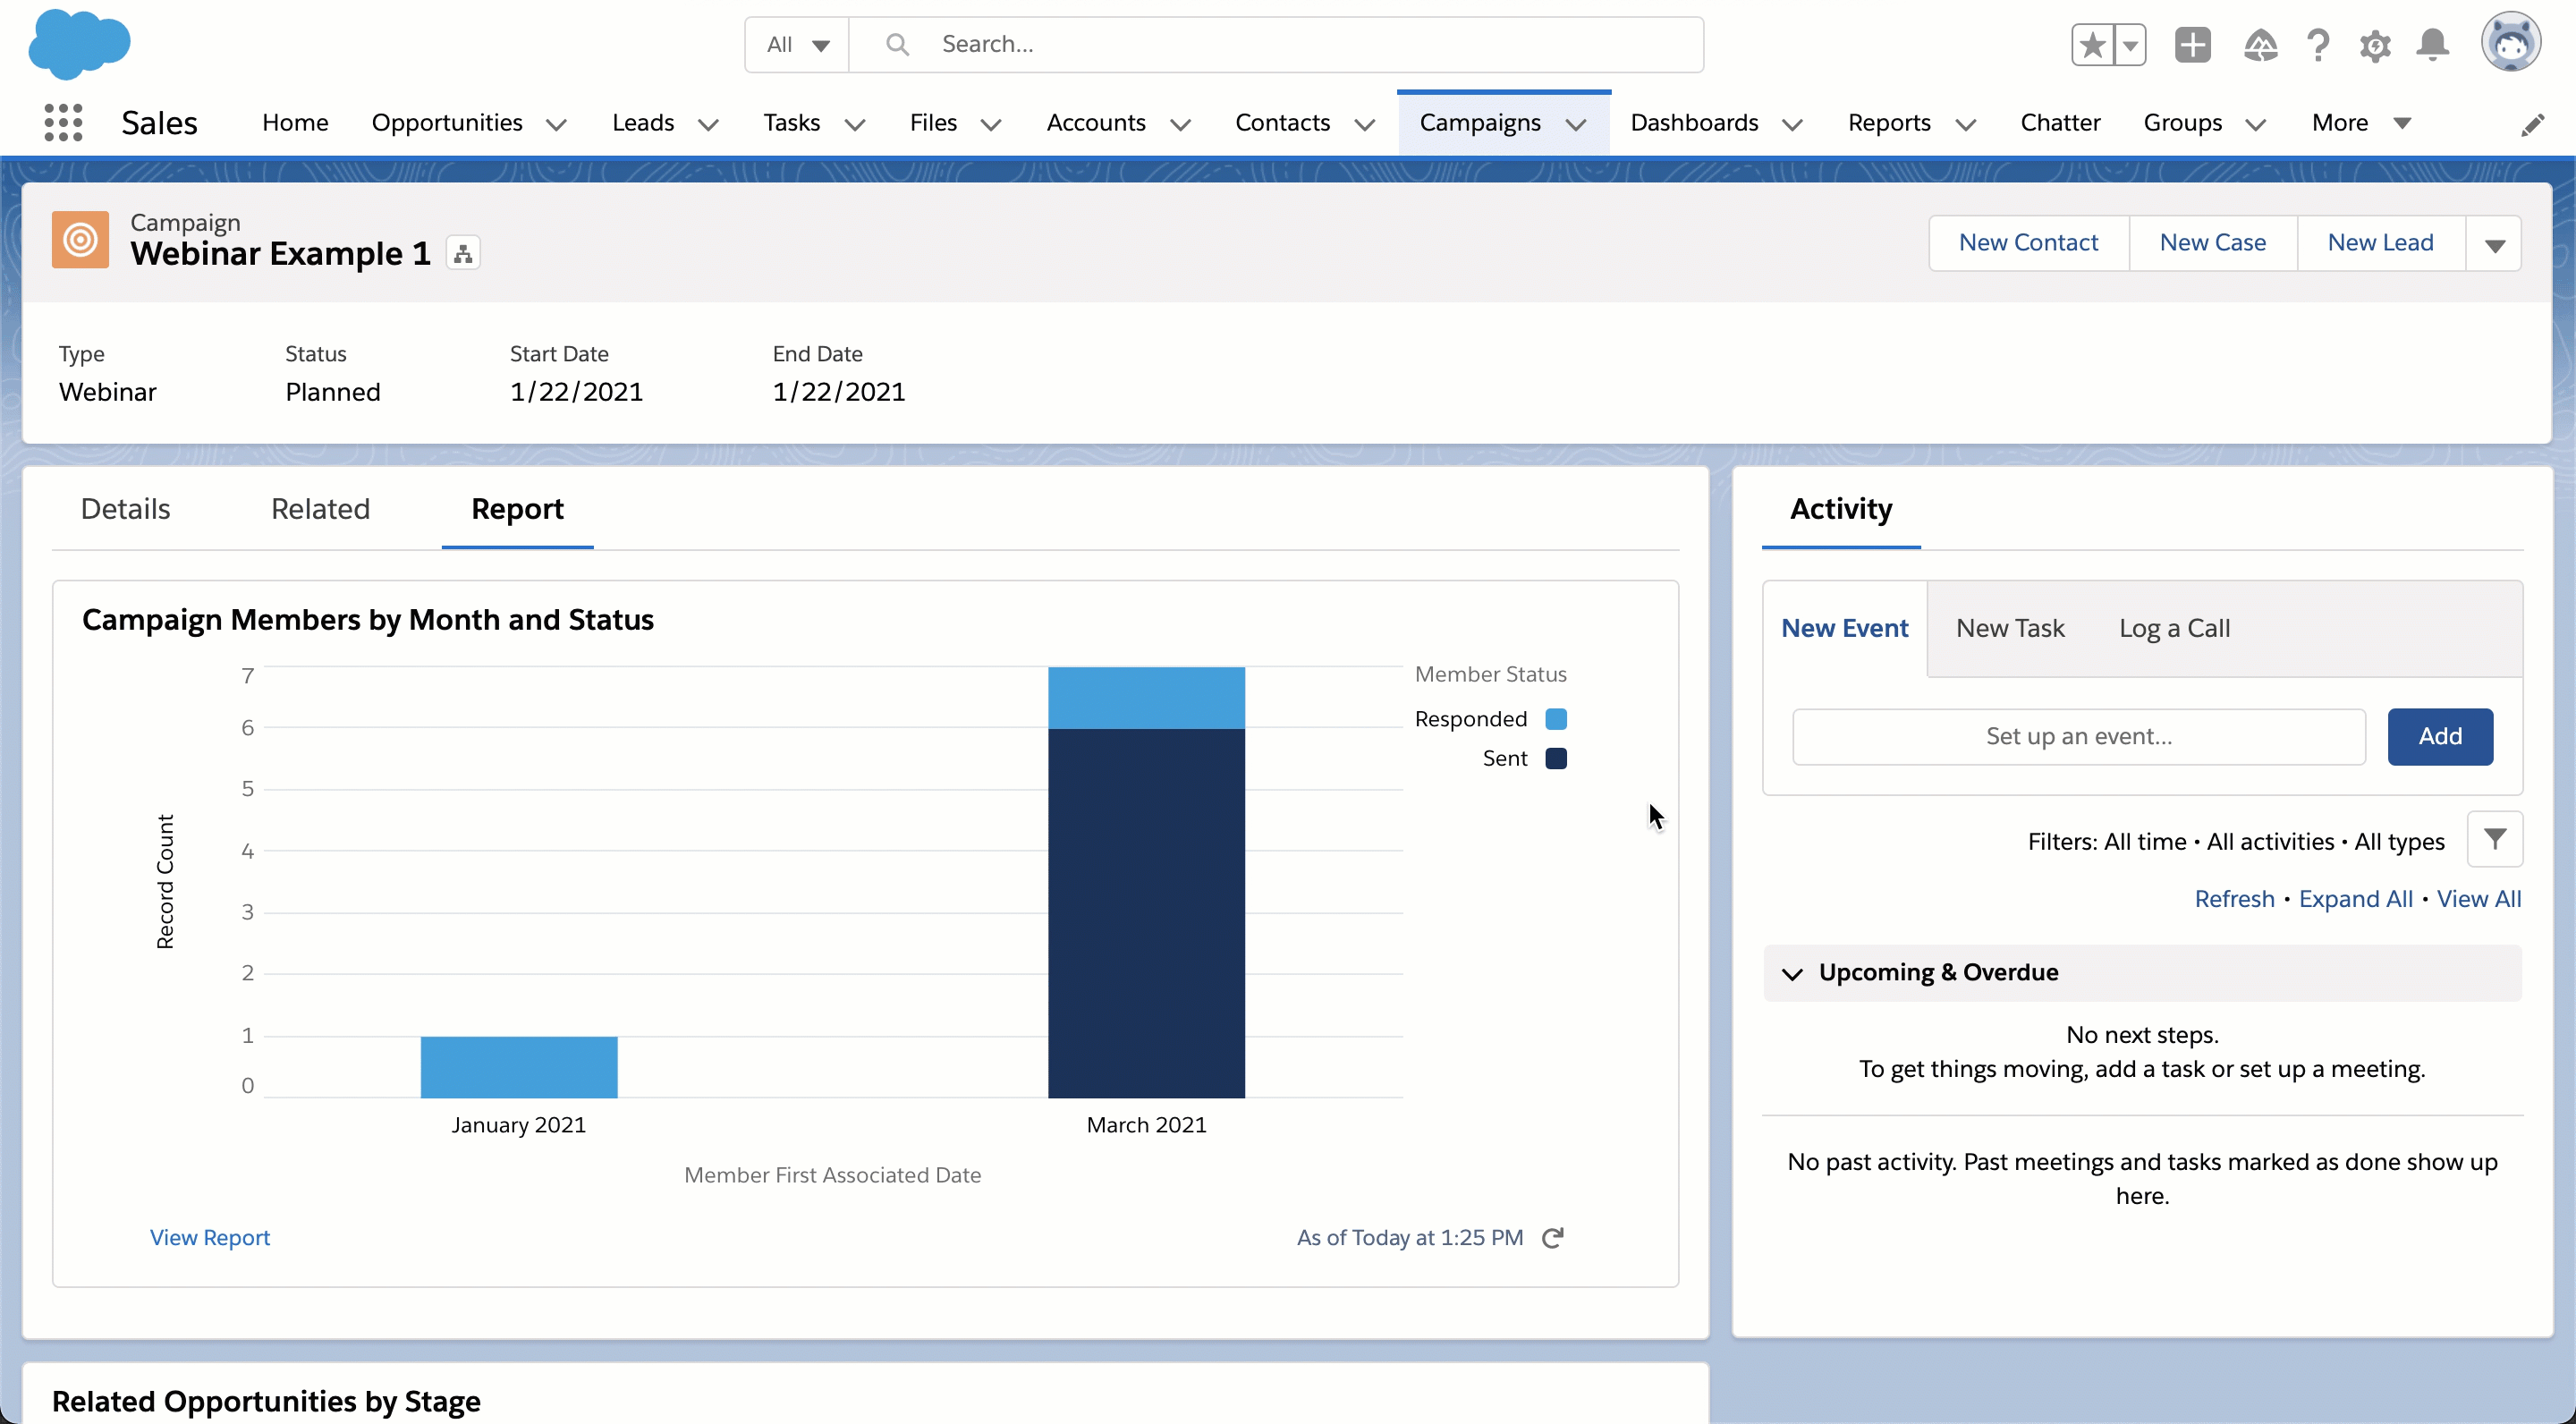
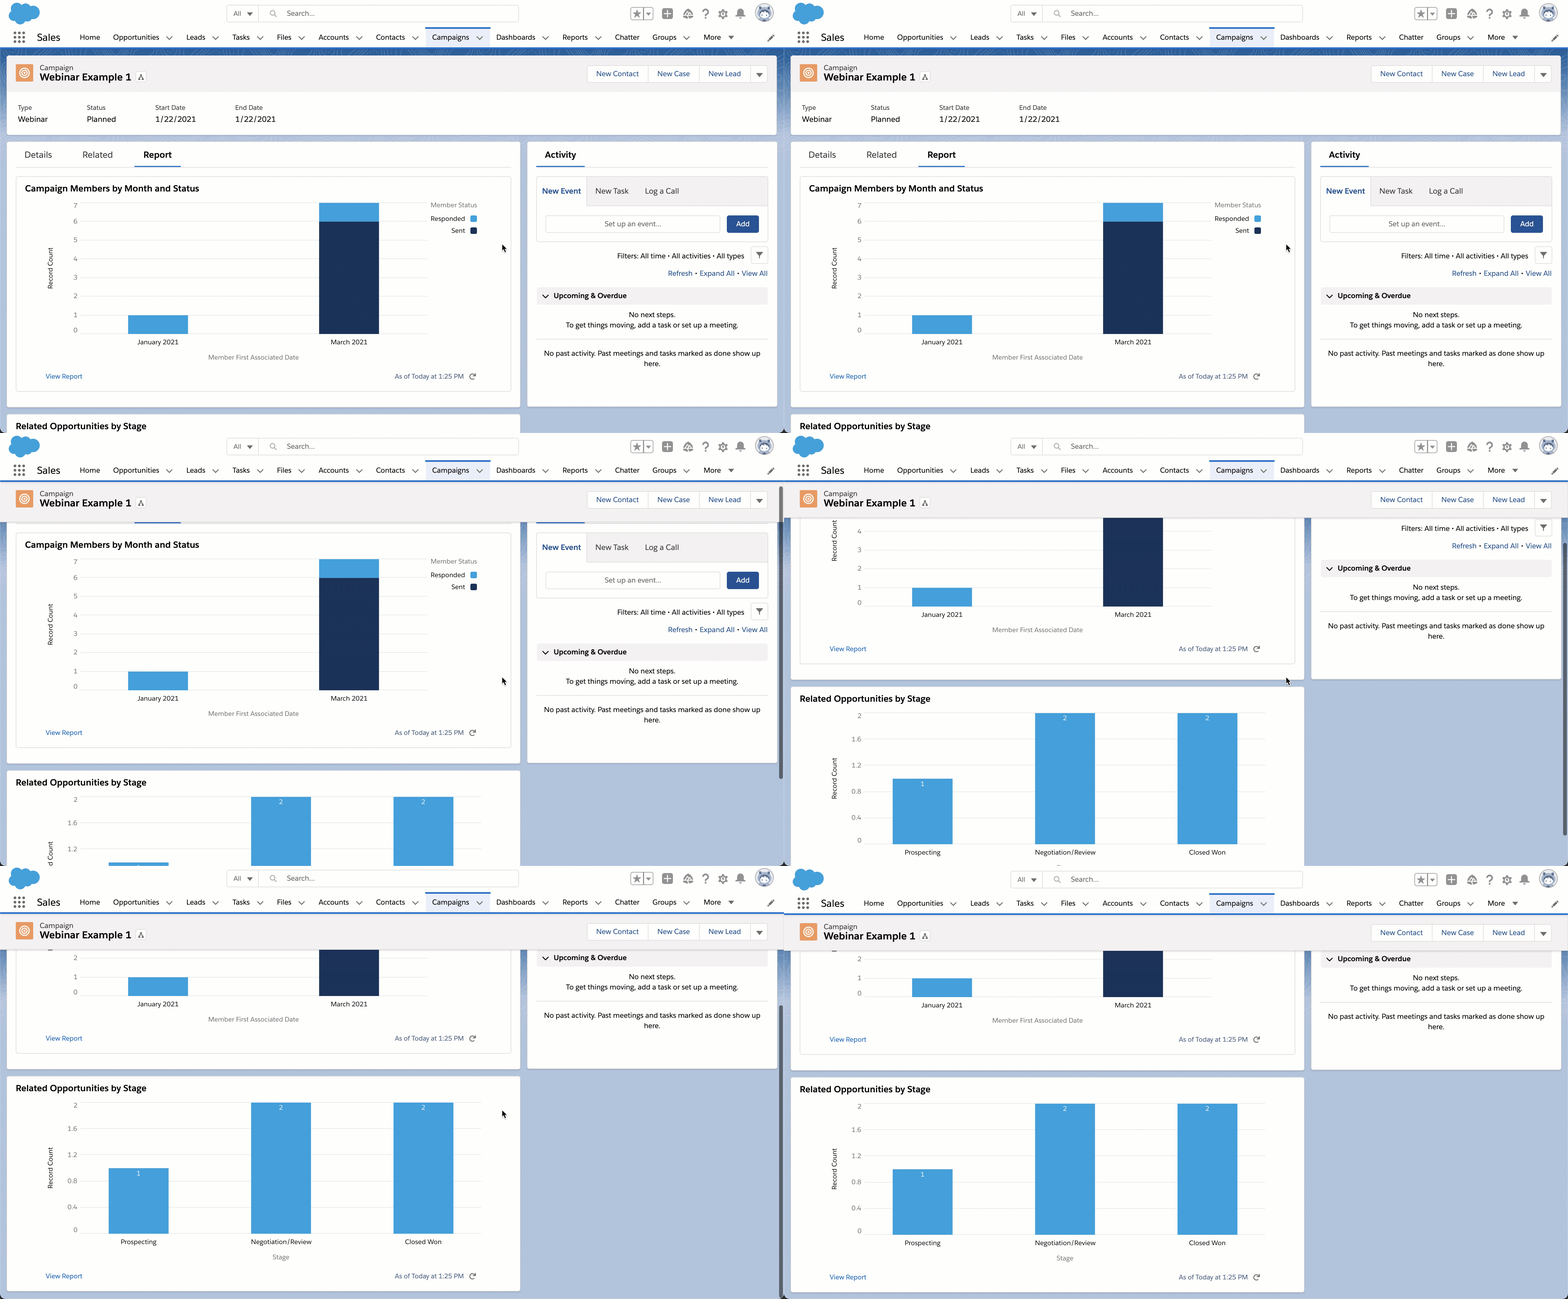
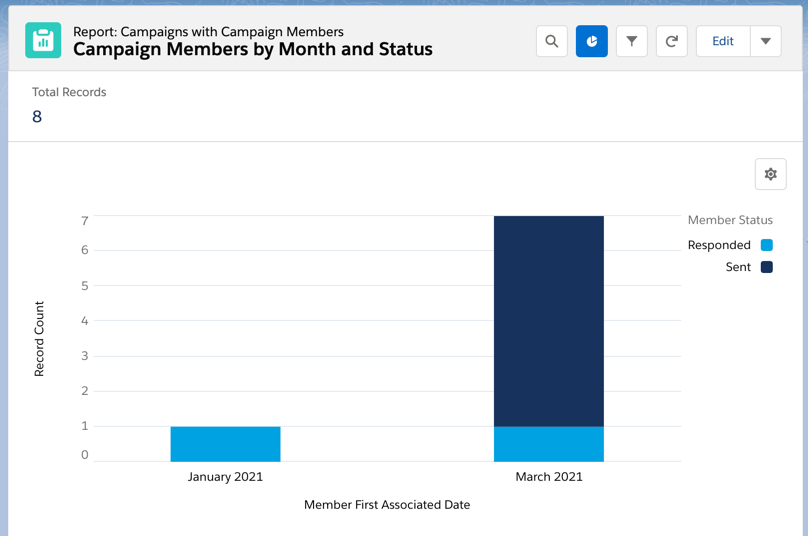
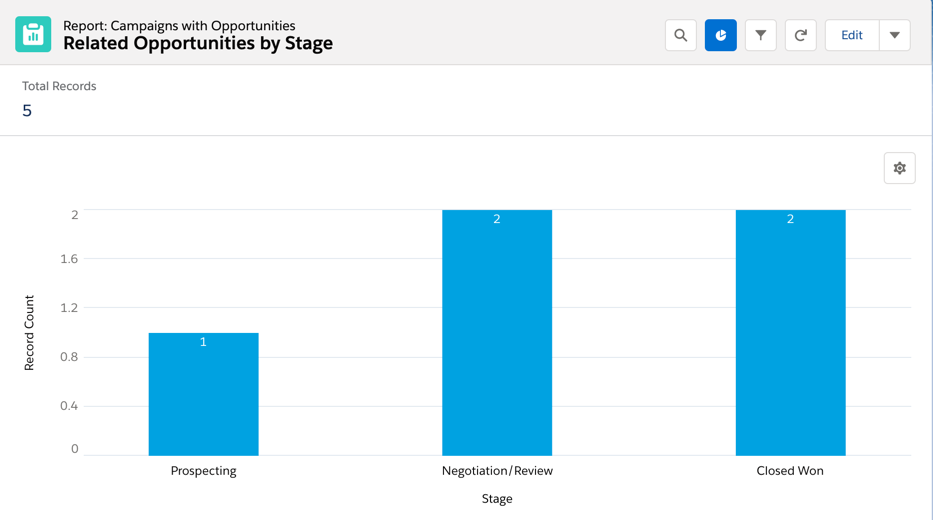
Adding report charts will give you insight into a particular campaign’s performance without creating a separate report or leaving the campaign page. These reports can show you how many campaign members were added, by month or by status, how many opportunities are influenced by the campaign by opportunity stage, etc.
To learn how to add reports to your campaign page in Salesforce, check out this blog post.
4. Add Tabs
Any of these components can be added as a tab within the campaign page instead.
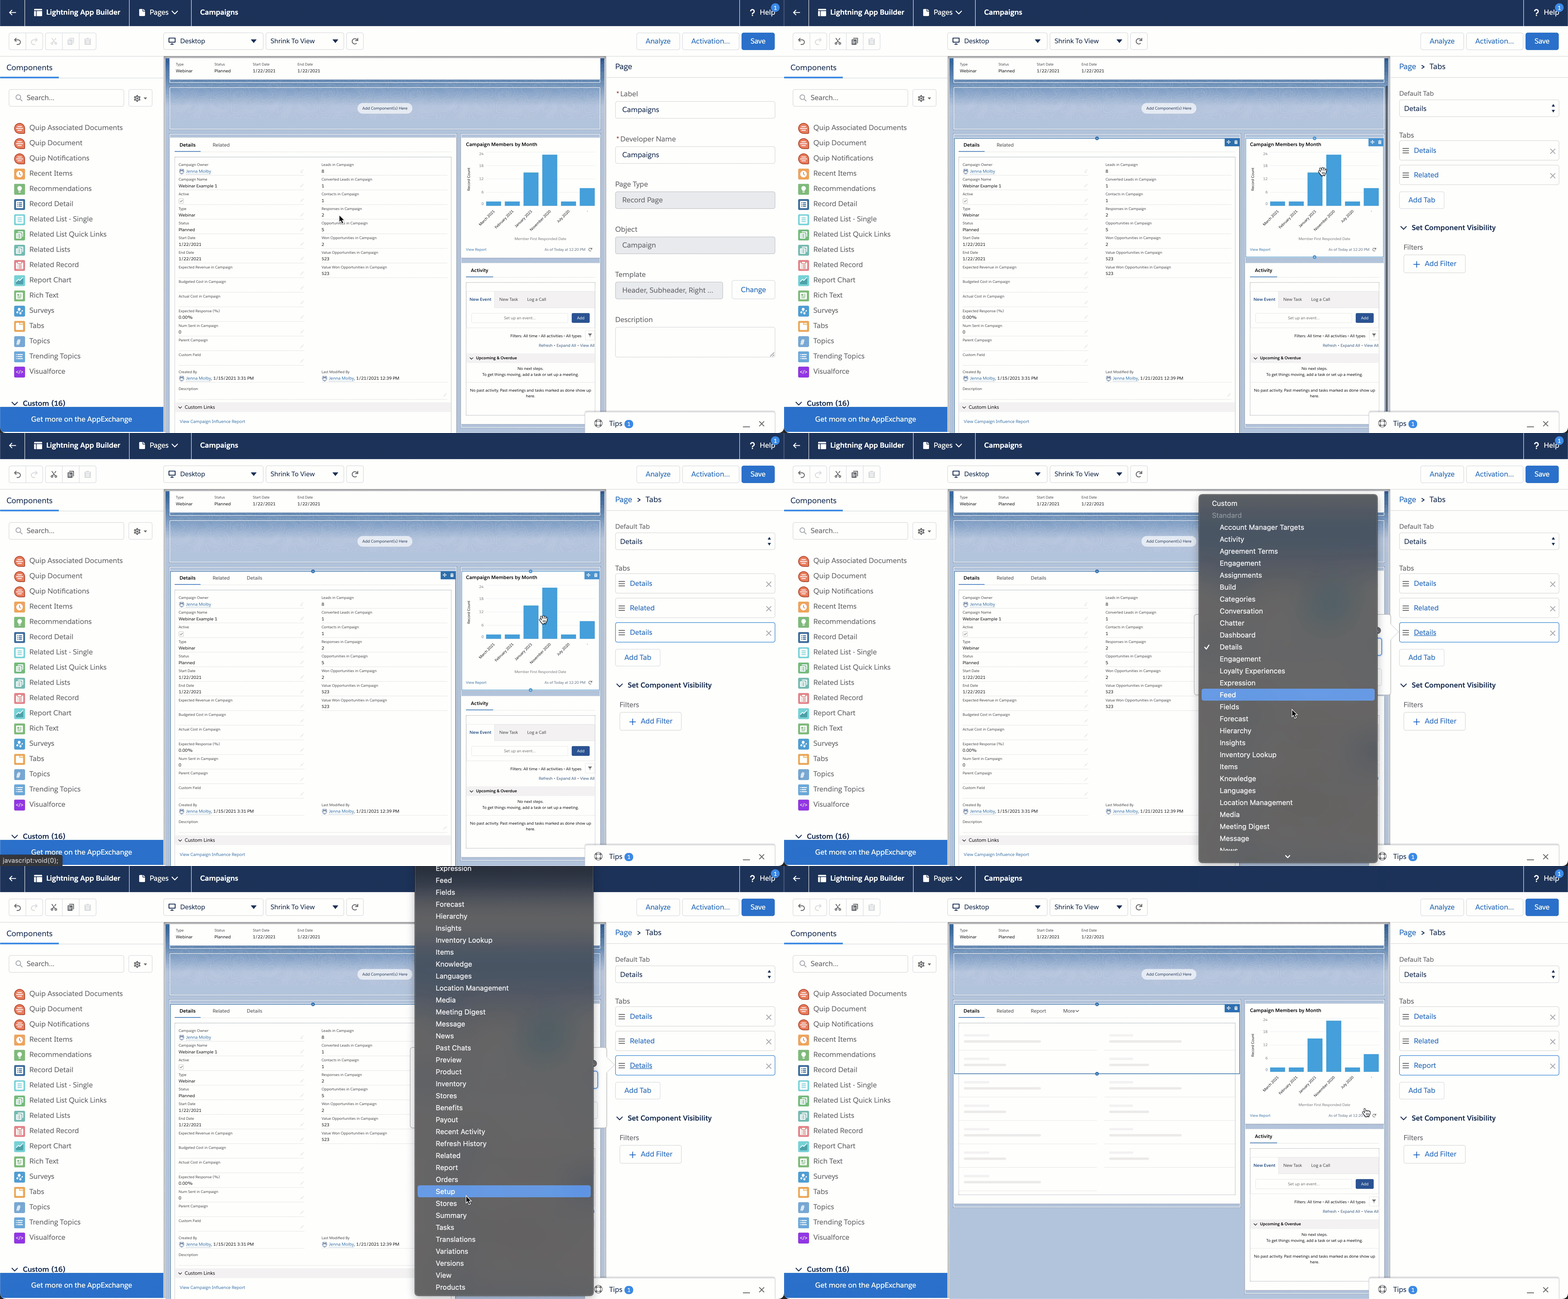
To add a tab, click on one of the tabbed sections to bring up the tab sidebar. Click the add tab button and select which component you want to add to the section.
Prospects now more than ever are demanding personalized content. For the last 4 years, adding the first name for personalization in emails has been the default. Unfortunately, that alone isn’t going to cut it anymore. To keep their attention, you have to make sure they know you’re thinking of them— no matter how long your list becomes.
In Pardot, the options to provide these experiences differ depending on your account tier and how you intend to use them.
If you’re a veteran to Pardot, it’s likely you know that there are several ways to accomplish the personalization you need. That’s why we’ve broken down some of the most common use cases that call for Pardot HML, Pardot Snippets, or Pardot Dynamic Content. Understanding how each of these work best in different scenarios will help you save time in your creation process.
Content personalization using Dynamic Content
Dynamic content allows you to display custom content, via Javascript, on your company’s website or within Pardot. Think about displaying different content on forms, landing pages, layout templates, and emails based on prospect criteria.
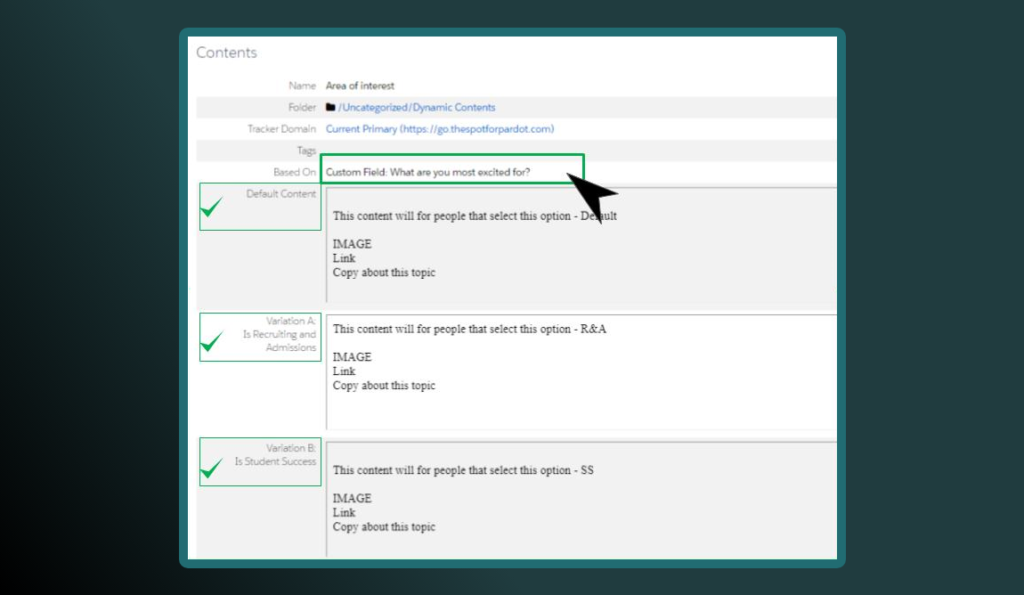
When a prospect matches the criteria for your dynamic content, the content variation corresponding to that field value will display. With this feature, it is possible to display up to 25 variations of content. If there are no matches or that person has no data, then they see the default option.
The instant benefit is that you can use one email template to showcase different pieces of content per Dynamic Content block. This feature is available both in Pardot Classic and Lightning that have a Plus or higher edition.
Popular Use Case: Showing different images or text based on the values found in the country field within an email. See our post about use cases for Dynamic Content here.
Content personalization using Handlebar Merge Language (HML)
HML is a new merge language for personalizing email in Pardot. Basically it’s the representation of a field value that you can showcase anywhere you have access to the WYSIWYG editor. Think of displaying prospects data on landing pages, forms, emails, etc. based on the data found within a prospects record in Pardot.
The benefits of Pardot HML almost immediate:
Easy to upgrade your content.
Ability to search for the fields you need.
The same language is shared across Salesforce Lightning Templates, laying the foundation for more email compatibility down the road.
HML can also be used within Dynamic Content, but not Snippets.
Allows you to do IF/ELSE statements to further expand its uses.
HML is available across all editions of Pardot Classic and Lightning (if enabled).
How do you know you’re using HML?
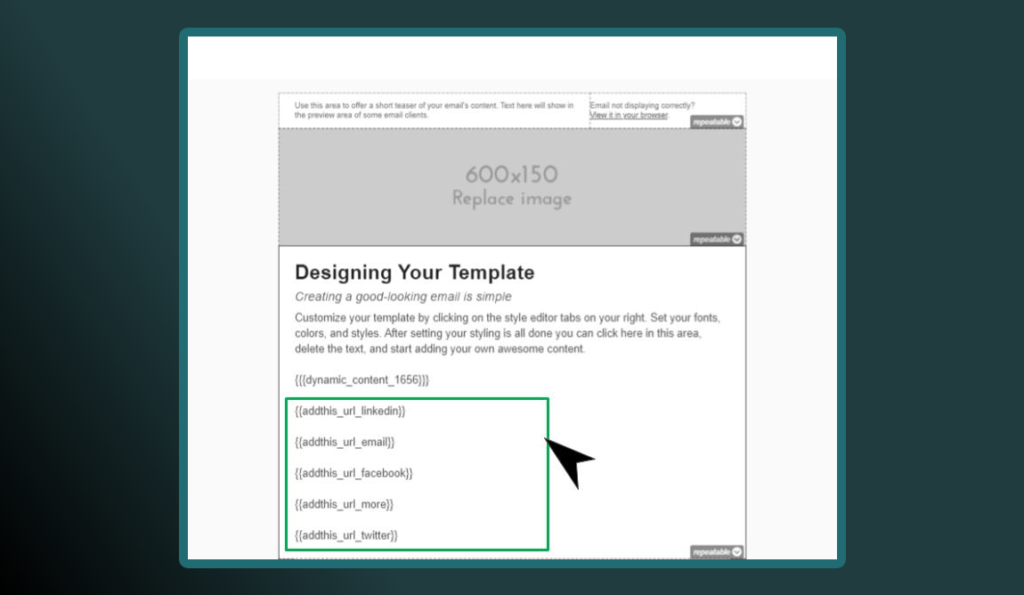
The easiest way to know is to look at your tokens. Do they look like this %%first_name%% or like this {{Recipient.FirstName}}? The option with the curly brackets ({}) is the appropriate one. New accounts from 2020 (or more recent) should have HML activated already, however, if you have an older account and need help migrating over from PML to HML, just follow our guide.
Popular Use Case: Updating email signatures for both sales and marketing emails to quickly create a connection with prospects based on CRM ownership. We also wrote about use cases for HML here.
Content personalization using Pardot Snippets
A Snippet is a reusable block of text, date, or links that can be pulled into multiple Pardot emails, forms and landing pages. These blocks are static, meaning you select the one you want and the values don’t change unless you change them. They’re best for strict text purposes as they do not support HTML/CSS.
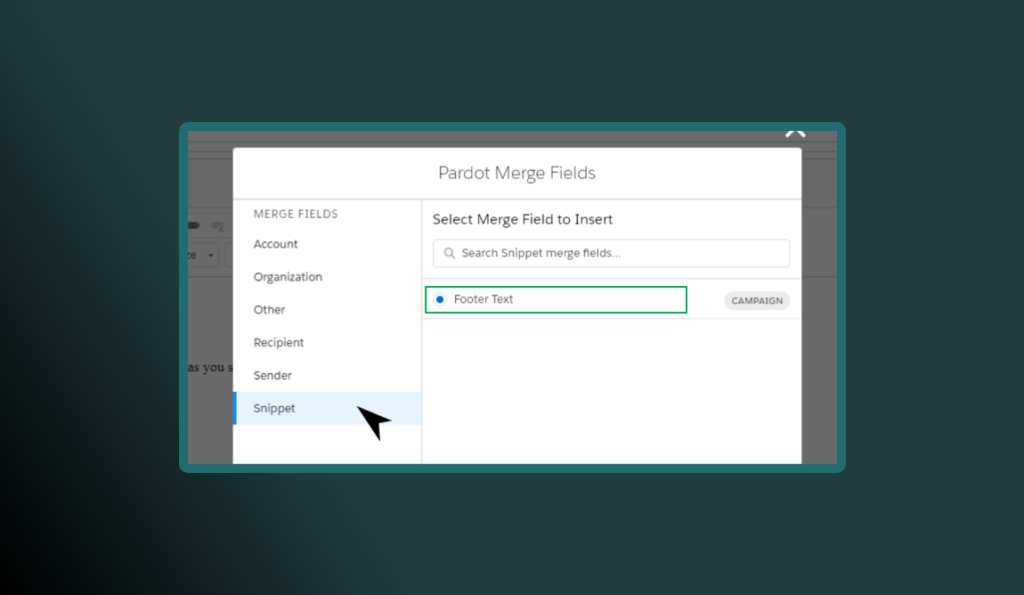
Snippets cannot be used with Dynamic Content. However, you can insert HML into Snippets, you just have to do it manually because there’s no HML option in the Snippet wizard. You must have Connected Campaigns and HML enabled to use them within your instance.
Snippets are based on Business Unit or Campaign ownership. Although you can use Snippets in Pardot Classic, you cannot create them without access to Salesforce (Pardot Lightning is preferred if you intend to use this feature). Snippets are available for all versions of Pardot.
Popular Use Case: Updating event or footer information across multiple assets. We recently wrote about Snippets and answered a few frequently asked questions on this blog!
Comparing HML, Snippets, and Dynamic Content
The bottom line is that people don’t want to go through a million forms. They want personalized content and they want it now.
This begs the question, when is it appropriate to use each Pardot personalization feature? If you have used Pardot for a while , you know that Pardot allows you to do similar things in several different ways. To help the decision making process, we put together this chart to help you decide when to choose each of these options.
Dynamic Content – Used for personalizing different variations of content blocks based on prospect record information
Handlebar Mail Language (HML) – Used as values from a prospect record for personalizing content across assets
Snippets – Used to personalize assets with static content.
Pardot Lightning required
No
No
Yes
Available in All Pardot Tiers
No
Yes
Yes
Created/updated in Salesforce
No
Yes
Yes
Association to a Salesforce campaign
No
No
Yes, or Business Unit
Created/Updated in Pardot
Yes
Yes
No
Limited by Pardot Tier
Yes, Plus tier or higher
No
No
Updated by changes to Pardot-Salesforce data
Yes
Yes
No
Allows HTML/CSS for customizing content
Yes
No
No
Used to personalize Pardot forms
Yes
Yes, content regions only
Yes, content regions only
Cross Business Unit Support
No
Yes
Yes
Example Use Cases for Pardot Personalization
Below are some scenarios you may find useful to differentiate between uses.
Scenario: You need to set up a completion action on a form that sends out an autoresponder email with specific content based on a picklist option for a field called “Area of Interest”. The picklist field on the form has four options. You don’t want to build multiple email templates. You are on the Plus edition of Pardot.
Solution: Dynamic Content shows specific content in relation to the data on the record of the prospect. This would allow you to use one email template but showcase different content based on which option the prospect chose while completing the form.
Scenario: You need to send a prospect an email receipt of the information they just submitted via a form or form handler to confirm their participation in your program. You are on the Growth edition of Pardot.
Solution: HML only shows what lies within the record of a prospect, nothing more, nothing less. You can customize the rows and order of the data in the email template to look however you want.
Scenario: Your team needs to be able to update and use a content block (with webinar information) across multiple Business Units. The information for this comes from the field marketing team and they do not have access to Pardot.
Solution: Snippets show information that is static that can be shared across different business units or locked down by campaigns. Snippets can be updated by Flows or manually by a person with the right permissions within Salesforce.
Personalization and delivering value are key to moving prospects quickly through the pipeline. Pardot provides you with a variety of features to allow you to leverage the data you already have in your CRM to your benefit.
Are you looking for ways to take your email marketing strategy to the next level with Pardot? With the guidance of our strategists, we can help you identify the fields which are and aren’t actively used by your team — it could be key to qualifying leads faster!
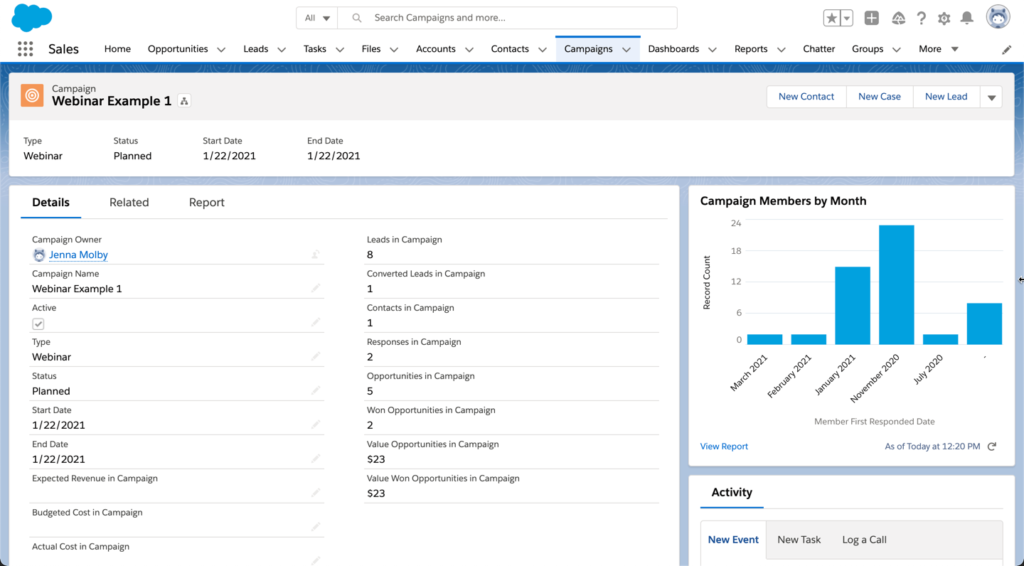
Did you know you can add report charts to your campaign page layout in Salesforce? Adding report charts will give you insight into a particular campaign’s performance without creating a separate report or leaving the campaign page.
These reports can show you how many campaign members were added, by month or by status, how many opportunities are influenced by the campaign by opportunity stage, etc. All this is made easy by customizing your campaign lightning record page.
Example
Here’s an example of a campaign that has a separate reports tab containing report charts.
This example has the report charts directly on the page instead of a new tab.
Step 1: Create the reports
The first step is to create the reports you want to add. There are two things to keep in mind when creating your reports:
Only reports with charts are available to add to campaign page layouts.
The reports must be saved within a public folder in order to add them to the page layout.
Example: Campaign members by month and status
When added to the page layout, this report will show a chart of all the campaign members (leads & contacts) by status and by month.
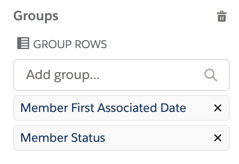
The report type is campaigns with campaign members, and the report is grouped by member first associated date and member status.
Example: Related opportunities by stage
When added to the page layout, this report will show a chart of all associated opportunities by opportunity stage.
The report type is campaigns with opportunties and the report is grouped by stage.
Step 2: Add the reports to the campaign page layout
Now that your reports are created, you can add them to the campaign page layout. Navigate to one of your Salesforce campaigns, click on the gear icon, and click on edit page. This will take you to the Lightning Page Builder.
Note: Editing the page will overwrite the existing page. You might want to create a new custom record page instead of overwriting an existing page.
Drag & drop the report chart component anywhere on the page.
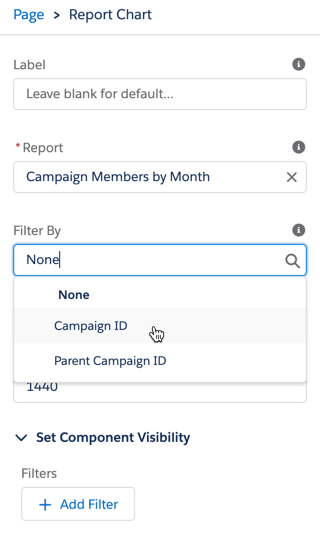
Select your report from the panel on the right. Add a filter for either campaign ID or parent campaign ID.
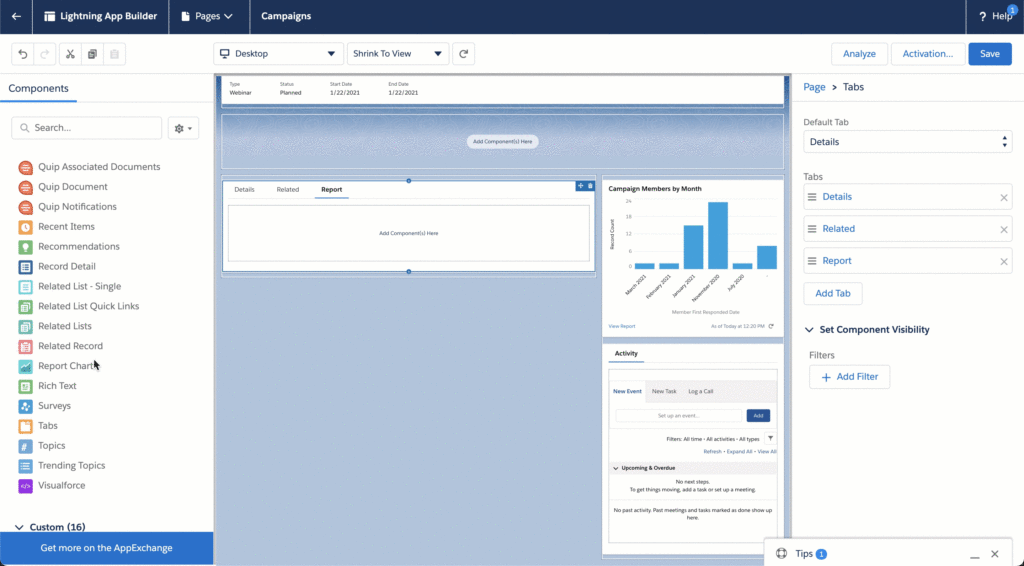
You can also add reports to a new tab within the page layout. To do this, click on the tab group, and click the add tab button. Click on the name of the new tab and select report from the menu.
Drag & drop the report chart element to the report tab to add your reports.
Save the Lightning Page and navigate to a campaign to see your reports in action!
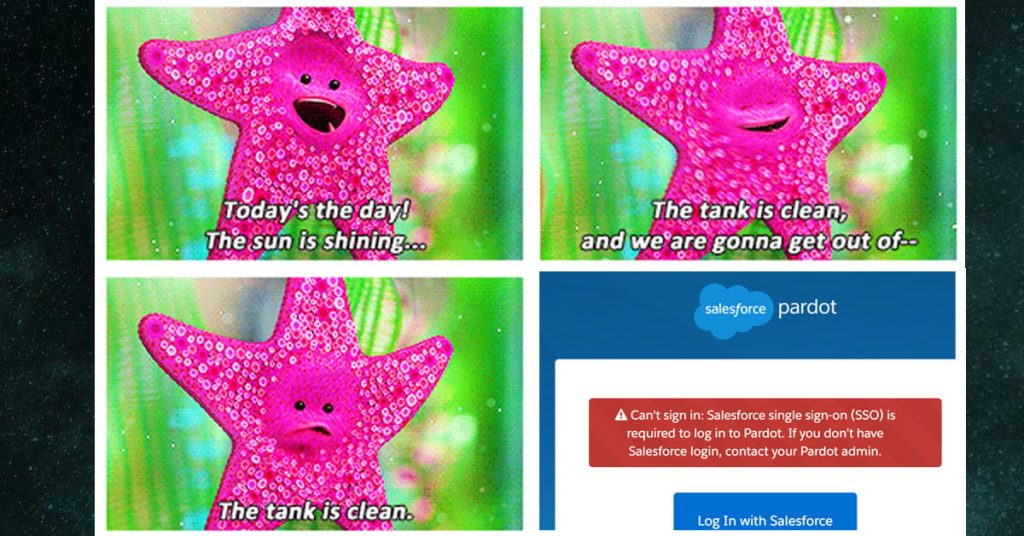
As Salesforce continues to rolls out Pardot SSO across all accounts, many Pardot users are now being greeted with the following error message when trying to login to Pardot:
“Can’t sign in: Salesforce single sign-on (SSO) is required to log in to Pardot. If you don’t have Salesforce login, contact your Pardot admin.”
What does this mean?
Back in June 2020, Salesforce announced they were discontinuing Pardot-Only Users & moving to SSO. Beginning on February 15, 2021 and coinciding with the Spring ’21 release, the Pardot user authentication system has been discontinued and all users will be required to use Salesforce single sign-on (SSO).
All Pardot users not enabled with Salesforce SSO by Spring ‘21 will lose the ability to log into Pardot until they are connected to a Salesforce user. This affects your users with Pardot-only access, your integrations that use the Pardot API, as well as the Pardot WordPress plugin.
How to fix it & get back into Pardot
Simply put, in order to get back into your Pardot org, you will need to go through the process to setup Pardot Single Sign On for both human users and API users. To do this, you will need to connect all Pardot users to Salesforce users, enable SSO and configure User Sync.
But wait, do I have to purchase Salesforce licenses? It Depends.
Salesforce provides 100 “Identity User” licenses that can be used to create Pardot-only Salesforce user records (those users not needing Salesforce access). If this number is not enough, additional licenses will need to be purchased.
Pardot user migration steps:
Identify Pardot only users
Identify users that are tied to an API integration. Set aside temporarily. These users need to be managed differently.
Identify users that do not have a Salesforce user record and create a record for them.
Map each Pardot user to the corresponding Salesforce user
Enable SSO for those users.
Update API users to be SSO compliant (steps 3-5) and update API Integrations to use SSO users
Enable Salesforce User Sync
Confirm users can access Pardot via their Salesforce credentials
We can help with setting up Pardot SSO
If you need help with getting Pardot SSO setup, we would love to review the Pardot User Migration guide with your team, discuss any nuances specific to your org, and develop a plan to minimize impact on your plans this year. Let’s Get Started
You might already be using UTM parameters to track your marketing campaigns with Google Analytics, but are you capturing that information when a prospect is created in Pardot? Capturing this data is critical to assess the value of your marketing campaign and is a lead management best practice.
What are UTM Parameters?
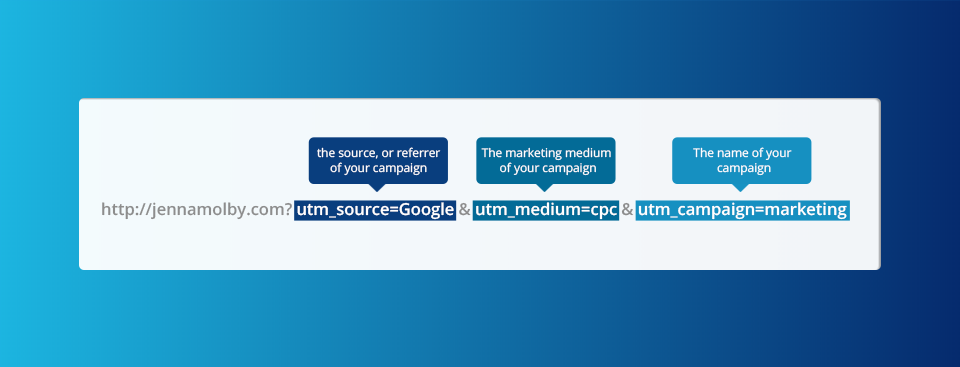
UTM parameters are tags you add to a URL. Marketers use this to track the traffic from a variety of sources such as email, social media, banner ads, etc. The tags can be sent back to Google Analytics and tracked, which can gauge the effectiveness of campaigns and identify the best ways to drive more visitors to your website.
Capturing UTM parameters in Pardot: Overview
There are two main ways to capture UTMs in Pardot. The first way is to enable the Google Analytics Connector. The connector simplifies the flow of Google Analytics data between Pardot and Salesforce. It collects data from five Google Analytics tags: campaign name, medium, source, content, and term automatically. Here are some great resources to help you get started with the Google Analytics Connector:
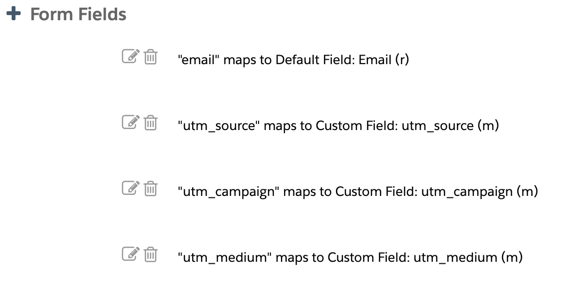
The second way to capture UTMs in Pardot is through hidden form fields. This method involves adding fields for campaign name, medium, source and content to each of your forms and then using a tracked URL within your marketing campaigns.
How are you embedding your form?
Select one of the options below to view the step-by-step guide.
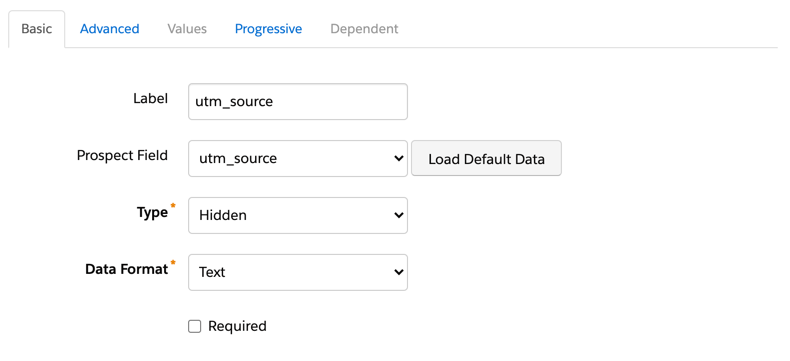
If you have an embedded form on a Pardot landing page, capturing URL parameters is easy. Add your UTM fields to your Pardot form as hidden fields with the following settings:
Not required
Type: hidden
Date format: Text
Always display even if previously completed (checked)
Maintain the initial value upon subsequent form submissions (checked)*
* checking this will ensure that the UTM parameters will not be overwritten (first touch only).
Creating URLs
In order for Pardot to automatically populate your hidden fields with the correct data, the Field ID and the parameter name in the URL MUST match. For example, if your Pardot field name is “medium” and your URL uses utm_medium, the fields will not automatically populate. Note: This is case-sensitve.
The IDs for your form fields are field ID or API name. This can be found in Administration > Prospect Fields > Custom Fields.
If your field names follow the standard naming convention recommended by Google, you can use this Campaign URL Builder to build your URLs. If your field names are different, you can create a Google Sheet to generate URLs. Here’s a Google Sheet Template to get you started. Simply update Column G with your field names.
Alternatively, you can use the script outlined in this post to have full control over the parameter names and field names.
On a web page (iFrame)
Capture URL parameters on a web page with a Pardot embedded form (iFrame)
Capturing URL parameters via an iFrame is similar to using a Pardot form on a landing page. The only difference is that you need to pass the URL parameters from the parent page (your webpage) to the embedded (iFrame) form.
Add your UTM fields to your Pardot form as hidden fields with the following settings:
Not required
Type: hidden
Date format: Text
Always display even if previously completed (checked)
Maintain the initial value upon subsequent form submissions (checked)*
* checking this will ensure that the UTM parameters will not be overwritten (first touch only).
Add the form to your web page
Grab the iFrame script for your Pardot form. Since we will be adding some JavaScript to the web page in order to pass the parameters to the iFrame, we need to give the iFrame an ID. Here’s what my iFrame code looks like after adding the ID called “myiframe”.
If you used a different ID for your iFrame, other than “myiframe”, you will need to update the ID within the JavaScript.
Creating URLs
In order for Pardot to automatically populate your hidden fields with the correct data, the Field ID and the parameter name in the URL MUST match. For example, if your Pardot field name is “medium” and your URL uses utm_medium, the fields will not automatically populate. Note: This is case-sensitve.
The IDs for your form fields are field ID or API name. This can be found in Administration > Prospect Fields > Custom Fields.
If your field names follow the standard naming convention recommended by Google, you can use this Campaign URL Builder to build your URLs. If your field names are different, you can create a Google Sheet to generate URLs. Here’s a Google Sheet Template to get you started. Simply update Column G with your field names.
Alternatively, you can use the script outlined in this post to have full control over the parameter names and field names.
A Pardot form handler
Capture URL parameters using a Pardot form handler
Add your UTM fields to you Pardot form handler and add them to your form as hidden fields.
Add some JavaScript code to your landing page or web page
Place this piece of code on your landing page or web page. This will parse the URL parameters and put the values into the hidden fields on your form.
<script type="text/javascript">
// Parse the URL
function getParameterByName(name) {
    name = name.replace(/[\[]/, "\\[").replace(/[\]]/, "\\]");
    var regex = new RegExp("[\\?&]" + name + "=([^&#]*)"),
        results = regex.exec(location.search);
    return results === null ? "" : decodeURIComponent(results[1].replace(/\+/g, " "));
}
// Give the URL parameters variable names
var source = getParameterByName('utm_source');
var medium = getParameterByName('utm_medium');
var campaign = getParameterByName('utm_campaign');

// Put the variable names into the hidden fields in the form.
document.getElementsByName("utm_source").value = source;
document.getElementsByName("utm_medium").value = medium;
document.getElementsByName("utm_campaign").value = campaign;
</script>
Flex fields are custom fields that can be used repeatedly to limit the number of one-time-only fields within Pardot and Salesforce. They contain data that is required temporarily to execute a specific event or campaign. Once the data is no longer needed, the fields can be reset to blank using an Engagement Program or Automation Rule.
How to Use Flex Fields in Pardot
Since these are meant to be temporary fields, I recommend creating these fields only in Pardot. I use custom fields named ‘Flex Field 1’, ‘Flex Field 2’, ‘Flex Field 3’, etc.
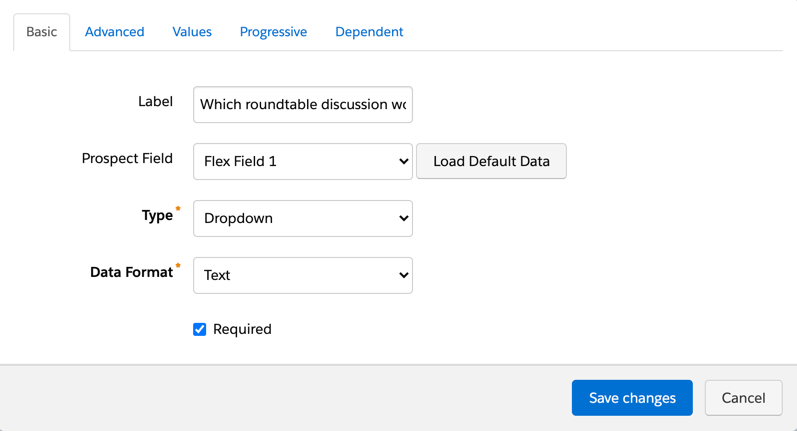
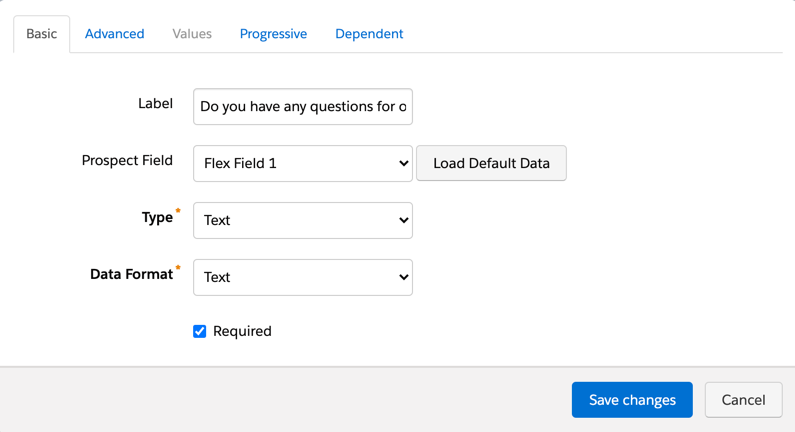
Once the fields are created, you can use them in your forms. Update the label for the field to include the question(s) or response(s) you want to collect.
Clearing the field data
Once your event or campaign is finished and you have exported the data or added these prospects to a list, you can clear out the values for the fields by running an Engagement Program or an Automation Rule.
Using an Automation Rule
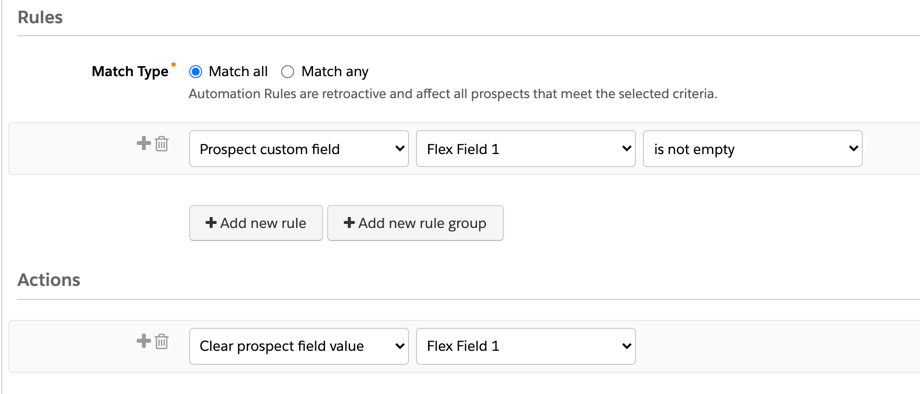
To clear the values for your flex field using an Automation Rule, select clear prospect field value as the action and select your flex field from the dropdown
Using an Engagement Program
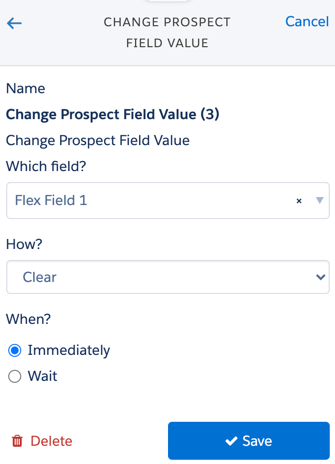
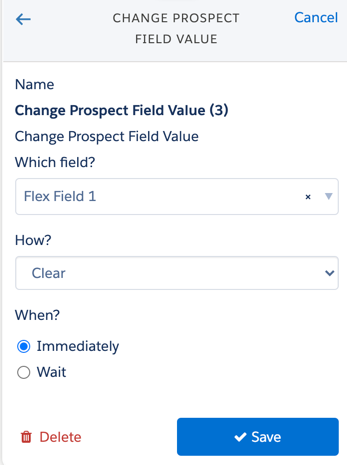
To clear the values for your flex field using an Engagement Program, select the change prospect field valueaction and set the value to clear.
Let’s take a look at some examples…
Now that you know how to create flex fields, let’s take a look at how they can be used.
For an event
Let’s say you are running an event where attendees need to register for a specific roundtable or session. You can use a flex field within your form to capture what session they would like to attend. Based on the response, you can add the prospects to a list and then set the flex field value back to NULL to use again in the future.
The flex field is added to the form with a dropdown of all the available sessions.
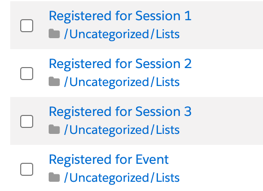
Lists are set up to track registrations for each one of the sessions. Note: these are NOT dynamic lists. since we will be clearing out the data for the flex fields.
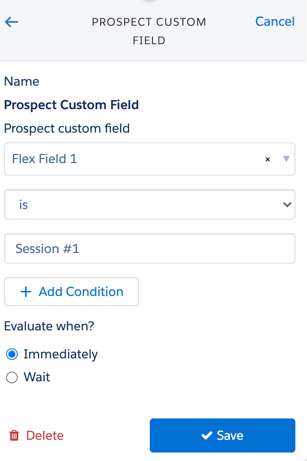
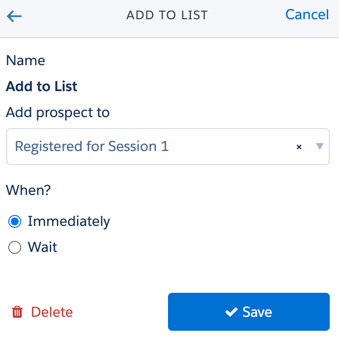
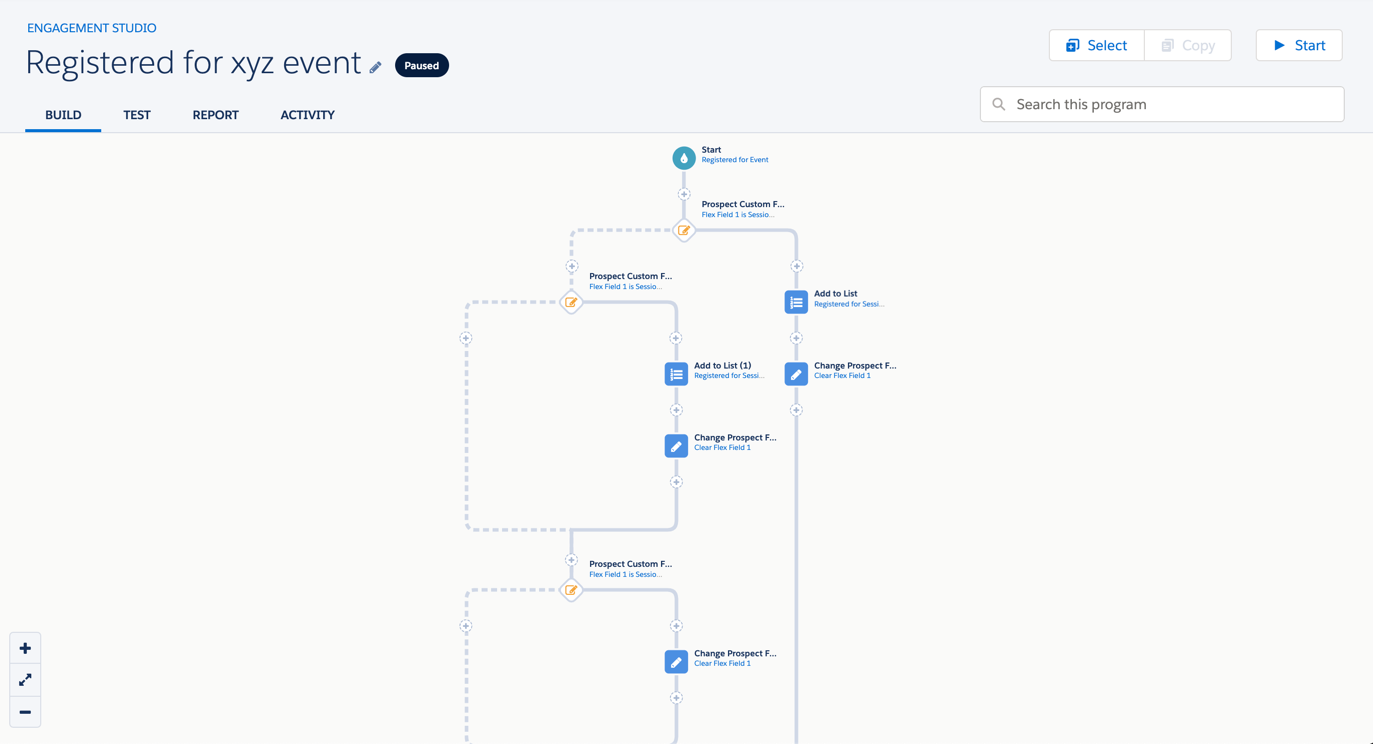
An Engagement Program is set up to add prospects to each of the lists based on their selected session. Once the prospect is added to the list, the value for the flex field is set to NULL.
Once the prospects have run through the Engagement Program, they should be added to the list for the session, and the field value for the flex field should be empty.
For a webinar
Another example is to use a flex field to allow prospects to submit a questionw when registering for a webinar.
The flex field can be added to the webinar registration form.
Once the webinar is over, you can run an automation rule to set the flex field value back to NULL.
Other use cases
These are just two examples of how to use flex fields in Pardot, but there are endless use cases. Get creative and make sure to do plenty of testing.
Tips
Keep track of which flex fields are currently being used. This can be in a Google Sheet, within Slack, etc.
Not sure where the fields are being used? Check the usage table in the prospect field settings.
You don’t have to clear the data right away. You can wait until the event or campaign is over and run an Automation Rule to clear out the values.
If you find that you frequently use these fields, you can create more and keep it specific to the event type. (Ex. Webinar Flex Field 1, Webinar Flex Field 2, etc..)