It’s that time – Salesforce Winter ‘24 release notes are out! Here are the key Salesforce platform features marketers and Salesforce admins should know about.
20 Platform Highlights from the Salesforce Winter ‘24 Release
Highlight#1: Migrate to Hyperforce with Hyperforce Assistant (Generally Available)
If you haven’t heard, Salesforce is undergoing a modernization of their infrastructure with Hyperforce, and undertaking steps to move customer orgs to Hyperforce. To help prepare for the migration, Salesforce has made their Hyperforce Assistant generally available, and updated with improved features to help orgs get ready for the move.
If you’re starting your journey to make the jump to Hyperforce we have more details here: Prepare Your Salesforce Org for the Migration to Hyperforce
Permissions & Record Access
Highlight#2: Report on Custom Permission Set and Permission Set Group Assignments
This is the first of many ideas that were delivered in this release. With this update you can create a report type that you can use to report on which users are assigned specific custom permission sets or permission set groups, or look at all of the assignments by user. This is just for custom permission sets and permission set groups, no word yet on when this would be available for standard permission sets and standard permission set groups.
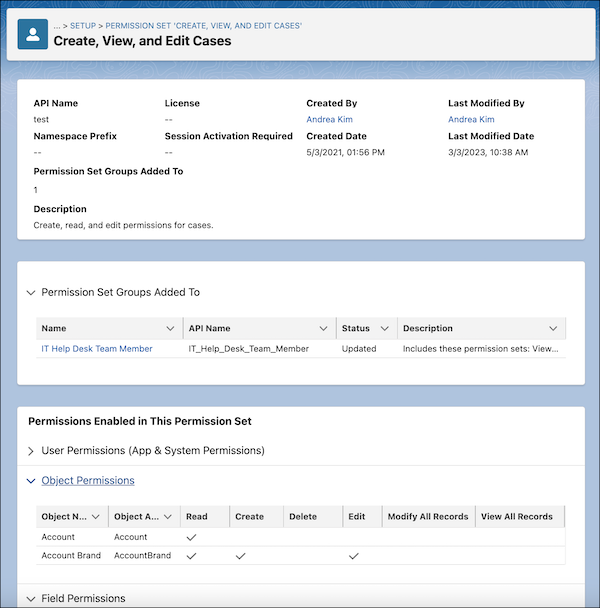
Highlight #3 What’s Enabled in a Permission Set More Easily (Beta)
Admins who have spent so much time trying to uncover the permissions included in a permission set are going to love this. Another idea exchange request, it’s now easier than ever to see the enabled object, user, and field permissions on one page. You can even see the permission set groups a permission set is included in!
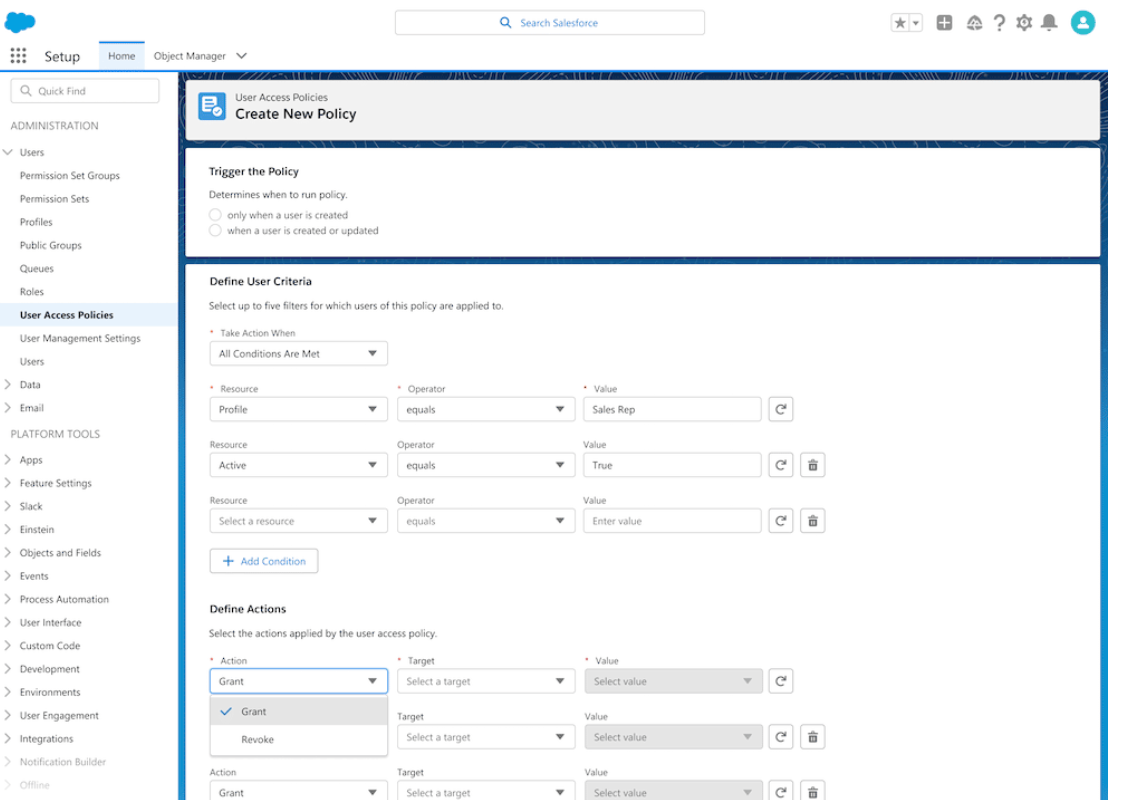
Highlight #4 User Access Policy Filters Improved (Beta)
Until now you could create User Access Policies referencing only one permission set, permission set group, or managed package license in your user access policy filters. With this update you can reference a total of three, giving you more flexibility to define your policy criteria.
What to know more about User Access Policies? Jason Ventura covered this in the post Salesforce Summer ’23: User Access Management Updates
Highlight #5 Report on Who Has Access to Accounts from Manual Shares and Account Teams
Admins and users will have a new way to understand better who has Read or Edit Access to an Account through Account Teams or Manual Sharing. By creating a report type it’s now possible to see which users and groups have access. Another idea was delivered!
Highlight #6 Report on Public Group Members
Another helpful report that’s going to save clicks! With this new custom report type, Admins will be able to more easily view which users, roles or groups are members of public groups.
Automation Updates
Highlight #7 Reactive Components now GA
With the general release of reactive flow screen components, admins will able to build more interactive single page applications, creating a more dynamic user experience.
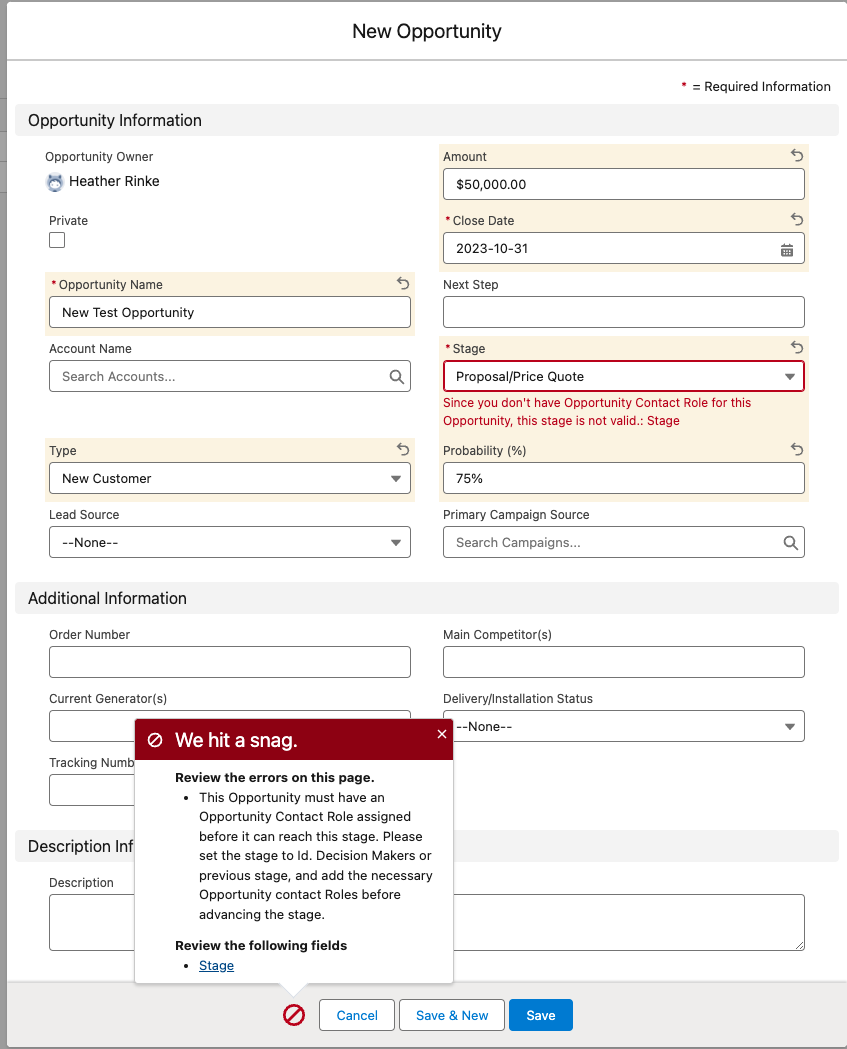
Highlight #8 Create Custom Error Messages in Record-Triggered Flows
Another Idea Exchange idea delivered! Flownatics everywhere will be cheering for this. Now admins can customize the error that users see on record triggered flows. You can control one or more messages that will appear, what the messages will be, and when you want them to appear. You can even set them to appear as a window on the record page, or as an inline error on a specific field, similar to validation rules.
In the example below, you can see the Custom Error message element where I’ve configured 2 messages to appear if an opportunity has been created or updated and the stage is advanced and no Opportunity Contact Roles are found. One error will appear in a window on the record page, and the other will appear inline on the Stage field.
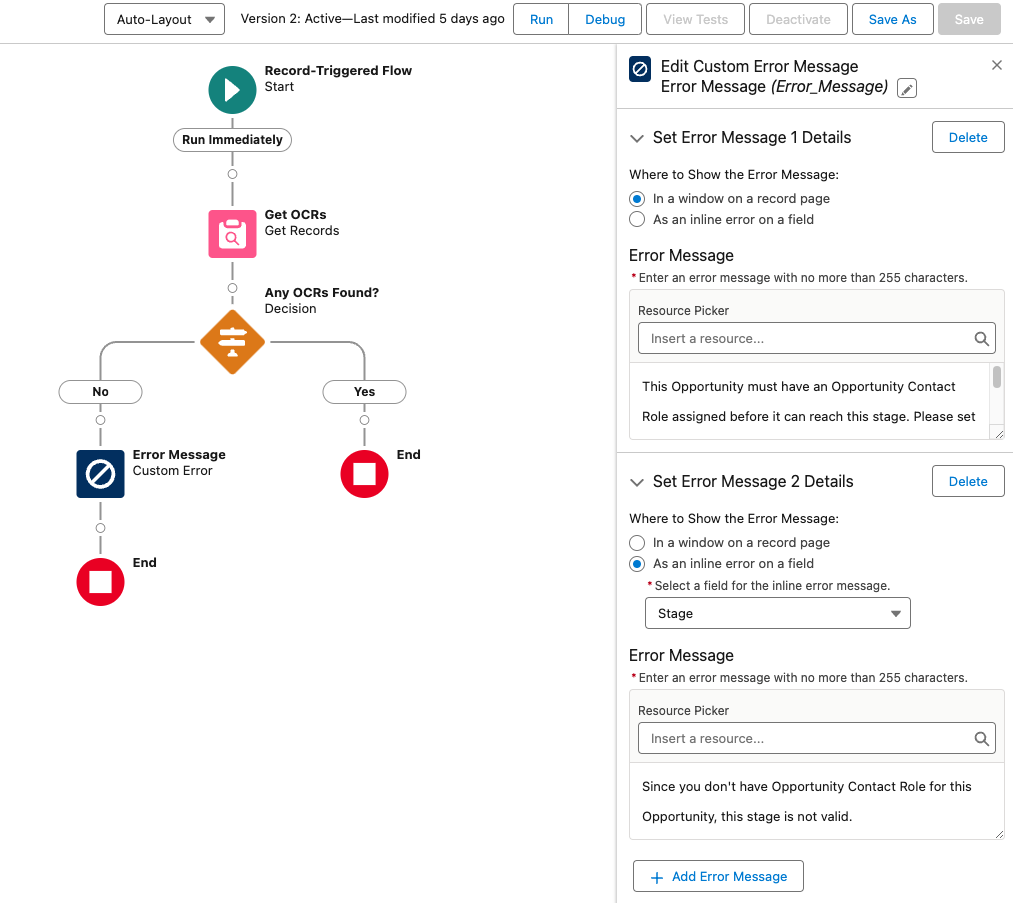
When active, the flow will display the configured error messages when the criteria has been met:
Highlight #9 Transform Your Data in Flows (Beta)
This is a new element for flow that lets users map data from a data source to a new target data destination. This can follow the HTTP Callout action that grabs data from an external location, and transforms the data before saving to a Salesforce object. Another use can be to transform field values while mapping from one object to another.
Highlight #10 Save a Flow Without Configuring Some Elements
How many times have you started to build a flow and have partially added elements, only to find you have to exit an element before fully completing the configuration. In the past you had to lose the partial configuration already completed, or add dummy data just to get the element to save, and remember to go back and update later. With this new feature, you now exit Start and Create Record elements before fully configuring them. According to Salesforce this is the “first steps to support saving a draft of a flow at any point in the building process”.
Highlight #11 Use Wait Elements in More Types of Flows
Marketers would be familiar with the ability to add a wait step in a customer journey (Marketing Cloud) or Engagement Studio Program (Account Engagement). The new Wait for Amount of Time and Wait Until Date elements are now available in schedule-triggered flows, autolaunched flows, and orchestrations. This adds more flexibility to being able to pause a flow interview for different use cases. The previous Pause element has also been renamed ‘Wait with Conditions’ for clarity.
Highlight #12 Flow Builder user interface moved to right panel
The element properties are now displayed in a panel on the right side of the screen instead of as a popup. So far this appears to be working for Start, Get, Create, Update, Transform (Beta), and Delete.
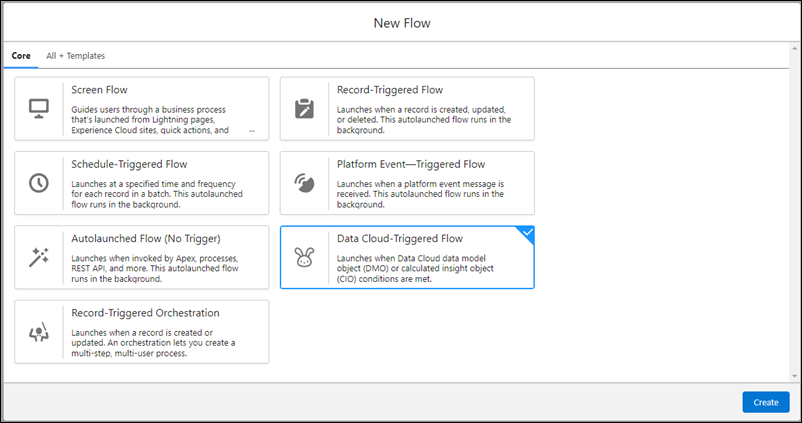
Highlight #13 Data Cloud Triggered Flows
For orgs with access to Data Cloud, you will be able to create new Data Cloud-triggered flows from the new Flow screen. After selecting Data Cloud-triggered flow, you will be prompted to configure your Start conditions specific to your Data Cloud object.
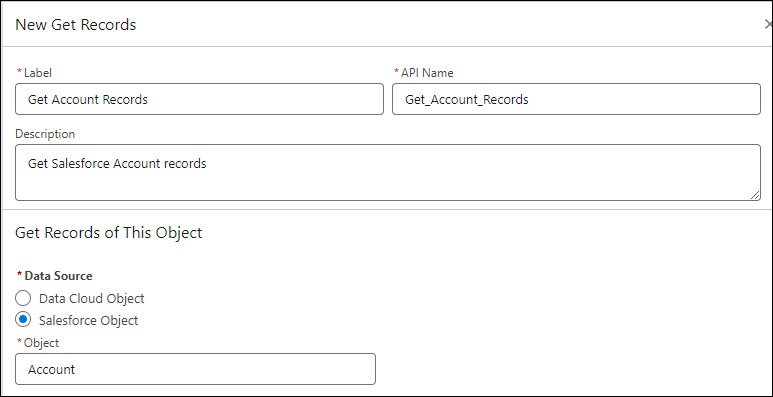
Highlight #14 Get Data Cloud Records More Easily in Flow Builder
Another Data Cloud related enhancement, admins can more easily choose between Salesforce objects and Data Cloud objects. Based on the choice more options are provided to specify the criteria.
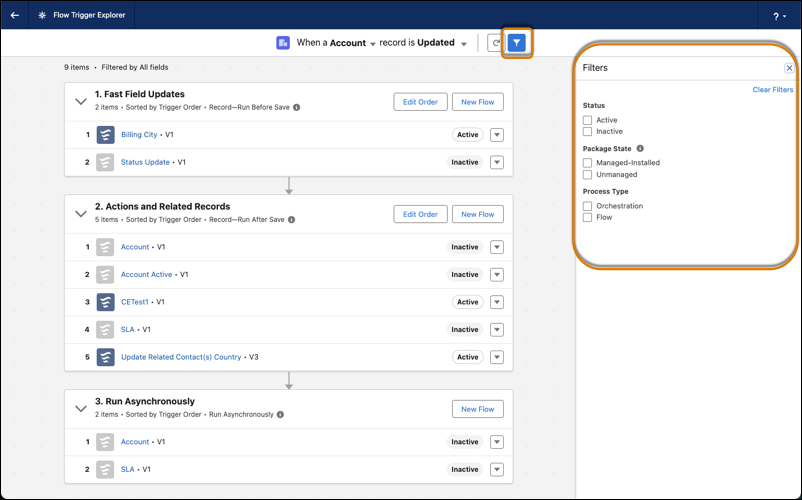
Highlight #15 Use Filters to Find Record-Triggered Flows Quickly
Orgs with increasing numbers of flows will benefit from this handy additional filtering capability that lets you zero in on the flows you’re looking for. You can now filter on flows by Status, Package State or Process Type.
Highlight #16 Migrate to Flow Updates
In the meantime, admins still working on moving legacy automations like workflow rules and process builder to flow may appreciate that the Migrate to Flow tool has been updated to accommodate more use cases:
- Migrate Workflow Rules with Pending Time-Based Actions to Flow
- Migrate Process Builder Processes with Custom Metadata in Formulas to Flows
If you’re in the process of migrating your workflow rules and process builders to flow, have you checked out our guide and tools to help with that migration? Check out Automation Facelift: Migrate Workflow Rules and Process Builder to Salesforce Flow
Cool Admin Updates
Highlight #17 Visualize Lightning Reports with Summary Formulas as You Create Them
I don’t know about you but I still struggle with using PARENTGROUPVAL or PREVGROUPVAL. In Classic there was a great feature that helped build the summary with these functions, and showed how they would work in your report. Now this feature is available in Lightning!
Highlight #18 Select Who Has Access To a Sandbox
When creating or refreshing a sandbox for your team to build or test a new configuration any active user in production could access the sandbox. Now, admins can limit access to specific users by adding them to a group. This then freezes all other users in that sandbox, so they can’t access it (unless you unfreeze them). Only the users in the group will be unfrozen automatically. And the “.invalid” won’t be added to their email addresses either. Bonus! Now, apparently this may not be immediately available when orgs are upgraded to WInter ’24. According to the release notes, this will be available “in production orgs when they’re upgraded to the Winter ’24 release starting in mid-October 2023.”
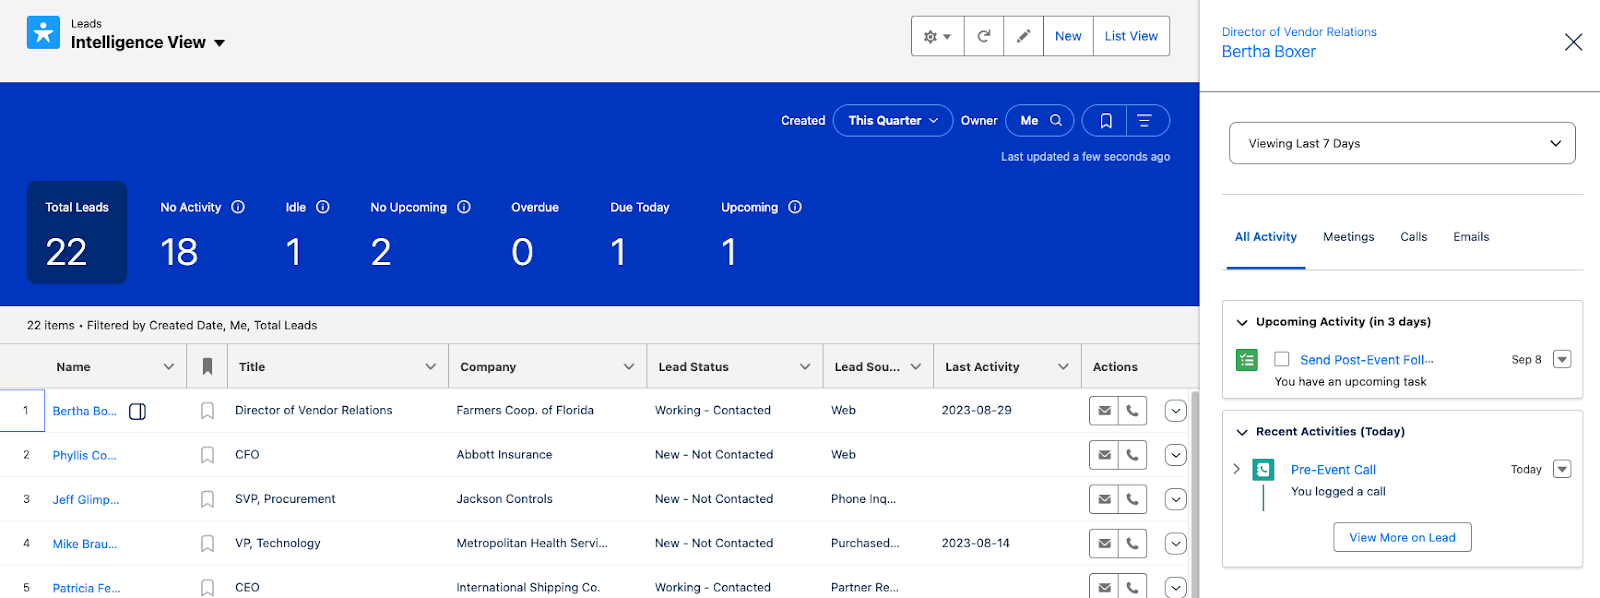
Highlight #19 & 20 Lead & Contact Intelligence VIews
Last but not least…. As part of Winter ’24 release, orgs will now have access to a more actionable lead and contact lists that can help users segment their leads, and take action to build their pipe and grow customer relationships. In one page you can create segments and view key metrics, prioritize important records, view activity history of individual records and make calls or send emails without leaving the list.
Other Notable Updates
- Mass Quick Actions on Related Lists (Generally Available)
- Dynamic Forms Experience on Mobile (Generally Available)
- Send Salesforce Data to an External Server Without Code via HTTP Callout (Generally Available) – also includes PUT, PATCH, and DELETE methods
- View Slack Channel Recipients in Subscription Reports
- Show Salesblazer Content in the Guidance Center
- Activities captured by EAC now reportable
- Salesforce Maps Lite to View Customers and Prospects
- Transfer Ownership of Lightning Dashboards (Beta)
Which Salesforce Winter ‘24 features are you excited about? Let us know in the comments!