As a marketing administrator within Salesforce, it is essential to understand your audiences and create a winning audience segmentation strategy. Without segmenting your audience, you will target the same group of people each time. That can lead to increasing opt-outs, spam, and a direct impact on your sending reputation.
The goal of sending mass emails is to target the right audience so you provide value to the people who are likely to interact with your brand. And that’s exactly what audience segmentation accomplishes.
Use these strategies to segment your audience so you can deliver the right marketing messages to the right groups of people every time — no matter if you’re a Salesforce Marketing Cloud Engagement or Account Engagement user.
Audience Segmentation Strategies for Marketers Who Use Salesforce
Whether you are a Marketing Cloud Engagement (A.K.A. SFMC) Administrator or an Account Engagement (Pardot) Administrator, fundamental principles apply across the board when it comes to audience segmentation.
Below are tactics you can use within Salesforce Marketing Cloud Engagement and Account Engagement.
Who is actively engaging with your brand?
Use web tracking, social, and ads to learn how visitors interact with your brand. You can compile a group of individuals to target based on clicks, form completions, and pages visited.
For example, if you have a visitor who clicks an ad on social media and is taken to your website, where they download the content that you promised them with your ad, you can make the assumption that the visitor is interested in that product.
What preferences do your customers share?
Let’s say you are sending an invitation for an upcoming webinar. Segment your target audience based on previous ad clicks, webinar attendees, or downloaded resources. By building an audience list based on shared preferences, you will see an increase in webinar registrations and attendance.
For example, look at the specific campaigns you’ve launched in the past. Think about how you can categorize the products or services that were the main focus. Maybe you had a marketing campaign to drive awareness about a product that would result in a one-time and low-cost purchase. And you had another campaign advertising a product that requires a high-cost ongoing purchase. The people who engaged with the high-cost product but didn’t necessarily purchase the item may be good candidates for a segmentation list that includes people with bigger budgets to potentially spend.
Who are you actively targeting to attain as a new customer?
If you could create a map of ideal customers, what attributes would they share? Is it a specific set of companies? Perhaps, it’s a specific product or service you can provide them?
Decide on those attributes and build your segmentation strategy and buyer personas. Target this audience and help sales close the deals on your ideal customer.
Which individuals have expressly subscribed to what topics?
Take advantage of your Email Preference Center. You can create targeted campaigns that run on an ongoing basis and continue to nurture your target audience based on their expressed interests.
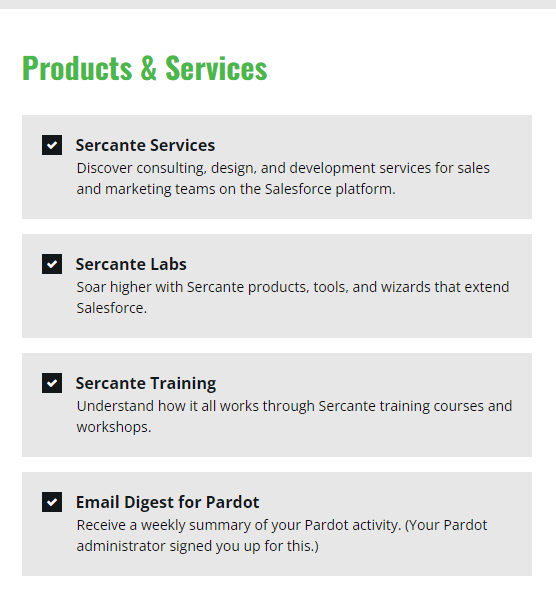
Ensure that your Email Preference Center offers a variety of targets, including product interests and types of communication. For example, the Sercante Email Preference Center allows email subscribers to sign up for only emails related to the services that interest them, like Salesforce consulting, integrations, or training.
Suppress individuals based on a subset of criteria
Counterintuitive to who you want to target with your email marketing, who do you want to ignore? Considering who you don’t want to receive a message from is as important as who should receive it. There will likely be a default suppression list, including competitors, employees, spam, etc., but you may also want to create specific one-off suppression lists too, such as email frequency or inactive customers.
Account Engagement (Pardot) Audience Segmentation Best Practices
Now that you have a few ideas on strategy, let’s talk about building segmentation within Marketing Cloud Account Engagement (Pardot) . Let’s review the list creation options and the different ways to add Prospects. Keep in mind, there may be times when you use multiple list types for a single send.
Static Prospect Lists
Static lists are controlled by you, the administrator. You set the rules and criteria for who joins and comes off the list. There are several ways to add to a static list, both manual and automated.
Imports
The most common way for building a static list is via prospect imports. When importing, you have the option to import via CRM ID or Email. If the list has existing prospects, you want to import via CRM ID. If they are brand new prospects, use the import via email option.
Within the import wizard, you will be given the option to add to a list via an existing list or by creating a new list. Once complete, review the import report for the total number of prospects created or updated.
Table Actions
Adding a subset of prospects that already exist within Pardot can be done via Table Actions.
To add a subset using Table Actions, follow these steps:
- Navigate to your prospect table.
- Set your filters, such as view and creation time frame.
- Check the boxes of those you want to add to the static list.
- Use the table action at the bottom of the table and “Add to List.”
Public Lists
Public Lists can be created as dynamic or static, but most default to static and are controlled by the Email Preference Center. These lists are subscribed to directly by the Prospect. Individual Prospects are able to subscribe and unsubscribe as they see fit based on their preferences.
Completion Actions
The “Add to List” completion action exists on most Pardot assets, including forms, form handlers, files, custom redirects, emails, and page actions. Completion Actions include both standard and conditional and allow you to set specific parameters when adding to a list.
Automation Rules
An automation rule is criteria-based. You can set multiple criteria pertaining to a Prospect by using “Match All” and/or “Match Any” statements. Based on this criteria, you then set an action, such as “Add to list,” which will populate a static list.
The good thing about using an automation rule to populate your static lists is that they are retroactive, so they will collect past and present matches and take action on them.
Dynamic Prospect Lists
Similar to automation rules, dynamic lists are criteria-based. Unlike static lists, these are outside of your control.
Once you set the criteria, the list will automatically add or remove prospects based on that criteria. These lists cannot be manually manipulated.
Campaign Membership
While there are several settings and criteria you can use to create dynamic lists, one of the most popular strategies is to build lists based upon campaign membership. This is especially beneficial when collaborating with sales teams.
If your sales team is adding Leads and Contacts to Salesforce Campaigns, perhaps based on a recent trade show, you can build a dynamic list in Pardot based on that campaign membership.
Marketing Cloud Engagement Segmentation Best Practices
Lastly, let’s look at how to best create segments in Marketing Cloud Engagement. Subscriber data can come from many different sources into Marketing Cloud and can be stored in two ways:
- Lists
- Data Extensions
Lists
A List is a collection of your subscribers. Lists are best used when you have a small dataset (500,000 or fewer subscribers) that you need to manage quickly and efficiently.
Lists share a format with your All Subscribers table and typically include Email Address, Subscriber Key, Status and any profile attributes you have created in your account.
Creating a List
To create a List:
- Navigate to the Subscribers tab within Email Studio.
- Within the My Lists folder structure, you can click ‘Create’ at the top right of the page to create a new List, assigning a name, external key, description, and placing the list in any folder you have created.
Once the list is created, it can be populated by manual or automated import.
Groups
A Group is a filtered list. Creating a Group allows you to build a subset of subscribers from a list based on rules or by splitting list subscribers by count or percentage of the total list being filtered.
The rules used to build a Group can be saved as a Data Filter, which can be used to automate the process to refresh membership in your group.
Creating a Group
To create a Group:
- Navigate to the Subscribers tab within Email Studio.
- Within the My Groups folder structure, you can click ‘Create’ at the top right of the page to create a new group.
- Select whether the group you are creating is a Filtered Group or Random Group, then select the source List.
- When creating a Filtered Group, drag any attributes or measures from the left side panel to the canvas and define the filter criteria.
- To create a Random Group, after selecting Random Group and your source list, click ‘Add Group’ to add as many random splits as needed to get the desired number of random segments.
- Once your filters or splits have been properly configured, click ‘Save & Build’ to create and populate your groups.
Once created, unless automated using a data filter, Groups need to be refreshed manually to be up-to-date.
Data Extensions
Data Extensions are more complex than lists and offer greater flexibility in managing contact data. While lists can only contain Subscriber information, Data Extensions are more flexible and can contain relational data.
Data Extensions data can be filtered in a similar fashion to Groups, and can also be combined with or filtered by data in other Data Extensions using SQL activities in Automation Studio.
Creating a Data Extension
Follow these steps to create a data extension:
- On the Subscribers tab in Email Studio, select a folder within the Data Extensions folder and then click ‘Create’ at the top right.
- Here, you select which type of Data Extension you want to create. Standard Data Extensions require you to define the fields of your Data Extension.
- After defining the name and data retention policy for your data extension, you must define the fields in the table, choosing from several data types, including Text, Date, Number, and Boolean. You can also set the length and default value for each field.
- Once you have defined all fields needed in your Data Extension, click ‘Create’ to finalize your Data Extension.
This Data Extension can now be populated by manual or automated file imports, API calls, SQL Query activities, or AMPScript.
Filtered and Random data extensions function in much the same way as Groups. Filtered Data Extensions require selection of a source Data Extension, then definition of any filter criteria. Random Data Extensions will produce a number of data extensions of randomly split rows based on the number of splits defined in the setup.
Go forth and segment your audience like a Salesforce marketing pro
Marketing Cloud offers multiple routes to implementing segmentation and audience targeting, regardless of platform. By taking into consideration your audience personas, incorporating key email marketing segmentation strategies, and applying the correct segmentation tools, you will be able to spread brand awareness swiftly.
Have any cool stories of marketing segmentation success? Tell us in the comments. Or reach out to the team at Sercante to get help with your audience segmentation strategy.
| Thank you to Zachary Norman for contributing to this post! |