Category

Release Notes

The Salesforce Winter ‘22 release introduced the ability to create a custom Lightning Web Component (LWC) for Lightning Email Content, and with Spring ‘22 we have the same ability for Pardot Lightning Email Templates.

With this new feature, you can create components for standard areas of emails, such as footers or headers. Or, use it for more complex items, such as displaying upcoming events or gathering prospect feedback.

In this post, we will present the code for 5 different LWCs, walking you through the most simple example and incrementing from there.

It is important to note that these custom components behave differently than Pardot Snippets or Dynamic Content. Unlike those features, when you change the LWC, existing Pardot Email Content and Templates do not get automatically updated. You need to go into each one to refresh them.

Because we all like analogies, think of the LWC as a rubber stamp and the Pardot Email Content & Template as paper. We can craft the stamp however we like (from simple to very complex), and once it is ready it will stamp the ink (HTML) onto the Email Content or Template. Changing the stamp does not change the ink already on the paper — you need to use the new/adjusted stamp and do it again.

Feel free to check out the code project in our github repository. If you aren’t already familiar with Salesforce Lightning Web Components, check out this Trailhead Quick Start.

Simple hard-coded HTML

This example is a pretty good one for anyone to get started. It demonstrates what is needed to at least have something work at the most basic level. Consider it the Hello World of Custom Email Components. In our github repository, this is the fixedAddress component.

This type of custom component is great to use for standard sections of your emails that do not change with each send. For example, the copyright notice, legal disclaimer, unsubscribe language etc.

At a minimum, our LWC will need 3 files:

  1. .html -> The HTML which will become rendered and stamped into the Email Content/Template
  2. .js -> Any coding required to support the component
  3. .js-meta.xml -> Salesforce Metadata, enabling this component to be used in Email Content/Templates

First, we will explore the Salesforce Metadata.

<?xml version="1.0" encoding="UTF-8"?>
<LightningComponentBundle xmlns="http://soap.sforce.com/2006/04/metadata">
    <apiVersion>52.0</apiVersion>
    <isExposed>true</isExposed>
    <masterLabel>Fixed Company Address</masterLabel>
    <targets>
        <target>lightningStatic__Email</target>
    </targets>
</LightningComponentBundle>

Some key notes:

  • isExposed (line 4) is needed to tell Salesforce that this component can be displayed in the Component Toolbox
  • masterLabel (line 5) is the name to display in the Component Toolbox
  • target = lightningStatic__Email is needed to tell Salesforce that this component can be used in the Lightning Email Builder. Other examples have a bunch of other targets, these are not needed and may result in your component showing up in unexpected places.

Next we will look at the JavaScript.

import { LightningElement } from 'lwc';

export default class FixedAddress extends LightningElement {}

Because our example is mostly hard-coded, there is nothing of value here. As we evolve, we’ll start seeing this get built out.

Finally, the HTML.

<template>
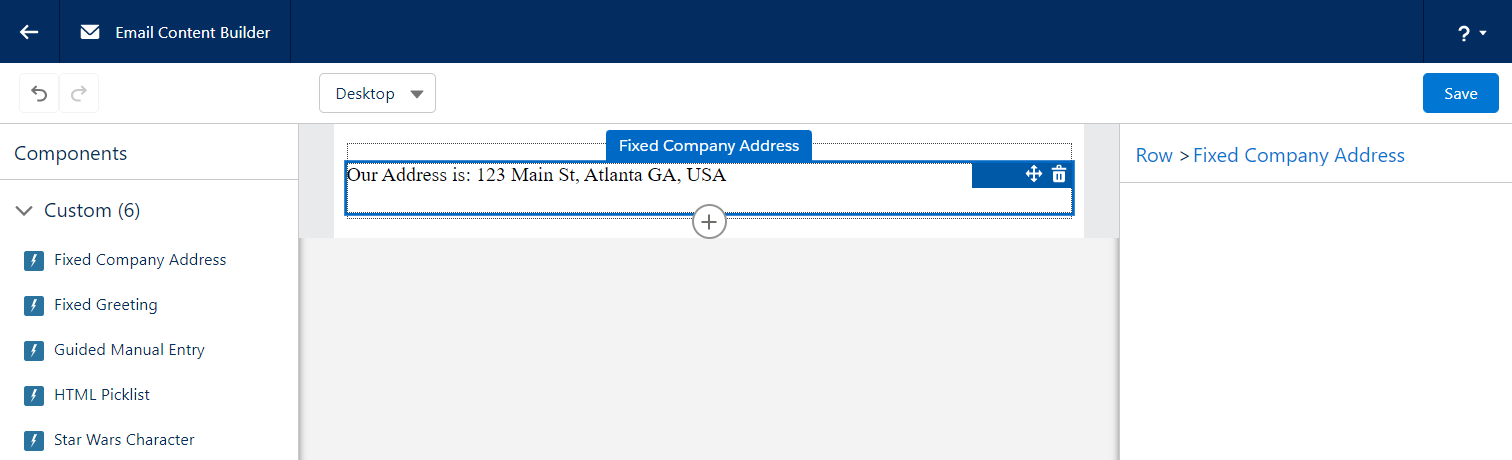
  <p>Our Address is: 123 Main St, Atlanta GA, USA</p>
</template>

Again, very simple. When the email HTML is rendered, everything in between the <template> tags will be written.

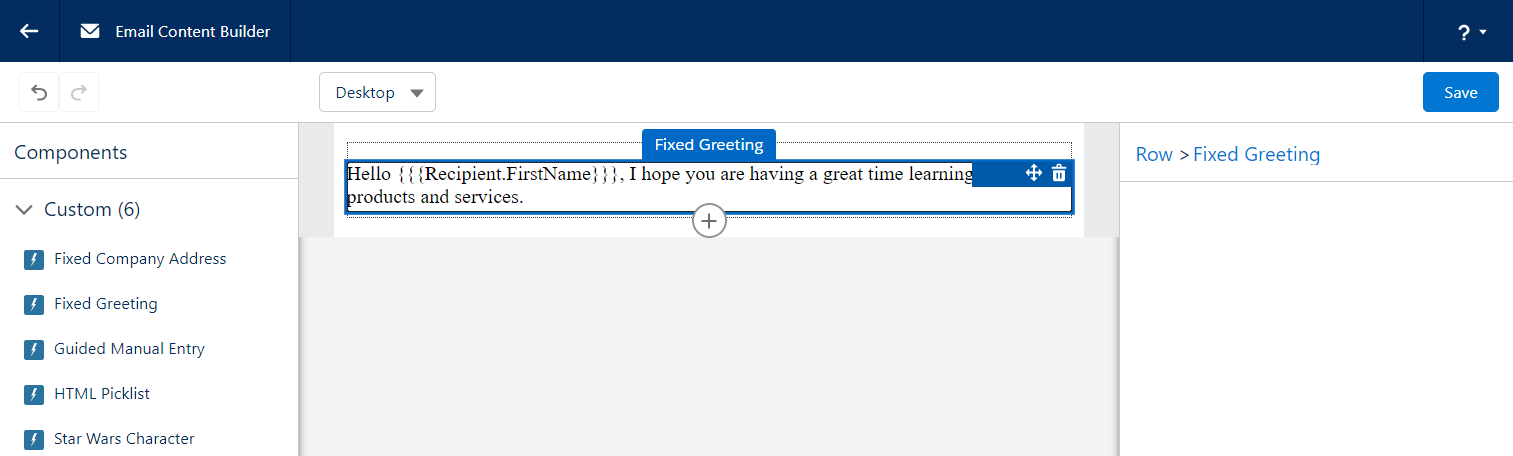
Here’s what it looks like in the builder. Once the component is added to the email, it is just simple text that is rendered.
Hard-coded HTML, which includes a merge field

This example is nearly identical to the previous one, so we will skip showing the JavaScript and the Metadata.  In our github repository, this is the fixedWithMergeFields component.

Straight to the HTML:

<template>
 <p>Hello {{{Recipient.FirstName&#125;&#125;&#125;, 
     I hope you are having a great time learning 
     about our products and services.</p>
</template>

What you might notice is how the merge tag has been written. Due to some very technical reasons, we can’t just use the usual {{{FIELD}}} syntax, we have to instead “escape” the closing curly brackets to make the LWC gods happy. This appears to only be the case when the merge tags are placed into the HTML file, as normal syntax can be used when the merge tags appear in the JavaScript.

Here’s what it looks like in the builder. Similar to the previous example, you get text that cannot be adjusted.
Allow someone creating an email to provide text

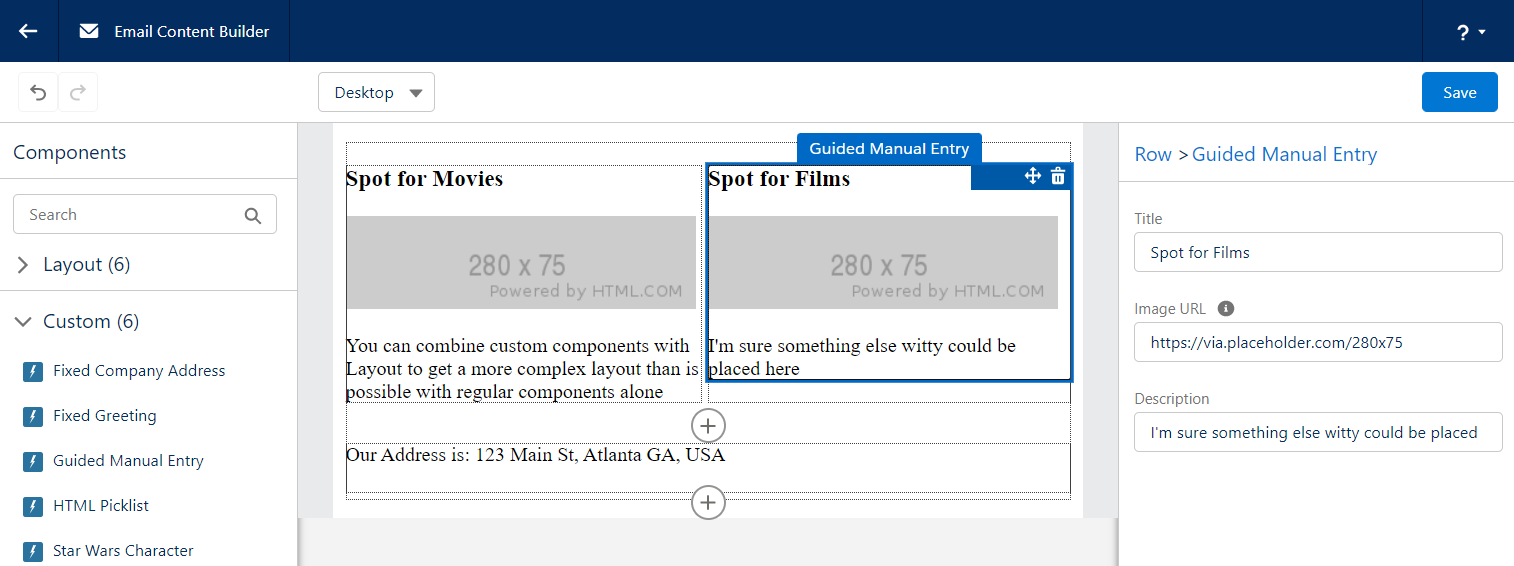
Now we are going to start allowing the user of a custom component to provide their own values. In our example we are going to start off a bit slow, simply allowing them to provide some text. In our github repository, this is the guidedManualEntry component.

We need to decide which “attributes” (or values) we want a user to provide. For this example, we will ask for a Title, an Image URL, and a Description. 

First, let’s take a look at our JavaScript. It needs to define these attributes.

import { LightningElement, api } from 'lwc';

export default class GuidedManualEntry extends LightningElement {
  @api
  title=""
  @api
  imageUrl=""
  @api
  description=""
}

You will note that each “attribute” has a variable name and the @api annotation. This annotation tells the LWC system that these can be referenced by the HTML file as well as our metadata file.

Next, we will tell our Metadata file to prompt the user to fill in these values.

<?xml version="1.0" encoding="UTF-8"?>
<LightningComponentBundle xmlns="http://soap.sforce.com/2006/04/metadata">
  ...
  <targetConfigs>
    <targetConfig targets="lightningStatic__Email">
      <property 
        label="Title"
        name="title"
        type="String"
        default="Title of Entry"
        required="false" />
      <property 
        label="Image URL" 
        name="imageUrl"
        type="String"
        placeholder="https://"
        description="Enter Image URL for this image. Be sure that it is a secure URL starting with https://"
        default="https://via.placeholder.com/575x150"
        required="false" />
      <property 
        label="Description"
        name="description"
        type="String"
        default="Description of Entry"
        required="false" />
    </targetConfig>
  </targetConfigs>
</LightningComponentBundle>

Ok, that’s a lot! What we are doing is giving our lightningStatic__Email target a list of properties to present on the right hand side of the Lightning Builder when someone wants to use our component.

Each property (to be presented) has a bunch of levers we can adjust to enable our user to give us what we need. Let’s break down the ones we use here:

  • label > basically a form field’s label
  • name > the name of the attribute in the LWC’s JS file
  • type > the type of input to present. For an email builder our current choices are:
    1. Boolean > displays a checkbox
    2. Integer > displays a text input allowing digits
    3. String > displays a text input allowing any character
    4. Color > displays a color selector
    5. HorizontalAlignment > displays a horizontal alignment selector
    6. VerticalAlignment > displays a vertical alignment selector
  • default > the default value to use when a new component is created
  • required > whether or not a value is required to save the component

The Salesforce LWC Developer documentation is a great resource for getting more details on all the abilities of the LWC metadata file.

Now that we are getting values from a user, we need to display them in the HTML!

<template>
  <h3>{title}</h3>
  <img src={imageUrl} />
  <p>{description}</p>
</template>

Here we are using LWC variables to place the values provided by the user. The syntax for this is the variable name (that has the @api annotation in your JavaScript file) wrapped by a single set of curly brackets. 

Now we can kind of understand why our HML syntax which includes 3 sets of curly brackets doesn’t really work, we can’t mix the two.

Here’s what this looks like in the builder. We are asking for the user to provide values within the section on the right hand side. 

You can combine your Custom Components with Layout components to build a nice consistent email.
Present a picklist of values, coming from APEX

Now things start to get interesting. We will tie our LWC to some APEX code, opening our world of options. Before we get started, it is important to know that you don’t have to use APEX to present a picklist of options, it can entirely be done in the Metadata. Sadly we can’t show every variation of example. In our github repository, this is the htmlPicklist component.

Before we get started, we want to give credit to the original author of this example to jrattanpal on github. We simply made some minor changes to enable it to be used as a learning example.

First, we need an APEX class which will provide the options that are available.

global class HTMLSources extends VisualEditor.DynamicPickList{
    
  global override VisualEditor.DataRow getDefaultValue(){
      VisualEditor.DataRow defaultValue = 
          new VisualEditor.DataRow('--Select--', '');
      return defaultValue;
  }

  global override VisualEditor.DynamicPickListRows getValues() {
      VisualEditor.DynamicPickListRows options = new VisualEditor.DynamicPickListRows();
      options.addRow(new VisualEditor.DataRow('HTML Option 1', '<h1>Sample 1, simple header</h1>'));
      options.addRow(new VisualEditor.DataRow('HTML Option 2', '<h3>Sample 2, smaller heading</h3>'));
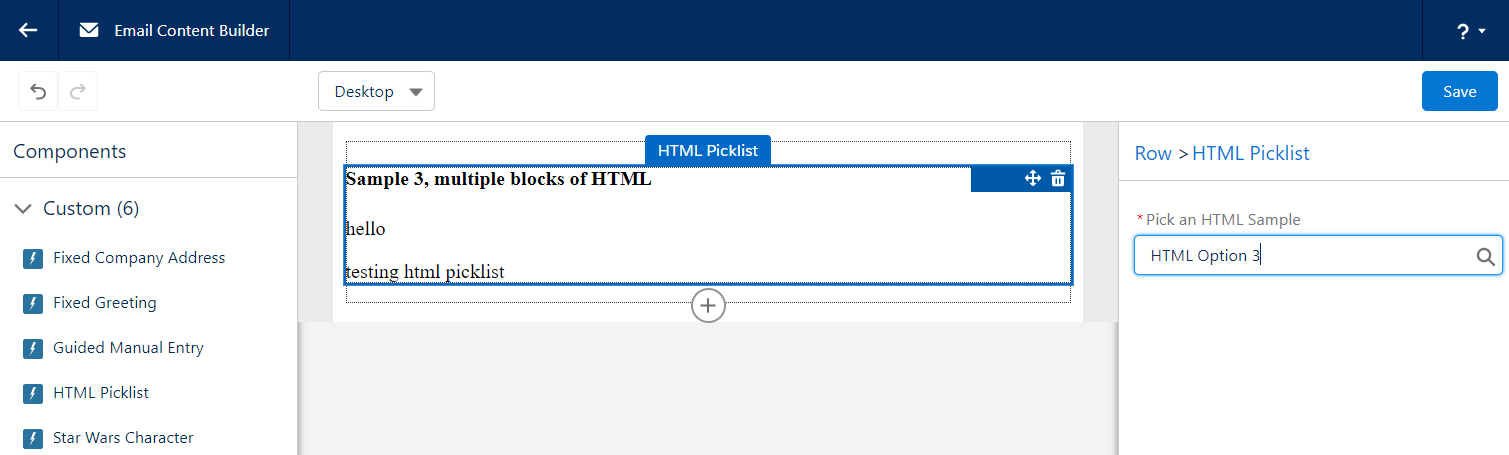
      options.addRow(new VisualEditor.DataRow('HTML Option 3', '<h4>Sample 3, multiple blocks of HTML</h4><div>hello<p>testing html picklist</p></div>'));
      options.addRow(new VisualEditor.DataRow('HTML Option 4', '<h2>Hello Trailblazer</h2>'));
      options.addRow(new VisualEditor.DataRow('HTML Option 5', '<h2>This was swell</h2>'));
      return options;
  }
}

Note that the class extends VisualEditor.DynamicPickList, which requires us to provide 2 method overrides.

  • getDefaultValue -> provides the value selected when the component is first added to an Email. In our example above we simply prompt for a choice.
  • getValues -> provides all of the options that a user can pick from. To our knowledge you can’t retrieve a list of values dynamically based on another input from the user, though if this changes in the future be sure to let us know!

Now that we have APEX which can provide our values, let’s set up our LWC. We will start with our JS.

import { LightningElement, api } from 'lwc';

export default class HtmlPicklist extends LightningElement {
  @api
  set htmlValue(value) {
    if (this.attachmentPoint) {
      this.attachmentPoint.innerHTML = value;
    }
    this._htmlValue = value;
  }
  get htmlValue() {
    return this._htmlValue;
  }
  renderedCallback() {
    this.attachmentPoint = this.template.querySelector('div[ishtmlcontainer=true]');
    this.attachmentPoint.innerHTML = this.htmlValue;;
  }
}

The approach here is a little bit different than all the other examples. The goal is to take the “htmlValue” (which comes from APEX) and have that HTML be the entire HTML that gets stamped onto the Content/Template. This keeps our LWC HTML very lightweight and gives full control over the HTML to APEX (or wherever the APEX is getting the value).

Next, we will tell our Metadata file to prompt the user to choose one of the options.

<?xml version="1.0" encoding="UTF-8"?>
<LightningComponentBundle xmlns="http://soap.sforce.com/2006/04/metadata" fqn="banner">
  ...
  <targetConfigs>
    <targetConfig targets="lightningStatic__Email">
      <property 
        name="htmlValue"
        label="Pick an HTML Sample"
        type="String" 
        required="true" 
        datasource="apex://HTMLSources"/>
    </targetConfig>
  </targetConfigs>
</LightningComponentBundle>

Some of our properties are similar to the previous example, however we introduce a new one.

  • datasource > 

As for the HTML file, it simply has a DIV that the JS can grab onto and fill.

<template>
  <div ishtmlcontainer="true" lwc:dom="manual"></div>
</template>

Here’s what it looks like in the builder. Similar to the previous example, the right hand side allows us to make a choice, and once made the content of our component is rendered.
Pull information from an Open API

This is the last of our examples, and it goes all out. By using an Open API, we don’t need to worry about authentication and all the additional steps to set it up in Salesforce. In our github repository, this is the starWarsCharacter component.

Similar to the previous example, we will start with some APEX. While there can be a lot going on here, the end result of the APEX is to provide a JSON String representing the attributes of each Object, or dropdown choice.

global with sharing class StarWarsCharacterPicklist extends VisualEditor.DynamicPickList {

  global override Boolean isValid(Object attributeValue){
      return true;
  }

  global override VisualEditor.DataRow getDefaultValue(){
      return new VisualEditor.DataRow('--Select a Character--', 'no-character-selected');
  }

  global override VisualEditor.DynamicPickListRows getValues() {
      System.debug('Providing Star Wars Character values now!');
      return getApiOptions();
  }

  private VisualEditor.DynamicPickListRows getApiOptions() {
    VisualEditor.DynamicPickListRows pickListRows = new VisualEditor.DynamicPickListRows();

    //Make API call to StarWarsAPI and get a list of characters
    List<StarWarsCharacterServices.StarWarsCharacter> characters = StarWarsCharacterServices.getCharacterList();


    // When a choice is made from the VisualEditor, the DataRow value will be provided to the LWC
    // We are choosing to have that "value" be a JSON string, so that the LWC can parse it and
    // render the properties as it sees fit
    for(StarWarsCharacterServices.StarWarsCharacter character: characters){
      String characterInfoAsJson = System.JSON.serialize(character);
      pickListRows.addRow(new VisualEditor.DataRow(character.name, characterInfoAsJson));
    }
    return pickListRows;
  }
}

Note that the class extends VisualEditor.DynamicPickList, which requires us to provide 2 method overrides.

  • getDefaultValue -> here we explicitly set a value that the JavaScript can look for, allowing it to determine if a character has been chosen or not
  • getValues -> the for loop iterates over a list of options that we’ve retrieved from some other source (just so happens to be a Star Wars API with a list of characters). For each option/star wars character, we build a JSON string of all the attributes we might care about in the LWC, and then return them.

Now, let’s take a look at the JavaScript.

import { LightningElement, api } from 'lwc';

export default class StarWarsCharacter extends LightningElement {
  @api
  character = {}
  @api
  characterChosen = false
  @api
  hasFilms = false
  @api
  hasStarships = false

  @api
  set characterJson(value) {
    // the "value" is the DataRow value that came from APEX
    // in our example, this is the JSON encoded string which contains details about our character
    console.log('setting characterJson::', value);
    this._characterJson = value;
    if(value==='no-character-selected') {
      console.log('There has been no character selected yet');
      this.characterChosen = false;
    }
    else {
      try {
        console.log('A StarWars character has been selected, parsing the JSON returned from APEX');
        this.character = JSON.parse(value);
        this.characterChosen = true;
        if(this.character.hasOwnProperty('films') && this.character.films.length > 0) this.hasFilms=true;
        if(this.character.hasOwnProperty('starships') && this.character.starships.length > 0) this.hasStarships=true;
        console.log('ok done');
      }
      catch(ex) {
        console.log('got an exception trying to parse json', ex.message);
        console.log(ex);
      }
    }
  }
  get characterJson() {
    return this._characterJson;
  }
}

Some things to note with this code:

  • @api character -> the JS Object which will contain all the attributes of a chosen Star Wars character.
  • characterChosen -> a flag that lets the HTML know which block to render
  • hasFilms -> a flag that lets the HTML know if the chosen character was in any films
  • hasStarships -> another flag
  • @api set characterJson -> a setter method, this is how the Email Builder will provide the JSON encoded string to the LWC once a choice has been made. The LWC then parses it and sets some of the flags.

Next, we will tell our Metadata file to prompt the user to choose one of the Characters.

<?xml version="1.0" encoding="UTF-8"?>
<LightningComponentBundle xmlns="http://soap.sforce.com/2006/04/metadata">
  ...
  <targetConfigs>
    <targetConfig targets="lightningStatic__Email">
      <property 
        label="Star Wars Character"
        name="characterJson"
        type="String"
        datasource="apex://StarWarsCharacterPicklist" 
        required="true" />
    </targetConfig>
  </targetConfigs>
</LightningComponentBundle>

It looks fairly similar to the previous example. A minor difference is that the “name” attribute specifies the setter method in the JavaScript as opposed to a property. Not a big difference, but worth calling out that you have a couple of options as you build your own.

Now, let’s look at our HTML.

<template>
  <template if:false={characterChosen}>
    <h3>Please select a Star Wars character from the picklist to the left</h3>
    <p>It may take a moment for Salesforce to retrieve the list of Characters and make them ready to display</p>
    <p>To my knowledge, it isn't possible to bind a search criteria to the API request, so all options need to be fetched first, however I'd love to know if someone figures this out!</p>
  </template>
  <template if:true={characterChosen}>
    <div class="card">
      <h2>{character.name}</h2>
      <p>
        Height: {character.height}<br />
        BirthYear: {character.birth_year}<br />
        HairColor: {character.hair_color}<br />
        HomeWorld: {character.homeworld}
        <template if:true={hasFilms}><br />Featured in {character.films.length} films</template>
        <template if:true={hasStarships}><br />Found in {character.starships.length} starships</template>
      </p>
    </div>
  </template>
</template>

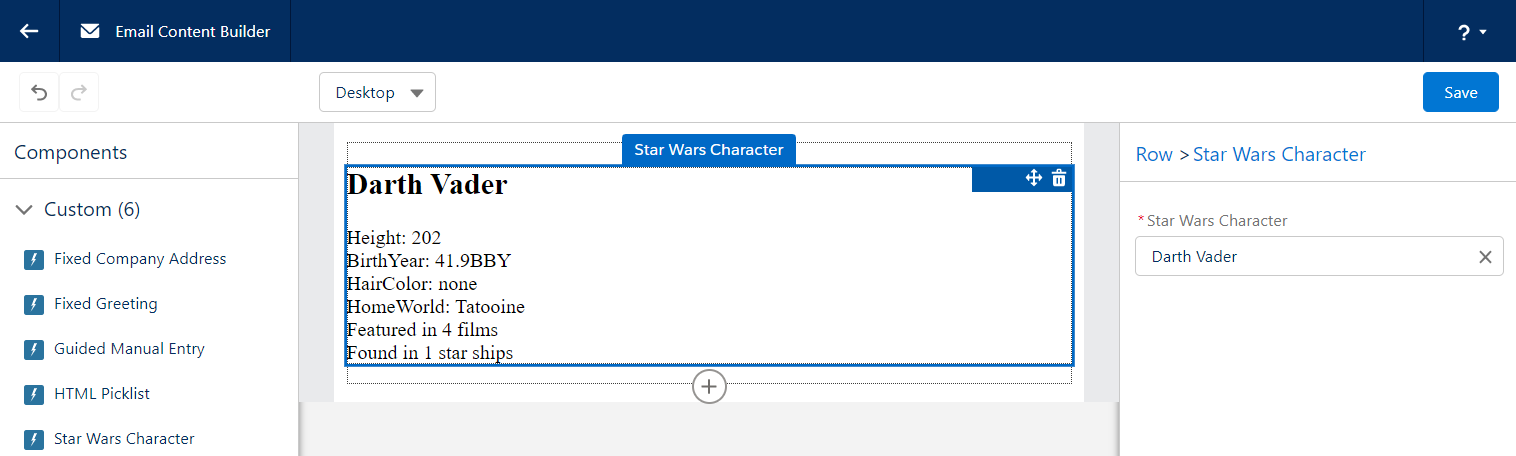
We have 2 templates, the first displays some instructions when a choice has not yet been made, and the other displays information about the choice nicely. You can see we are using simple dot-notation to merge the character attributes into the HTML of the Email Content / Template.

The web developer inside of me really does prefer this approach for rendering HTML into an email, though it does prefer a consistent structured payload for each option.

Here’s what it looks like in the builder. Similar to the previous examples, the right hand side container is where the user makes their selection and, once made, the details are rendered in the email.
Custom components are platform assets, meaning they do not belong to a specific Pardot Business unit and can easily be shared across all of your Business Units. These components will enable your users to easily drag in standard areas of emails (copyright notice, unsubscribe language, etc.) as well as more technical components, making email building faster and easier. With no backend HTML access to Lightning Builder Email Content and Email Templates, custom components are vital to building advanced emails. 

What custom components do you plan on building? Let us know in the comments!

It’s time to prepare for the Salesforce Spring ‘22 Release and how it will affect your Pardot instance.

We get three major releases from Salesforce each year — Spring, Summer and Winter. Each Salesforce release includes upgrades and enhancements that affect Salesforce orgs in different ways. 

So, if you’re using and managing Pardot for your company or organization, then you’re in the right place. We’re going to cover everything you need to know about the Salesforce Spring ‘22 Release for Pardot admins and users.

Salesforce Spring ‘22 release dates

Here are the Salesforce Spring ‘22 Release dates:

  • December 16, 2021: Pre-release org signup
  • December 22, 2021: Release notes available
  • January 7, 2022: Sandbox preview starts, release site available, and release Trailhead module launches
  • January 10, 2022: Release overview deck and feature matrix available
  • January 14, 2022: Release weekend
  • February 4, 2022: Release weekend
  • February 11, 2022: Release weekend
  • February 4-11, 2022: Release Readiness Live

Salesforce Spring ’22 Release: 6 highlights for Pardot users and admins

Pardot users and admins are getting lots of attention from the Salesforce Spring ‘22 Release. Some updates are changing the way we work to meet evolving technology demands. Others are saving us time by connecting the dots in a logical way. All we know is, this release includes big updates for people in the sales and marketing world.

pardot email builder enhancements

1. Pardot Lightning Email Builder enhancements

The newer Pardot Email Builder in Salesforce Lightning Experience is getting quite a few upgrades during this upcoming release. Salesforce is continuing to improve the connection between Pardot and the Lightning Email Builder in an effort to make it a seamless experience between the two.

Enhancement #1: Push emails from Lightning Experience into Automation Rules and Completion Actions

The Winter ‘22 release brought us the exciting news of being able to use Lightning Email Content in Engagement Studio when you mark those emails for “Automation” use.

After Spring ‘22, Salesforce has further enhanced this feature by enabling you to push emails from Lightning Experience into Automation Rules and Completion Actions in the same manner as you did when you enabled emails for Engagement Studio.

Enhancement #2: Specify Tracker Domain for Automated Emails in Lightning

Now that there have been enhancements in using your Lightning emails for various automation tools in Pardot, Salesforce is looking to provide other upgrades to the Lightning Email Builder.

This Spring ‘22 release will enable you to specify the tracker domain for automated emails in Lightning. All you have to do is create your emails and activate them for use in automations to receive the option to specify the tracker domain.

Enhancement #3: Choose which Email Template Types are Available in Salesforce Engage

Customers who have Salesforce Engage will also see an exciting enhancement that will further optimize their connection between the marketing and sales teams in their organization.

With the Spring ‘22 release, you can choose which Email Template Types you want to make available in Salesforce Engage. This allows you to specify whether you want Pardot or Lightning Email Templates available to your sales team. You can even determine which Lightning Email Template folders you want to make available for sales to ensure they cannot use templates in marketing-specific folders.

Enhancement #4: Create Custom Components for Email Template Builder

We were all excited to start creating emails in the drag-and-drop editor in Salesforce Lightning Experience. But then we encountered limitations with the components you drag into your template.

Spring ‘22 provides the option to create custom components for the new drag-and-drop editor. You’ll need to create a metadata package and ensure you test it in a sandbox before you deploy for use in your production environment.

What you should do: Evaluate how your team creates Pardot email templates.

These enhancements to the drag-and-drop email editor give Pardot marketers even more tools to push them toward the Lightning Email Builder. You should evaluate what your team’s current selection of email templates are and determine if some are better managed through the Lightning Email Builder. 

Document your team’s current processes and talk to them about what works and doesn’t work well for them. Also, pay attention to how much time they are spending on these tasks so you can determine if it makes sense to invest in upgrades or external resources.

pardot lightning builder enhancements

2. Pardot Lightning Landing Page Builder enhancements

Marketers were very excited to learn about the new drag-and-drop Landing Page Builder that Salesforce recently released. As with the Lightning Email Builder, Salesforce has ensured that you will continue to get improvements to this new tool.

Enhancement #1: Customize Pardot Form Styling in Lightning Landing Page Builder

The new Enhanced Landing Page Builder previously did not allow you to customize your Pardot Form within your Landing Page without adjusting the Layout Template code. With the Spring ‘22 release, you are able to edit styling such as colors, fonts, margins, and more within the Lightning Landing Page Builder by clicking on the new Style tab when you drag your Pardot Form into the builder.

Enhancement #2: Set a Redirect for Unpublished Landing Pages

When a Pardot Landing Page was previously archived, users were redirected to the website that is set up through Pardot Settings. The Spring ‘22 release provides an option to set a custom redirect URL for an enhanced landing page that you unpublish. 

You’re able to set this up by editing the redirect field before you unpublish the landing page.

Enhancement #3: Add Scripts to Lightning Landing Pages

The Lightning Email Builder will soon be able to support script code in either the header or footer of an individual landing page. When you publish your landing page, the code blocks are pulled into the source code for the landing page. 

Organizations will find this feature useful if they want to use JavaScript to support their Google Analytics tracking.

Enhancement #4: New Prebuilt Templates

The Lightning Landing Page Builder will now provide prebuilt layouts for your landing pages in the Spring ‘22 release. This new change will help you drag in new rows and columns easily as you customize your landing page. 

The breadcrumbs feature at the top of the editing panes will help you navigate to a row so you style and add new columns.

What you should do: Evaluate how your team creates Pardot marketing assets.

Similar to the enhancements to the Lightning Email Builder, these enhancements will help marketers move from the Pardot Landing Page Builder to the new Lightning Landing Page Builder. You should evaluate the Landing Pages you already have built and in use within Pardot and determine whether it is a good time to move those landing pages into the new drag-and-drop builder.

pardot email privacy changes

3. Get your Pardot automations ready for email privacy changes

As you may have heard, Apple has announced Mail Privacy Protection (MPP) in mid-2021 as a way to protect their users and hide email marketers from tracking the customers they send emails to. 

These changes will force email marketers to look at other email metrics, outside of email opens, to properly report on their email sends moving forward. Along with this, Pardot admins will need to do a full review of their automations to determine which rely on email opens so they can update the criteria appropriately.

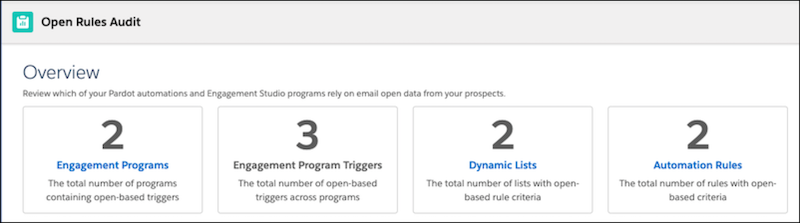
Fortunately, the Salesforce Spring ‘22 release will include a reporting page that will provide an overview of which of your automations rely on email opens at this time.

This reporting feature will allow you to see how many Engagement Programs, Dynamic Lists, and Automation Rules have been configured to rely on email opens. 

You can access this report by going to the Pardot Reports tab, navigating to the Marketing Assets section and finding Open Rules under the Automations section.

What you should do: Utilize this report and update all automations.

It is strongly recommended that you update any automation that relies on email opens to start looking at other high-value metrics, such as email clicks. You should also ensure that everyone who views reports on your email sends understand that email opens is not a reliable KPI anymore and should not be used to consider an email’s success.

4. Prepare for the retirement of Pardot drip programs

Pardot drip campaigns

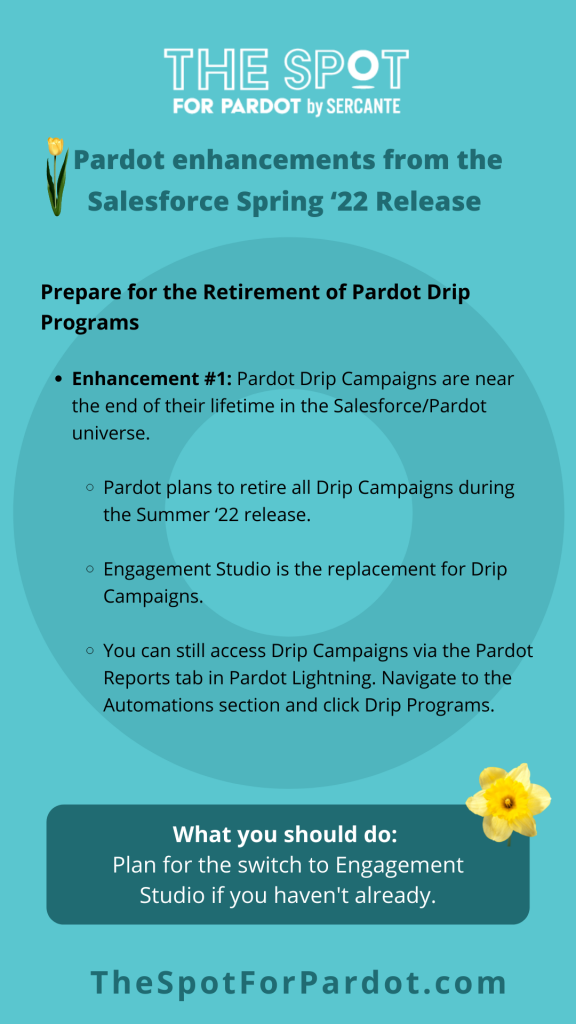
Pardot Drip Campaigns are near the end of their lifetime in the Salesforce/Pardot universe. Although they won’t be retired with this release, Pardot plans to retire all Drip Campaigns during the Summer ‘22 release. If you have never used the Drip Programs tool (now known as Engagement Studio), then the feature was removed with the Winter ‘22 release.

Pardot will still provide access to reporting for Pardot legacy Drip Programs, and the company has moved them to a new location with the Spring ‘22 release. Head to the Pardot Reports tab in Pardot Lightning, navigate to the Automations section and click Drip Programs. 

This option is not accessible to Pardot orgs that did not use Drip Programs previously.

What you should do: Start planning for the switch to Engagement Studio.

If you haven’t already made the switch to Engagement Studio, then now is definitely the time to start considering it.

Here are resources to prepare for switching to Pardot Engagement Studio:

pardot integrations

5. Extending Pardot through integrations

Salesforce is highly customizable thanks to integrations. And new ways to extend Pardot through integrations are going live all the time.

Here are a few Salesforce Spring ‘22 Release enhancements that use integrations to extend Pardot functionality.

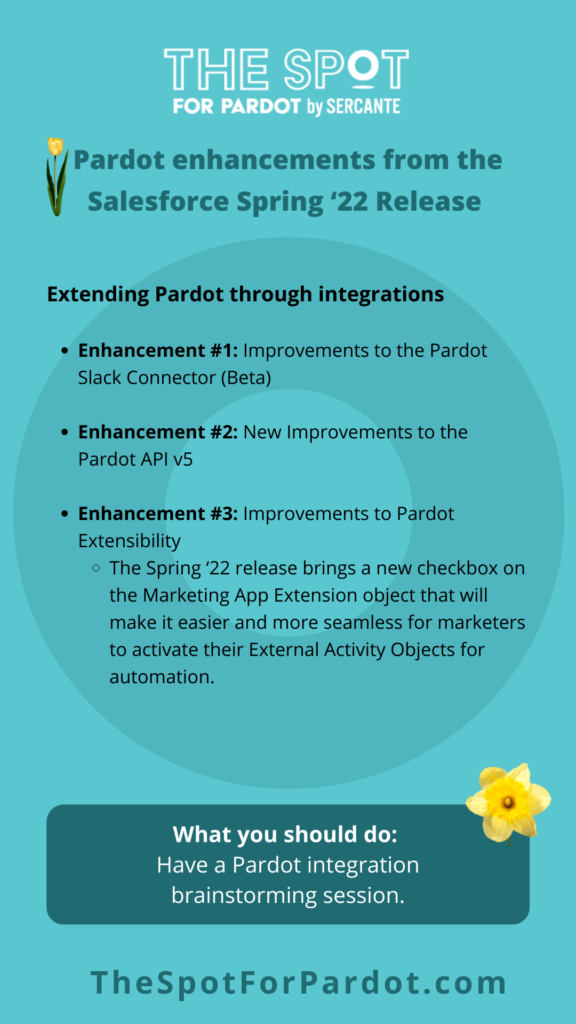
Enhancement #1: Improvements to the Pardot Slack Connector (Beta)

If you tried out the Pardot Slack Connector (beta) when it was introduced in the Winter ‘22 release, you may be excited to hear that we are already receiving improvements to the feature.

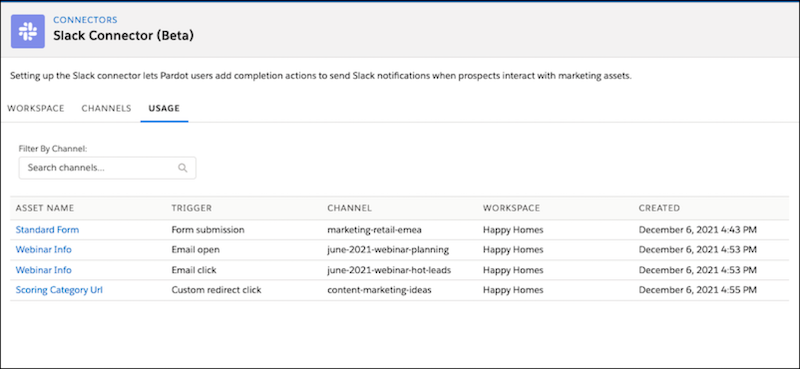
The completion actions that you were already able to set up to send Slack Notifications for your marketing assets are now available in the Pardot Lightning Email Builder Experience. There is also a new Usage tab available for the Slack Connector so you can get a complete view of which marketing assets are connected to Slack via Completion Actions.

Enhancement #2: New Improvements to the Pardot API v5

The Pardot API v5 became available in the Winter ‘22 release and will be seeing some improvements with the Spring ‘22 release. 

There will be 13 more objects available through the API and updates to 3 of the objects that were already accessible. This release will also bring a new Tracking and Consent JavaScript API that will give you control over how Pardot tracks page views.

Enhancement #3: Improvements to Pardot Extensibility

Pardot announced the release of Marketing App Extensions to collect prospect data in third-party applications and bring that data into Pardot during the Winter ‘22 release.

The Spring ‘22 release brings a new checkbox on the Marketing App Extension object that will make it easier and more seamless for marketers to activate their External Activity Objects for automation.

What you should do: Integration brainstorming session

Have a brainstorming session to discover ways you can use integrations more effectively in your Pardot instance. You can kickstart the session by completing the sentence “wouldn’t it be nice if Pardot…” as many times as you can. 

Then, rank those sentences you created and focus on the ones that will have the greatest impact on your marketing efforts. If implementing those integrations you identified through your brainstorming goes beyond your team’s capabilities, then reach out to Sercante Labs to find out how you can make it happen.

6. Additional features to look out for

Pardot included a few extra features in this release that don’t really fit any of our above topics, but are definitely still important to understand ahead of the release.

Here are a few additional Salesforce Spring ‘22 Release enhancements that can help with reporting and segmentation. 

Enhancement #1: Einstein Engagement Frequency

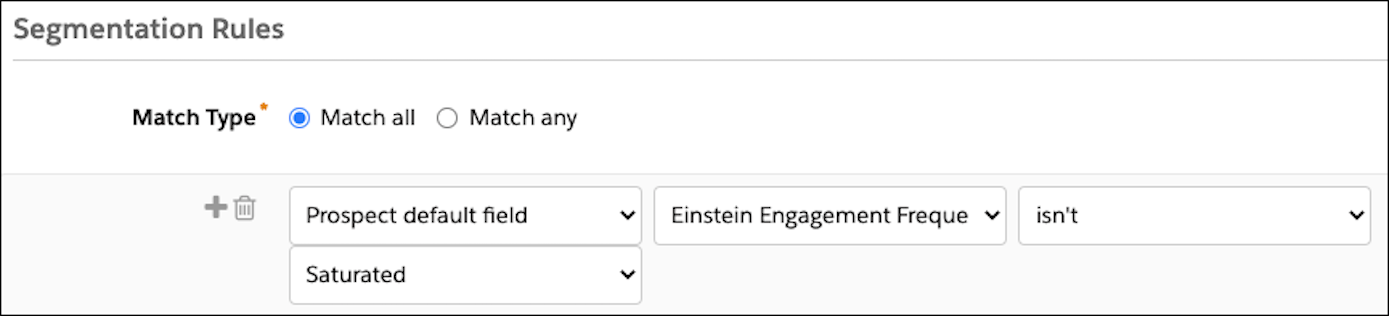
This feature (only available to Pardot Advanced and Premium Editions) helps reduce email fatigue by scanning individual prospect engagement behaviors to help you understand the optimal send for marketing emails. 

You will need to enable this feature through Marketing Setup in Salesforce and ensure you have enough data for the model to train itself within 72 hours. Once the model is trained, you will be able to use a new prospect field called “frequency category” to segment prospects in lists or Engagement Studio.

Enhancement #2: Einstein Account Tier

This feature (also only available to Pardot Advanced and Pardot Premium editions) helps you segment on your prospect accounts in a new way by using another model to start assigning tiers to your accounts. 

To use it, you will need to map the Account Tier field to a custom Pardot field to read in the values that the Einstein Key Accounts Identification model starts assigning to your Accounts. You’re able to easily use this field in any automation as the field will be listed under the “Prospect Account field” criteria type that you can choose. 

Enhancement #3: Improved Thresholds for Metrics Guard Filtering

This feature applies to all Pardot editions by improving filtering on what’s considered to be bot-click activity. The Metrics Guard will now look for any bursts of email open and email click activity that surpass thresholds that are put in place. Your team will no longer see activity from those IP addresses until the activity falls below the threshold again.

What you should do: Consider using these AI features to improve your email marketing and reporting capabilities.

These features are nice additions to any Pardot org. There is minimal work your team needs to do outside of setting up the features. Then you can sit back and enjoy the benefits they bring to your segmentation and reporting.

Pardot is getting bigger and better all the time

B2B marketers who come to Pardot are usually looking to scale their efforts and grow in a way that makes sense. These latest enhancements from the Salesforce Spring ‘22 Release get Pardot marketers closer to those goals by saving them time and resources. 

Adding more user-friendly design capabilities addresses a major pain point for many Pardot customers. And extending Pardot through integrations and feature upgrades is preparing Pardot orgs of all sizes for the future. Contact the team at Sercante to get help implementing these enhancements in your Salesforce org and Pardot instance. And leave us a comment below to let us know what you think about the Spring ‘22 Release.

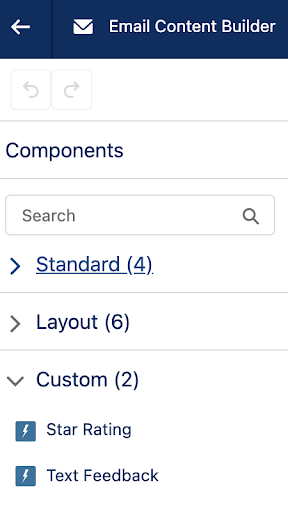
The Pardot Winter’ 22 release includes a new way to add content to emails you create using the email content builder in Pardot Lightning. Custom components allow marketers to easily build a library of standardized components users can drag-and-drop into email content builder emails without needing to edit HTML or CSS. 

With this new feature, you can create components for standard areas of emails, such as footers or headers. Or, use it for more complex items, such as displaying upcoming events or gathering prospect feedback. 

You can create your own custom components, or search for components built by third parties in the Salesforce AppExchange. 

Pardot email custom components available now

pardot email content builder

Salesforce Labs already has three custom components available:

  1. Embedded Feedback within Pardot Emails

Add a feedback form component to emails and gather instant feedback from prospects.

  1. Video for Email

Easily embed video thumbnails.

  1. Newsletter Lightning Email Template with Google API 

Create newsletter emails with components for Youtube Webinar and Google Calendar.

Once installed, the component will appear in the email content builder in Pardot Lightning under Custom. 

Note: You must be a Salesforce administrator or your Salesforce user must have the Download AppExchange Packages permission to install a custom component from the Salesforce AppExchange. 

Configure the custom component

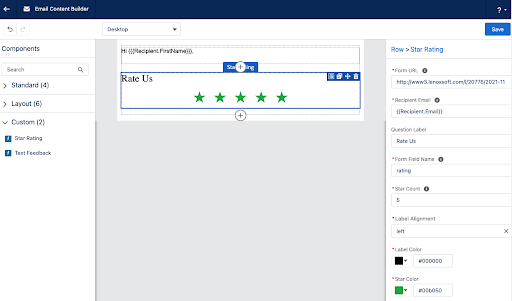
Once you drag and drop a custom component into a Pardot email, you can use the right-hand side to configure the component. 

pardot custom component example

This new feature is available in the Lightning Email Builder for Email Content and Email Templates (Custom Components for Email Templates is part of the Spring ‘22 release). This feature is available for Growth, Plus, Advanced, and Premium Pardot editions.

Custom component availability

It is not yet available in the email template builder, but that should be coming in future releases. This feature is available for Growth, Plus, Advanced, and Premium Pardot editions.

Updating Pardot email content custom components

If a custom component is applied to email content and then that component is updated, the email content will not automatically reflect the changes. To update the email content, you must click Edit in Builder and re-apply the custom component. 

Considerations for multiple Pardot Business Units

If you have multiple Pardot Business Units, be mindful of creating custom components that reference fields, content, or assets that only exist in one business unit. Custom components are a platform asset and are not tied or restricted to a specific business unit. 

Share your experiences

How are you planning on using this new feature in your org? Tell us in the comments!

Included in the Salesforce Winter ‘22 release is a beta feature that highlights the beginning of an integration between Pardot and Slack.

Salesforce officially acquired Slack on July 21, 2021, and the company is already looking to push out new features to integrate Slack with your Salesforce instance. The newest announcement regarding the integration between the two systems went into detail about how every company should have a digital headquarters and what features will soon be available.

Here is what you need to know so you can understand how Slack will work with Pardot.

Connecting Pardot with your company Slack workspace

What does the beta service include?

This beta feature allows your marketing and sales teams to receive updates in their Slack workspace when a prospect engages with your marketing assets. Through a completion action on your marketing asset, a new post will be shared within your Slack workspace informing your team of what asset the prospect interacted with and their basic contact information. When setting up the completion action, you are able to select which Slack channel you want your team to receive the notification.

Push notifications from Pardot to Slack via Pardot completion action

How do I enable the Pardot and Slack integration?

Before enabling the Pardot Slack connector, you will need to create a Slack app that will be installed in your Slack workspace so you can connect Slack to Pardot. If you are like me and have never heard of a Slack app, that’s fine! A Slack app should be created when you need to use Slack APIs to connect your workspace with a third-party service through an integration.

It’s recommended to create an app from an app manifest when setting up the basic Slack app, but it is possible to create your own. The Salesforce documentation for this integration includes JSON code for you to use in the manifest file. 

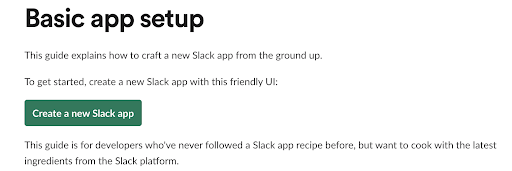
Slack provides an easy-to-navigate article that helps you create your Slack app for whichever Slack workspace you want to integrate with Pardot. By following the steps shown through the “Create a new Slack app” button, you will be able to create your own app within a couple of minutes.

Once your app is created, you will have to install it in your Slack workspace. This is so the Pardot and Slack integration is connected and ready to be used. Finally, you will have to generate a token and scope through your Slack app to add your workspace to the Slack connector in Pardot.

Enable the Pardot Slack Connector

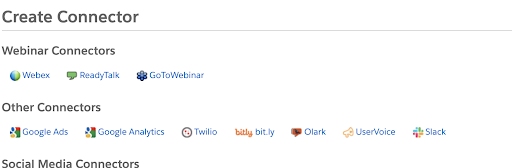
Now that we have everything set up on the Slack side of the integration, you should navigate to your Pardot settings through the Pardot Lightning App to enable the Pardot Slack connector. Once you have enabled this setting, Slack will be available as a Connector through your connector settings through the Pardot Settings tab.

Enable the Pardot Slack Connector
Pardot Slack Integration create connector

When you choose the Slack connector, you will be prompted to add a Slack workspace to integrate with Pardot. To connect to your workspace, you will have to use the bot token provided when you generated the token and scopes for your Slack app. Once your workspace is added to the Slack connector, you can then choose up to 10 channels from that workspace to connect to Pardot. 

You will need to copy the channel links in order to set them up through the connector. You can find these by right clicking on the designated channel within your Slack workspace.

Configure Slack Notification Completion Actions in Pardot

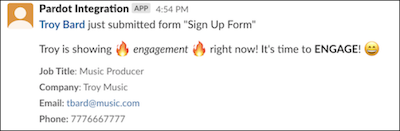
Now that you have your Slack workspace and channel(s) set up through the Slack connector in Pardot, you can use the “notify Slack channel” Completion Action on your marketing assets. When setting up your completion action, you are able to select which channel you want to post to as well as customize the message that is posted in the Slack channel. With each post, Pardot will also include the following fields for the prospect so your teams can easily identify them in Pardot:

  • Name
  • Job Title
  • Company
  • Email
  • Phone

These fields will show as blank values if they are not populated for the prospect who has completed the particular action you have set up.

Pardot Slack Integration sample message

Upcoming features

Salesforce announced Slack-First Marketing in mid-September and emphasized how the initiative will enable marketing teams to be able to collaborate through a shared digital workspace in Slack. 

Pardot Automation for Slack is the newest feature available for Pardot users to integrate with Slack. Although there is not much information on this new feature yet, we know it is expected to be available with the Spring ‘22 release and provides a shared view of your customer in Slack while streamlining notifications for the sales department.

Important things to know

Here are a few considerations you should keep in mind when you enable the Slack integration in Pardot.

  • You will need to work with your Slack workspace admin to create an app for the workspace you want to integrate with Pardot.
  • The Pardot Slack Connector is a beta feature and is only available in English.
  • The Pardot Slack Connector is not available through Pardot Classic, so you will need to install the Pardot Lighting App to use this feature.
  • You can only create the completion action to notify a Slack channel through a Pardot form, form handler, file download, custom redirect, page action, and Pardot Classic emails.
  • At this time, you are only able to connect one Slack workspace to Pardot and add up to 10 Slack channels for the integration.

Learn more about the Slack integration with Pardot

Remember to reach out to Sercante if you want to know more about setting up these features in your Pardot org. Or, comment below to let us know your thoughts.

In the Salesforce Winter ’22 release, Pardot launched the new drag-and-drop Landing Page builder, which allows users to create natively responsive landing pages and control when pages are published and/or removed. This builder uses the same integration as the drag-and-drop email content builder, so if you are already using that feature there is nothing new to set up!

This post will cover a few things you can do to ensure your users are successful with this new builder. For a great demo of this new feature, check out the Pardot Release Readiness Winter ’22 Webinar (The landing page builder demo starts around the 14-minute mark).

Note: We updated this post for the Salesforce Spring ’22 release.

Requirements and system usage

Before you get started with the landing page builder, you’ll need to ensure:

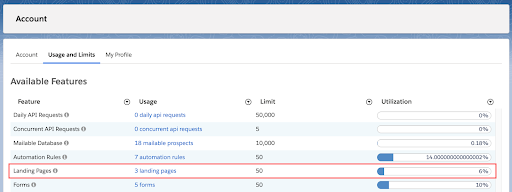
You’ll also want to take a look at your landing page usage and limit. Landing pages published with the new drag-and-drop experience plus landing pages published with the classic experience will both count toward your account’s limit. 

To check your usage and limit, navigate to Pardot Settings > Usage and Limits

Ensure consistent use of naming conventions

Good naming conventions are going to be especially helpful when using this new builder. Naming conventions will allow users to quickly and easily locate the correct campaign, images, and form while building a new landing page. 

If you are using multiple Pardot Business Units (PBU) it will be even more important to have good naming conventions. When you create a new landing page, you will need to associate it with a connected campaign. The campaign you select determines which PBU the landing page belongs to as well as which forms can be used on this landing page (the landing page can only use Pardot forms that exist in the same PBU as the page). To make sure your users can determine which PBU a campaign or asset belongs to at a glance, I highly recommend adding your PBU name to the naming convention. 

To ensure naming conventions are used correctly on Salesforce Campaigns, check out our previous blog post on how to automate Salesforce Campaign Naming Conventions.

Vanity URLs

You’ll also want to make sure you have a good policy around using vanity URLs and ensure your users know how to check if a vanity URL is already in use before attempting to publish their new landing page. Vanity URLs are not validated until the landing page is published, meaning a team may center their marketing materials around the URL being www.sercante.com/really-cool-awesome-stuff only to find out upon publishing that this URL is already in use for another marketing initiative. More considerations for vanity URLs can be found here. 

Salesforce navigation and page layout edits

Make sure your users know where to find this new feature by adding the Landing Page tab to the Pardot Lightning App navigation.

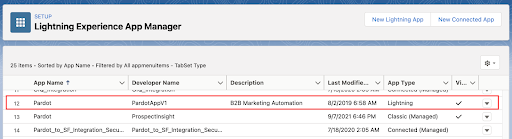
  1. Navigate to Setup >  App Manager
  2. Locate the Pardot app (ensure the App Type says “Lightning”)
lightning experience app manager
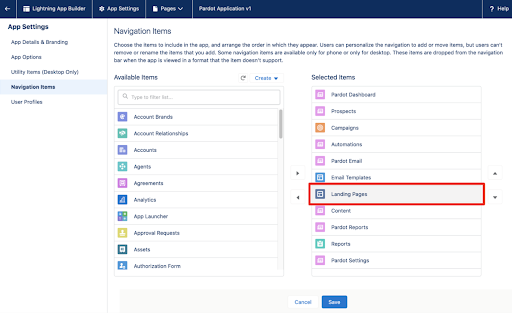
  1. Select the dropdown arrow and click Edit
  2. Select Navigation Items
  3. Move Landing Pages over to the Selected Items pane, click Save
navigation items - landing pages

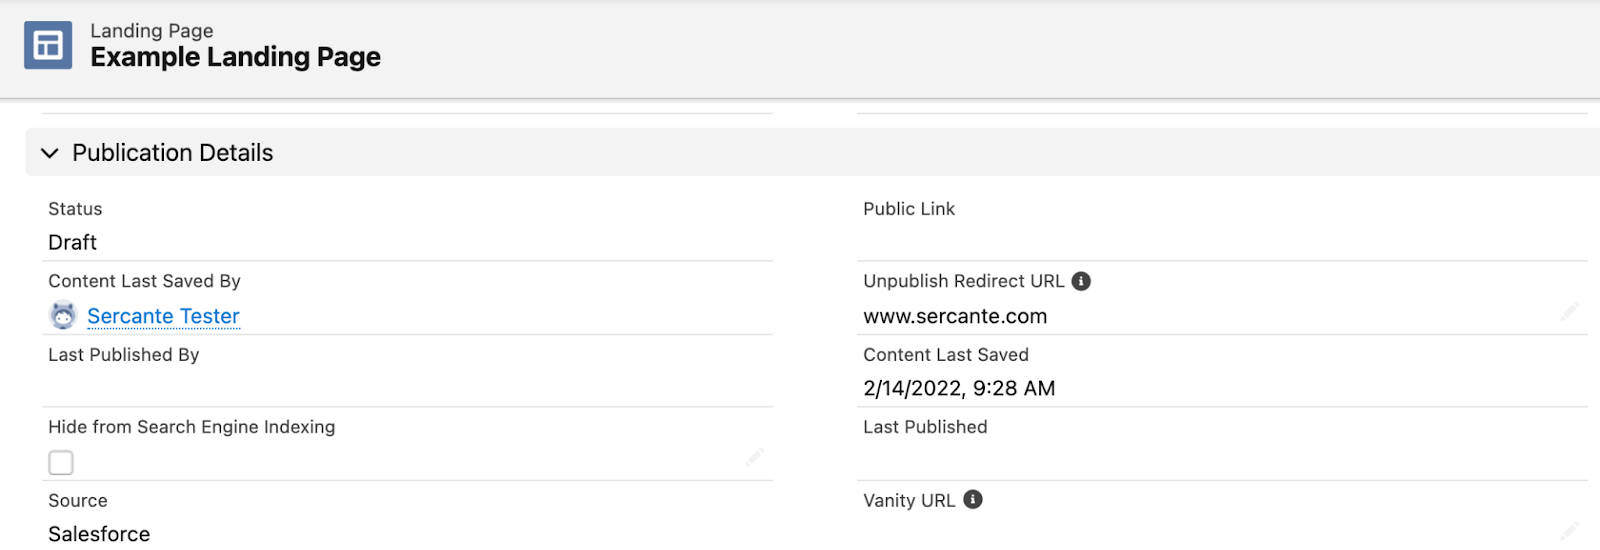
Also edit your Landing Page layouts to include the new Publication Details section:

You can edit this page layout by navigating to Setup > Object Manager > Landing Page > Page Layouts

Create new landing page list views

With more granular control over when Pardot Landing Pages are published and unpublished, as well as additional tracking of changes, creating a few list views will help you easily audit your pages. 

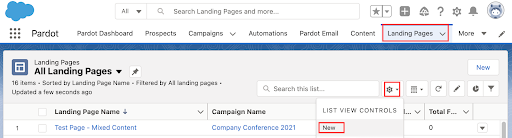
You can create new landing page list views by navigating to Landing Pages, clicking the Action wheel, and then New.

all landing pages

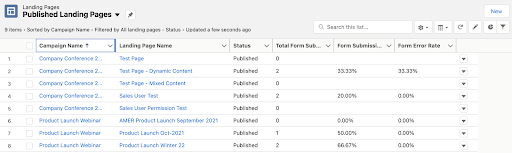
Configure a “Published Landing Page” view to keep an eye on metrics

  • This view is filtered to only show “Status equals Published”
published landing pages

Configure a “In Progress Landing Pages” view to monitor which pages are unpublished but in progress:

in progress landing pages
  • The “Content Last Saved” fields are updated anytime the landing page name, campaign, content, search engine indexing, vanity URL, Unpublish Redirect URL and/or Header and Footer Code are changed. Publishing and unpublishing a landing page does not update these fields.
  • This view is filtered to only show “Status equals Draft”

Finally, configure a list view of landing pages that have a status of “Published (Changes Pending).” Unlike the classic landing page builder, new and updated pages will need to be pushed to “published” when they are complete. Landing pages will not auto-publish upon saving. This new change in functionality may cause some users to leave their page in the “Published (Changes Pending)” state and a list view can help you keep on eye out for these. 

For this list view, clone your “In Progress Landing Pages” view but change the filter to only show “Status equals Published (Changes Pending)”

published pending landing pages

Automate reminders to publish

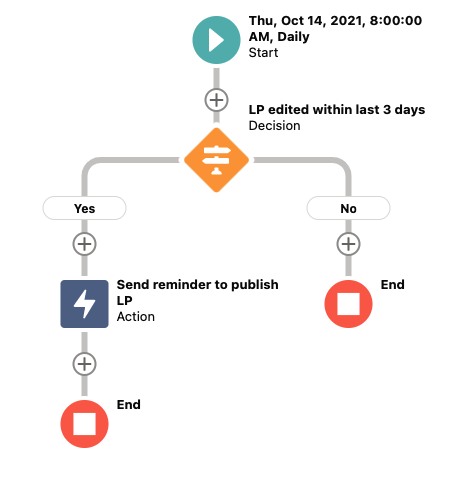
Since users will need to publish landing pages when changes are made, you can set up a flow to remind landing page owners that their pages are not published. I set this up with a flow. My flow looks for landing pages with a status of “Published (Changes Pending)” and a Content Last Saved date of three days ago or less. My Flow will send an email reminder to the user who last updated the landing page for up to three days after their edits were made (unless the page is published). 

automate reminders to publish landing pages

What excites you about the new Pardot Landing Page builder? Tell us in the comments!

Pardot announced some big prospect mailability changes in their Summer ‘21 release, and those changes are becoming permanent for everyone with the Winter ‘22 release. 

So, let’s break down exactly what’s changing, what your Pardot users need to know, and how to protect your prospects’ email preferences after this change. 

What’s changing?

Currently Pardot has two fields that control a prospect’s mailability:

Opted Out: Indicates the prospect has unsubscribed from marketing emails. Prospects who have opted out can still receive operational emails (a.k.a transactional emails) and autoresponders.

Do Not Email: Indicates the prospect cannot receive any email communications at all.

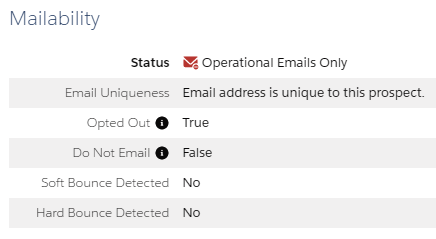
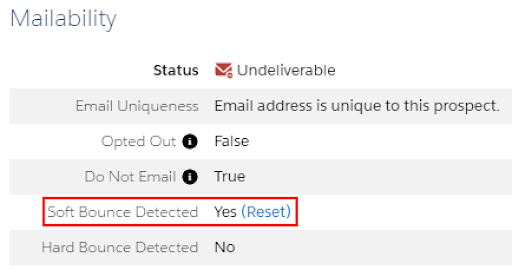
Things are about to get a lot more granular with the new prospect mailability changes. Pardot is adding a “Mailbility Insights” section to the prospect page with six fields:

mailability fields
  1. Status: Outlines which kinds of emails prospects can receive and their overall mailable status.
  2. Email Uniqueness: Records if the prospect’s email address has any duplicates in Pardot.
  3. Opted Out: Indicates the prospect has unsubscribed from marketing emails. These prospects can still receive operational emails and autoresponders. 
  4. Do Not Email: Indicates an internal user has suppressed this prospect from marketing emails. These prospects can still receive operational emails and autoresponders.
  5. Soft Bounce Detected: Indicates the prospect’s email address has returned soft bounce(s) from an email send. A soft bounce occurs when an email is recognized by the recipient’s mail server but is returned to the sender because the recipient’s mailbox is full or the mail server is temporarily unavailable. Prospects with a soft bounce may be able to receive emails at a later time.
  6. Hard Bounce Detected: Indicates the prospect’s email address has returned hard bounces from an email send. A hard bounce occurs when the prospect’s email address is invalid, the domain name does not exist, or the sender is suspected as spam and/or has been blocked. Prospects with a hard bounce are no longer mailable. 
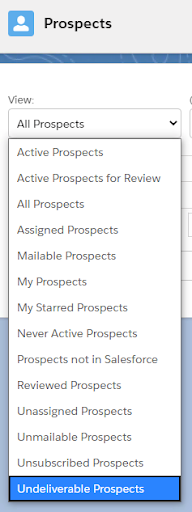
undeliverable prospects

Previously when a prospect was marked as Opted Out, the Do Not Email field would also change to “TRUE.” This is no longer the case with the new update. 

This change also enables a new filter to view Undeliverable Prospects (a.k.a prospects who  have received a hard bounce or 5 soft bounces).

More changes to note

  • If you upgrade to the new mailability insights early, all Pardot users will have access to update prospect Opted Out and Do Not Email fields. The Pardot user role permission “Toggle Opt-In Status” will no longer restrict access to the Opted Out field. However, this is changing with the Winter ’22 release. In the release, the “Toggle Opt-In Status” field will become “Update Opted-Out Field” and, if set to TRUE, allows a user to edit Opted Out on a prospect record.
  • Overwrite Prospect Opt Out Field is enabled by default.
  • A prospect’s number of soft bounces can be reset (remember 5 soft bounces equal a hard bounce).
    soft bounce detected
  • Pardot will mark a prospect with a hard bounce as “Undeliverable.” But, it will no longer automatically change their Do Not Email field to TRUE.
  • The only way to resolve a prospect’s hard bounce status is to change their email address to an address that does not have a hard bounce.

New prospect mailability capabilities

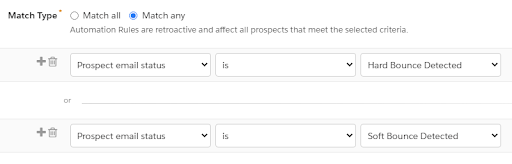
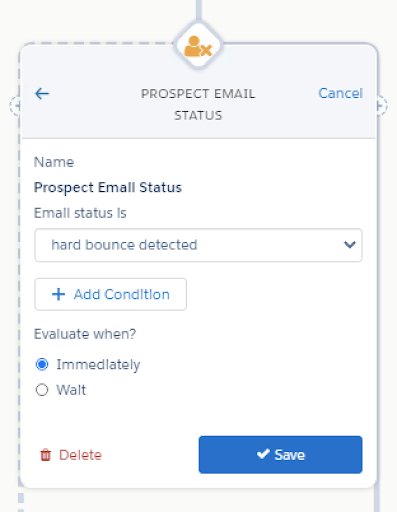
The prospect mailability upgrade also includes new ways to edit, update, and use the prospect mailability fields. You can edit or manually query these fields on the prospect page through an import or via automation rules, dynamic lists, completion actions, and Engagement Studio programs.

prospect mailability automation rules
prospect email status

Ensure these new features are used correctly

With great power comes great responsibility. So, work with your users to ensure everyone understands the new mailability updates and when or when not to change a prospect’s status. 

I recommend that you:

  • Review your Pardot user roles to determine which user roles have access to change the Opted Out and Do Not Email fields. You’ll want to look for the access to create/edit:
    1. Automation Rules
    2. Page Actions
    3. Custom Redirects
    4. Files
    5. Emails
    6. Forms 
    7. Form Handlers
    8. Engagement Studio Programs
    9. Prospects
      You can learn about the permissions for the four default user roles here.
  • Train your users on bounce codes and outline which codes can be resolved and which cannot. Make sure you avoid re-contacting email addresses that will never be successful. Contacting those addresses can have a severe impact on your send reputation!
  • Read Lindsey Mark’s post about how to align your data after the upgrade. 

How should you use these new fields?

Here are a few tips that should help you navigate through the new features.

  • Mark incoming prospects as “Do Not Email” until they have explicitly subscribed to your marketing materials. This will allow you to track, score, and grade the prospect while still respecting their email preferences. 
  • Regularly review your soft and hard bounce error codes by creating dynamic lists of prospects with errors.
  • Edit (or create) your double opt-in process to ensure prospects who subscribed but have not yet confirmed their email address are marked only as Do Not Email. 

How do you plan on using Pardot’s new Mailability upgrade? Let us know in the comments!

No more posts to show