Category

Analytics & Reporting

On October 14 2021, Google announced a replacement for Universal Analytics, which they’re calling Google Analytics 4 (GA4). 

You might be wondering, how does this impact our businesses’ use of Google Analytics and Marketing Cloud? Well, we’re going to give you the lowdown and tell you what you need to do to keep your reporting solutions up to date.

Google Universal Analytics is going away

If you use Google Analytics to track your website engagement metrics, then you likely use Universal Analytics. You’ll need to upgrade to GA4 before Universal Analytics goes into retirement mode to avoid any disruptions in your website reporting.

At the end of June 2023, Google is going to retire the free version of Universal Analytics. The GA4 upgrade deadline is September 2023 for Premium paying customers. After these dates, Universal Analytics will stop capturing data. 

Take action soon

We recommend implementing tracking in GA4 by the end of June 2022. Our hasty deadline recommendation is based on the need for at least one year’s worth of data for year-to-year analyses.

What’s different between Universal Analytics and Google Analytics 4?

So the big question, what is different between the two Google Analytics versions and what are the advantages with GA4? Well, here you go.

Goals are now Conversion Events

Universal Analytics allows you to measure conversions by setting up goals. GA4 includes a change to this feature that impacts how you measure conversions

In a nutshell, the difference between the old and new ways is this. GA4 allows 30 events per property while Universal Analytics only allows 20 Goals per view, and a single property can have more than 30 different styles of Goals. 

Depending on how you operate you might need to consolidate your Goals down.

Flexible event-based model

Rather than tracking data as hit types, GA4 data points are all characterized as events.

Universal Analytics uses a session-based model to collect and report on data. That means, each tracked interaction is categorized by hit type (web page, event, ecommerce, and social). 

In contrast, GA4 properties have become more flexible by using an event-based model. This allows for additional information to be captured and passed to Google Analytics for each interaction as well as more accurate reporting.

Focus on privacy

The new GA4 is privacy-focused and durable for the future and any additional changes that may come.

Machine learning insights

GA4 is intelligent, using machine learning to unearth insights about the customer journey across platforms and devices.

Integrations across Google ads platforms

GA4 has enhanced, seamless integrations with Google advertising platforms to optimize campaign performance and drive greater marketing ROI.

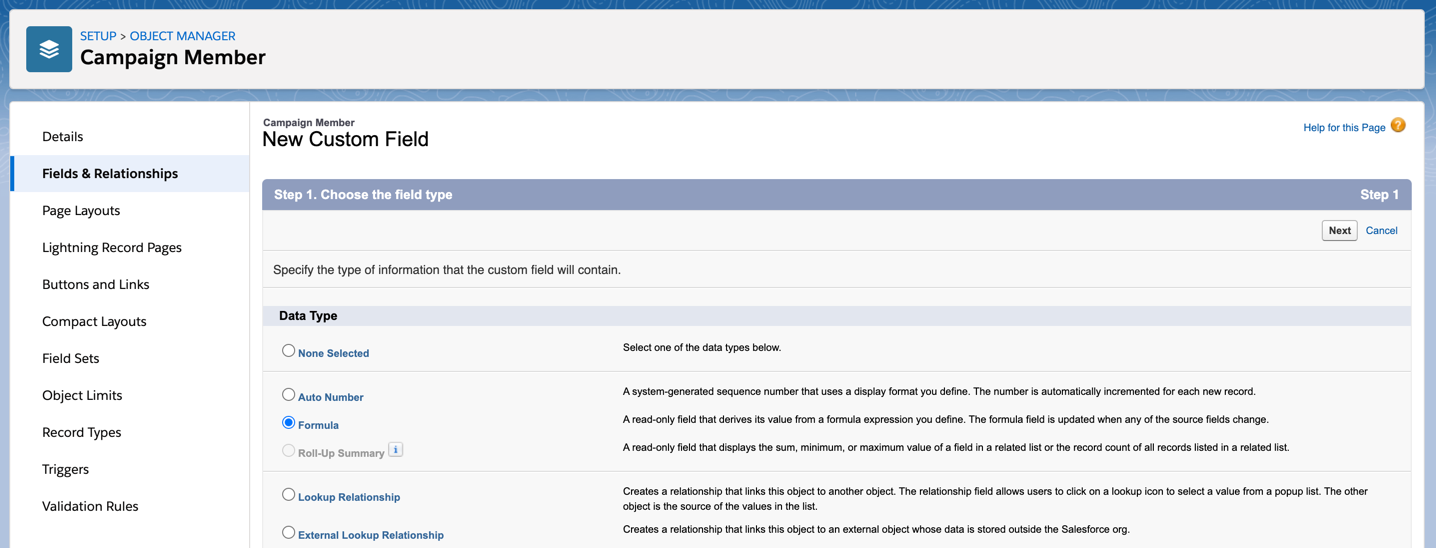
How to set up the new Google Analytics 4

Upgrading to GA4 is where Google has made our lives easier. It’s super simple to set up a new GA4 property. 

There are three big steps to go about setting this up. All you need to get started is the Editor role for the Google account.

Step 1. Create an account (or confirm you have one)

Already have an account set up? Great. You’re good to go.

If you don’t yet use Google Analytics you can simply create a new account. This will allow you to set up a Google Analytics 4 property.

Step 2. Create a GA4 property

If you are already using a Universal Analytics property, you can add a Google Analytics 4 property to the existing setup. Or read on if you’re starting fresh.

  1. In Google Analytics, select Admin (lower left hand corner).
  2. In the Account column, make sure it is the correct account you wish to update (ignore this if you only have one account).
  3. In the Property column, select the Universal Analytics property you wish to use that already collects data on your website.
  4. In the Property column, select the GA4 Setup Assistant. This should be the top option in this column.
  5. Click Get started under I want to create a new Google Analytics 4 property.
  6. If you currently use the gtag.js, tag you can elect to “Enable data collection using existing tags.

    If your website does not support the gtag.js, you use Google Tag Manager, or is tagged with analytics.js, then you can’t reuse your existing tags and will need to add the tags again.
  7. Click Create your Property.

Step 3. Update global site tag on your website

If you currently use a website builder platform that requires you to provide a “UA-” ID, don’t worry, you can still use Google Analytics 4. 

You’ll need to paste the global site tag (gtag.js) snippet manually into your website builder’s/CMS’s custom HTML field. Select your website builder from this table for platform-specific instructions.

Do I need to change anything in Salesforce Marketing Cloud for the GA4 upgrade?

This is a great question, and the short answer is — not really. 

From what we can see so far, you will not need to make any changes to your Google Analytics connector to Marketing Cloud tools, including Account Engagement (Pardot).

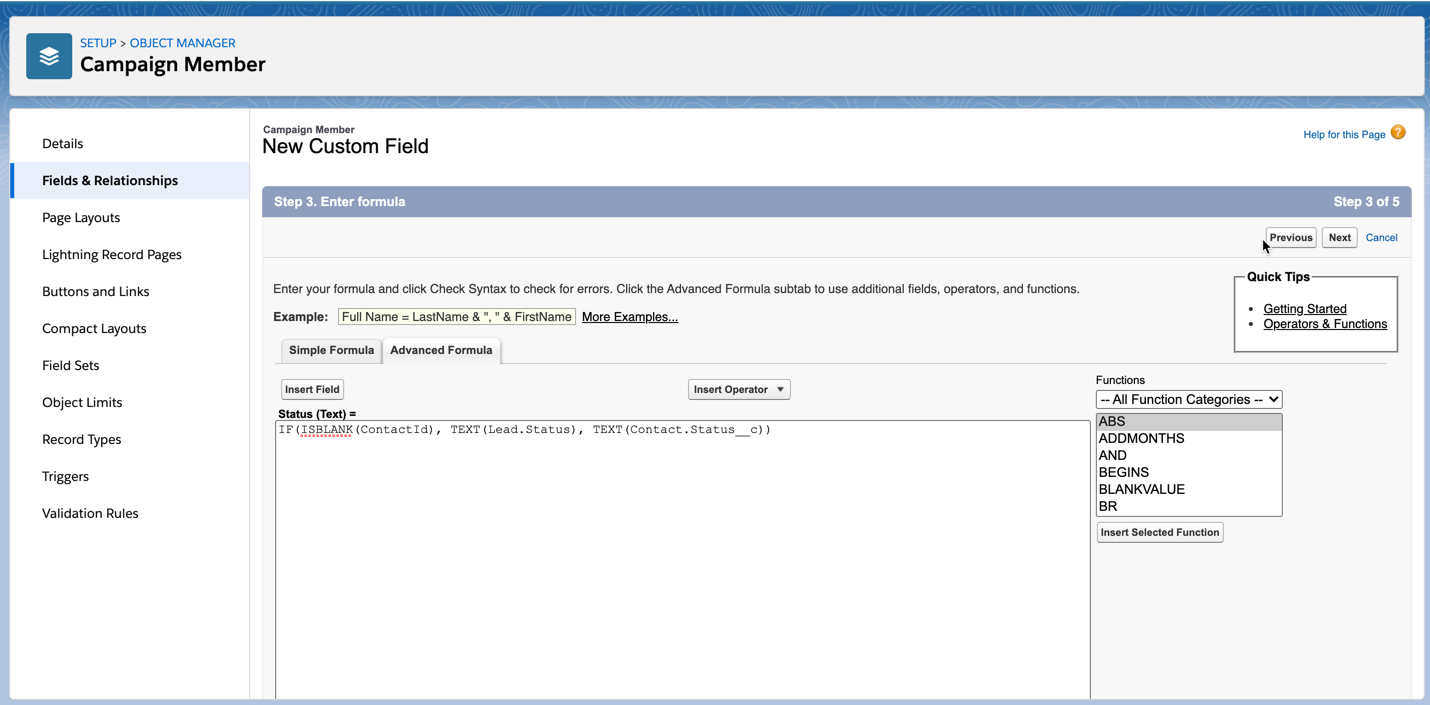
Check for Google Code in Marketing Cloud forms

However, you may need to take action if you are using Google Code within your Marketing Cloud forms to fire events or track form completion. Navigate to your Form completion code section to review and make sure your forms are using the gtag.js tag and not the old analytics.js tag (refer to Step 3 in this blog post for details). 

Get ahead of the GA4 upgrade

If you currently don’t have the Pardot Google Analytics connector set up and want to know more about it, you can read more on our blog post 10 FAQs on the Pardot Google Analytics connector.

If you have any other concerns about this change or have further questions, feel free to reach out to us to find out more.

Creating a Salesforce marketing dashboard is an effective way to see how you are doing against your marketing targets. What channels are most effective for generating pipeline? How many leads did we generate this month compared to last month? In this post, I’ll share some example marketing dashboard components and some tips and tricks for creating dashboards in Salesforce.

Hot Tip: Check out this blog post to learn more about choosing a Salesforce marketing reporting tool.

Salesforce Marketing Dashboard Tips & tricks

Create a reports folder for your dashboard reports

Anyone accessing your dashboard also needs access to the underlying reports. Creating a separate folder for your reports allows you to easily control who has access to them. And (bonus!) it’s easier to find your reports when you are creating your dashboard.

Choose your dashboard running user wisely

Each dashboard has a running user, whose security settings determine which data to display in a dashboard. If the running user is a specific user, all dashboard viewers see data based on the security settings of that user—regardless of their own personal security settings. For this reason, you’ll want to choose the running user wisely, so as not to open up too much visibility.

Add a chart directly to your report

Adding a chart directly within your report can speed up your dashboard setup time, especially if you are going to use the same report on multiple dashboards. It is also helpful if you are going to share the report directly instead of the dashboard.

Change your dashboard palette

Give your dashboard a fresh new look by changing the dashboard palette. There are 14 themes available in both light and dark mode.

Resuse reports within your dashboard

The same report can be used many times within your dashboard. This is a great way to visualize the same data in different ways without creating multiple reports.

Example Dashboard Components

Let’s dive into some examples of what type of reports you might want to add to your dashboard. In these examples, I’m specifically looking at the pipeline and revenue marketing has generated. To pull these reports, I have the primary campaign source field populated on the opportunity and I use the campaigns with influenced opportunties report type. Your setup might be differ depending on how you associate marketing campaigns with opportunities.

Marketing vs Target

What this reports answers: How are we tracking against our pipeline target?

Report setup

  • Report type: Campaigns with Influenced Opportunties
  • Filters: Show me all opportunities CREATED this fiscal quarter
  • Grouped by: Create date

Dashboard component setup

  • Chart type: Gauge

Closed won revenue

What this reports answers: How much marketing generated pipeline has been closed-won?

Report setup

  • Report type: Campaigns with Influenced Opportunties
  • Filters: Show me all opportunities CLOSED this fiscal quarter
  • Grouped by: Close date

Dashboard component setup

  • Chart type: Gauge

Leads created by source

What this reports answers: What are our top lead sources this quarter by month?

Report setup

  • Report type: Leads
  • Filters: Show me all leads created in the last fiscal quarter
  • Grouped by: Create date and lead source

Dashboard component setup

  • Chart type: Stacked vertical bar chart
  • X-axis: Create date
  • Y-axis: Record count

Contacts created by source

What this reports answers: What are our top contact sources this quarter by month?

Report setup

  • Report type: Contacts and Accounts
  • Filters: Show me all accounts created in the last fiscal quarter
  • Grouped by: Create date and lead source

Dashboard component setup

  • Chart type: Stacked vertical bar chart
  • X-axis: Create date
  • Y-axis: Record count

Pipeline by source

What this reports answers: What are the top marketing channels for generating pipeline?

Report setup

  • Report type: Campaigns with influenced opportunities
  • Filters: show me all campaigns where created date (opportunity) is this fiscal quarter
  • Grouped by: Campaign type
  • Columns: Opportunity amount summarized by sum and average

Dashboard component setup

Table component
  • Chart type: Lightning table
  • Grouped by: Campaign type
  • Measure: Opportunity amount (summarize by sum and average amount)
Donut component
  • Chart type: Donut

Marketing qualified leads (MQLs)

If you want to learn how to display MQL reports within your dashboard, check out this blog post.

Questions?

Send me a tweet @jennamolby, or contact the Sercante team for help.

Ever wonder how you can optimize real estate in your Salesforce CRM Analytics (formerly Tableau) dashboard? A great option is using toggles. 

There are several types of toggles. You can select a single field from a dataset when you have the values in one field. Or, you can create a custom toggle that lets you change views and other attributes dynamically. 

You can go from this:

Graphical user interface, application

Description automatically generated

To this:

Graphical user interface, application, table, Excel

Description automatically generated

What is a toggle?

A toggle is a widget that lets you quickly jump from view to view and show your dashboard users what their options are. You can use them to change groupings, column names and even metrics used. 

In this example, we will keep it simple.

Step 1: Create the visual.

In our example, we are using the Pardot Prospects dataset. We drag a chart filter onto the Canvas and group by Country.

Chart, bar chart

Description automatically generated

Step 2: Create the CRM Analytics (Tableau) toggle.

Next, we drag a toggle widget onto the canvas. With your toggle on the canvas, you’ll:

1. Click on the toggle.

2. Select “Change data source” (top right).

3. Select “Create Custom Query” (bottom left).

Graphical user interface, application

Description automatically generated

4. Add a name for the column (the name will display in the toggle).

5. Select “+ Add Column” and select “Dimension.”

Graphical user interface, application

Description automatically generated

6. Select the “Pardot Prospects” Dataset.

7. Add Country.

Graphical user interface, application

Description automatically generated

8. Repeat for all dimensions you want to use. Click “Done.”

9. Click on the toggle and change the query properties to “Single Selection (required).” Application

Description automatically generated with medium confidence

Step 3: Bind the toggle.

1. Click on the chart you created earlier and select “Advanced Editor” in the right-hand panel.

Graphical user interface, application

Description automatically generated

2. Click on “Select Query” on the left-hand side.

3. Select the name of the Toggle you created (In this case, it’s “Select Group”).

Graphical user interface, text, application

Description automatically generated

4. Select the Back arrow by choosing a query to return to the main screen.

5. Under “Source Data” click on “Choose data.”

Graphical user interface, application

Description automatically generated

6. Use the dropdowns to select “column” and select the column with the Dimensions you selected. Use the back arrow next to “Select Data” to return to the main screen

7. Change the interaction type to “selection” and the “Data Serialization Functions” to “asObject”

Graphical user interface, application

Description automatically generated

Note that the Interaction result shows you the value that is created by your string. Click on the “Copy” button to save the interaction code to your clipboard

8. Find the “groups” area and replace the “Country” group with the code you just created (see below). Make sure you keep the Quotes on each side.

Graphical user interface, text, application

Description automatically generated

9. Click on the “Widget” Link at the top. Use the Find function to find the “column map” section.

Graphical user interface, text, application, email

Description automatically generated

10. Change the value from this:

A picture containing chart

Description automatically generated

To this:

Graphical user interface, application, Word

Description automatically generated

Why do we need to remove the column map?

We remove the column map because we are dictating with our Binding what the columns will be and removing Tableau CRM’s static mappings.

Happy toggling with Tableau CRM!

That’s it! You can now use the toggle to select any of the views you created.

As you play around with this feature, you can get very fancy. You can use bindings to change just about anything in your chart dynamically.

When you’re finished playing around, here’s another solution you can use to customize your Tableau CRM reporting tables and keep it going.

Happy toggling!

How fancy are you gonna get with your custom toggling in Tableau? Tell us about it in the comments or send us a message to chat.

We marketers have pivoted our strategies to comply with GDPR in the past, but a recent court ruling may have us scrambling to change the way we use Google Analytics with European website users.

In a groundbreaking court case, the Austrian Data Protection Authority decided that the use of Google Analytics is currently violating the GDPR. The primary reason Google Analytics is violating GDPR involves personal data privacy.

As a result, it’s time for marketers to wake up and pay closer attention to how they track and report on visitor data coming from European Union (EU) countries. 

What is GDPR?

The thing we’re talking about here is the General Data Protection Regulation (GDPR).  It’s a law passed by the EU in May 2017 that creates standards for organizations that market to, track, or handle personal data from EU residents.

GDPR applies to you if you’re doing business or marketing to people in the EU regardless of where your company is physically located.

Google Analytics is currently violating GDPR

The court case that led to the realization that Google Analytics violates GDPR stems from a complaint that landed on the doorstep of the Austrian Data Protection Authority (a.k.a. Datenschutzbehörde).

Here’s how it went down.

On August 14, 2020, a Google user accessed an Austrian website called NetDoktor, which has self-serve resources for learning about health issues. The website uses Google Analytics, which means data about the user is transmitted to Google. Website users have filed 100+ complaints since then with similar GDPR violations from Google Analytics. 

The issue at hand is that sensitive data about EU website users is traveling through Google’s servers and across the pond to the US and other non-EU countries. As a result, that data is not being subjected to the privacy standards established through GDPR. (official legal response from Google here🤓)

So, in December 2021, the Austrian Data Protection Authority determined that the NetDoktor website’s usage of Google Analytics does not comply with GDPR. Other cases have come forward since that first case, which means this is something that’s here to stay.

What marketers on Salesforce need to know about GDPR and Google Analytics

If you’re a marketer using Salesforce Marketing Cloud or Tableau and you’re importing website user data through integrations with Google Analytics, then you’ll want to listen up. This is especially important if a large portion of your website users are located in a European Union country.

How to take action to stay GDPR compliant

We knew you’re a good seed. Here’s what you need to know to stay on the GDPR compliant side.

You’re already ahead of the curve if you’ve made the switch to first-party web tracking cookies. However, you’ll need to take additional steps to avoid legal action from website users living in EU countries regardless of the type of web tracking cookies you use (and we think you should switch to first-party cookies).

Verify privacy policy is up-to-date and available

Google Analytics requires all website owners using the Google Analytics Advertising features to display the privacy policy link on websites that utilize the service. And if you’re using advanced features to track website user data, then it’s likely that you’re using Google Analytics Advertising features.

Here’s what to include in your privacy policy:
  • The Google Analytics Advertising Features you’ve implemented
  • How you and third-party vendors use first-party cookies (such as the Google Analytics cookie) or other first-party identifiers, and third-party cookies (such as Google advertising cookies) or other third-party identifiers together
  • How visitors can opt-out of the Google Analytics Advertising features you use. This includes features used through Ads Settings, Ad Settings for mobile apps, or any other available means (for example, the NAI’s consumer opt-out).

Enable cookie consent on your website

Letting your website users know you’re using tracking tools to gather data from them is a great way to stay compliant with GDPR while using analytics tools like Google Analytics.

You can use a cookie consent vendor, such as OneTrust, to collect informed consent prior to dropping the tracking cookies into the website user’s browser. Cookie consent vendors make it easy for you to deliver a banner to your website visitors that collects their consent for tracking website browsing data using tracking cookies before they are activated and set.

We recommend you enable IP anonymization on your Google Analytics account to ensure you use pseudonymous identifiers. In addition, you can set the time period before the data stored by Google Analytics is automatically deleted from servers. Then, include that time period in the Google Analytics cookie banner. 

The banner you use to collect cookie consent from website users should be a simple and clear message explaining:

  • How user data is collected
  • Purposes of data collection
  • Duration of the data collected
  • Vendors and technical details

If you’re using third-party cookies, the banner should also inform users that the website uses third-party cookies for profiling purposes to provide advertising insights.

What could happen if you take no action

So, maybe you missed the memo and you haven’t done anything to address your website’s usage of Google Analytics in EU countries. Or maybe you use some other analytics tracking tool, like Heap, Matomo, Statcounter, or Adobe Analytics, and didn’t realize this probably applies to you, too. 

Well, it’s a good thing you’re here. We advise you to do two things: 

  1. Notify your legal counsel that there is a potential risk.
  2. Get ahead of the regulations. 

Violating the regulations doesn’t necessarily mean the GDPR privacy police are going to show up on your doorstep tomorrow.  It means someone could complain about your collection of their web browsing data. That complaint could snowball into a lawsuit and all the expenses that go along with it.

That’s why it’s so important for you to collect informed consent before a cookie starts collecting data from a website user who’s visiting your site from an EU country. 

Still confused by all of this? Tell us about it in the comments section. 

Ever wished you could facet, filter and do other magic on a dataset that also had aggregated data from a summary table in Tableau CRM?  

There is a way!

For example, you want to look at all the scores in the Pardot engagement history object, but also would like to use the same report to show summarized campaign information.

The dilemma?

When you bring in the summarized data and join it by Campaign, each Activity row will contain the data for the entire campaign. While it will make your campaign numbers look spectacular, it will also be spectacularly wrong!

What to do?

Use a flag to differentiate summarized data

Tableau CRM has an AMAZING feature that lets you create a row number that you can use as a flag to differentiate between summarized and detailed data.  

How? You can use the flag in your dashboard widgets to summarize or exclude data as needed.

Here’s how it works:

  1. Join your data as usual. Here we are joining on ActivityCampaignID in Pardot Engagement history to the ID in the Campaign table after we aggregate the metrics we want from Campaigns (leads, cost $ and opps $).
  2. Use a transform in your recipe to create the “flag” / unique identifier.
  •   Select Add transformation.
  •   Select Multiple row formula at the top.

The multiple row indicator allows Tableau CRM to “partition” the data so you can look at groups of data within the data and apply metrics to the specific group. 

In this instance, we are grouping by the CampaignID to assign a row number for each instance of the campaign (starting from 1).

  1. Select Row Number.
  2.  Select the field you wish to create row numbers from.
  3. Select numeric.
  4. Give it a name and save.
  5. Complete your recipe and run!

You now  have a “flag” that can be used in your recipe.  Each #1 in the row can be used to reflect the “unique” campaign aggregate.

The flag gives you access to accurate data

Now you can use this flag in metrics and KPI widgets where you want to see the campaign metrics. 

Example

By adding the flag we created to the filter for summary statistics around Campaigns, we are able to limit the  distinct Campaigns for our KPI/top level summary. But we are still able to see the row-level detail for non-aggregated data (like score).

Why is this great?  Now you can use the SAME filters, toggles and other interaction features to see detail AND the summary.

Using a single dataset, we can now view the Campaign stats (which we aggregated) and all the activity details our marketing teams crave!

Have a fun use case for this solution? Tell us about it in the comments.

If you’re new to using Salesforce campaigns, then this blog post is the perfect starting point. Use these 5 tips to make your life easier as you dip your toe into using Salesforce campaigns.

Even seasoned Salesforce pros may find a gem they haven’t seen before.

Tip #1: View the unique count of records in a report

Want to know how many accounts or companies attended an event, webinar or interacted with a marketing campaign? The “show unique count” option within Salesforce reports can be enabled to view this information.

How it works

While editing a report in the report builder, find the column for which you want to count unique values.

  1. Click Show More | Show Unique Count.
  2. Click Save.

A count of unique values appears as a grand total for the whole report and as a subtotal for each group.

Show Unique Count

Each report support up to 3 unique counts.

Example: Campaigns with contacts report

This example shows the unique count of the accounts touched by a specific marketing campaign.

The report is using the “campaigns with contacts” report type and has a filter for campaign name equals (the virtual event campaign).

Example: Campaigns with contacts report

The unique count for account can be pulled by selecting the show unique count option for the account column.

show unique count option for the account column

Running the report allows you to see the total number of records (the number of contacts) and the unique account count (the number of accounts that were touched by the campaign).

total number of records and the unique account count

Tip #2: Add custom fields to campaign members

The campaign member object in Salesforce represents the association between a campaign and a lead or a contact. While some standard lead and contact fields are available for the campaign member object, if you want to view or pull a report for custom fields, you will need to create a new field.

How it works

Create a formula field on the campaign member object that will check if the campaign member is a Lead or a Contact and populate the field with the custom field value.

Navigate to the campaign member object within the object manager and create a new formula field.

create a new formula field

If your lead and contact fields are picklists, use this syntax for the formula.

IF(ISBLANK(ContactId), TEXT(Lead.Status), TEXT(Contact.Status__c))

If your lead and contact fields are not picklists, use this syntax for the formula.

IF(ISBLANK(ContactId), Lead.Status, Contact.Status__c)

create a new formula field

Add the field to campaign member related list

You can add the new custom field to the campaign member related list by navigating to the campaign object in the campaign manager and selecting your page layout. Scroll to the campaign member related list and click on the wrench icon to select your fields.

Add the field to campaign member related list

Now the custom field displays in the related list for campaign members.

Now the custom field displays in the related list for campaign members

Tip #3: Create a campaigns calendar (without installing an app)

Did you know you can create a calendar based on any custom object in Salesforce – without using an app? Yes, this applies to the campaigns object as well. While there are a couple of limitations to using this feature, it’s a great way to get a view of all your campaigns in a campaign view without purchasing an app from the Salesforce App Exchange.

How it works

Search for “Calendar” in the App Launcher to find the calendar app.

Search for “Calendar” in the App Launcher

Under My Calendars, click on the gear icon to create a new calendar.

Create new calendar

Select the Campaign object from the drop-down and click next.

Give your calendar a name and select the start date (required) and the end date (optional). You can use the standard Salesforce campaign fields for the start date and end date, or you can select a custom field. For example, if you have a “go live” date field, you can use that as your start date instead.

Create new calendar - step 2

You also have the option to add a filter to your calendar. The filter has to be a list view using the campaign object. For example, if you want to have a separate campaign calendar for webinars only, this is what your list view would look like.

Filter campaigns by webinars only
add filter to calendar

Here’s what my calendar looks like:

finished calendar

Click on the gear icon next to your calendar name to change the colour of the campaigns displayed in the calendar.

change the color of campaigns displayed in the calendar

Hover over the campaign name within the calendar to view more information about the campaign.

view more information about the campaign
Limitations

There is one big limitation when it comes to using this feature… the calendar can not be made shareable without using the API. If you want to use this feature, each user will need to create their own calendar. With that being said, there is an idea open to allow sharing via the UI.

If you are looking for more robust calendar functionality, take a look at these apps on the Salesforce AppExchange.

Tip #4: How to automatically create campaign member status values

When a new campaign is created in Salesforce, there are two default member status values: “Sent” and “Responded”. For the majority of your campaigns, you will want to get more granular with your campaign member statuses than the default values. To do this, there are a couple of options:

Tip #5: Customize your campaign page

One of my favourite Lightning features is customizing the campaign page using the Lightning App Builder. The drag-and-drop App Builder allows you to add tabs, reports and instructions to your page.

How to customize your campaign page

To customize your campaign page, navigate to one of your Salesforce campaigns, click on the gear icon, and click on edit page. This will take you to the Lightning Page Builder.

Lightning Page Builder

Note: Editing the page will overwrite the existing page. You might want to create a new custom record page instead of overwriting an existing page.

Check out these 4 changes to make to your campaign page

Questions?

Send me a tweet @jennamolby, or contact the Sercante team for help.

No more posts to show