
If you’re new to using Salesforce campaigns, then this blog post is the perfect starting point. Use these 5 tips to make your life easier as you dip your toe into using Salesforce campaigns.
Even seasoned Salesforce pros may find a gem they haven’t seen before.
Tip #1: View the unique count of records in a report
Want to know how many accounts or companies attended an event, webinar or interacted with a marketing campaign? The “show unique count” option within Salesforce reports can be enabled to view this information.
How it works
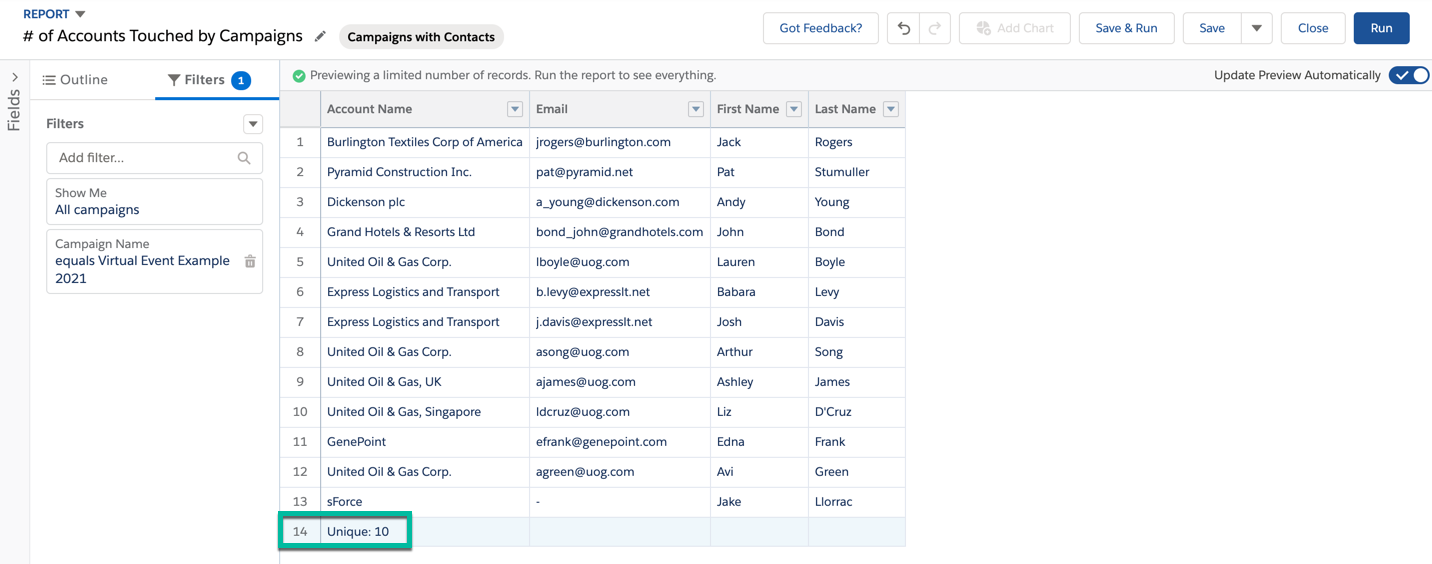
While editing a report in the report builder, find the column for which you want to count unique values.
- Click Show More | Show Unique Count.
- Click Save.
A count of unique values appears as a grand total for the whole report and as a subtotal for each group.

Each report support up to 3 unique counts.
Example: Campaigns with contacts report
This example shows the unique count of the accounts touched by a specific marketing campaign.
The report is using the “campaigns with contacts” report type and has a filter for campaign name equals (the virtual event campaign).
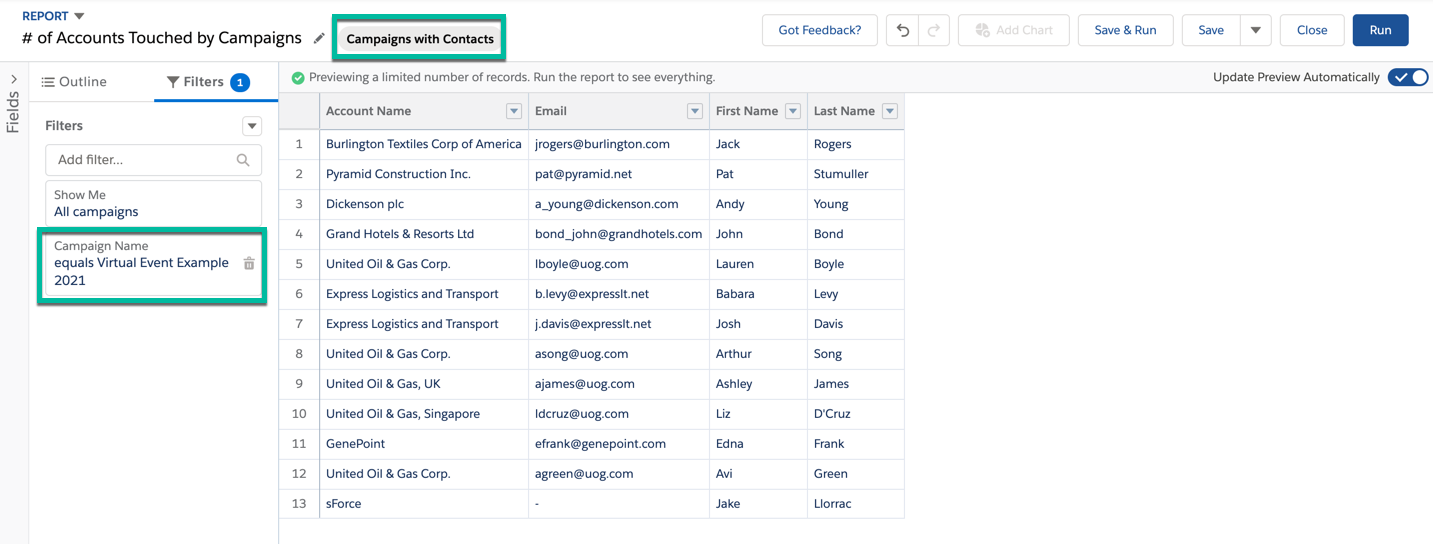
The unique count for account can be pulled by selecting the show unique count option for the account column.
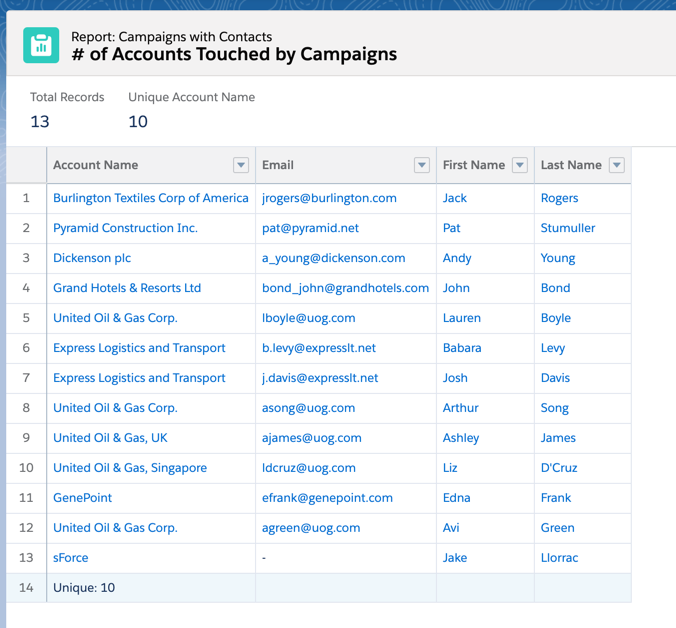
Running the report allows you to see the total number of records (the number of contacts) and the unique account count (the number of accounts that were touched by the campaign).
Tip #2: Add custom fields to campaign members
The campaign member object in Salesforce represents the association between a campaign and a lead or a contact. While some standard lead and contact fields are available for the campaign member object, if you want to view or pull a report for custom fields, you will need to create a new field.
How it works
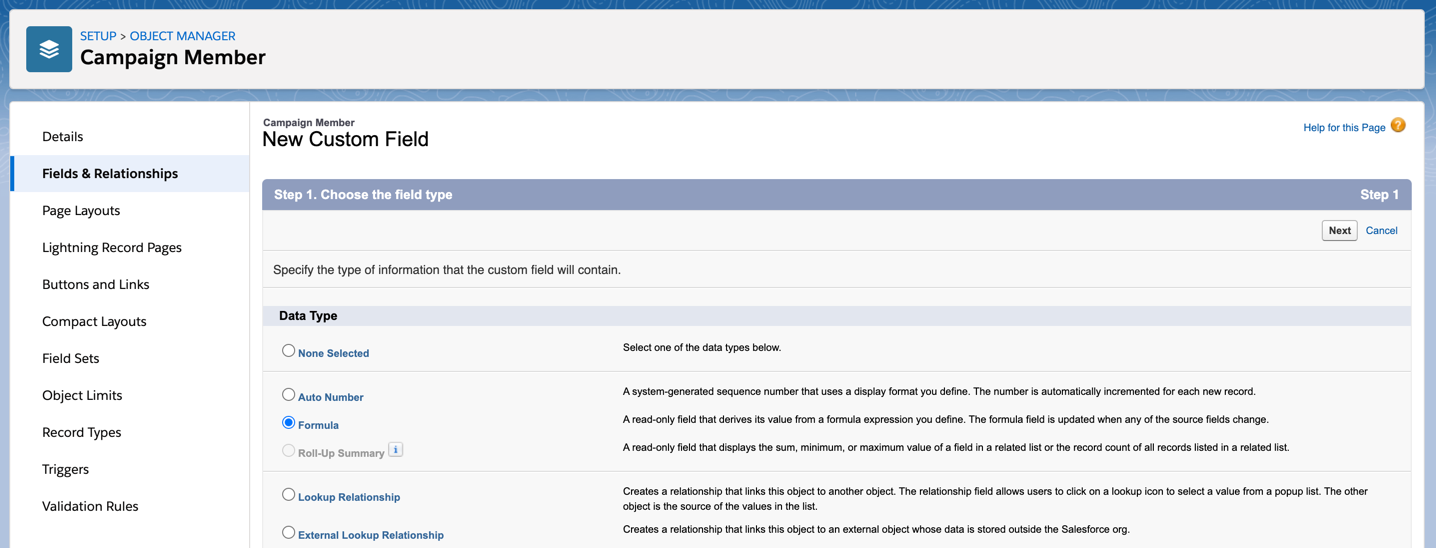
Create a formula field on the campaign member object that will check if the campaign member is a Lead or a Contact and populate the field with the custom field value.
Navigate to the campaign member object within the object manager and create a new formula field.

If your lead and contact fields are picklists, use this syntax for the formula.
IF(ISBLANK(ContactId), TEXT(Lead.Status), TEXT(Contact.Status__c))If your lead and contact fields are not picklists, use this syntax for the formula.
IF(ISBLANK(ContactId), Lead.Status, Contact.Status__c)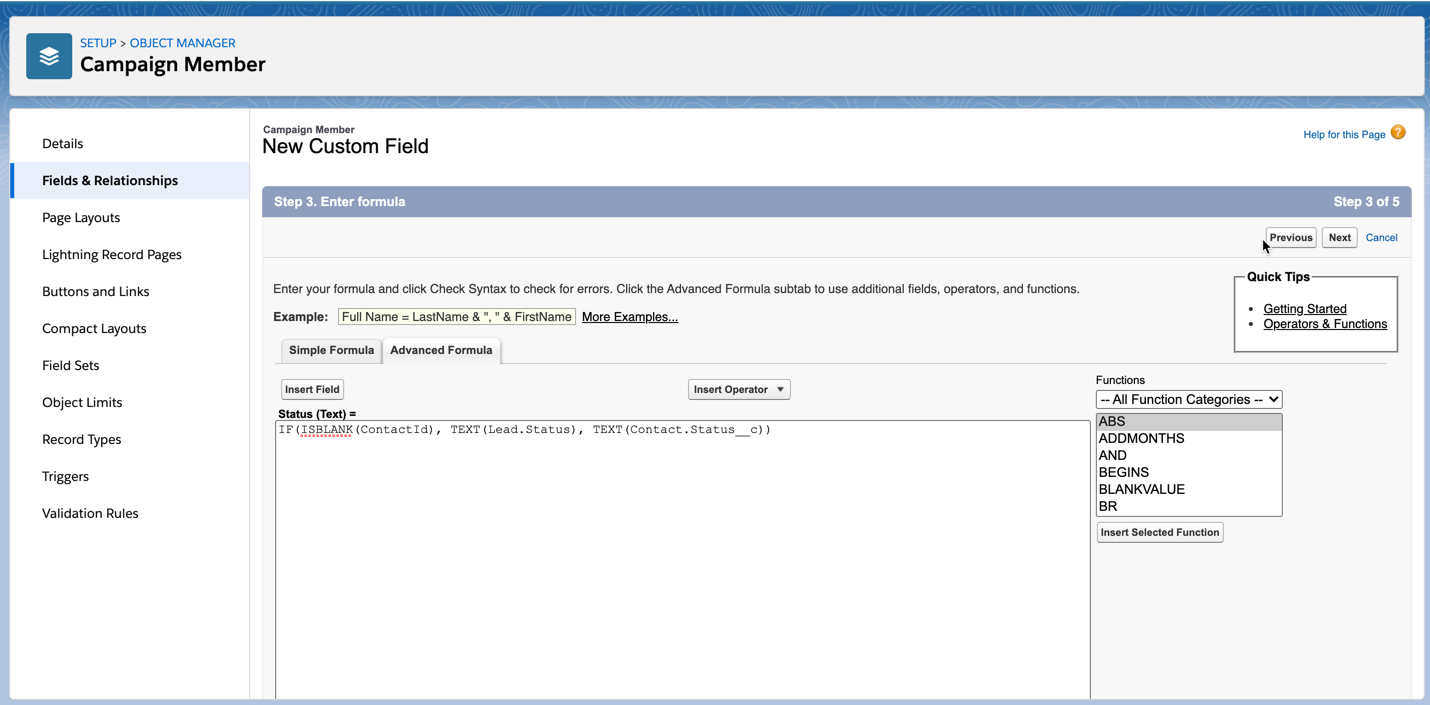
Add the field to campaign member related list
You can add the new custom field to the campaign member related list by navigating to the campaign object in the campaign manager and selecting your page layout. Scroll to the campaign member related list and click on the wrench icon to select your fields.
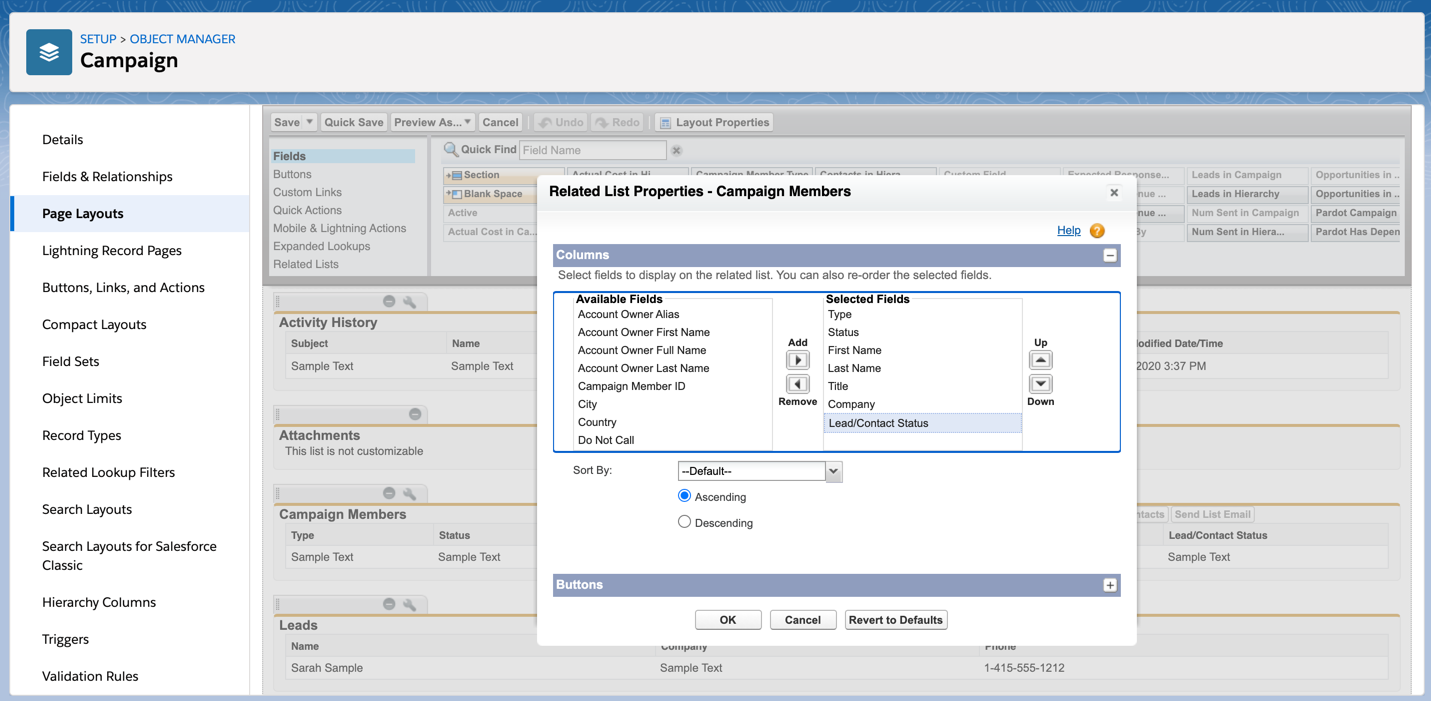
Now the custom field displays in the related list for campaign members.

Tip #3: Create a campaigns calendar (without installing an app)
Did you know you can create a calendar based on any custom object in Salesforce – without using an app? Yes, this applies to the campaigns object as well. While there are a couple of limitations to using this feature, it’s a great way to get a view of all your campaigns in a campaign view without purchasing an app from the Salesforce App Exchange.
How it works
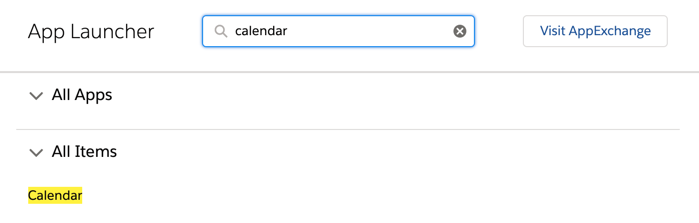
Search for “Calendar” in the App Launcher to find the calendar app.
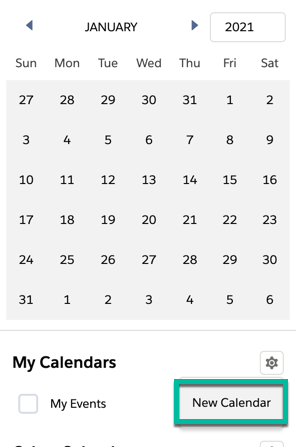
Under My Calendars, click on the gear icon to create a new calendar.
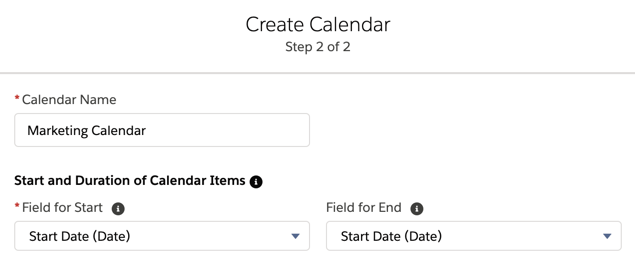
Select the Campaign object from the drop-down and click next.
Give your calendar a name and select the start date (required) and the end date (optional). You can use the standard Salesforce campaign fields for the start date and end date, or you can select a custom field. For example, if you have a “go live” date field, you can use that as your start date instead.
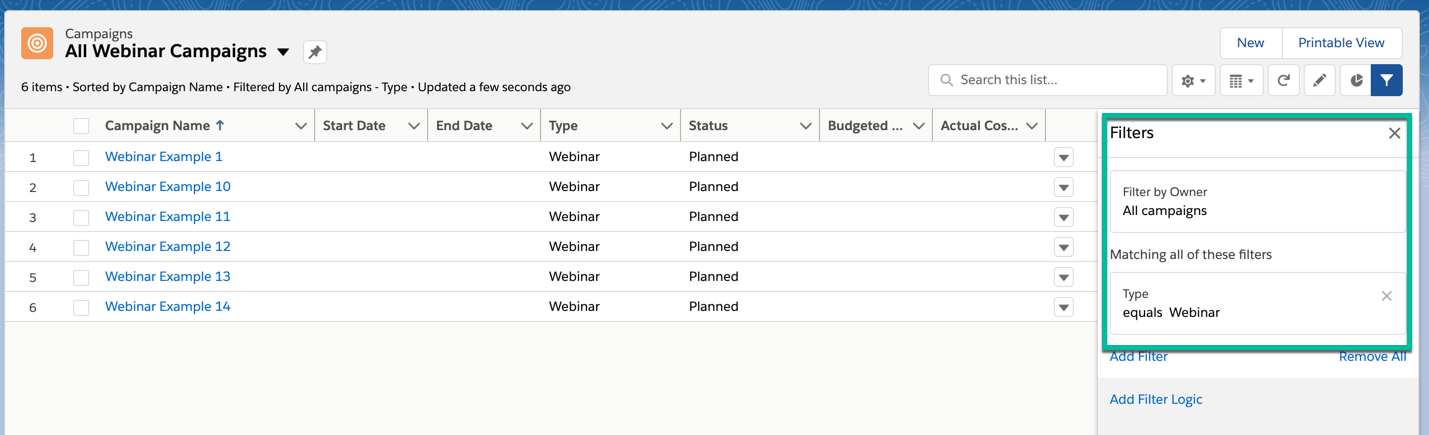
You also have the option to add a filter to your calendar. The filter has to be a list view using the campaign object. For example, if you want to have a separate campaign calendar for webinars only, this is what your list view would look like.

Here’s what my calendar looks like:

Click on the gear icon next to your calendar name to change the colour of the campaigns displayed in the calendar.

Hover over the campaign name within the calendar to view more information about the campaign.

Limitations
There is one big limitation when it comes to using this feature… the calendar can not be made shareable without using the API. If you want to use this feature, each user will need to create their own calendar. With that being said, there is an idea open to allow sharing via the UI.
If you are looking for more robust calendar functionality, take a look at these apps on the Salesforce AppExchange.
Tip #4: How to automatically create campaign member status values
When a new campaign is created in Salesforce, there are two default member status values: “Sent” and “Responded”. For the majority of your campaigns, you will want to get more granular with your campaign member statuses than the default values. To do this, there are a couple of options:
- Create the statuses manually when you create a new Salesforcecampaign.
- Set up “campaign templates” to copy the status values.
- Use Data Loader to bulk create the values.
- Automatically create campaign member statuses using Salesforce Flow.
- Install the Protected Campaign Member Statuses App.
Tip #5: Customize your campaign page
One of my favourite Lightning features is customizing the campaign page using the Lightning App Builder. The drag-and-drop App Builder allows you to add tabs, reports and instructions to your page.
How to customize your campaign page
To customize your campaign page, navigate to one of your Salesforce campaigns, click on the gear icon, and click on edit page. This will take you to the Lightning Page Builder.
Note: Editing the page will overwrite the existing page. You might want to create a new custom record page instead of overwriting an existing page.
Check out these 4 changes to make to your campaign page
Questions?
Send me a tweet @jennamolby, or contact the Sercante team for help.