
Your website is one of your most important demand generation assets and a blog is a great way to increase your online presence by making you more visible on Google. It’s also a great way to bring prospects into your database to expand the top of your funnel.
In this tutorial, I’ll show you how to set up your blog with a Marketing Cloud Account Engagement (Pardot) form, how to create a blog welcome email, and tips to automate blog digest emails.
How do you want your blog readers to subscribe?
There are many ways you can get your readers to subscribe to your blog. Some companies use a popup form when you visit a blog post, which has proven to be effective and other companies make it more subtle. Here are some different methods which will give you inspiration on how you should add the form to your blog.
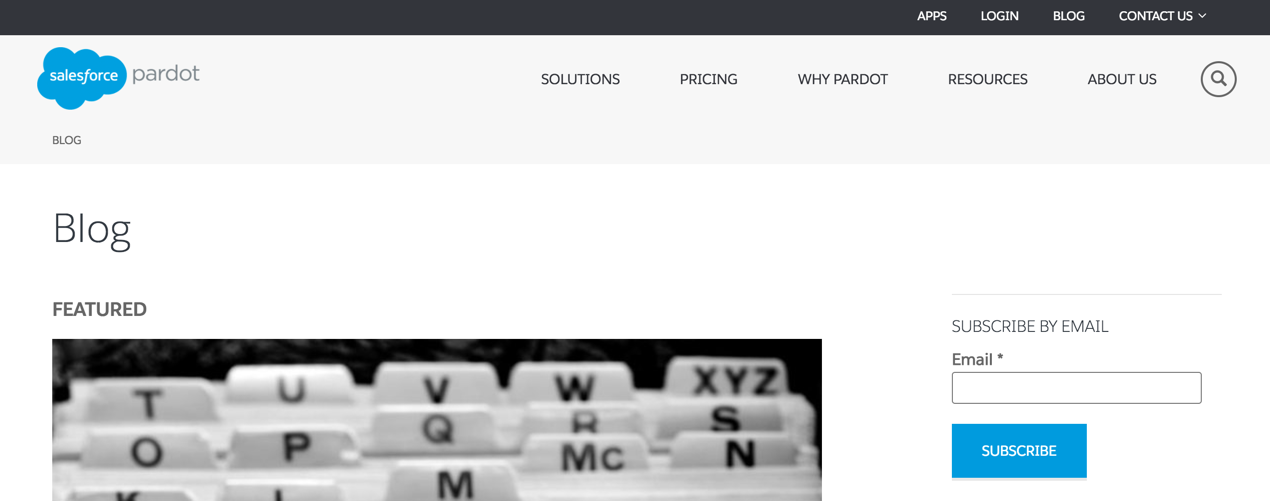
Example 1: In a sidebar
Pardot lets you subscribe to their blog by entering in your email address in the sidebar.
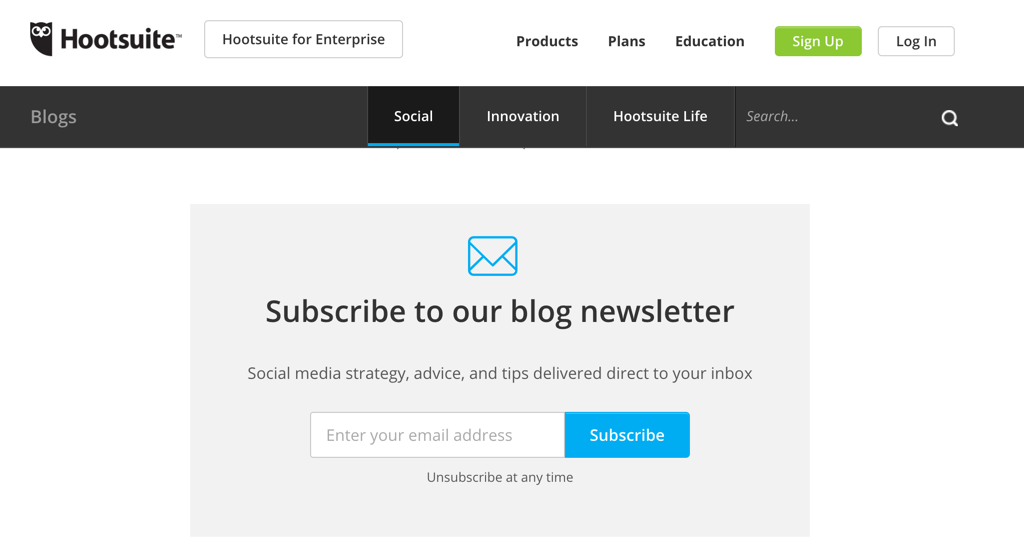
Example 2: At the end of each blog
Hootsuite adds their blog subscription form to the bottom of each blog post. They also only ask for your email address and have some nice icons, so it’s clear what you’re signing up for.
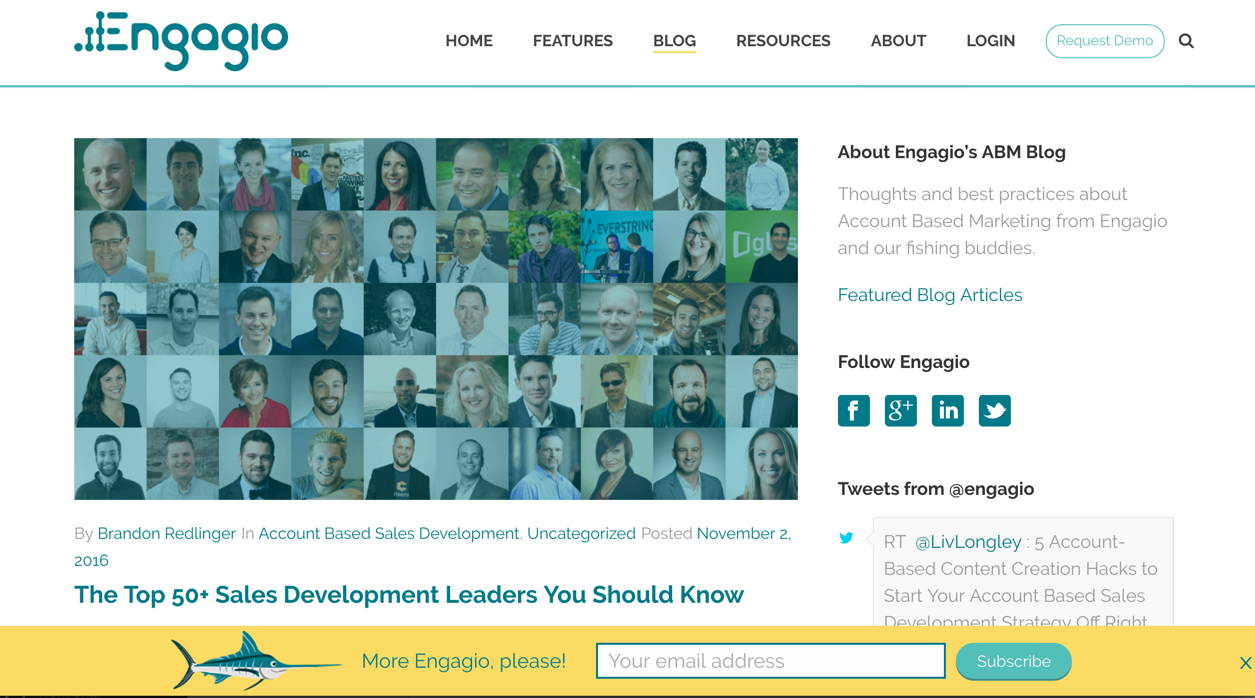
Example 3: In the footer
Engagio has a “sticky footer” at the bottom of their blog page, as well as on each blog post to get readers to subscribe. The bold yellow color also draws your attention to the subscription form without being too invasive and they provide you with a close button to hide the form.
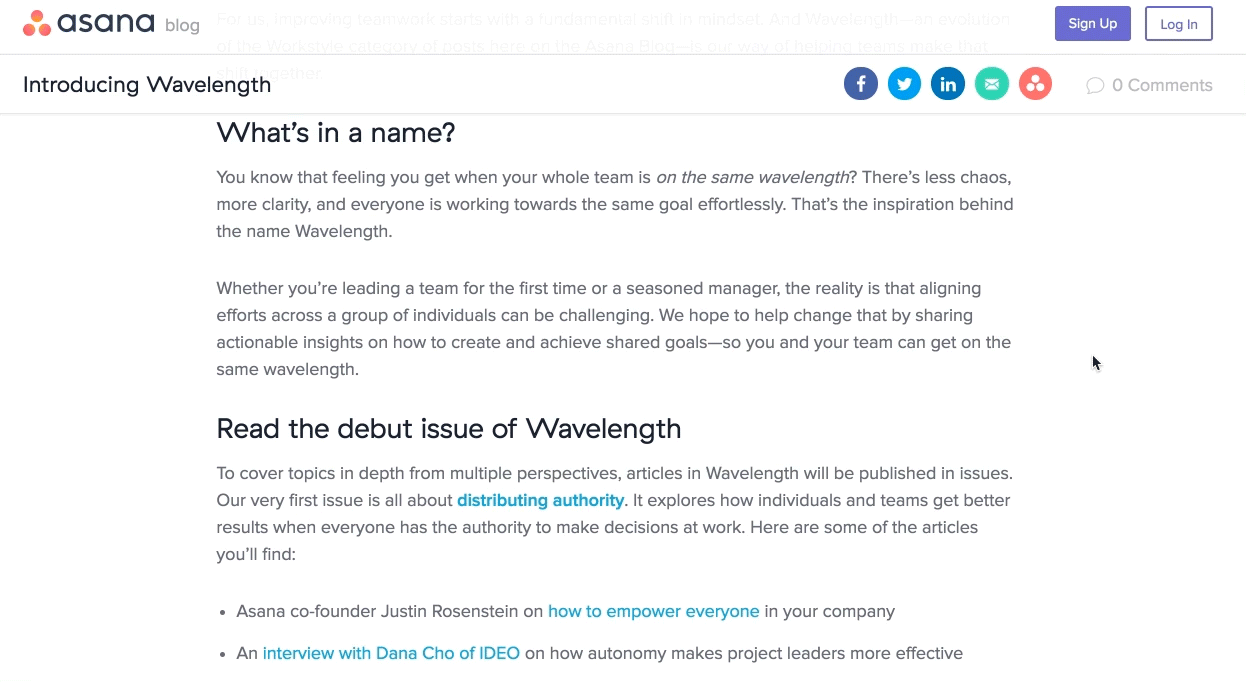
Example 4: With an automation
Asana uses a subscription form that slides out at the bottom when you scroll down about 80%. I like how the animation captures the attention of the readers and how they incorporate Facebook and Twitter buttons beneath the email sign up.
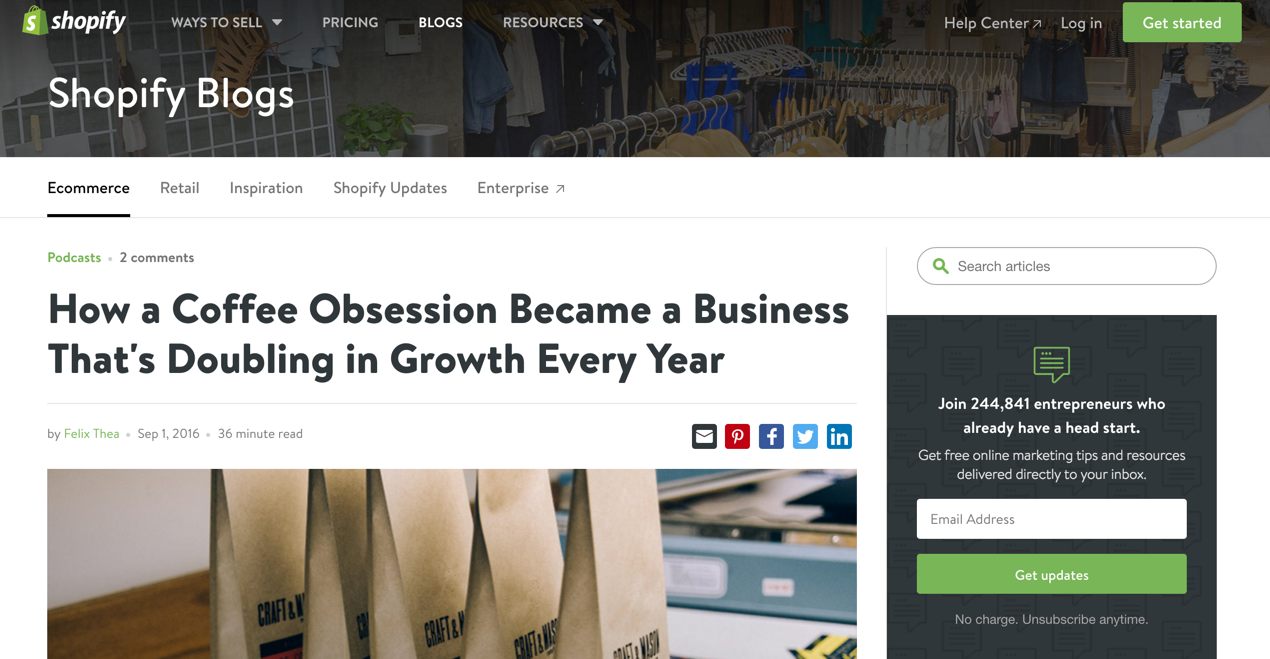
Example 5: In multiple spots
Shopify uses two slightly different methods for capturing their blog subscribers. When you visit their main blog page you can subscribe right from their header.

They also have a subscription form in the sidebar of each post. I like that they include some social proof in the subscription form in the sidebar and it’s clear what I can expect them to send me if I give them my email address.
What fields should you capture?
Standard fields
The shorter the form the more likely you will get your readers to subscribe to your blog. Most blogs only ask for an email address, but some also will ask you for your first and last name for more personalized blog digest emails.
Hidden fields
Your standard source fields should be on your blog subscription form, just like every Pardot form you create.
If you opt to have a subscription form on every blog post, I also like to add hidden fields for blog post title and blog post category. With my blog, for example, I have a subscription form at the bottom of each post and I use custom code in WordPress to automatically populate the hidden fields with the post title and post category. This way I can pull reports in Pardot to see what type of content is generating more blog subscribers and what posts have generated the most blog subscribers.
Here’s an example of populating hidden fields with WordPress blog information. Note: This method is only possible while using Pardot Form Handlers.
<input type="hidden" name="post-category" value="<?php the_category(); ?>" />

<input type="hidden" name="post-category" value="<?php single_post_title(); ?>" />
The Pardot implementation
Now that I’ve given you some examples of what form fields to include in your form and some methods for blog subscription forms, it’s time to show you how to build it out in Pardot.
Pardot Form Handlers vs. Pardot Form embed
There are some advantages and disadvantages for each form method. Embedded Pardot forms allow you to update the form directly in the Pardot form editor and the changes are live on your site as soon as you save the form. However, they also are embedded on your site using an iFrame, which means that certain functionality might not be available. Pardot form handlers are much more flexible and allow you to use your own HTML code to send data to Pardot.
When integrating your blog with Pardot the best form method to use, in my opinion, is Pardot form handlers, for a couple of reasons:
- Changes don’t need to be made to the blog form regularly
- It’s easier to have the form match your website/blog
- Many blogging platforms have plugins you can use for blog subscription forms that will work well with Pardot form handlers
Create a campaign dedicated to blog subscribers
Create a campaign to attribute your blog as a lead source for any new subscribers. Your form and new subscribers should be assigned to the campaign in Pardot and/or Salesforce, depending on your lead attribution processes.
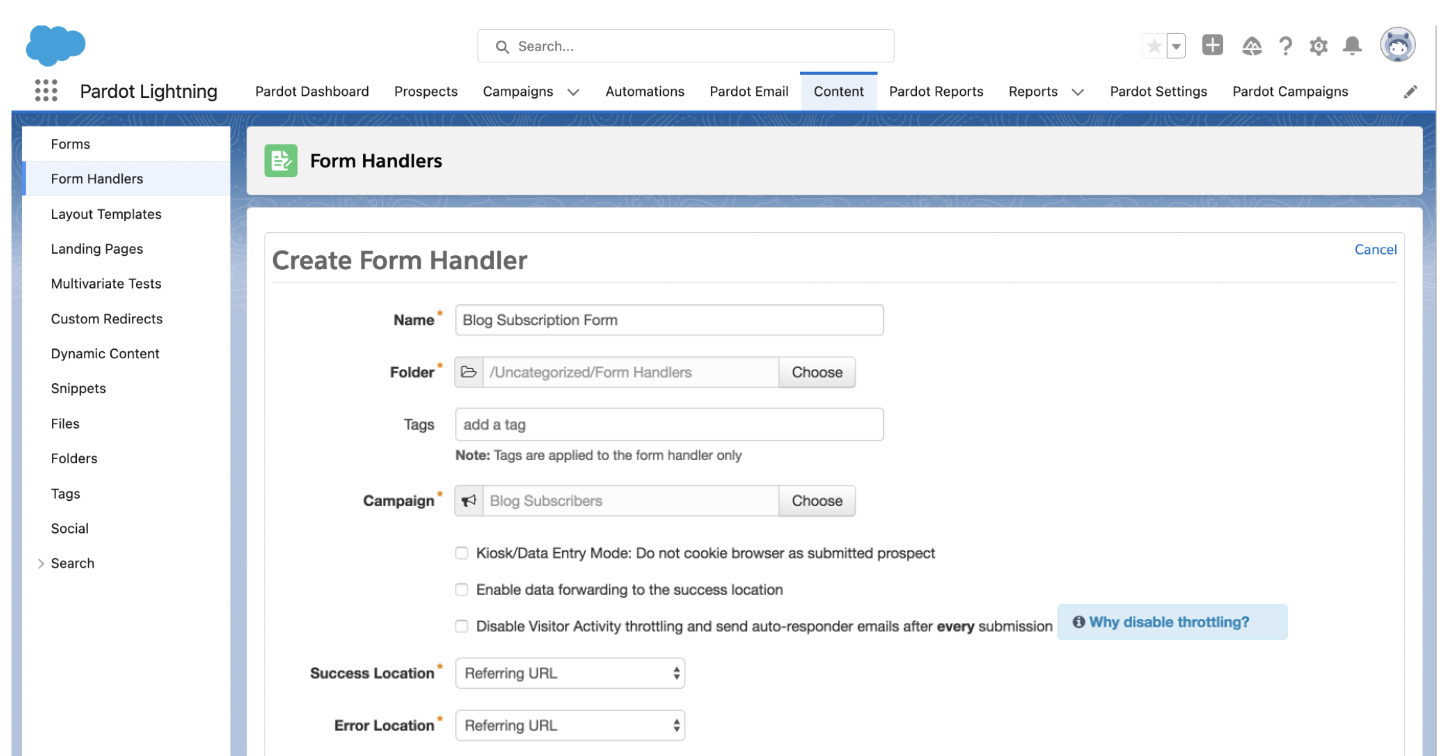
Create a Pardot Form or a Form Handler
In this tutorial, I will be using a Pardot form handler. You can also use a regular Pardot form if you prefer.
Create a Pardot form handler with a descriptive name. I called mine “Blog Subscription Form.” Select your new campaign, map the fields that you want to add to the form and click save. Note: Completion Actions and some other settings will be updated later on.
Add the form to your blog
There are many tools that allow you to add forms to your blog, but it depends what platform you use. Here’s a list of some popular plugins that will help you add your Pardot form to your blog.
- PopUp Domination can be used to create a popup subscription form on your blog. You can use any HTML you want, which means it will work perfectly with your Pardot form handler.
- Sumo is another option that will work on any type of blog platform. They also offer many different ways to display the subscription form on your blog.
While I’m a big fan of these tools, if you have a developer available the best option is to get them to implement your Pardot form on your blog using custom code. Depending on the method you choose it should be pretty easy for a developer to implement your form and it means you don’t have to pay a monthly subscription fee for using these tools.
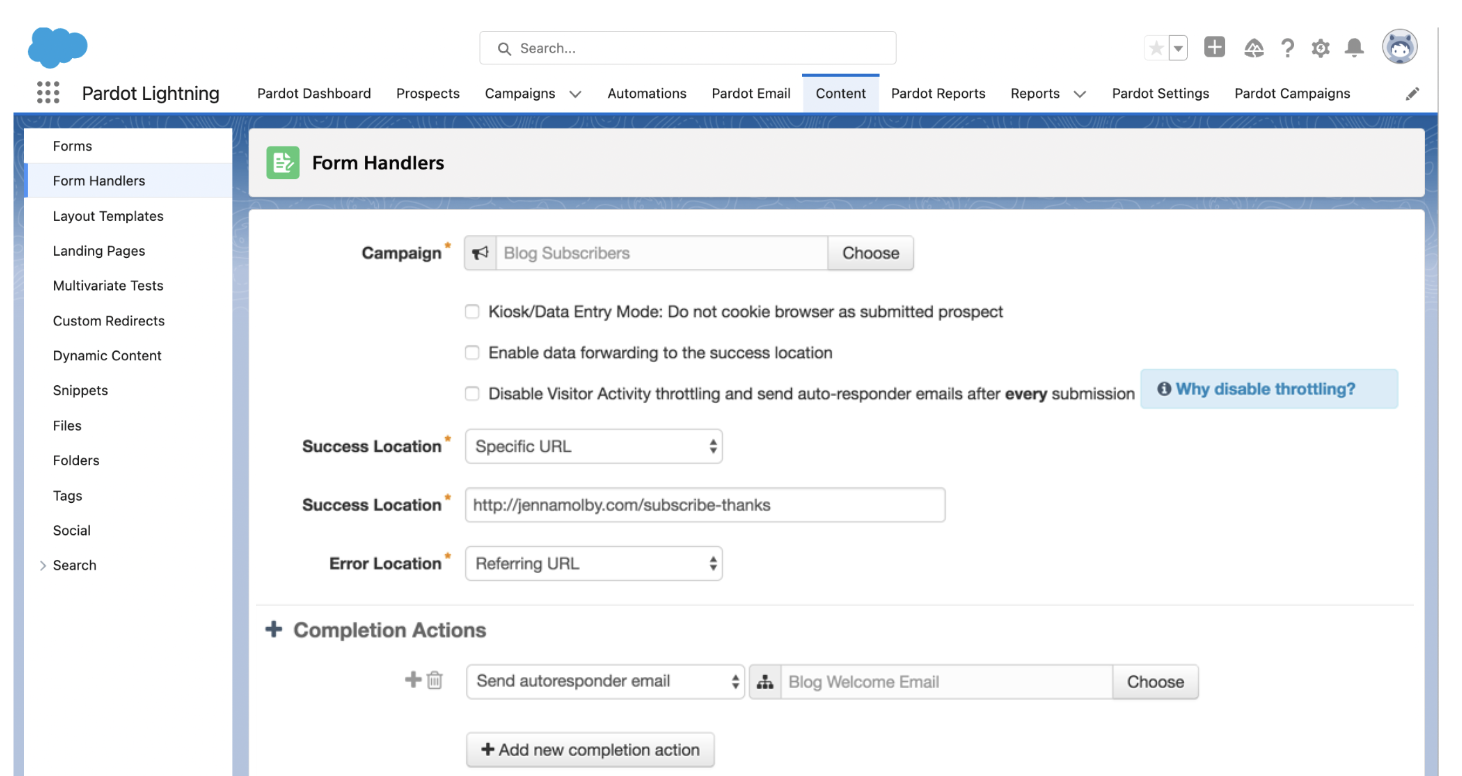
Create a Thank You page
The next step is to create a Thank You page that the form will direct to when someone subscribes to the blog. I recommend that you create it on your website (instead of a Pardot landing page), to ensure it has the same look as your blog.
Once your Thank You page is created, copy and paste the URL into the Success location in the Pardot form handler.
Create a blog welcome email
A blog welcome email is a great way to promote more of your blog content. Choose a couple of your popular posts or create a digest of curated content your readers might be interested in.
When a reader subscribes to my blog, I send them a welcome email with some of my top Pardot blog posts. Click here to see what it looks like (and feel free to copy and paste the HTML to create your own welcome email).
Once you have your blog welcome email created add a completion action to your Pardot form to send an autoresponder email.
Emailing subscribers: Automated vs. Manual
Now that your form is set up on your site and your welcome email is ready, it’s time to figure out how you’re going to send notification emails when there’s a new blog post. There are two ways you can send out blog posts:
- Automatically using a third-party application, or
- Manually, since Pardot doesn’t have an RSS feed integration.
For my blog, I send out all my blog digest emails manually, since I like to have control over what’s sent. However, I only post about once or twice a week, so it’s pretty manageable.
Automated blog posts using Feed Otter
If you opt to go with the automated route, Feed Otter provides a full RSS integration with Pardot. You can quickly build, schedule, and email your blog subscribers notifying them of a new post, a weekly digest, or a monthly newsletter.
Manual blog post emails
Manual blog post emails require you to create an email each time there is a new blog post, or if you post a lot during the week, you can do a digest of all the new posts, once a week. It can be time-consuming, but if you have a good email template setup and a defined process the whole thing doesn’t take very long. If you’re going to go the manual route, here are some tips:
- Create a simple, one-column email template, so you don’t have to spend time messing with formatting. This is the template I use for my blog posts.
- Create an email that you can copy each time you need to send a blog email. This will contain all the settings (from address, list, etc.) you need to send the blog email.
Questions?
Send me a tweet @jennamolby or leave a comment below.
| Note: This post was originally written in November 2016 and updated January 2023. |