
The surest way to get a reaction from any Salesforce Admin is to mention multi-select picklists. They are notoriously hard to report on and can be challenging at times. However, there are times when more than one value is needed.
Multi-select picklists can also cause quite a few issues for Marketing Cloud Account Engagement (Pardot) Admins. In this guide, we’ll discuss the proper way to create, sync, and update multi-select picklists in Account Engagement.
Field Types and Compatibility
Field types between Salesforce and Account Engagement don’t always behave the same way. Before we address how to work with multi-select picklists, we first need to understand field types and compatibility.
Account Engagement
- Checkbox – Allows a prospect to select multiple options from a list of values.
- Dropdown – Prospects can select a single value from a picklist.
- Multi-Select – Prospects can select multiple values from a picklist.
- Radio Button – Allows a prospect to select a single option from a list of values.
For more information, see the complete list of Account Engagement Prospect Field Types.
Salesforce
- Checkbox – A single select field that is used to indicate true or false.
- Picklist – Allows users to select a single value from a defined list.
- Picklist (Multi-select) – Allows users to select multiple values from a defined list.
For more information, see the complete list of Salesforce Custom Field Types.
The first thing to note is that checkboxes are multi-select in Account Engagement, but not Salesforce. This can lead to issues when syncing to a checkbox field in Salesforce. To avoid issues, set your field type to radio button in Account Engagement when syncing to a Salesforce checkbox (for more information see – Mapping Pardot checkbox fields to Salesforce checkbox fields).
The next thing that you’ll notice is that Account Engagement has two fields that allow users to select multiple values – checkbox and multi-select. So what’s the difference and how should each be used? I’m glad you asked.
- Checkbox – Select this option if you are creating a form in Account Engagement and you would like all values to be shown as individual boxes where prospects can check one or many.
- Multi-Select – Select this option if you are creating a form in Account Engagement and would like the values displayed in a picklist where the user can select one or many options.
Salesforce and Account Engagement Field Compatibility
| Salesforce Field Type | Account Engagement Field Type | Compatible |
| Checkbox | Checkbox | ❌ |
| Checkbox | Dropdown | ❌ |
| Checkbox | Multi-Select | ❌ |
| Checkbox | Radio Button | ✔ |
| Picklist | Checkbox | ❌ |
| Picklist | Dropdown | ✔ |
| Picklist | Multi-Select | ❌ |
| Picklist | Radio Button | ✔ |
| Picklist (Multi-Select) | Checkbox | ✔ |
| Picklist (Multi-Select) | Dropdown | ❌ |
| Picklist (Multi-Select) | Multi-Select | ✔ |
| Picklist (Multi-Select) | Radio Button | ❌ |
Account Engagement Custom Fields
Now that we are all on the same page related to fields and compatibility, it’s now time to create our custom fields in Account Engagement to hold the data. You have options when creating custom fields, so it’s important to consider the data in Salesforce and how you would like the information displayed on your Account Engagement forms before creating your field.
Option #1 – Checkbox
If the multi-select picklist in Salesforce has a small number of values (less than 5) and you would like all options visible to prospects when they view your form, checkbox is the field type for you.
Example Form with Checkbox Field Type

Option #2 – Multi-Select
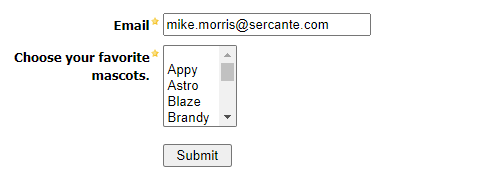
If the multi-select picklist in Salesforce has a large number of values and displaying all on a form would not be practical, multi-select is the way to go.
Example Form with Multi-Select Field Type
Additional Field Options & Considerations
Regardless of the field type selected, there are a few options that I would highly encourage you to consider.
Options that Should Always be Selected
- Keep this field’s type and possible values (for dropdowns, radio buttons, checkboxes) in sync with the CRM.
- Use pre-defined values (for checkboxes, radio buttons, drop downs, and multi-selects).
Record and Display Multiple Responses
The “Record and display multiple responses (useful for fields that are set to always be displayed like reporting issues)” box is not as clear cut as the other options mentioned above. Its use is really tied to how you are using the field and what data should be retained.
- Selected
- Initial selections will be recorded in Account Engagement upon initial form completion and synced to Salesforce.
- If form is completed again and new values are selected, they will be added to the prospect record in Account Engagement (and will sync to Salesforce).
- Values that were deselected during the second submission will still be included in the prospect record in Account Engagement and would also be visible in Salesforce. Essentially, the original selections from the initial form submission will be retained – even if they are not selected during the second form submission.
- Not Selected
- Initial selections will be recorded in Pardot.
- If form is completed again and new values are selected, they will be added to the prospect record in Account Engagement (and will sync to Salesforce).
- Values that were deselected during the second submission will be REMOVED from the prospect record in Account Engagement and would NOT be visible in Salesforce after the records sync.
Account Engagement Forms
We’re getting there! Now that we have decided how we want the multi-select picklist options to display on our form and we’ve created the custom field in Account Engagement, it’s time to build our form. For this exercise, I’m going to assume that you are familiar with creating a form. If you need a quick refresher, check out the Create a Form article from Salesforce.
Forms with Checkboxes
The process of adding a checkbox field to a form is pretty straightforward. Simply click the +Add New Field button once you reach the “Fields” tab and configure the field. Be sure to set the type to Checkbox and make sure to click the Load Default Data button.
Check the “required” box if you would like the field to be required. You can also select the “Always display even if previously completed” option on the “Advanced” tab, if you would like the field to always display.

After configuring, your form preview will look like the example below. Finish the form wizard for completing the additional tabs (Look and Feel, Completion Actions, Confirm & Save) and your form will be ready for use.
Form with Multi-Select Picklists
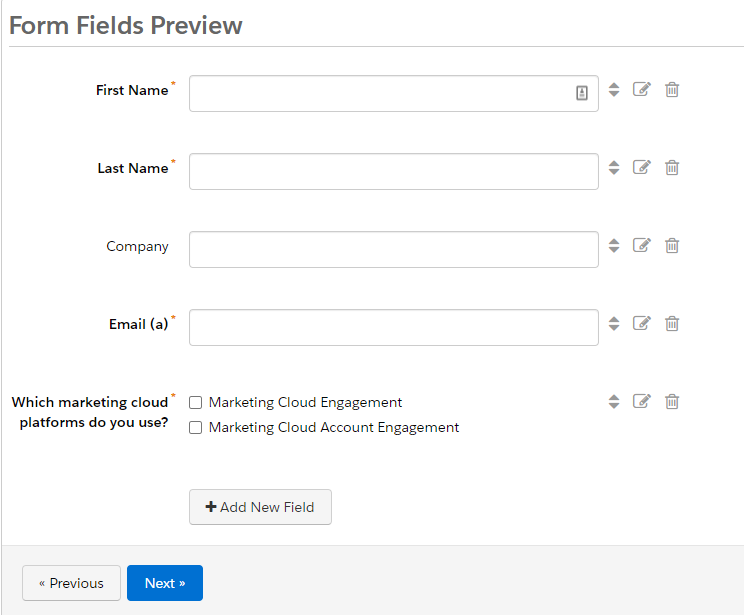
The process for creating a form using a multi-select field is very similar to the process for creating one for a checkbox. The only real difference is the “Type” of field that you’ll select.
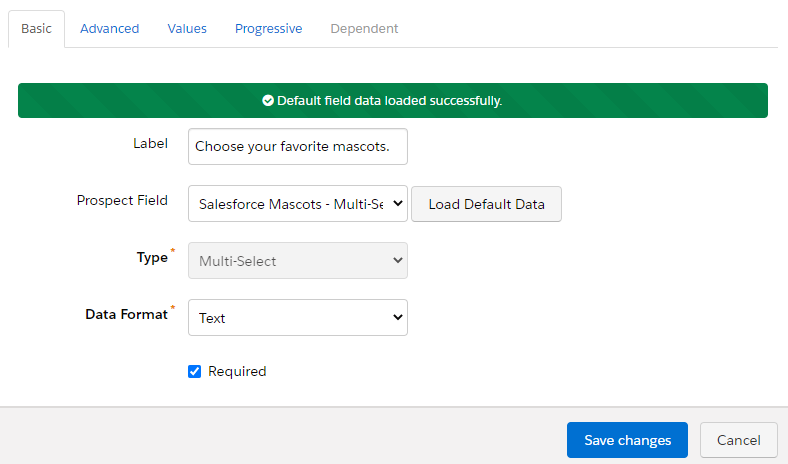
Very quickly, you’ll notice that there is not a multi-select option in the “Type” list. This can be confusing, but is not an issue. When configuring the form, set the checkbox type.
The magic will happen when you click the Load Default Data button. This will pull in the data from the multi-select field that you previously created and update the type selection to Multi-Select.

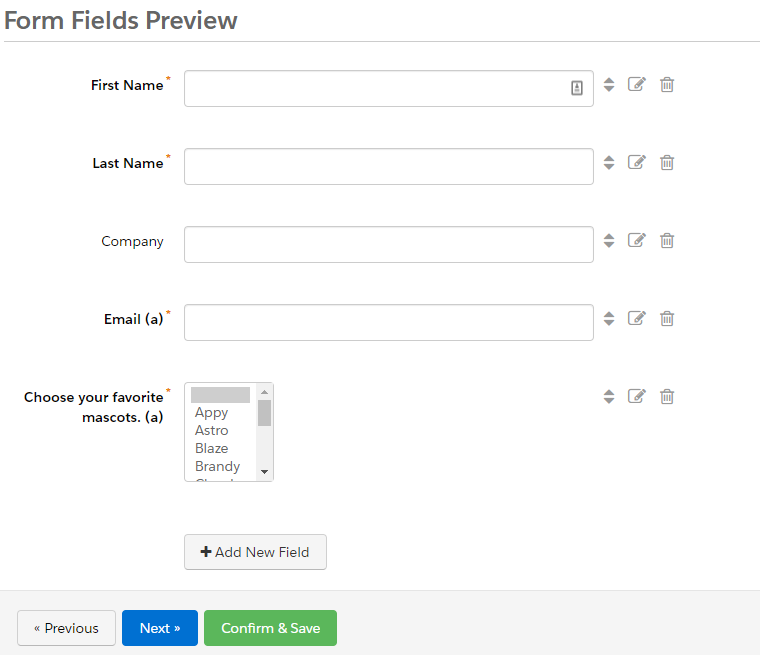
After configuring, your form preview will look like the example below. Finish the form wizard for completing the additional tabs (Look and Feel, Completion Actions, Confirm & Save) and your multi-select form will be ready for use.
Importing Multi-Select Picklist Values
When importing data into a multi-select field in Account Engagement, you must first decide on the desired action. Do you want to overwrite the current selections or do you want to add new selections to the existing data? This is a big one as it will determine if you should select the Record and display multiple responses (useful for fields that are set to always be displayed like reporting issues) option when creating your field.
Import – Record and Display Multiple Responses NOT Selected
In this scenario, the Record and display multiple responses (useful for fields that are set to always be displayed like reporting issues) is not selected for either of my custom fields in Account Engagement.
After completing both forms, my initial selections were recorded in Account Engagement and synced to Salesforce.

The data below was then imported into Pardot. The “overwrite existing data” option was selected for the MAP field, but not not the Mascot field upon import.

The result is that the MAP field was updated to Marketing Cloud Engagement, but no changes were made to the Mascot field. This makes sense as we opted to overwrite the data in the MAP field when we imported. Since we did not overwrite the Mascot data, the initial values were retained.


Import – Record and Display Multiple Responses Selected
In this scenario, the Record and display multiple responses (useful for fields that are set to always be displayed like reporting issues) IS selected for both of my custom fields in Account Engagement.
After completing both forms, my initial selections were recorded in Account Engagement and synced to Salesforce.
The data below was then imported into Pardot. The “overwrite existing data” option was selected for the MAP field, but not not the Mascot field upon import.
The result is that the MAP field was updated to Marketing Cloud Engagement and that the additional values of Flo and Brandy were added into the Mascot field. This is exactly what we would expect. We told Account Engagement to overwrite the data in the MAP field so it did. Since we did not select “overwrite” for the Mascot field and the field was configured to record and display multiple responses, the new values were appended to the existing.

Updating Multi-Select Picklist Values
When using automation rules to change data in multi-select picklist fields, you must first decide on the desired action – just like you did for list imports. Checking (or not checking) the Record and display multiple responses (useful for fields that are set to always be displayed like reporting issues) option when creating the field will impact the results in Account Engagement and Salesforce.
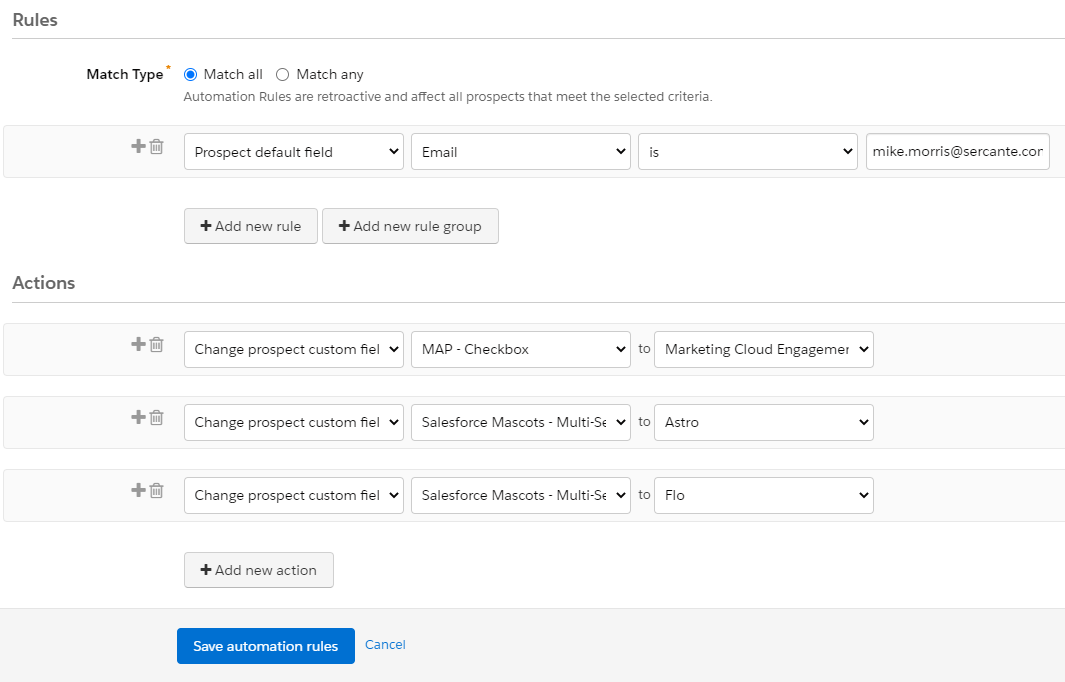
Automation Rule – Record and Display Multiple Responses NOT Selected
In this scenario, the Record and display multiple responses (useful for fields that are set to always be displayed like reporting issues) is not selected for either of my custom fields in Account Engagement. The values have also been reset to the values below as the starting point. We will now create automation rules to update the values.
For this exercise, I’m going to assume that you are familiar with creating automation rules. If you need a quick refresher, check out the Create an Automation Rule article from Salesforce. The automation rule below contains actions to update the MAP field to “Marketing Cloud Engagement” and the Mascot field to “Astro” and “Flo”. Let’s run and record our results.

The result is that both fields were updated based on the actions included in the automation rule. This is the expected behavior based on the field configuration. The automation rule told Account Engagement to change the field values and that’s exactly what it did.

Automation Rule – Record and Display Multiple Responses Selected
In this scenario, the Record and display multiple responses (useful for fields that are set to always be displayed like reporting issues) IS selected for both of my custom fields in Account Engagement.
The values have also been reset to the default values below.
We’re now going to recreate the exact same automation rule as we did earlier. As a reminder, the rule contains actions to update the MAP field to “Marketing Cloud Engagement” and the Mascot field to “Astro” and “Flo”. What do you think will happen this time?
If you said that both MAP fields would be selected and that the Mascot field would contain all four of our fiends (Astro, Codey, Flo, and Max), you would be correct. Since our fields are now configured to record multiple responses, the new values were added and the original values were retained.

Parting Words
In this guide, we tested a lot of situations that can result when working with multi-select picklists in Account Engagement to help add clarity to how these fields work. The decisions that you make related to how data should display on forms and the data that you would like to retain are two critical questions that must be addressed at the beginning of your project. These decisions will determine how your fields are created in Account Engagement and the data that will ultimately end up in Salesforce.
Further Reading
- Sync Error Workaround: Dynamic Dependent Picklist Fields and Pardot Forms
- How to Update Salesforce Picklists & Keep In Sync with Pardot
Questions?
Contact the Sercante team for help.

