
A Campaign Member’s First Associated Date records the date a Lead/Contact became a member of a Salesforce Campaign, and it’s a great metric to use in your reporting. First Associated Date can be used to show how many Leads/Contacts a Campaign touched in a given time period, how long the Lead/Contact was in the campaign before they moved to a “Responded” status, or how long the Lead/Contact was in the campaign before an associated Opportunity was opened. However, sometimes the Campaign Member’s first associated date gets skewed.
Common causes of this are:
- Lead/Contact should have been added to the campaign on September 15th, but was stuck in the Account Engagement sync queue until October 1st
- New Leads from an event we’re not uploaded into Salesforce until a few weeks after the event
- Campaign Members were brought over from another Salesforce org during a migration
- Sales didn’t enter a new Lead they were working with until after the Opportunity was created
If you are relying on Campaign Member First Associated Date for your reporting, any of the above causes can really throw off your data and make a Campaign, or a time period, look less successful than it actually was. Luckily, you can backdate this field with a few system permissions and the help of Data Loader!
You can insert, but not update!
Before we get into the nitty-gritty of how to do this, it’s important to note that you can’t update the Campaign Member First Associated Date of existing Campaign members. You can only insert new Campaign Members with a backdated first associated date. However, you can use Data Loader to export Campaign Members, their Campaign Status, their dates, etc. from a Campaign, delete the Campaign Members, then re-add them to the Campaign with new dates.
Permissions needed
The first step to updating First Associated Date is enabling “Set Audit Fields Upon Record Creation”.
- Navigate to Setup > User Interface
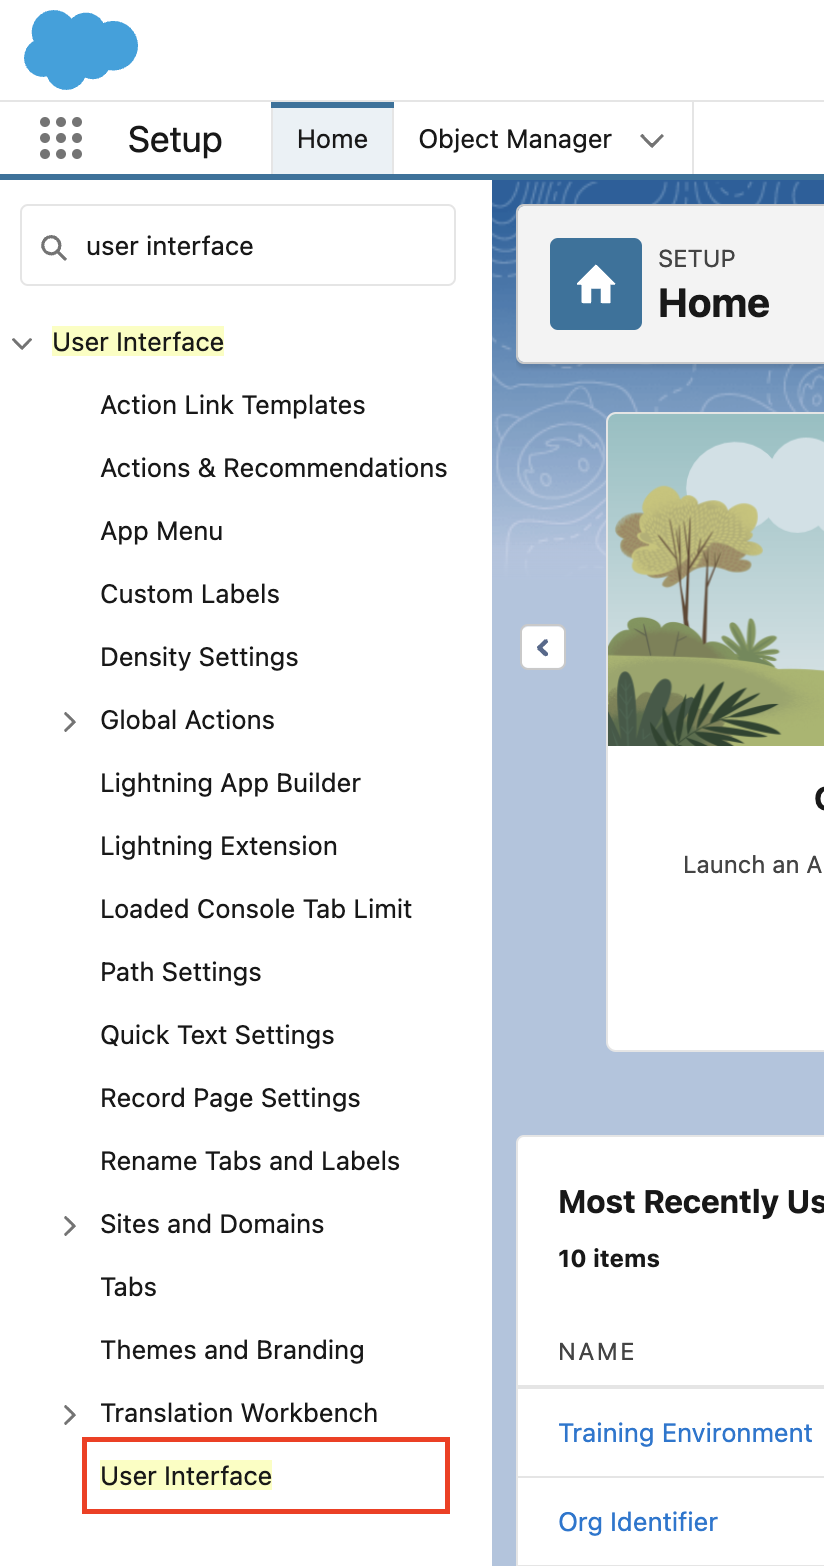
- Ensure the “Enable “Set Audit Fields upon Record Creation” and “Update Records with Inactive Owners” User Permissions” option is selected
- Select Save
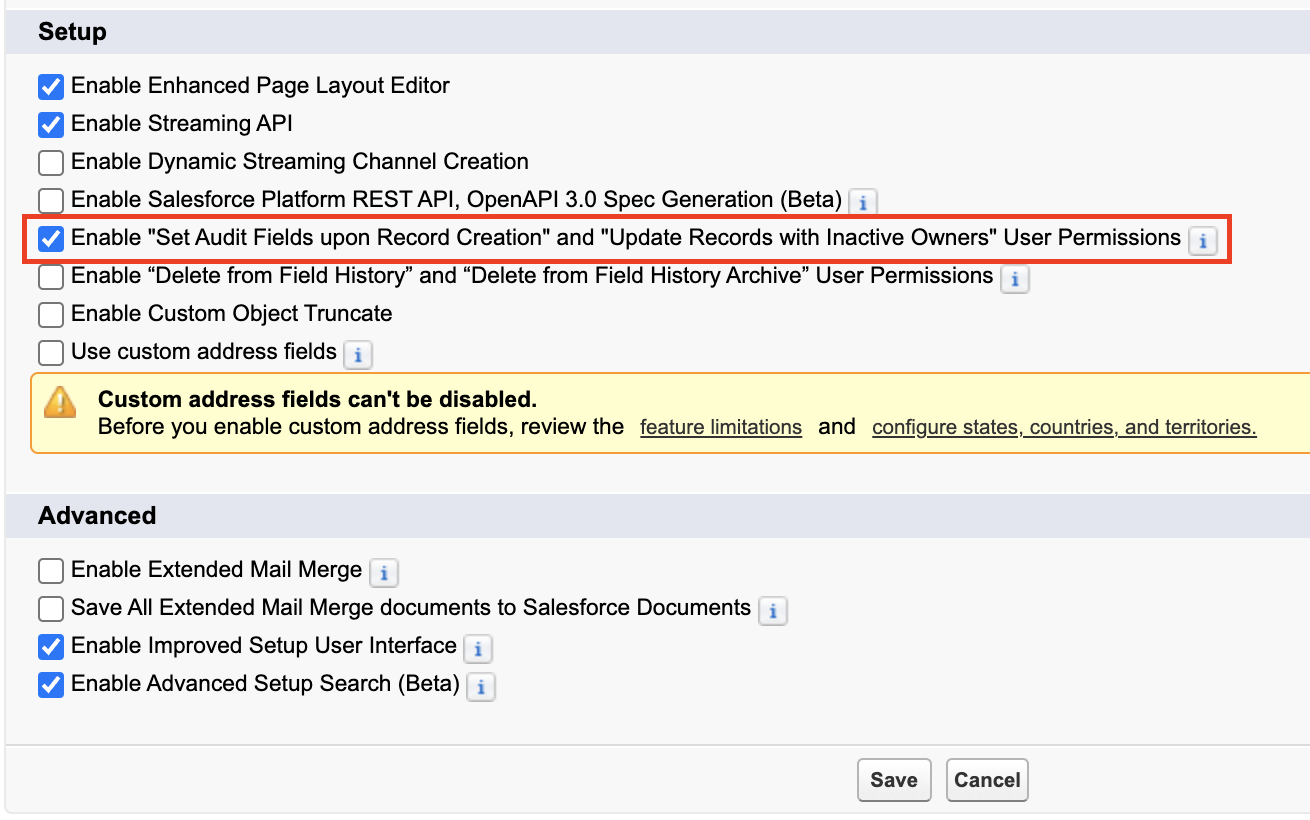
Next, create a Permission Set for “Set Audit Fields Upon Record Creation” and assign this Permission Set to the user(s) who will handle the Data Loader imports.
- Navigate to Setup > Permission Sets
- Select New
- Name your Permission Set “Set Audit Fields Upon Creation”
- Select Save
- Within your new permission set, type “Set Audit” into the “Find Settings” box
- Select Set Audit Fields Upon Creation
- Select Edit on the resulting page and select the Set Audit Fields Upon Creation checkbox
- Select Save
- Select Manage Assignments
- Select Add Assignments
- Select any users who will be handling the Data Loader imports of Campaign Members, then select Next and Assign
Import your data
Finally, get your Data ready for import! At a minimum, you’ll want to make sure your file includes:
- Campaign ID
- Lead ID and/or Contact ID
- If you are importing both Leads and Contacts into the Campaign, I recommend splitting the import into 2 files.
- Campaign Member Status (if different from the Campaign’s default Status)
- Campaign Member first associated date
- Ensure the column is formatted using one of the options below, otherwise you will get an error.
- MM/DD/YYYY (example: 04/23/2012)
- DD/MM/YYYY (example: 23/04/2012)
- YYYY-MM-DD (example: 2012-03-25)
- Ensure the column is formatted using one of the options below, otherwise you will get an error.
To import the data
- Open Data Loader and login
- Note: Updating Campaign Member First Associated Date is not possible with the Data Import Wizard, only Data Loader.
- Select Insert
- Note: The ability to map to Campaign Member First Associated Date will not be available if you select Update or Upsert.
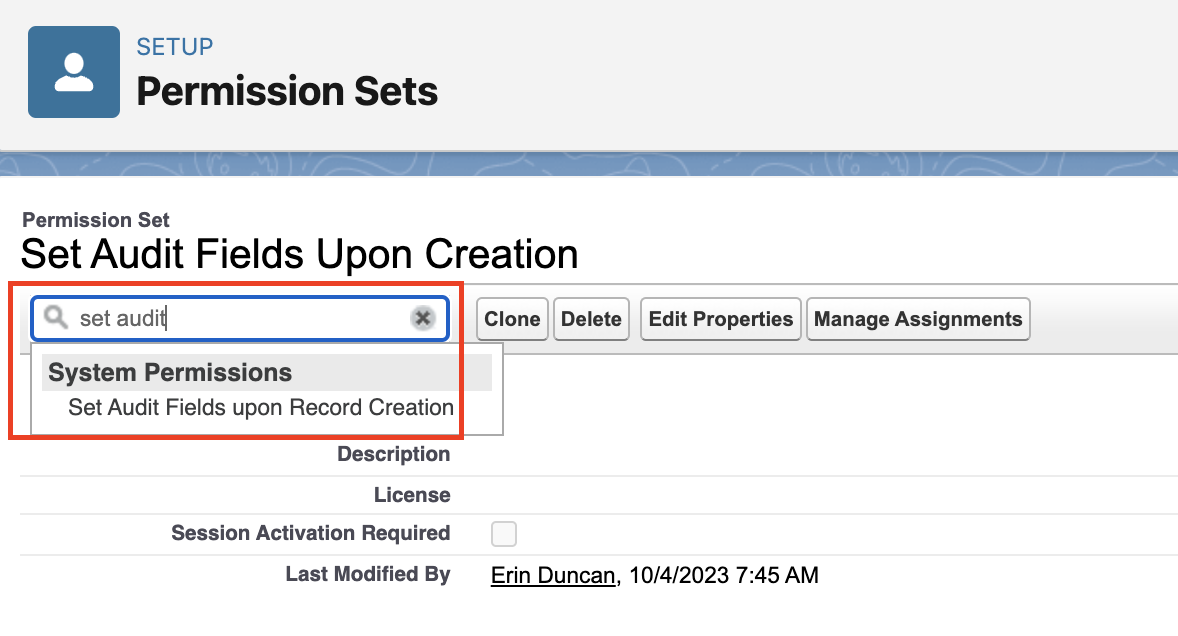
- Check the Show all Salesforce Objects checkbox and search for CampaignMember
- Select your CSV file and click Next
- Select Create or Edit a Map and map your fields
- CreatedDate is the field you’ll need to map to the Member First Associated Date column
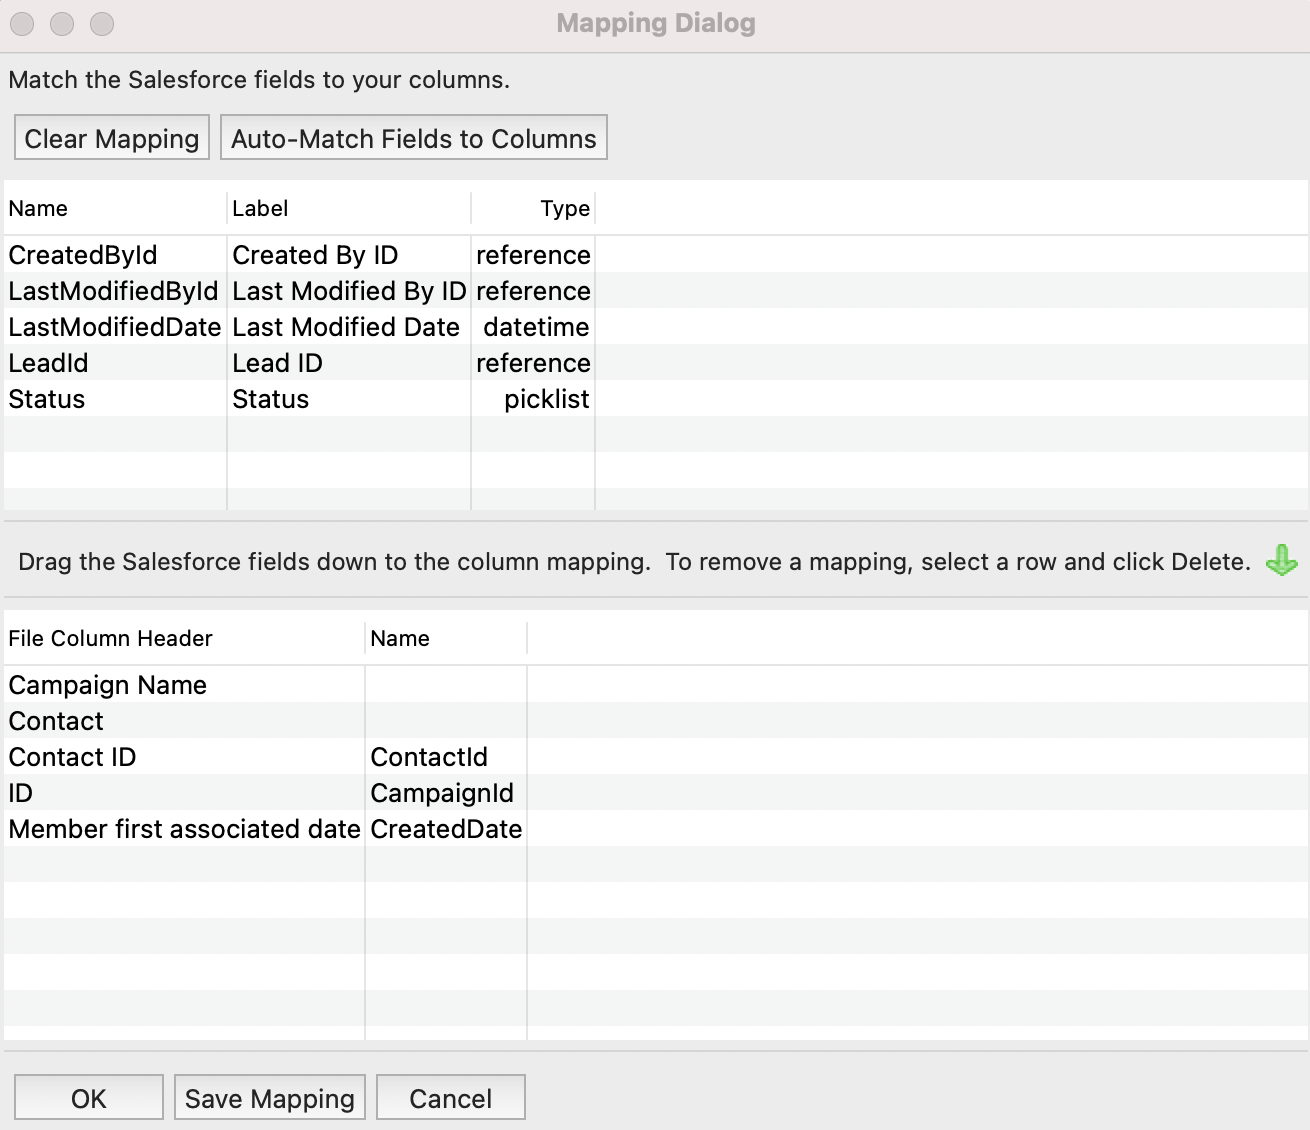
- Select OK > Next > Finish
And Voila, beautiful, accurate Campaign Member data!