
Product Note: Marketing Cloud Growth and Advanced are editions of Marketing Cloud Next and have also been referred to as Agentforce Marketing.
Managing consent records in Marketing Cloud on Core (aka Marketing Cloud Growth or Advanced Edition) has raised many questions. While most agree with the concept of consent, generating individual consent records each time a sales team member adds a new lead in Salesforce can be tedious. I’ve been asked many times if I could just create a flow to add consent when new leads are created. The answer is “Yes” and here’s how you can do it too.
Disclaimer
The Salesforce-recommended methods for capturing consent are the Consent Request element in form-triggered flows and consent imports. This record-triggered solution offers an alternative that has been thoroughly tested across multiple organizations without issue. However, due to a potential risk associated with caching, please perform comprehensive testing prior to deployment.
Consent Fields
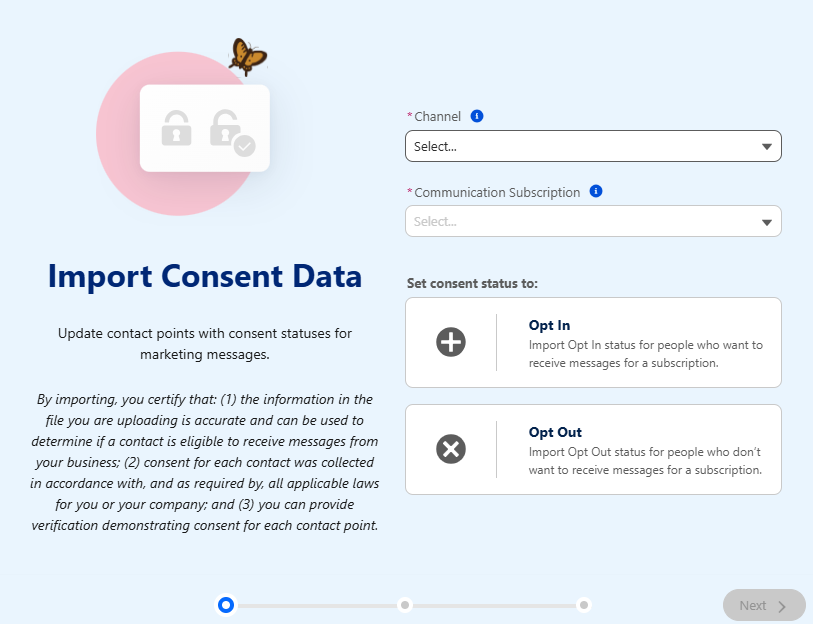
Before creating consent records, we first need to understand the requirements. When doing a consent import, the following fields are captured in the wizard and through the import template. This process is very simple and the magic happens behind the scenes.
- Channel – Communication delivery method (Email or SMS)
- Communication Subscription – The individual subscription name (ex. Newsletter)
- Consent Status – Indicates whether an individual has “Opted In” or “Opted Out” at the subscription level.
- Email – Email address of the individual captured on the consent record.
- Consent Date – The date/time that consent was captured.
When digging in a bit more, I found a field named Communication Subscription Consent Id. This field combines the email address and the Communication Subscription Channel Type Id with “#” between them to create a new field. This field is the key to creating a consent record.
Example
- [email protected]#0eBHs0000010zyOMAQ
Communication Subscription vs. Communication Subscription Chnl Type Id
It’s important to know the difference between these fields and where to find them. When creating your Communication Subscription Consent Id field in your flow, you’ll need to be sure to use the correct value.
The difference between these fields is that Communication Subscription Chnl Type Id references the email subscription and the channel. Communication Subscription is channel agnostic and only references the subscription.
Example
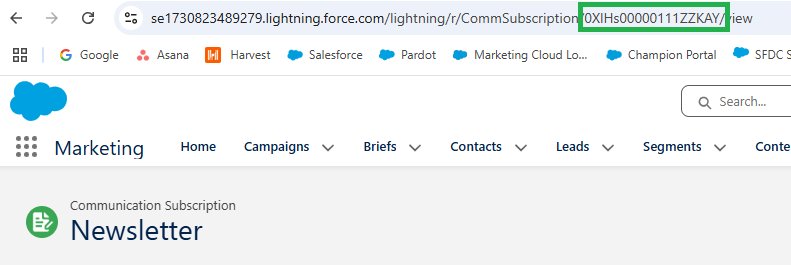
- Communication Subscription – 0XlHs00000111ZZKAY
- Refers to the Newsletter subscription
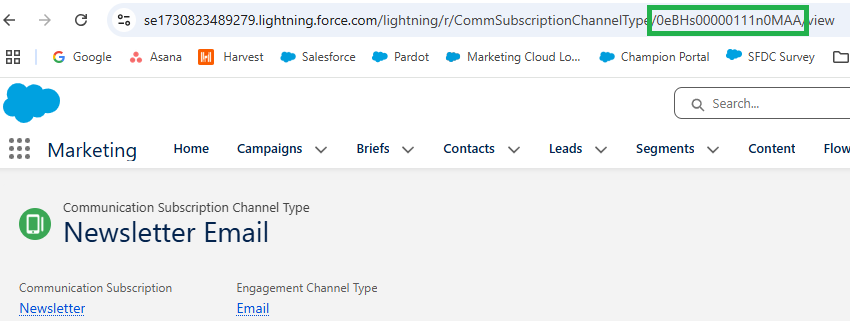
- Communication Subscription Chnl Type Id – 0eBHs00000111n0MAA
- Refers to the Newsletter subscription and email channel
You can find these values by creating a Salesforce report using the Communication Subscription Channel Type report type. You’ll see one record for each subscription and channel. In this example, I have four subscriptions on my preference page as I’m just using the email channel. If the SMS channel was in use, there would be 8 records.
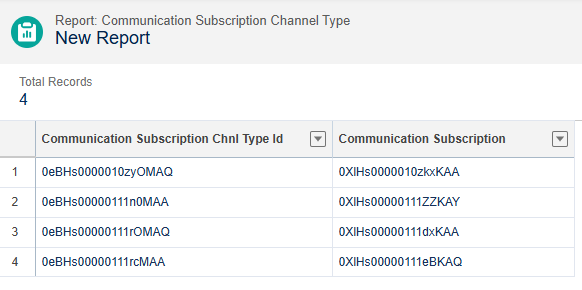
Both of these values are going to be needed when creating your flow, so make a report in your org and be sure to save it. You can also view these values by accessing the records from the Communication Subscriptions and Communication Subscription Channel Types objects if you prefer.
Record-Triggered Flow Build
We’re finally to the fun part. But before we get started, consider a few questions.
- Which object should trigger the flow?
- When should the flow trigger?
- What entry conditions should be used?
- Are there any countries or states where double opt-in is required?
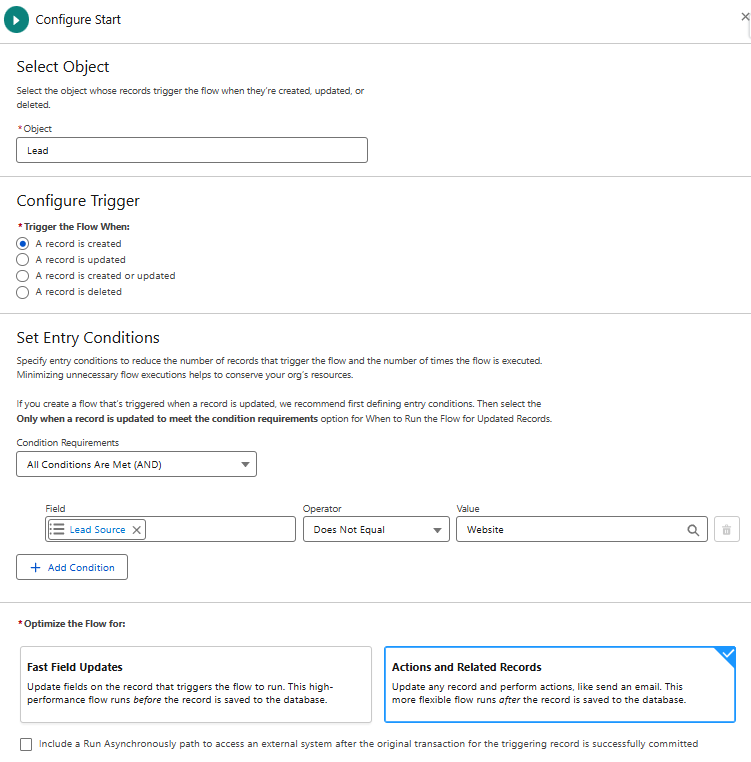
Start Element
I want my flow to only run when new leads are created. I also want to exclude leads that were created from a form submission. Marketing Cloud on Core forms require a consent element, so we don’t need to update these leads. Your start criteria will differ based on your needs.
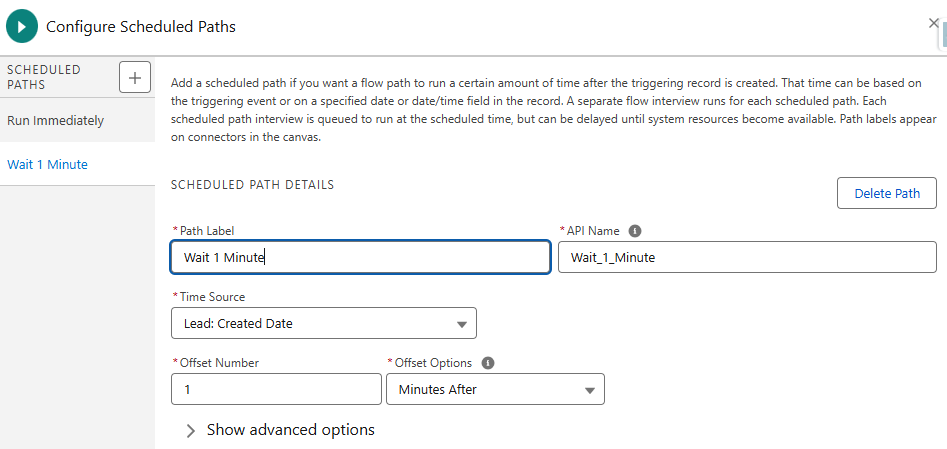
Scheduled Path
Record-triggered flow can’t execute actions that make external callouts in a path that runs immediately. You can address this by adding a scheduled path with a slight delay. My path has a 1-minute delay from when the lead was created.
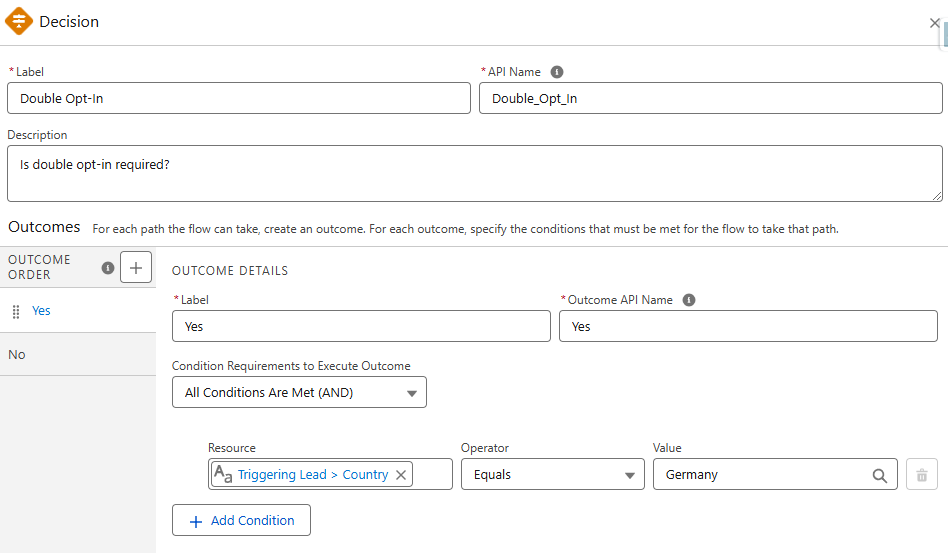
Decision Element
I did not exclude countries that require double opt-in from my start element intentionally. I decided to let them enter the flow and use a decision element to route them down a second path. The idea is that I can later add an action to send a transactional email to these leads encouraging them to update their subscription preferences.
Action Elements
Salesforce set us up for success by including the MessagingConsent.MessagingConsent action. All we need to do is configure it correctly and our consent records will be created. Like consent imports, you’ll need action for each of your subscriptions by channel.
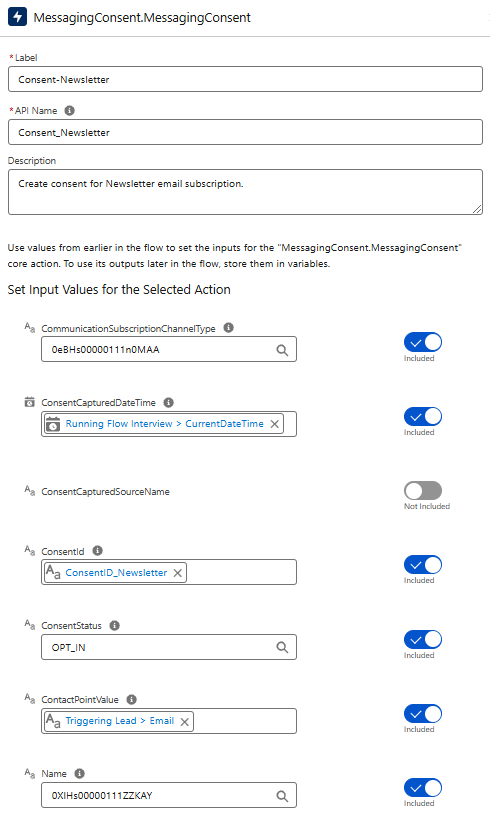
When configuring actions, you’ll need to set values for the inputs below.
- CommunicationSubscriptionChannelType*
- This is the id that relates to the communication subscription and channel.
- ConsentCapturedDateTime
- Date/time that consent was captured.
- ConsentId
- This is the concatenated field that we discussed earlier that includes the email address and the Communication Subscription Channel Type Id.
- ConsentStatus
- Set value to OPT_IN or OPT_OUT.
- ContactPointValue
- The email address of the triggering record.
- Name*
- The communication subscription (id) from the report that we created earlier. This is the id that relates to the subscription only (does not include the channel).
- The communication subscription (id) from the report that we created earlier. This is the id that relates to the subscription only (does not include the channel).
*Note: You can create content records without these values, but I prefer to include them to more closely resemble the records created from consent imports.
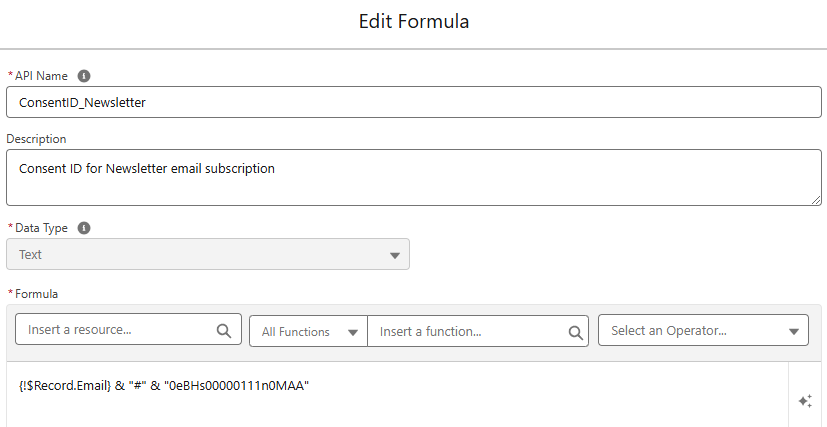
Formula Resources
Next, we need to generate the consentid field that will be needed in the action elements. This can be done using a formula to generate the value using the email address (of the triggering record) and the Communication Subscription Chnl Type Id. You’ll need one resource per Communication Subscription Chnl Type Id.
Example Formula
- {!$Record.Email} & “#” & “0eBHs00000111n0MAA”
Configured Action Element
Here’s an example of an action element that has been fully configured.
Final Flow
Here’s a look at the final flow.

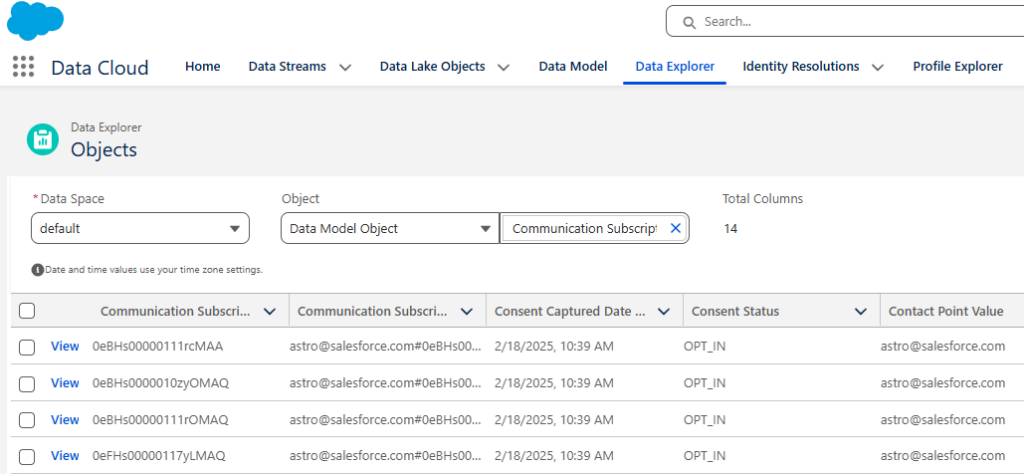
Testing
After activating your flow, create a new lead in Salesforce. Upon creation, the consent values will be set to Opt Out. After a few minutes (allowing time for the scheduled path to run), verify the consent record was created by viewing the Communication Subscription Consent DMO in Data Explorer in Data Cloud.
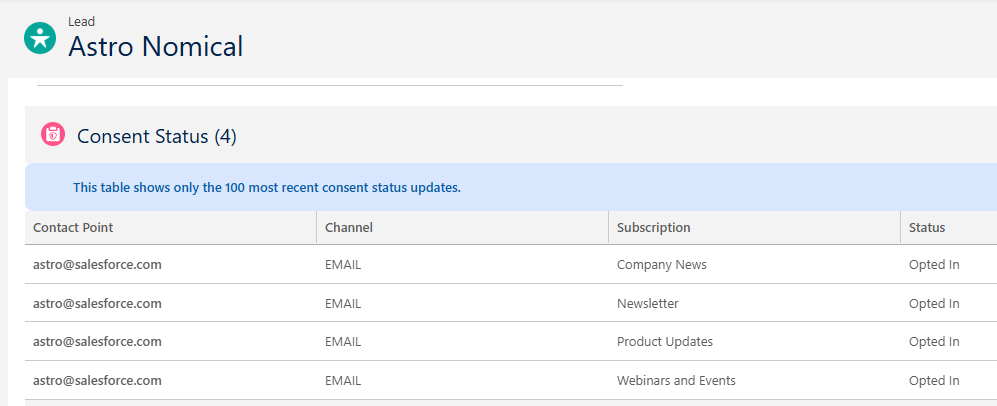
Once the data from Data Cloud syncs back to the lead record, the consent values will be updated to Opt In in the Privacy Consent Status component.
Respect Consent & Be Responsible
The best practice recommendation is to create consent records using the consent element on form-triggered flows or by completing consent imports. While these recommendations make sense, generating consent records for individual records created by users can present challenges.
Record-triggered flows offer a good solution for automating consent records, but organizations must ensure compliance with regional, state, and company legal requirements. When in doubt, err on the side of caution and prioritize transparency in consent management.