Product Note: Marketing Cloud Growth and Advanced are editions of Marketing Cloud Next and have also been referred to as Agentforce Marketing.
Marketing Cloud Growth and Advanced Edition (aka Marketing Cloud on Core or just Marketing Cloud) offers incredible capabilities to marketers in so many areas. From AI powered segmentation, scheduling and sending SMS in a nurture campaign, and unprecedented abilities to tailor your marketing content to the audience viewing it, Marketing Cloud Growth and Advanced Edition can help marketing teams large and small automate their marketing efforts. All of these amazing capabilities rely on the power of one key feature of Data Cloud – the Data Graph.
Data Graphs allow you to combine and transform data from multiple Data Cloud Data Model Objects (DMOs) into a single view. This read-only Data Graph can then be used in a variety of ways through API, automations, and Salesforce applications, like Marketing Cloud. In fact, a Data Graph is a requirement for using personalization (and some automations) within Marketing Cloud – the objects and fields you select when creating this graph are the same objects and fields that you’ll have access to when adding personalization to your marketing content or powering your automations.
Your Data Graph needs to have a specific shape to successfully send your emails. If you have Marketing Cloud Advanced Edition, you’ll also need to ensure that Einstein Engagement Scoring and Einstein Engagement Frequency features have been enabled before building. This blog will help you understand the steps needed to take to create and edit your Data Graph for Marketing Cloud.
Things to Consider Before Building a Data Graph
Once upon a time editing a data graph wasn’t possible, which meant gathering all of the information you’d need to reference in your marketing efforts before building your first graph. Now it’s entirely possible to edit your data graph, but I’d still highly recommend you gather your requirements ahead of time, so let’s think about what you’ll need.
What fields do you need for personalization?
Personalized marketing content is the name of the game, so the first thing to consider is what fields you’ll want to reference in any personalized marketing content. This should include things like First Name, Last Name, Title, and Account but you should also consider what custom fields you may want to reference, like the name of a product or webinar they’ve attended.
Are there any fields you’ll need for segmentation?
The segmentation capabilities in Marketing Cloud rely on the fields that are included in your data graph, so next up it’s time to think about how you’re planning on segmenting your prospects for email, SMS, and/or WhatsApp sends and automations. Common things to include could be industry, region, and address data. Make note of the fields and the object that those fields are on. For example, if you want to pull in industry, that field is likely on the Account Object. Keep in mind that anything you include here must have some relationship to the individual included in the segment.
What will you need for your automations?
The last thing you’ll need to consider is any information you might need for your flows. What information will you be basing your automation decisions on? Things to consider include campaign membership or status, email engagement, and geographical information.
Have Advanced edition? Turn on Einstein Features (if applicable)
Marketing Cloud Advanced Edition includes Einstein Engagement Scoring and Einstein Engagement Frequency. Be sure to enable these features before building your data graph!
Confirm the fields are in Data Cloud
Now that you have your field requirements determined, the next step is to make sure all these fields are mapped to your Data Streams. These field mappings take the new information ingested in the data stream and map it to the appropriate fields and objects in the Data Model Object (DMO) to create or update the appropriate records. Head to the Data Streams tab in Data Cloud and confirm all the fields you listed earlier are mapped to the appropriate DMOs. Check out this help article for some data mapping best practices.
Be sure the Data Cloud Connector can View All fields
One of Salesforce’s core tenets is trust, and that extends across all layers of the Salesforce ecosystem. This means that the connector between Data Cloud and Sales Cloud has minimum access to information in your Salesforce system. Make sure all the fields you’re including in your data graph are visible to Data Cloud by going to the Data Cloud Salesforce Connector Permission Set and updating the object settings to include the View All and Read permissions for every object you’ve listed. This ensures that all objects and fields are able to be ingested into Data Cloud.

Building the Standard Data Graph for Marketing Cloud
We have a step by step blog on building a data graph for personalization, but as a quick refresher, here are the steps you’ll need to take and things to keep in mind.
- Go to Salesforce Setup > Marketing Cloud > Assisted Setup > Reporting and Optimization > Customer Engagement
- Click on “Go to Data Graphs”
- Create a new data graph from scratch
- Use the default data space
- Select the Unified Individual as your Primary Data Model Object
- Ensure your data graph has the following shape:
- Unified Individual (Primary Data Model Object)
- Unified Link Individual
- Individual
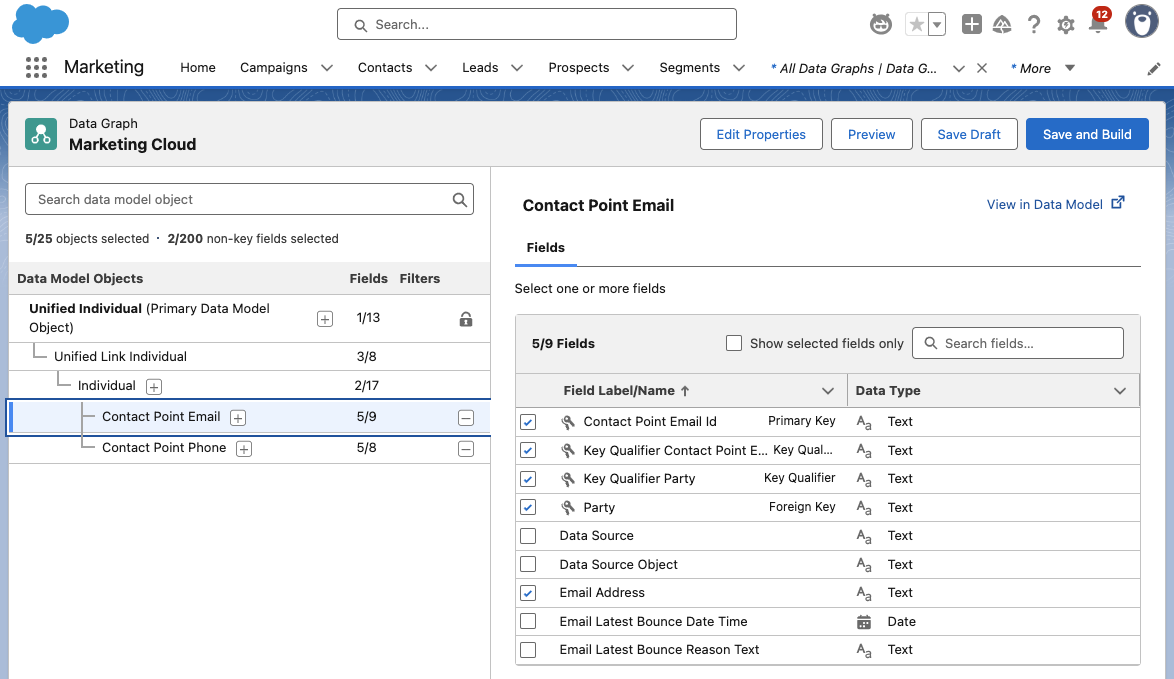
- Contact Point Email
- Contact Point Phone
- Individual
- Unified Link Individual
- Make sure all the objects and fields on your lists are included in the data graph
- The following fields must be selected during the Data Graph setup:
- Individual ID from ‘Individual’
- Email Address from ‘Contact Point Email’
- Telephone Number from ‘Contact Point Phone’
- The following fields must be selected during the Data Graph setup:
But what if you have Advanced?
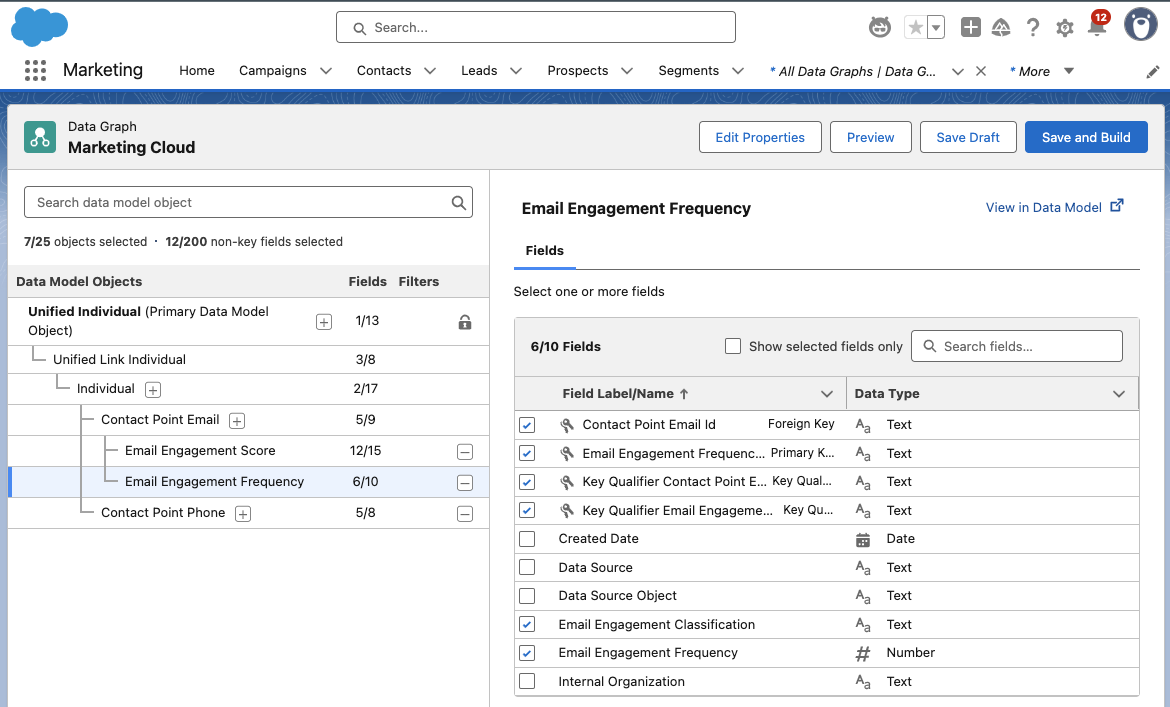
If you’re using Marketing Cloud Advanced Edition, be sure to include the Email Engagement Score (Unified Individual > Unified Link Individual > Contact Point Email) and Email Engagement Frequency (Contact Point Email & Contact Point Phone).
Add in SMS
By now, your data graph should look something like this, give or take the Email Engagement Score, Email Engagement Frequency, and SMS options. To include SMS in your Data Graph, be sure to include the Contact Point Phone and the Message Engagement options, as shown below.
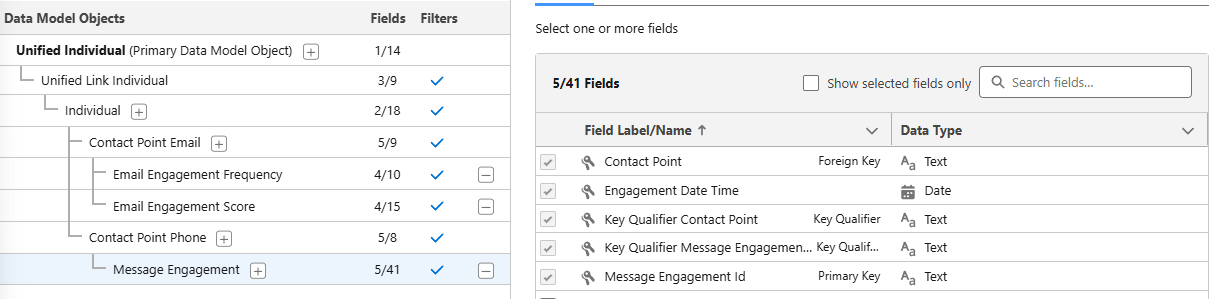
Message Engagement gives you lots of options for monitoring how your SMS marketing is doing. Use this to monitor engagement with your SMS messages, the messages you’re sending, links, subscription information and more!
Bringing in Custom Fields and Objects
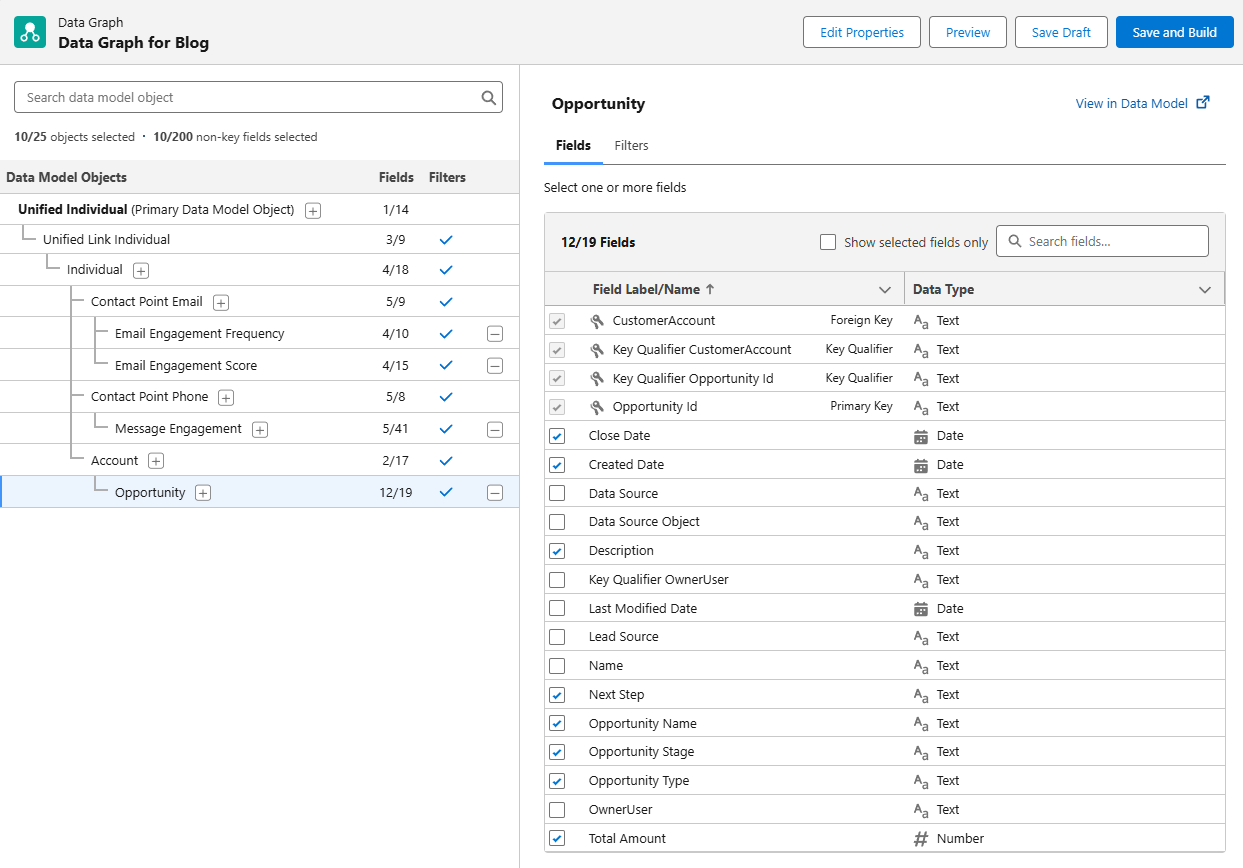
Okay, so we’ve covered adding in all the standard objects and fields you’ll need for your standard personalization and automation needs, but what about the custom objects that you may have in your organization? These may be objects from integrations, or ones you’ve created to help manage campaigns or customer orders.
To bring this information into your Data Graph for use in your marketing, you’ll need to ensure that there’s a connection to the Individual in some manner. What does that mean? An easy example is an Opportunity – Opportunities are connected to the Individual via their Account in Salesforce. Select the top level item in your Data Graph, then use the + option to drill down to the object you’re looking for. Once you’ve gotten your object added on the graph, use the right side of the screen to select the fields you want to include in the graph.
Deploy Your Data Graph
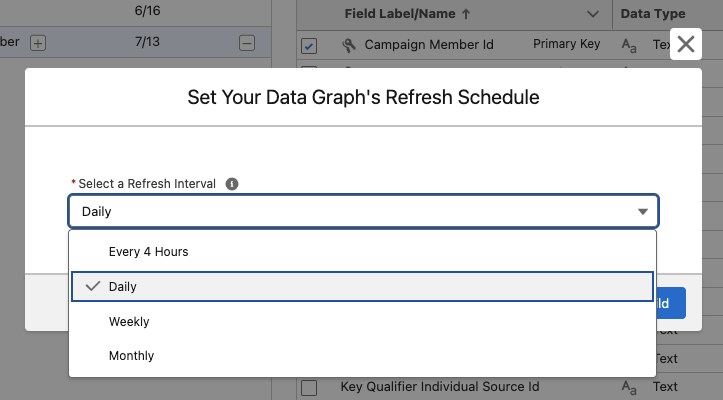
Now that you’ve built your graph, the next step is to save and build, then deploy your graph. Click on Save and Build then choose your refresh interval. Keep in mind that every refresh will consume credits! The right refresh interval will depend on how you’re planning on using the Data Graph, but typically the daily refresh rate works well for marketing needs.
Head Back to Setup to Deploy Your Graph
From Salesforce Setup, type Reporting and Optimization in the Quick Find box and navigate to the Customer Engagement option. In the Configure Basic Personalization section, use the drop down menu to select the Data Graph you just created.

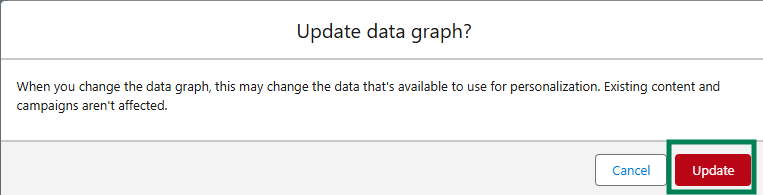
If prompted, confirm that you want to update your data graph by clicking the Update button.
Get Personalizing with Your Data Graph!
Now that you’ve built and deployed your Data Graph, you’re able to use the information in your personalization and automation efforts across Marketing Cloud. This powerful tool combines information from across your Salesforce organization into a single place of reference for Marketing Cloud to use that will update automatically on a planned schedule.