
Get a solution for Protected Campaign Member Statuses in Pardot and step-by-step instructions for installation.
We go through all the effort of setting up beautiful Salesforce Campaigns, naming standards and maybe even a hierarchy. The next challenge in completing your beautiful work of campaign art is getting a hold on your Campaign Member Statuses for each campaign.
When a new Salesforce Campaign is created, many people aren’t just happy with the two default statuses of Sent and Responded. This prompts them to create what they think makes the most sense. Though as time goes on and as reporting starts to be needed, everyone making their own Campaign Member Statuses can be a nightmare that prevents you from getting meaningful and actionable intelligence. It would be really nice to take the guesswork out of status reporting and have a standard set of Campaign Member Statuses everyone uses consistently.
Jenna Molby posted a fantastic solution that enables you to automatically create the right Statuses on Campaign creation.
The automation here is good, though as you increase the number of Types the Flow could become a bit unwieldy.
Another thing that could be a problem comes later when other people might make changes to your carefully crafted structure. What happens if someone edits or even removes these statuses?
Install Protected Campaign Member Statuses
Protected Campaign Member Statuses is a free solution you can install and easily configure to solve this problem. It allows you to:
- Define the Campaign Member Statuses that should always be present on given Campaign Types.
- Restore the Protected Statuses on Active Campaigns should someone make changes.
- Create additional Statuses for specific reasons.
- Override by authorized users on a per-Campaign basis.
I don’t want the details, just let me install it
(Don’t worry. Keep reading to learn exactly what’s going on inside.)
We have an Unlocked Package you can install that sets up the application.
- Product Installation URL (for admins only)
- Sandbox Installation URL (for admins only)
- GitHub project for you to inspect the entire solution
Get started
Once installed, you need to define your Protected Statuses. This is done with Custom Metadata Types.
- Login to Salesforce Lightning, and go to Setup.
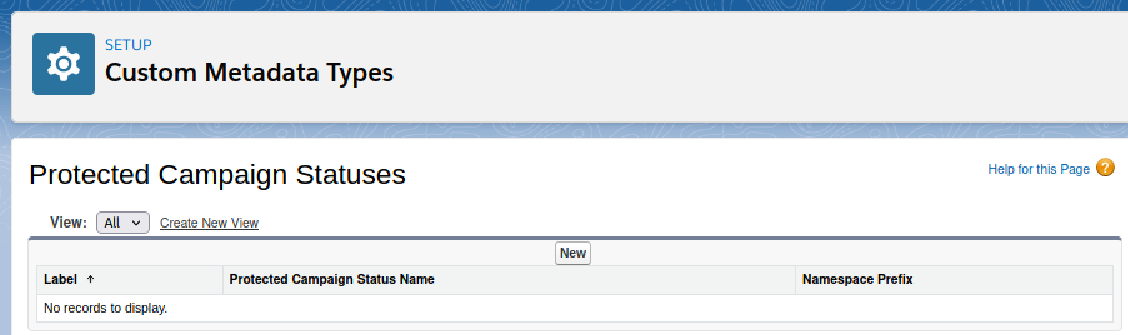
- Navigate to Custom Metadata Types, and click Manage Records for Protected Campaign Status.

- To create your first ones, click New

- Fill in the various fields.
- Label: Used in the List of Campaign Statuses in the Setup view in step 3 above. Recommended convention: TYPE-STATUS
- Name: This is an API name that can be used by developers. Not required by this package. Recommended: let this autofill after you type in the Label.
- Campaign Type: This is the actual value for the Campaign’s Type field.
- Protected Status: This is the Status value that will become protected.
- Is Default: Select this if this Status should be the default (please pick only 1 per Type).
- Is Responded: Select this if this Status should be marked as Responded.
- When complete, your screen may look something like this:
- Click Save (or Save & New) and repeat a whole bunch.
- Lastly, time to set up a scheduled job to restore deleted protected statuses.
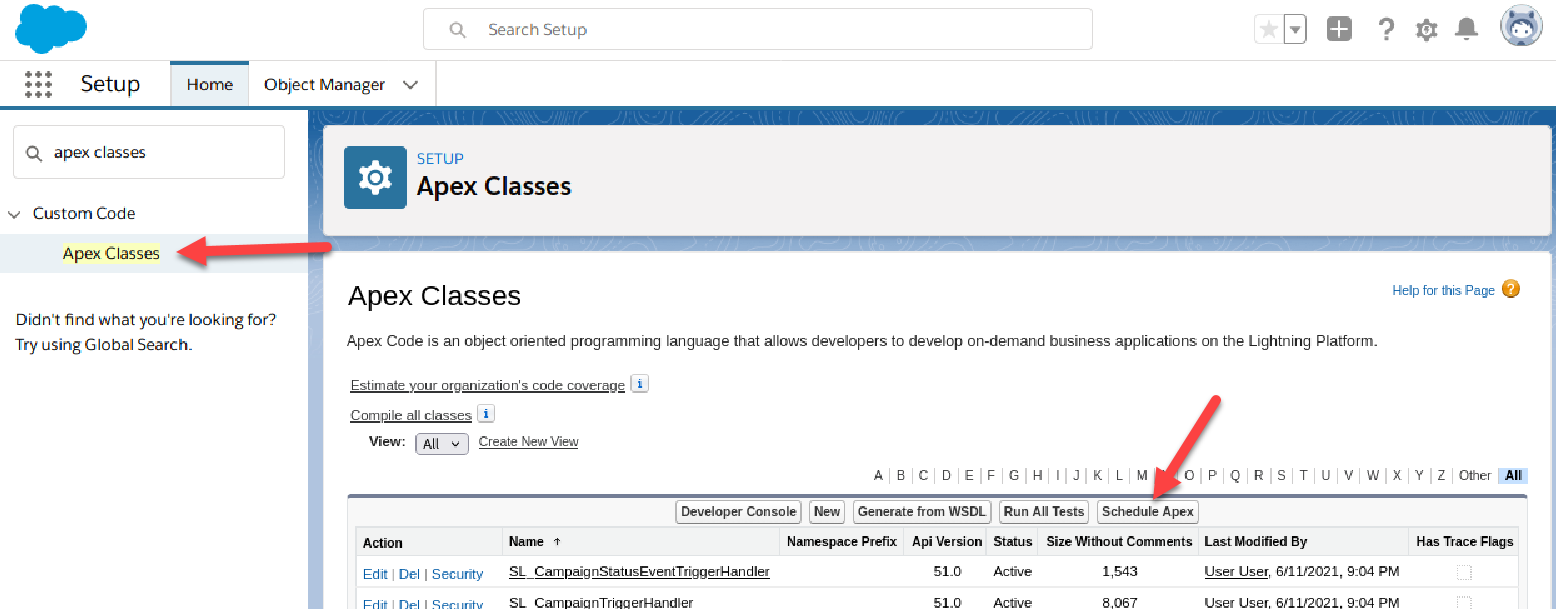
- Back in Setup, go to Apex Classes and click Schedule Apex.
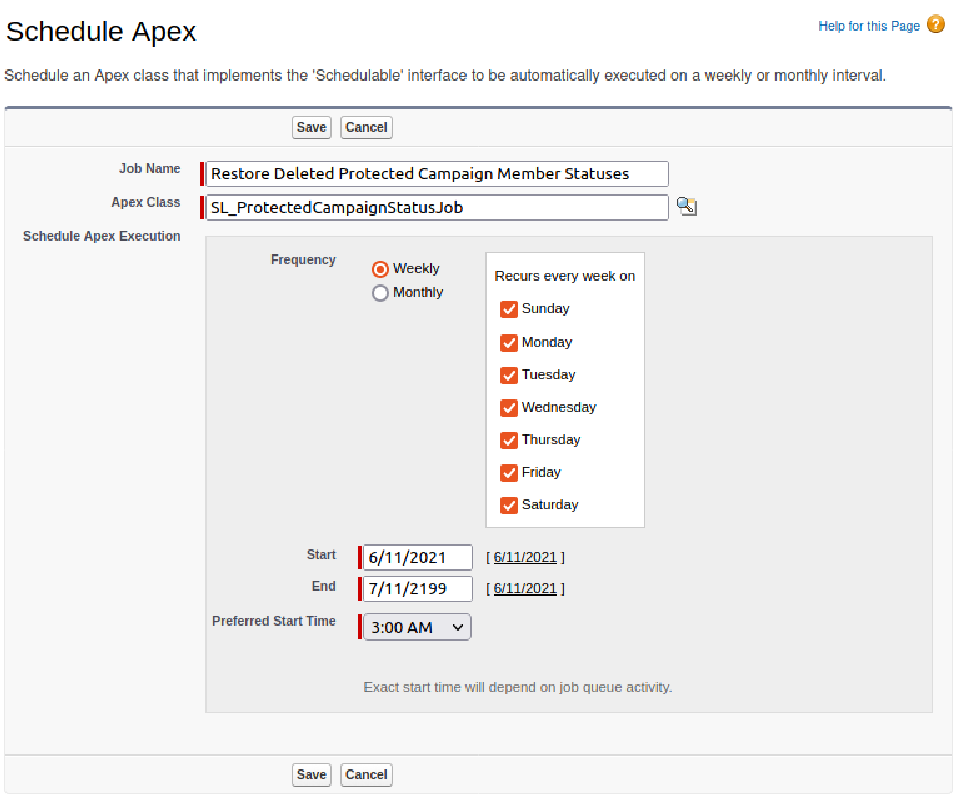
- Fill in the few fields.
- Job Name: give this a nice descriptive name so you remember what it is in 3 months.
- Apex Class: SL_ProtectedCampaignStatusJob
- Frequency: set this to what works for you. We recommend running this daily during off-peak hours.
- Start: today
- End: some time in the distant future
- Preferred Start Time: off peak hours
- When complete, your screen may look something like this:

You are good to go once you have provided your statuses. Give it a whirl by creating a new Campaign with the Type you have set up. Then take a look at the statuses already created.
Campaigns with Types not already set up will keep the default two statuses that Salesforce creates.
That’s cool. What’s behind the curtain?
To accomplish this, we leverage a few cool tools available to us:
- Custom Metadata Types: Allows the Protected Statuses to be treated like normal Salesforce metadata and can be deployed around like any other metadata (changesets, insert devops tool here)
- Campaign Custom Field: Has_Protected_Campaign_Member_Statuses__c is automatically checked by the solution if a Campaign is created and there are Custom Metadata Type records that specify this Campaign’s Type. It is also what allows the rest of the code to keep the statuses intact. You can clear the checkbox for this field to make changes to the statuses if you need to. However, you can’t enable protection afterwards.
- Change Data Capture: We turn this on for CampaignMemberStatus so we can detect edits to statuses and then fix the records after-the-fact. Sadly we can’t (yet?) put any triggers on CampaignMemberStatus (which would have been ideal).
- Triggers: yea these have been around for a while and are quite handy. We use them to kick off the automation that we’ve built when a Campaign is created. We also use them to watch for Campaign Member Status edits (through the ChangeEvents from Change Data Capture) so we can set things right afterwardsd.
If you want even more details, check out the Github project where you can see all the inner workings of what is going on.
Further reading
Here are some resources you can use to learn more about Salesforce Campaigns and how they work in Pardot:
- Pardot Training: The Complete Guide to Campaigns
- Use Accounts as Campaign Members in Pardot
- Connected Campaigns & Campaign Influence: How to Use Them to Get to the Metrics that Matter
Let us know how you did with this solution in the comments!