
Pardot is delivering a whole new way to leverage your prospect data in The Salesforce Winter ‘22 release. Similar to webhooks, the new Pardot External Activities feature allows users to receive data from third-party systems and use the data in automations and Engagement Studio Programs. For instance, you could record when a prospect registers for a webinar, completes a survey, or watches a video.
In an earlier blog post, we describe how to set up the External Activity in Salesforce so a third party can begin sending activities to Pardot via API. This post will detail how to actually send the activities with Zapier. Similar approaches can be done with other meta-services. If you want hands-on help, we’d love to work with you.
Pardot External Activities Zapier Solution
Before we get started, it is important to note that Zapier doesn’t actually support this Pardot API request. Zapier only supports four of the many API requests possible, so we will be taking advantage of the Zapier Webhook capability to build our solution.
At a high level, we need to:
- Configure Salesforce to allow our Zap to make API requests to Salesforce and Pardot
- Create a new Zap which listens for a third-party event (such as registering for a Webinar)
- Enhance the Zap to submit prospect information to a Pardot Form Handler
- Enhance the Zap to get an OAuth token from Salesforce
- Enhance the Zap to publish the External Activity (which works well as the Form Handler has ensured the Prospect exists already)
- Test
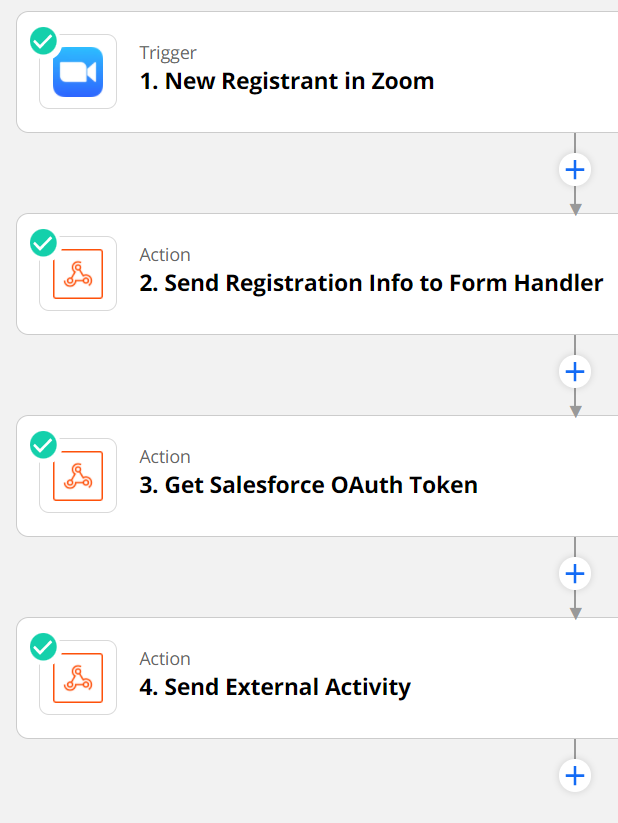
Now I realize this is a lot, but don’t worry, we’ll walk through it all. Once you are done building this Zap, you’ll end up with something like this:
Configure the Salesforce Connected App
Anytime we want to work with the Pardot API, we first need to “authenticate” with Salesforce to receive an Access Token that can be used with the Pardot API. To do so, create a new Salesforce Connected App for Zapier. We highly recommend creating and testing this new Connected App by following the steps in our earlier blog post, Pardot API and Getting Ready with Salesforce SSO Users.
Once you have created your new Connected App, you should have a new Salesforce and Pardot User for the Zapier connection. Keep the user’s username, password, and security token handy for later.
In our example, we will be creating a Zap for a Zoom Webinar Registration. Due to the way Zoom Webinars are integrated with Zapier, you will need to create a Zap for each webinar, as well as creating automations in Pardot for each webinar. This may vary depending on which App you are using in Zapier.
Create a new Zap in Zapier
- Log in to your Zapier Account
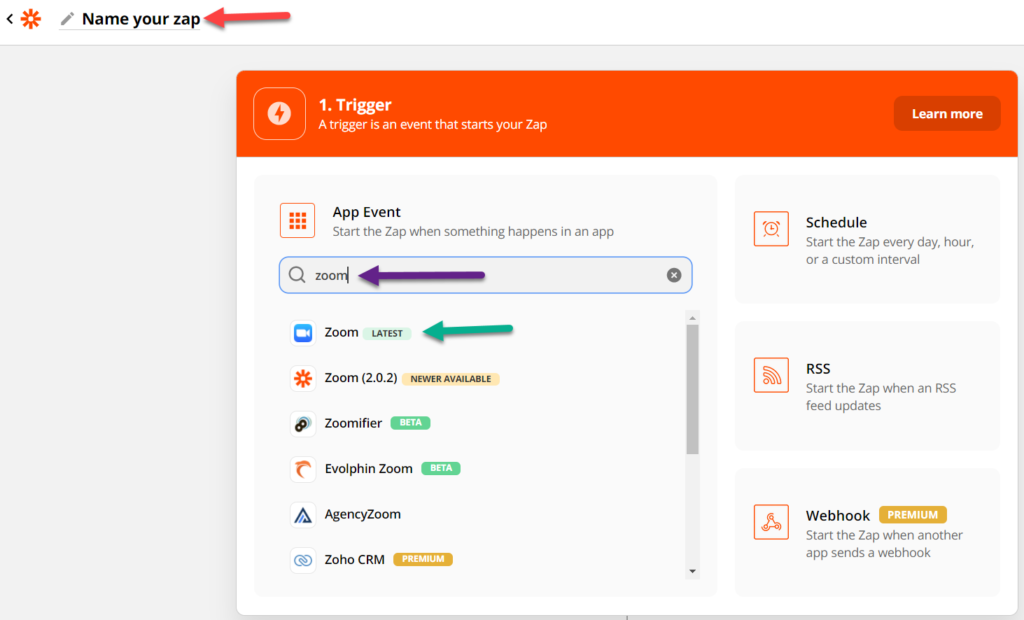
- Create a new Zap and give it a name
- Find the third-party app that will trigger this Zap. For our example, we’ve chosen Zoom.

- Select your Trigger event. For our example, we have chosen “New Registrant”.
- Choose the Zoom account for your connection. If you haven’t already connected the app, now will be your chance!
- Next, (and this might differ based on your app), select the upcoming webinar you wish to integrate.
- Click “Test trigger”
- This often works best if you have a recent “event.” For Zoom webinars, it helps if you have at least 1 person who has already registered for the webinar via the Zoom registration page. In doing so, you will see sample fields and values, making the process a bit easier.
- Finally, click “Continue” and you should have a nice clean “trigger.” Zapier will prompt you to make your first Action.


Enhance Zap to submit the Pardot Form Handler
Zapier now has a handle on prospects registering for the selected webinar, now we need to send this information to Pardot.
In this first Action, we are going to send details about the person who registered for the Zoom webinar to a Pardot Form Handler. This allows us to create/update a Pardot prospect with the right field values.
Why are we using a Form Handler instead of API calls?
- This approach greatly simplifies the integration by natively handling new prospect creation.
- Reduces sync errors for new prospects who have not interacted with a Pardot form yet
- More cost effective and efficient than using the Read API to create new prospects
- Ensures duplicates are not accidentally created
- The action that the person took will actually show up as Prospect Activity. This is good since they took real action and submitted a form.
- You can apply Completion Actions, which are not available in the API.
Make sure you have the Pardot Form Handler created and that you have the field names and the https URL handy.
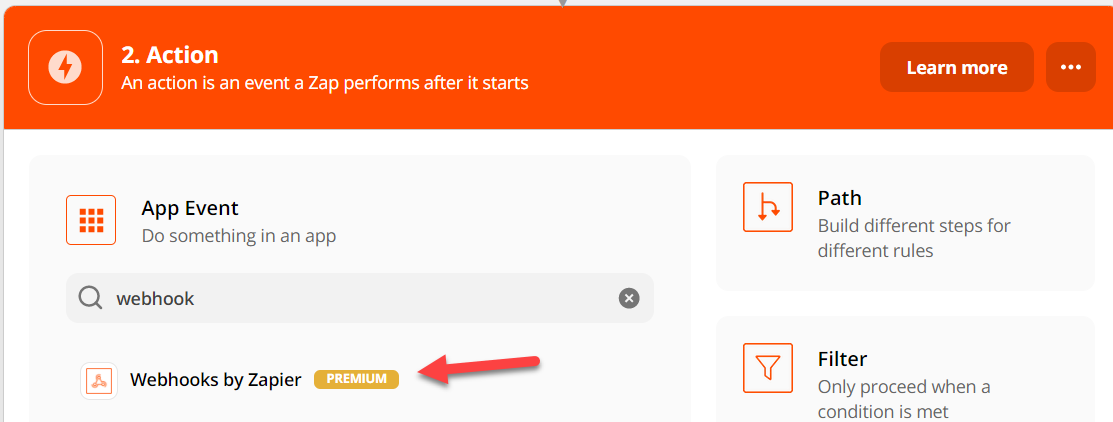
- Continuing from the previous section, create a new Webhook Action by selecting “Webhooks by Zapier.”
- This step is important to establish who is registering and to make sure we associate the External Activity with a prospect.
- For the Action Event, choose POST.
- Set up the action by filling in the following fields:
- URL: The https URL of your Pardot Form Handler
- Payload Type: form
- Data: Enter the Pardot Form Handler field name, and the values coming from the trigger setup earlier. Add new “rows” for each field you wish to populate in the Pardot Form Handler based on your trigger data available.
- Once you have finished setting up the Action, test the action, check that the Pardot Form Handler was called, and verify that the data is where it should be.
- Rename the Action to “Send Registration Info to Form Handler” so that it’s clear what this Action is accomplishing.

Enhance Zap to get OAuth token from Salesforce
Now things start to get a bit tricky. Since we can’t leverage the Pardot app in Zapier, we need to do things manually. This is where we will use the Salesforce and Pardot User we set up with the Connected app in the first section.
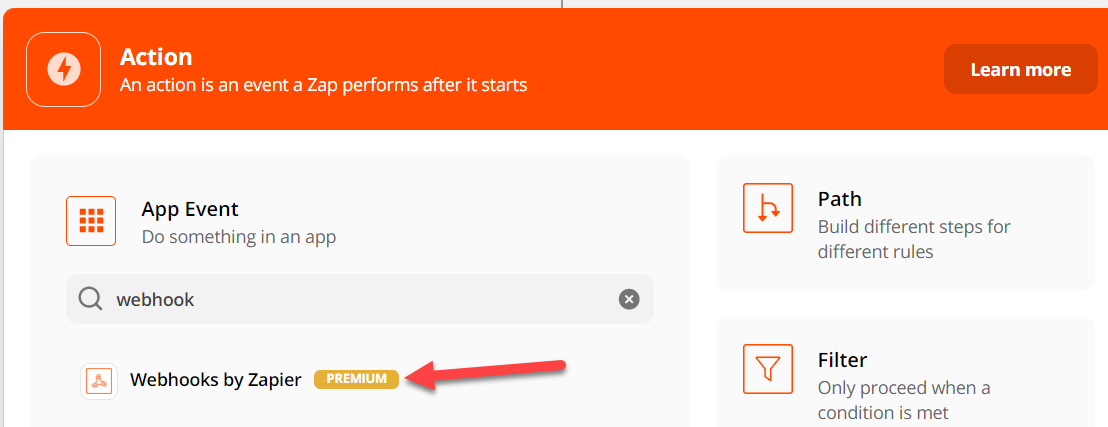
- Create a new Webhook Action by selecting “Webhooks by Zapier”
- For the Action Event, choose POST
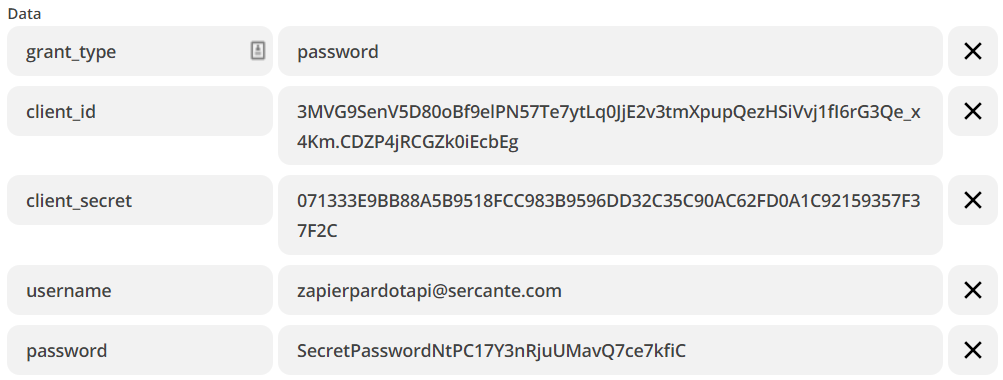
- Set up the action by filling in the fields:
- URL: https://login.salesforce.com/services/oauth2/token
- Payload Type: form
- Data -> grant_type: password
- Data -> client_id: Enter the Consumer Key from your Connected App
- Data -> client_secret: Enter the Consumer Secret from your Connected App
- Data -> username: Enter the Salesforce Username of the Pardot user we will use for API calls
- Data -> password: Enter your Salesforce user’s password followed by the Security Token
- Once you’ve provided all the values above, Test and Review. A successful request should show values like access_token and instance_url for your Salesforce org.
- Rename this Action to “Get Salesforce OAuth Token” so that it’s clear what this Action is accomplishing.
Enhance Zap to publish Pardot External Activity
Finally, we will send the External Activity to Pardot
- Create a new Webhook Action by selecting “Webhooks by Zapier”
- For the Action Event, choose POST
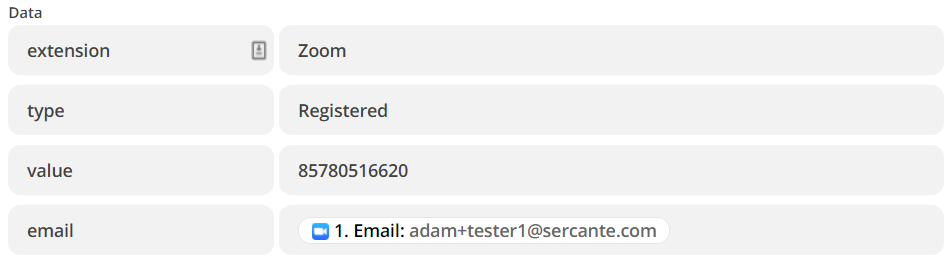
- Set up the action by filling in the fields:
- URL: https://pi.pardot.com/api/v5/external-activities
- Payload Type: json
- Data -> extension: Enter the name of the Marketing App Extension you created in Salesforce
- Data -> type: Enter one of the Activities you set up and associated with your Marketing App Extension in Salesforce
- Data -> value: Enter a unique value to identify this Activity, event IDs work great here
- Data -> email: Enter the email address that was used in step 3 of the “Enhance Zap to submit the Pardot Form Handler” section
- Headers -> Authorization: This one is a bit tricky to fill out. First, when you click in the text box, type “Bearer “ (with the space) and then select the Access Token.
- Headers -> Pardot-Business-Unit-Id: Enter the ID of the Pardot Business Unit that is associated with the Marketing App Extension. You can find the Pardot Business Unit ID by navigating to Salesforce Setup >Pardot Account Setup. (Detailed instructions here).
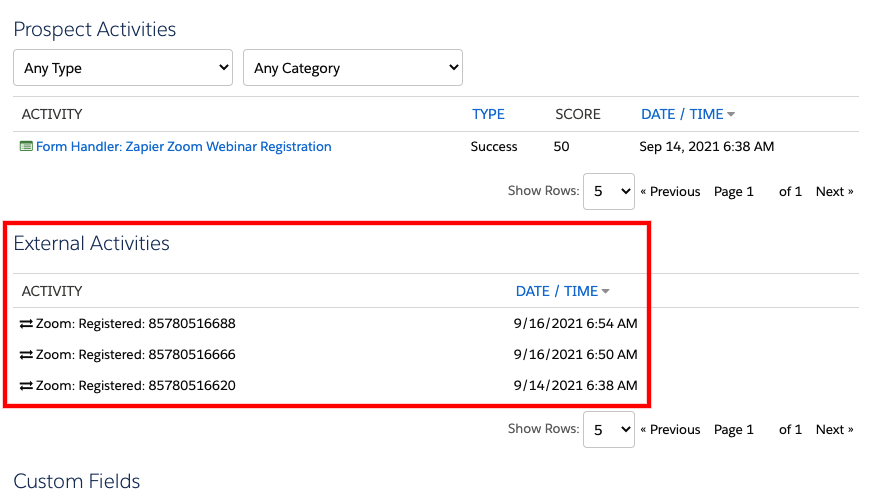
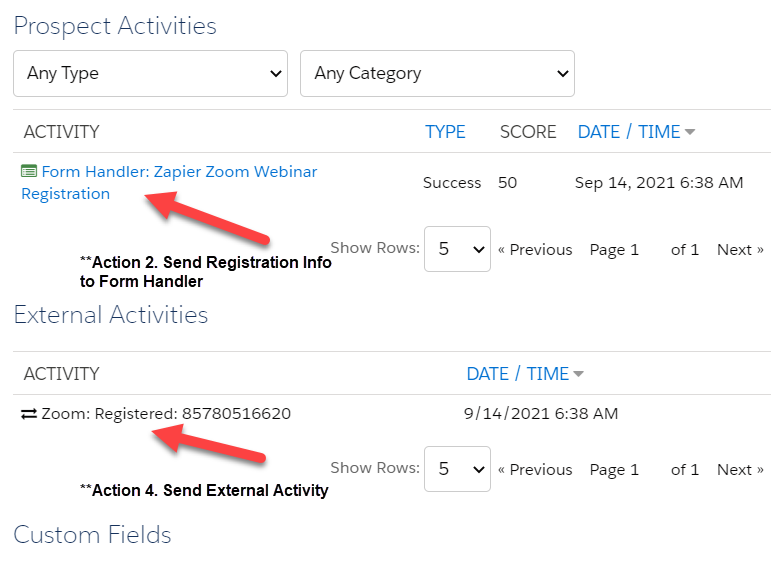
- Once you’ve provided all the values above, Test and Review. Check the Pardot Prospect for the new Activity record. This activity will appear between the Prospect Activities and Custom Fields section of the prospect page.

- Rename this Action to “Send External Activity” so that it’s clear what this Action is accomplishing.
Test
Now it’s time to test our Zap end-to-end.
Activate your Zap and perform the action that you are capturing in the Zap’s Trigger (i.e. register for the Zoom webinar). After a couple of moments, check the Pardot prospect that you are testing with. You should now see all the information you passed through the Zap!
Considerations
- The Export Activity API call only works for known prospects, and it will not work if the email address is not already associated with a prospect in your Pardot Business Unit. This is why we have the form handler in our example.
- If you have multiple Pardot Business Units, there is no intelligence of “choosing the right one.” You need to target the right one with your Zap, which assumes all prospects going through this trigger are from the same Business Unit. Proceed with caution and test rigorously when attempting more advanced solutions with business units.
- Salesforce only allows five access tokens to be issued at a time. With high volumes of a triggering event, it is possible that Zaps may fail due to Salesforce Access tokens getting recycled before they can be used in the following actions (this is due to us manually getting an Access Token with the second Action).
- Any time the user’s password and/or security token changes in Salesforce, each ZAP that uses it will also need to be updated.
These considerations are best addressed by writing your own code, which can properly address the edge cases, etc. For assistance with this or other Pardot External Activities, reach out to Sercante!