
Twice in the span of less than a week, two different clients had questions or issues related to Salesforce campaign activation. I had my fair share of questions and assumptions about that little checkbox when I was in a marketing role and it seems like I’m not the only one.
With the help of a very simple Salesforce flow (that we’ll build in this post), we can automate the Salesforce campaign activation (and deactivation) process for Marketing Cloud Account Engagement (formerly Pardot), and let the marketing folks get back to marketing!

What does that “active” checkbox even do?
When creating a Salesforce campaign, we’ve all robotically checked that standard “Active” checkbox and never given it a second thought (because that’s what we were told to do). Well, for every good marketer who “checks the box,” there are plenty who don’t — and it does matter.
Campaign activation implications in Marketing Cloud Account Engagement (Pardot)
Just about all MCAE (Pardot) assets REQUIRE a campaign to be selected upon creation including:
- Custom redirects
- Emails
- Forms
- Form handlers
When the Active box is checked, you’ll be able to see your campaign and correctly associate it with your MCAE (Pardot) asset. If it’s not checked, then you are out of luck!
Additionally, imports into MCAE (Pardot) also require a campaign and play by the same rules. And completion actions? You guessed it. Only active campaigns can be selected and used.
Campaign deactivation implications in Marketing Cloud Account Engagement (Pardot)
Scrolling through long lists of campaigns in MCAE (Pardot) is not one of my favorite things. Deactivating campaigns helps by limiting visibility and shortening lists.
However, deactivating a campaign will NOT remove associations to assets that were made when the campaign was active.
If there’s an Add to CRM Campaign completion action set, it will continue to add members after the campaign has been deactivated. However, you will not be able to create new completion actions that reference the deactivated campaign.
I thought that box was automatically checked
I’ve been there too! Seems like a logical assumption.
If you’re going to ask me for the campaign start date and end date, then why the hell don’t you put it to use!
We’re going to do just that with a simple flow.
Enter Salesforce Flows
For MCAE (Pardot) Admins, think of Flow Builder as the Salesforce equivalent of Engagement Studio. With Flow Builder, just about anything in Salesforce can be automated using a graphical user interface and no code.
For Salesforce Admins, you should be getting comfortable with flow as Salesforce is retiring Workflow Rules and Process Builder at the end of 2022.
Let’s build our Flow to automate Salesforce campaign activation
Prerequisite Requirements
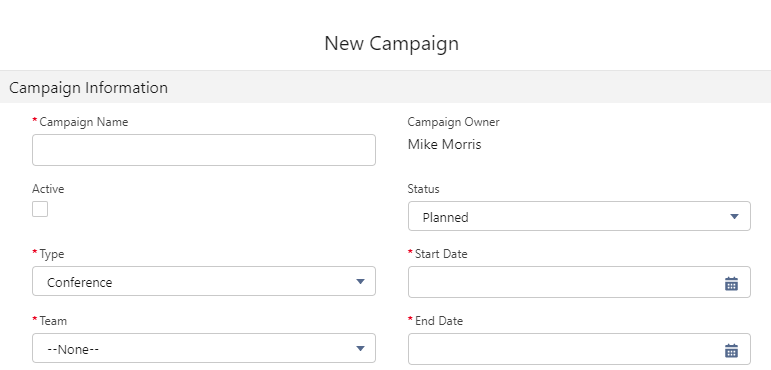
Before we start building, we need to ensure that we have all the necessary data to power the flow. Take a moment to look at your campaign page layout and make sure the following fields are present and required.
- Start Date (Make required)
- End Date (Make required)
We recommend you build and test your flow in a Sandbox environment. After testing and validation, deploy to production.
Step 1: Create a new Salesforce Flow
We will be using a Record-Triggered Flow for this use case. The flow will launch when a record is created, updated, or deleted.

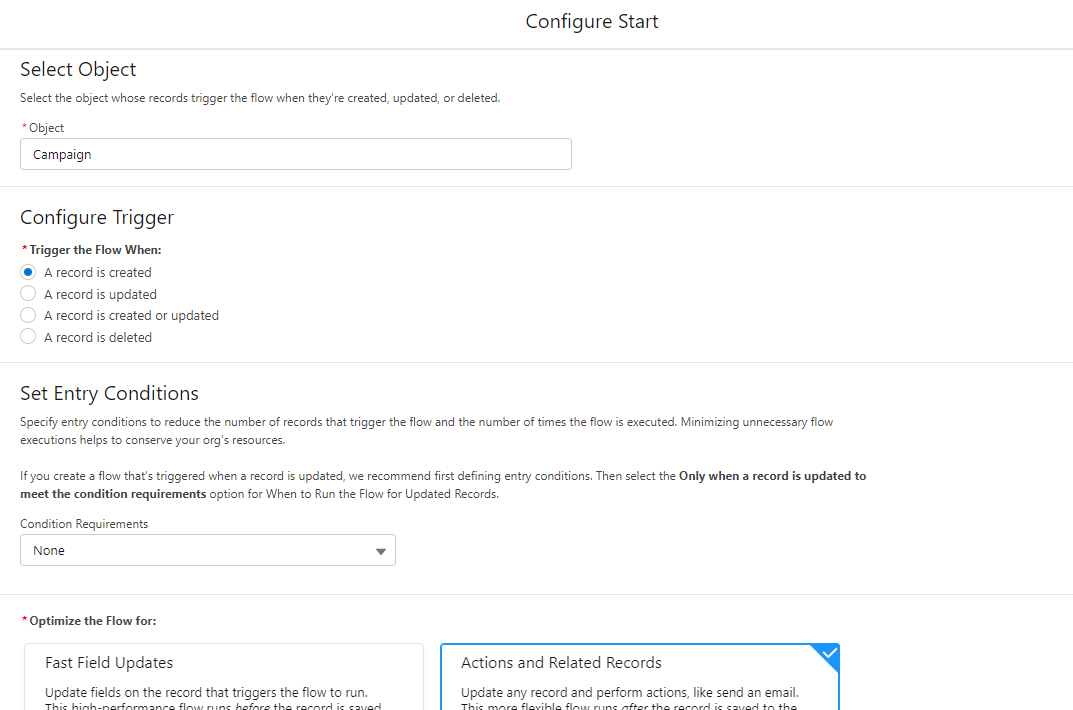
Step 2: Configure start
In this step, you’ll be selecting the object and configuring the trigger. We’ll be using the Campaign object in this example and we’ll be triggering the flow when a record is created.
We won’t be adding any entry conditions, but you might want to based on how your organization is set up. For example, you could set the Flow to only trigger for marketing record types.
Step 3: Configure the immediate path
We’ll be using two paths in this flow. We’re going to address the first path in this step and we’ll tackle the second path later.
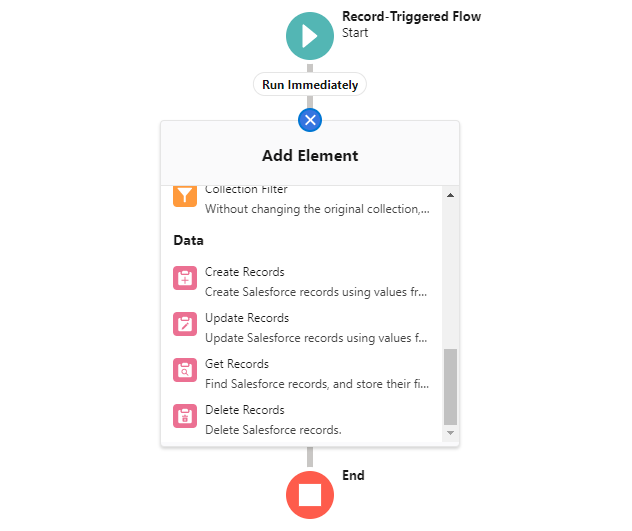
The first path will run immediately (hence the “Run Immediately”) label. All we need this path to do is check the active box once our campaign is created.
To do this, we’ll be using the Update Records element. Add this by clicking the + sign under the Run Immediately label and selecting Update Records.
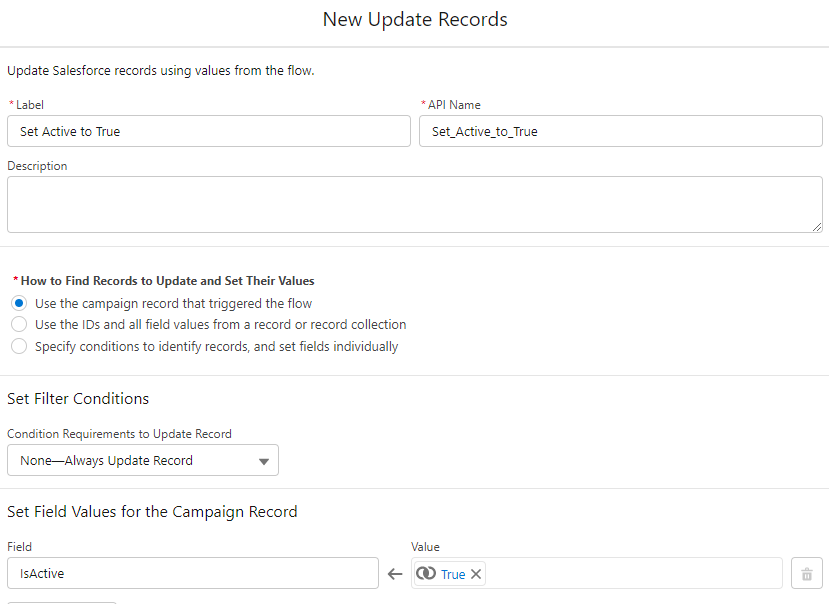
You’ll then want to add a descriptive label and set the field values. In this case, a good label is “Set Active to True.”
The field that we’ll be updating is the IsActive field. Since this is a checkbox, we’ll be using the $GlobalConstant.True to “check the box.”
Step 4: Configure the second path
To add a second path to your flow, select the “Add Scheduled Paths” option. If you don’t see this, you’ll need to click on the “Start” trigger to open the editing section.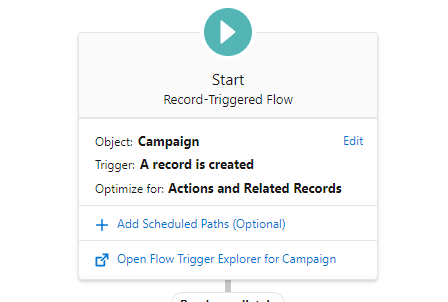
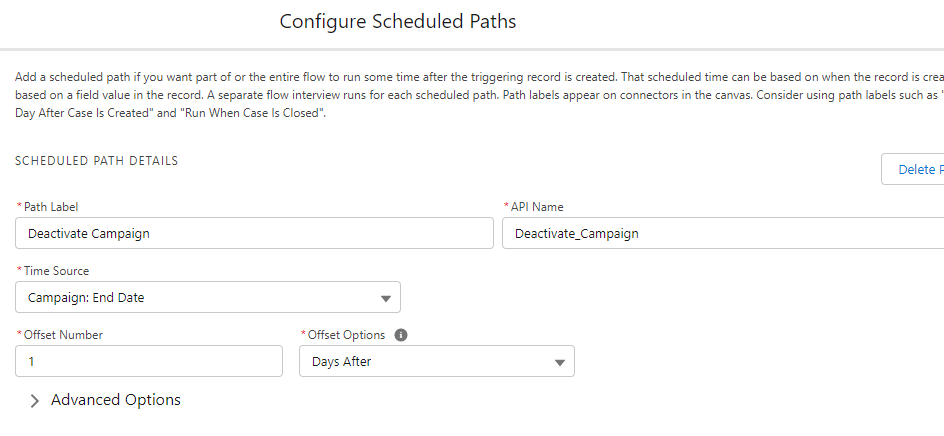
After adding the scheduled path, we’ll need to configure it. Below are the key elements:
- Path Label – Name/description of the path
- Time Source – The time element that will trigger the path
- Offset Number – The length of the delay
- Offset Option – Specify the measure of time (minutes, hours, or days) and if the path should activate before or after the Time Source
In this example, the scheduled path will run one day after the campaign end date. If you would prefer to have your campaigns visible for a longer period of time, you can increase the Offset Number.
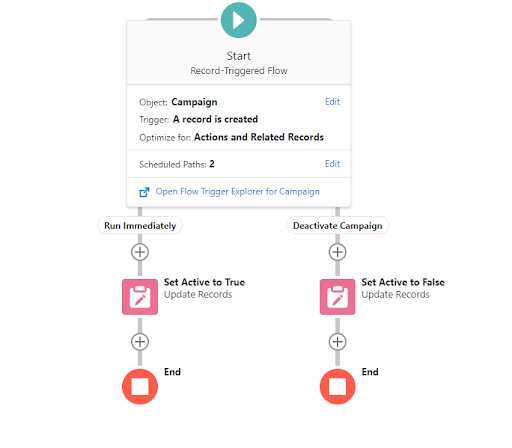
After configuring our scheduled path, we’ll need to add another Update Records element. This will look very familiar from the Run Immediately path. The only difference is that we will be using the $GlobalConstant.False value to uncheck the Active box.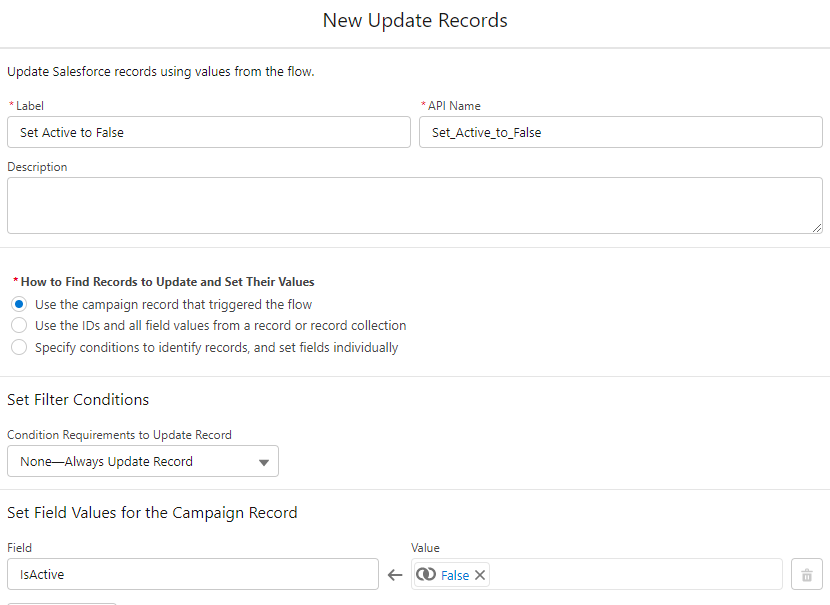
Step 5: Save, Activate and Test
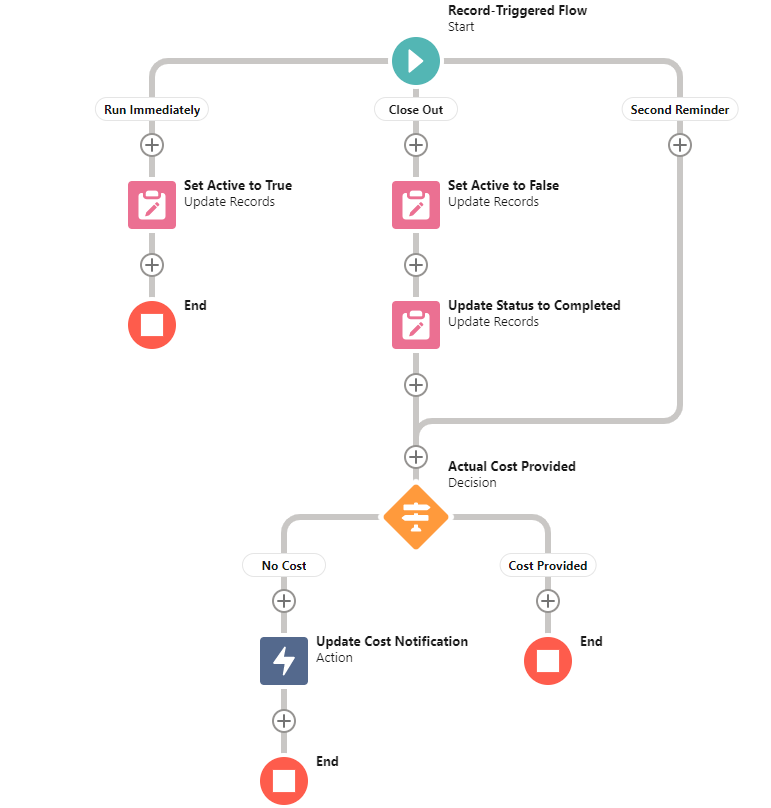
Your flow should look like the image below at this point.
If you are anything like me, you don’t want to sit around waiting days to see if your flow works as expected. To speed up your testing, simply update the setting in your scheduled path.
You can set the Time Source to Campaign: Created Date, Offset Number to 5, and Offset Options to Minutes After. With this configuration, your campaign will be deactivated 5 minutes after it’s created.
You can test your flow by creating a campaign (be sure the flow has been saved and activated), verifying that the Active box has been checked, and then checking the campaign again in 5 minutes to confirm that the Active box has been unchecked.
Once your testing is complete, don’t forget to update your scheduled path options back to the original settings.
Step 6: Deploy to Production
Once your flow has been tested, deploy to production using a change set, and sit back and relax!
Full Salesforce campaign management
The flow we built today was very basic and served a single purpose — to automate the activation of campaigns. However, it does not need to end there.
This flow can be enhanced to automatically update campaigns to “Completed” when they end and to send reminder emails to the campaign owner if they fail to enter the Actual Cost in Campaign.
Automate your Salesforce campaigns with Flow
Campaign management does not need to be manual. And it’s an essential piece when reporting on your efforts as a marketer. With the help of a simple Salesforce Flow, automation can be used to simplify the process and make things easier for your marketing team.
If you have questions about the simple flow detailed in this post or would like to look under the hood of the full campaign management solution, drop us a note in the comments section or reach out to the team at Sercante.

