As part of the Winter ‘24 release, Account Engagement users gained the ability to copy assets to and from Account Engagement Sandboxes. This allows marketers to test automations and assets before pushing them to their Production Account Engagement org. It also allows them to pre-populate Sandboxes with assets so they don’t have to start from scratch.
The Account Engagement to Sandbox-to-Production Flow currently supports seven asset types:
- Email Templates
- Custom Redirects
- Custom Fields
- Files
- Engagement Studio Programs
- Layout Templates
- Form Handlers
Account Engagement Sandbox-to-Production Flow Installation Instructions
To start using the Sandbox-to-Production flow, you will need to create a Connected App and two named credentials.
Step 1: Create the Connected App in the Sandbox Org
This provides the interface to authenticate into an org.
- In your source org (Production), grab the Sandbox Asset Auth Flow callback URL.
- Go to Setup > Auth. Providers
- Open the Sandbox Asset Flow Auth
- Copy the Callback URL, you will need this shortly
- In your Sandbox org, navigate to Salesforce Setup > App Manager and then select New Connected App.
- Configure the Connected App as follows:
- Connected App Name: MCAE Sandbox to Production
- Contact Email: Email Address of the admin who will be managing the Sandbox-to-Production promotion process.
- Enable OAuth Settings: Checked
- Callback URL: The Source Org Callback URL you copied in step #1
- Selected OAuth Scopes:
- Access the Salesforce API Platform (sap api)
- Access unique user identifiers (openid)
- Manage Pardot services (pardot_api)
- Manage user data via APIs (api)
- Manage user data via Web browsers (web)
- Perform requests at any time (refresh token, offline_ access)
- Require Secret for Web Server Flow: checked
- Require Secret for Refresh Token Flow: checked
- Select Save
- Note: It may take 10-15 minutes for the connected app to be ready for authentication.
- Select Manage Consumer Details
- Copy your Consumer Key and Consumer Secret for later use.
Step 2: Update Auth Provider in Production Org
This handles the authentication process.
- In your Source Org (Production), enter the Consumer Key and Consumer Secret from your Connected App
- Go to Setup > Auth. Providers
- Open the Sandbox Asset Flow Auth
- Select Edit
- Enter the Consumer Key and Consumer Secret
- Select Save
Step 3: Create an Account Engagement API Named Credential
This establishes access via an integration user to the Account Engagement API.
- In your Source Org (Production), navigate to Setup > Named Credentials
- Select New Legacy
- Note: Do not select “New”, it should be “New Legacy”!
- Configure the Named Credential as Follows:
- Label/Name: MCAE API Access
- URL: https://pi.demo.pardot.com
- Identity Type: Named Principle
- Authentication Protocol: OAuth 2.0
- Authentication Provider: Sandbox Asset Flow Auth
- Scope: Pardot_api refresh_token
- Make sure this says “pardot_api refresh_token”, not just “api refresh_token”
- Start Authentication Flow on Save: Checked
- Generate Authorization Headers: Checked
- Select Save
- Log back into the Sandbox org with your credentials. Doing so finalizes the authentication for the named credential.
Step 4: Salesforce Metadata API Named Credential
This establishes access via an integration user to the Metadata API to retrieve BU details.
- In your Source Org (Production), navigate to Setup > Named Credentials
- Select New Legacy
- Note: Do not select “New”, it should be “New Legacy”!
- Configure the Named Credential as Follows:
- Label/Name: Metadata API Access
- URL: https://mydomain—sandboxname.sandbox.my.salesforce.com, but replace “mydomain” and “sandboxname” with the value from your sandbox url.
- ex: https://sercante–testing.sandbox.my.salesforce.com
- Identity Type: Named Principle
- Authentication Protocol: OAuth 2.0
- Authentication Provider: Sandbox Asset Flow Auth
- Scope: api refresh_token
- Start Authentication Flow on Save: Checked
- Generate Authorization Headers: Checked
- Select Save
- Log back into the Sandbox org with your credentials. Doing so finalizes the authentication for the named credential.
Running the Flow
Before you run the flow, ensure the destination org has at least one Folder, Campaign, and Tracker Domain. If your destination does not have these assets, you will run into issues with the flow.
- In your Source Org (Production), navigate to Setup > Flow
- Open the Account Engagement Sandbox-Production Bulk Asset Copy Flow
- Select Run
- For “Named Credential for Salesforce API Access” select the Metadata API Access (step 4 above)
- For “Named Credential for Account Engagement API Access” select the MCAE API Access (step 3 above)
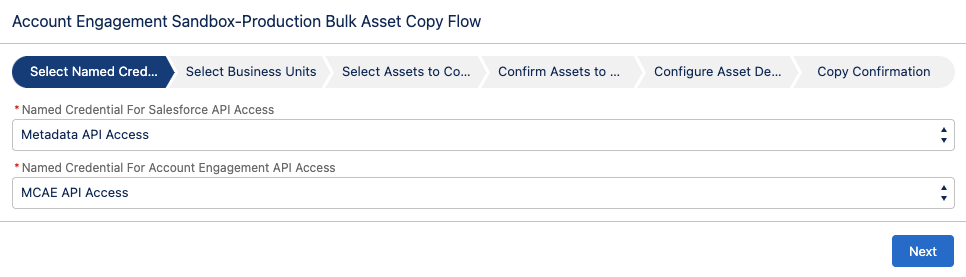
- Select Next
- Select your direction of Copy
- From a Sandbox to Production
- From Production to a Sandbox
- Select your Production and Sandbox Business Units
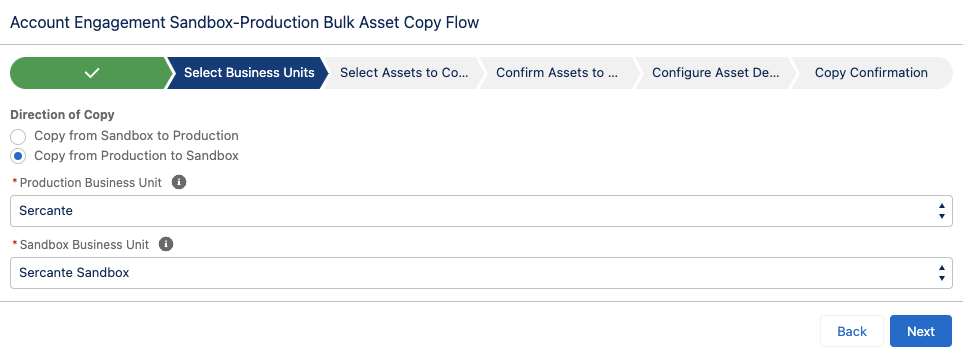
- Select Next
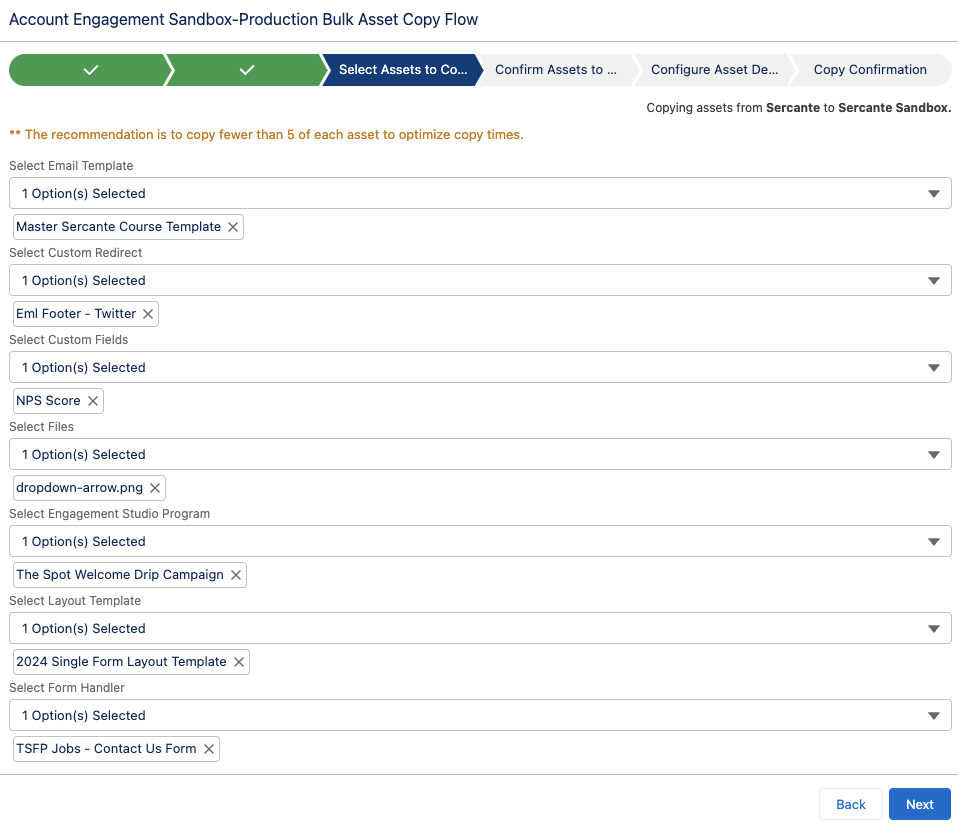
- Select assets to copy over, select Next
- Confirm the Assets, select Next
- Select your Folder, Campaign, and Tracker Domain for your new assets
- Select Copy Assets
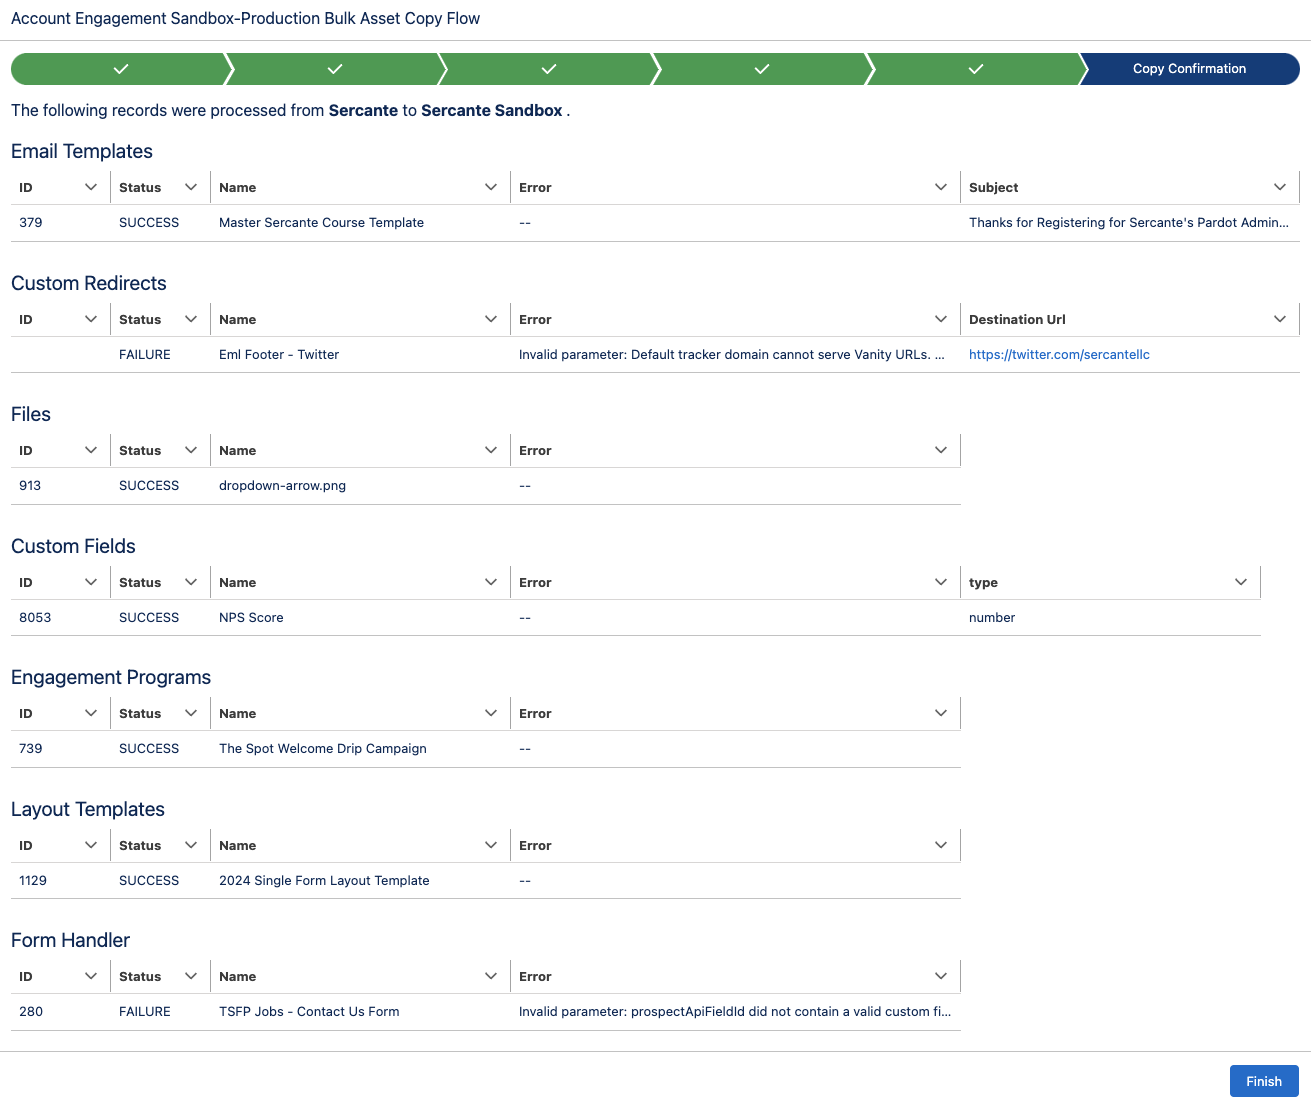
- The final screen will provide details regarding the copied assets as well as let you know if there were any errors.
Considerations for Using the Sandbox to Production Flow
Since this is a new capability for Account Engagement, there are some details and settings that do not come over when copied. I thoroughly tested each asset type and below are the considerations that I found.
Tracker Domain
You must verify the Tracker Domain in your Sandbox. Otherwise, Email Templates, Custom Redirects, and Files will fail when the unverified Tracker Domain is selected. You can use the default tracker domain (go.pardot.com) but this will cause issues when copying over any Custom Redirects with a Vanity URL.
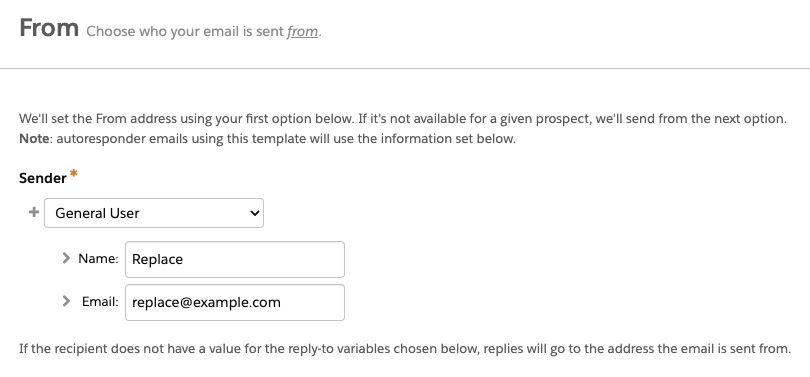
Email Templates
- When copied, the email sender will be replaced by a General User with the email [email protected]. This applies even if you have a sender hierarchy specified using “Assigned User” and ‘Account Owner.”
- Email Templates containing Dynamic Content will not copy over. This is because dynamic content is unique to the Business Unit. Even if you have the same Dynamic Content in each Business Unit, they will have a different asset ID and merge tag.
- If the Email Template contains a merge tag for a field that is not in the destination org, the flow will fail. Ensure all needed fields are copied to the destination org before copying over any assets that use custom field merge tags.
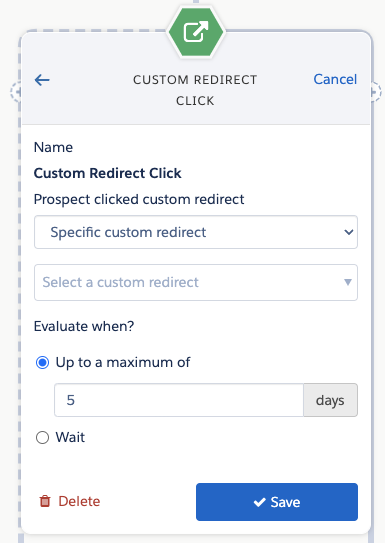
Custom Redirects
A Custom Redirect’s Completion Action(s) will not copy over, however, the Google Analytics Parameter values do.
Files
During my testing, I tested PNG, JS, JPG, GIF, SVG, CSS, and PDF file types, and all successfully copied over!
Custom Fields
When you copy custom fields, only the following information comes over:
- Field Name
- Field API Name
- Field Type
Engagement Programs
- When you copy an Engagement Studio Program (ESP) only the ESP structure is copied. The Recipient List, Suppression lists, Send days/times, and “Allow prospects to enter more than once” settings do not come over and will need to be reconfigured.
- The assets specified in a Trigger or Action node, such as email templates, landing pages, and forms, will need to be reselected in the new ESP. However, the number of wait days specified in the node will copy over.
- If an Action node looks at a Prospect field (i.e. Prospect default field “Job Title” is not blank) and that field is in both Production and Sandbox, then the node will be copied to the new ESP with the field and value/settings specified. If the field does not exist in both Production and Sandbox, then the Action node will still be in the ESP but the field and value/settings will need to be reconfigured.
Layout Templates
If you use Dynamic Content within your Layout Templates, keep in mind that the Dynamic Content will not come over when the Layout Template is copied. You can copy the Dynamic Content over as a separate asset, but you will still need to edit the Layout Template in your destination Business Unit to make sure it has the correct Dynamic Content ID.
Form Handler
- Ensure all the fields on the Form Handler exist in the environment you are copying to before copying the Form Handler.
- If your Form Handler only uses Default Prospect Fields, then all of the fields will come over when the Form Handler is copied. However, if your Form Handler uses any Custom Prospect Fields, the custom field needs to be in the destination org before you copy the Form Handler.
- When copied, the Success Location and Error Location details will copy over to the new asset. Completion Actions do not copy over.
Now it’s even easier to work with Account Engagement Sandboxes!
This new Flow is a huge step toward making Account Engagement Sandboxes user-friendly for testing and staging. What other capabilities would you like to see in this Flow? Let us know in the comments!