Adding personalization to your marketing assets, like a recipient’s first name or company information, has been a hallmark of the marketing automation world for as long as I’ve been a marketer – probably longer. Legacy Salesforce tools for marketers have included ways to personalize content using data that resides in the system you’re working within – Account Engagement or Engagement – but with the Marketing Cloud Growth and Advanced Edition Salesforce has introduced a way to include personalization from multiple sources.
Cross Object Personalization opens up a world of possibilities when it comes to crafting the perfect message for your audience. Imagine post-virtual event follow up emails that include specific sessions an attendee was at and links to where they can find recordings for sessions they missed, or a personalized post-purchase nurture program that pulls in data from the customers most recent order. This is achieved by creating Data Graphs that allow you to add fields and other objects as related attributes to the Unified Individual.
Creating a Data Graph
The first step in cross object personalization is creating a Data Graph in Data Cloud. We’ll build this Data Graph based on the Unified Individual object and whichever objects hold the data you want to reference in your Marketing assets. You can only have one Data Graph per Marketing Cloud instance, so you’ll want to keep that in mind as you’re thinking through your connections.
Build a New Data Graph
To build out your Data Graph, select the App Manager and search for Data Graphs.
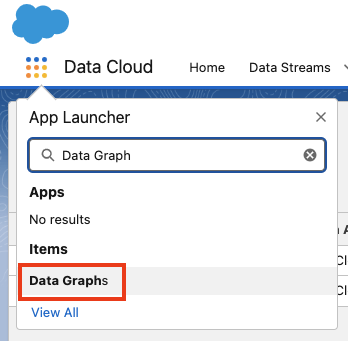
Select “New” in the upper right hand corner and then choose “Start from Scratch”.
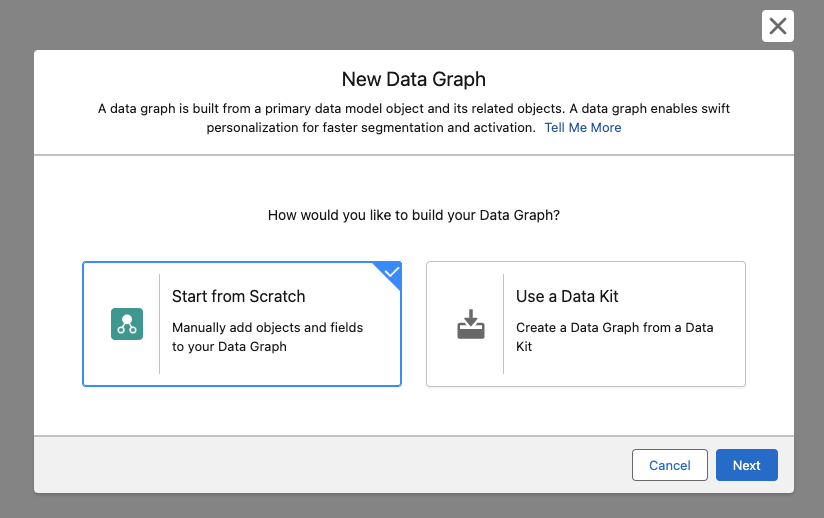
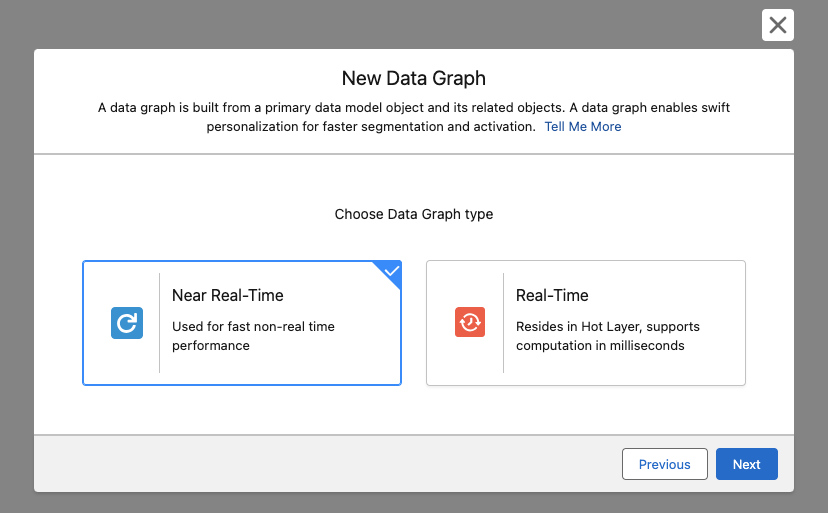
Next select your Data Graph Type
- Near Real-Time: Updates within a short time frame but not necessarily instantly. This option is recommended in most use cases and will help you save on Data Cloud credits.
- Real-Time: Updates immediately with new information. Each update consumes Data Cloud credits.
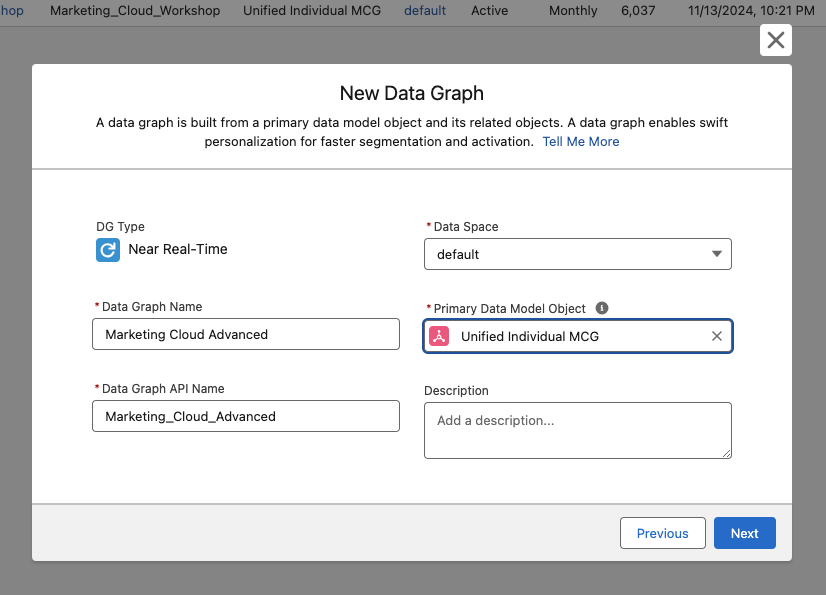
Name your Data Graph, leave the Data Space as default, and choose the Unified Individual as your Primary Data Model Object.
On the next screen you’ll be able to choose which objects and fields you’d like to include in this Data Graph by clicking on the + button next to “Unified Individual”.
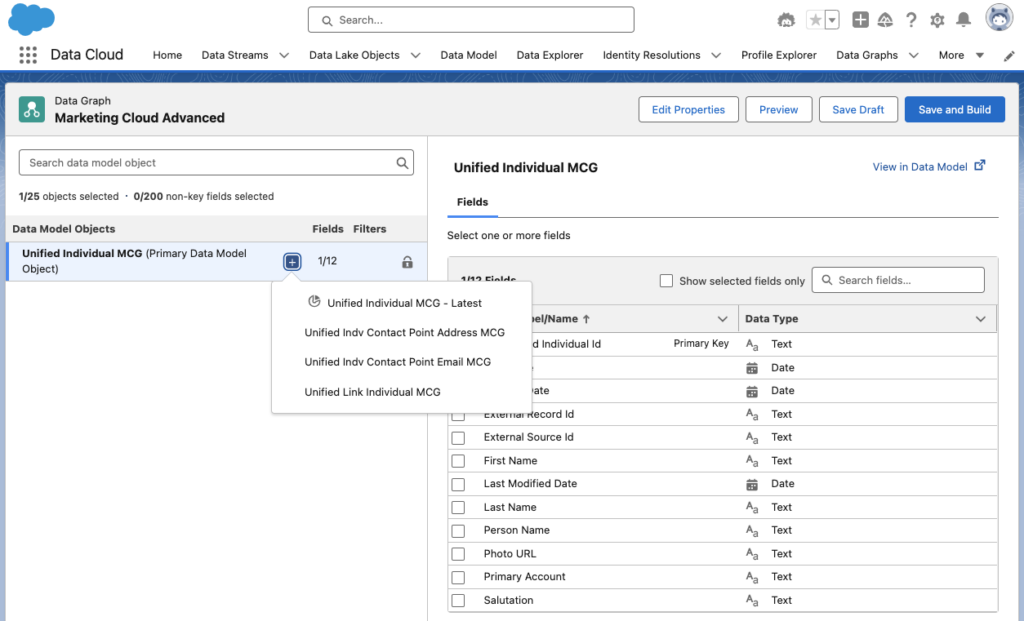
Depending on which of these objects you select, you’ll have a range of different options – either diving deeper into related objects or selecting fields you want to include from that object on the right hand side of the screen.
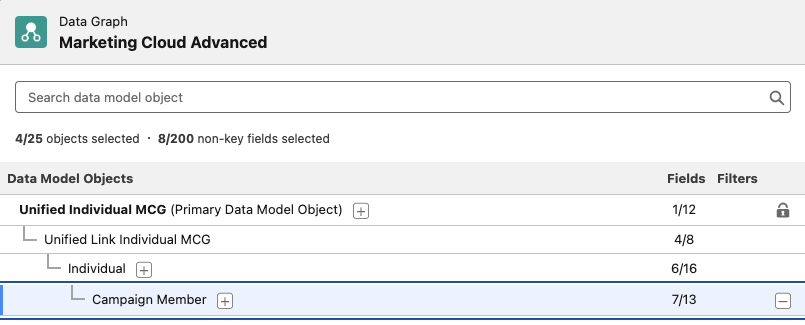
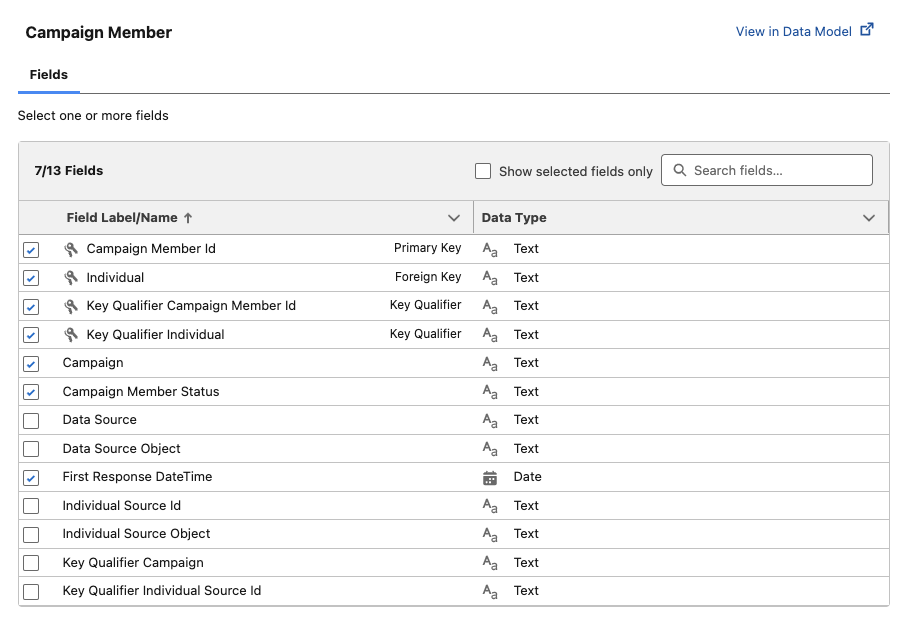
In the following example, I have drilled down to Campaign Member to bring in Campaign Name, Campaign Member Status, and Campaign First Response DateTime fields into Marketing Cloud. I’ve achieved this by going from Unified Individual > Unified Link Individual > Individual > Campaign Member. At each of these levels of data I am able to select fields I’d like to include in the Data Graph, which will make them available for use as personalization items in Marketing Cloud.
The Data Model Objects section on the left side of the screen displays the number of fields selected to bring into the Data Graph, as well as the total number of fields available and if there are any filters setup on these objects.
On the right side of the screen, we’re able to see the selected Data Model Object, in this case Campaign Member, and all of the fields available for us to bring into our Data Graph. Any field that’s marked with the 🗝️icon will automatically be selected to be brought in as it is either a Primary Key, Foreign Key, or Key Identifier used to link to other objects in Data Cloud.
Save and Build Your Data Graph
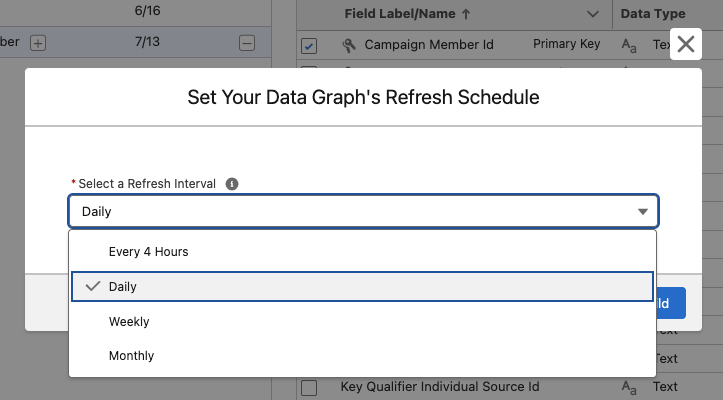
Once you have selected all of your objects and related fields for your Data Graph, click Save and Build in the upper right corner.
Select a refresh interval for your Data Graph. Remember – every time you refresh your data you’re consuming credits, so think carefully about how often you need to refresh this data. You can always adjust this later if you decide your refresh rate is too slow or too fast.
Deploying Your Data Graph
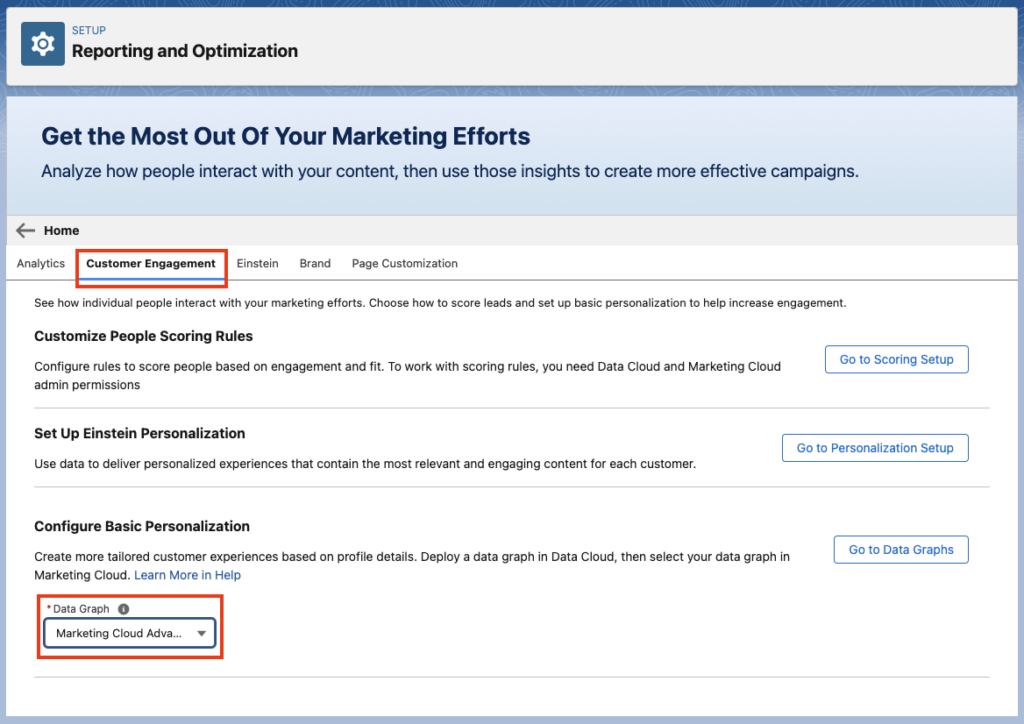
Now that you have successfully set up your Data Graph with additional objects and fields for personalization, deploy it so it can be used within Marketing Cloud. Head to Salesforce Setup, then in the Quick Find box search for “Reporting and Optimization”.
From there, click on the Customer Engagement tab. At the bottom of the page, under Configure Basic Personalization, click into the drop down menu to select a Data Graph.
Personalize To Your Heart’s Content
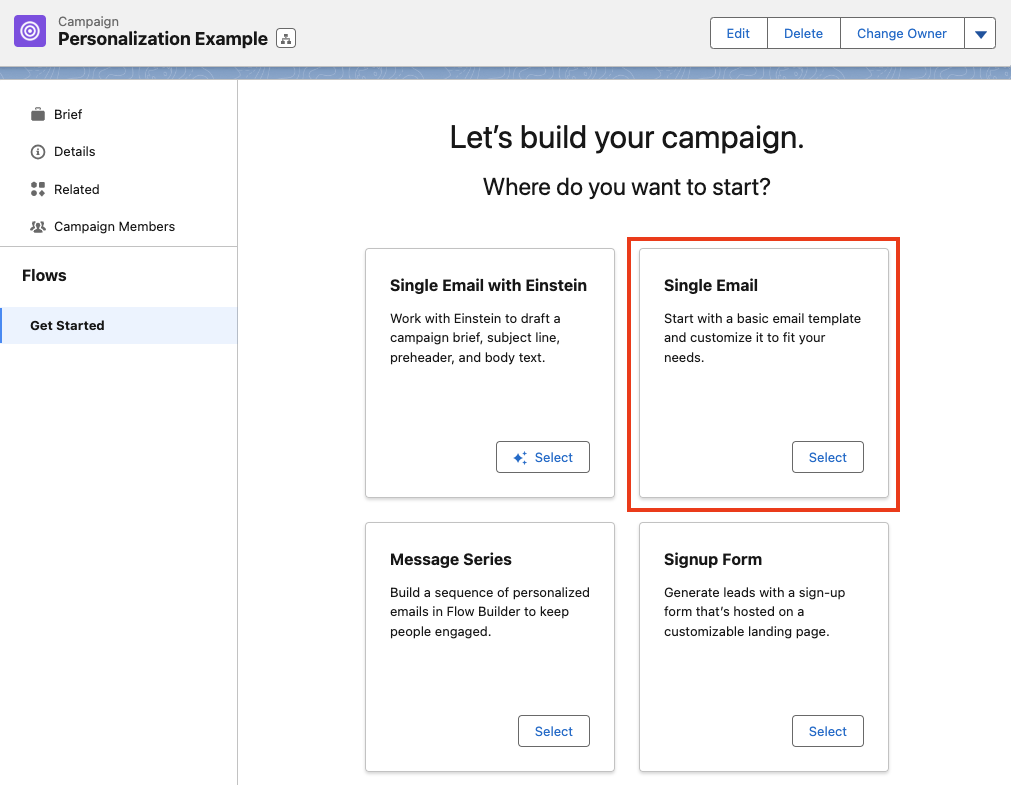
Now that you have successfully deployed your Data Graph, you’re ready to start personalizing your Marketing assets! We’ll build a Single Email Campaign for our example by going to App Manager > Marketing > Campaigns and creating a new Campaign.
Customizing your Email
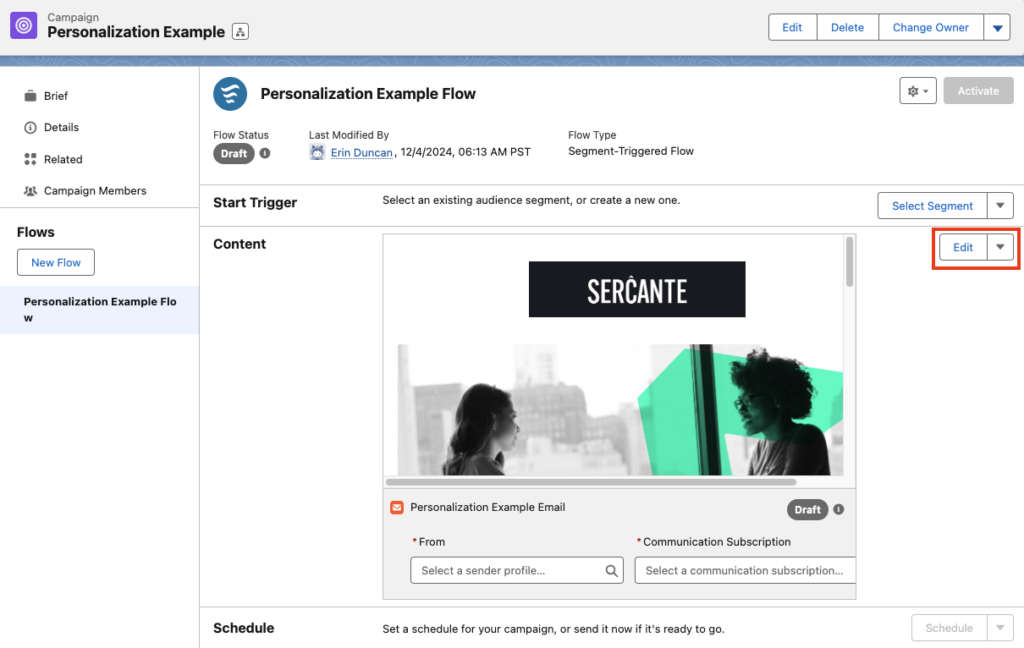
Select Edit from the top right hand corner to open your email in the builder.
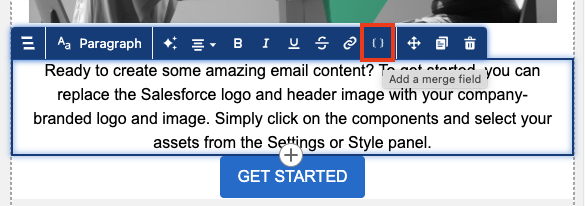
Select a Paragraph Component or drag and drop a new Paragraph Component onto the canvas. When a Paragraph Component is selected, an editing menu will appear along the top. Select the { } icon to enter a merge field.
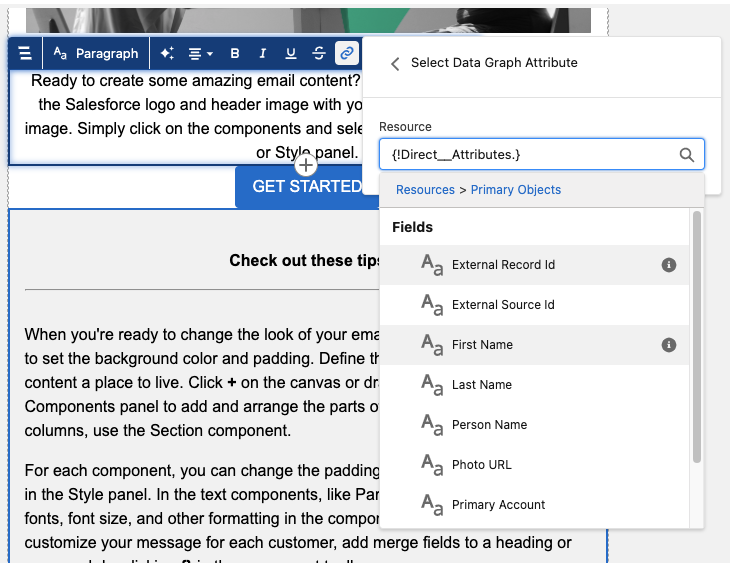
Once selected, choose the Select Data Graph Attribute option.
Next, you can choose between Primary and Related Objects. Primary Objects will allow you to enter direct information about the Unified Individual, such as their First Name. Related Objects will allow you to enter any of the related fields you selected when building your Data Graph.
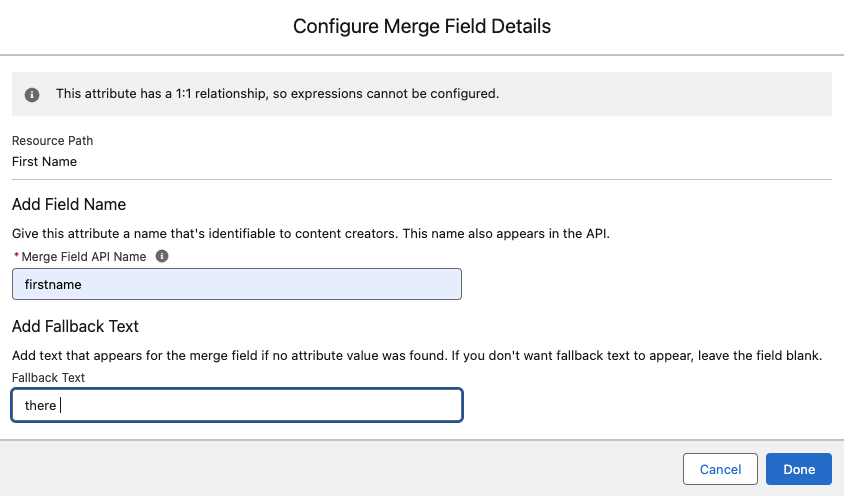
After you’ve selected your merge field, configure your merge field details. This includes the Merge Field API Name and Fallback Text that will be used if the recipient does not have a value in this field.
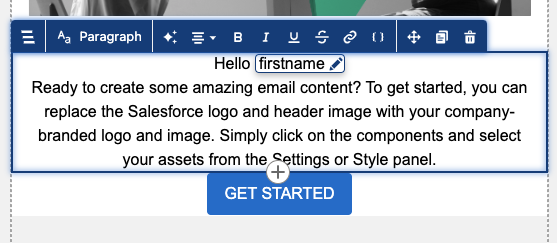
Select Done and you can see your merge tag inserted into your Paragraph Component.
Get Started with Cross-Object Personalization
Cross-object Personalization with Marketing Cloud brings an incredible amount of flexibility with how you personalize your marketing assets. With Data Graphs, you’re able to bring in any data that is tied back to the Unified Individual into your Marketing Cloud organization and personalize to your heart’s content!


