Category

Automations

Conditional Completion actions are coming to Marketing Cloud Account Engagement (Pardot)! And they’re a game changer for adding complexity to completion actions on your marketing assets.

This has been a long awaited request in the IdeaExchange. So, we’re ecstatic to see it finally come to fruition.

Note: This feature is not currently available in production. Conditional Completion actions will be rolled out during the Summer ’22 release (May 21st – June 11th) and this blog will be updated as we get access to this feature. Stay tuned!

What are Marketing Cloud Account Engagement (Pardot) completion actions?

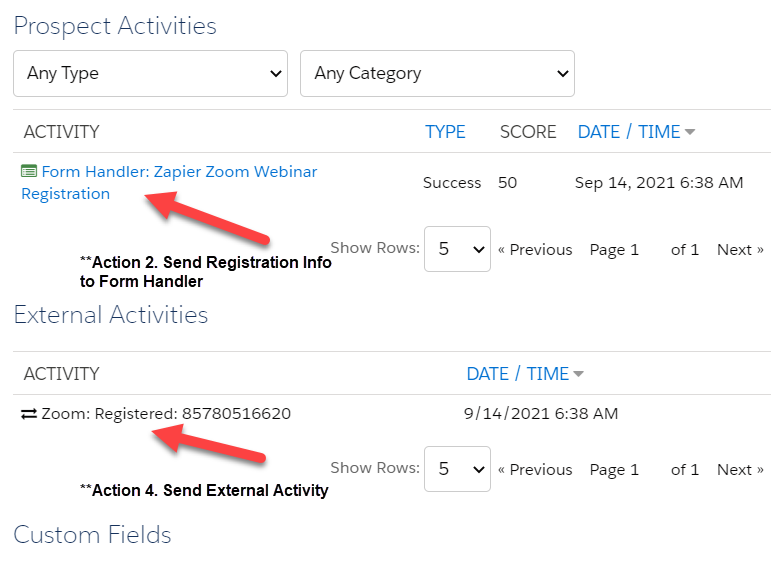
Pardot Completion Actions allow you to add follow up automations to most Pardot assets such as forms, landing pages, files, custom redirects, etc. 

These actions trigger after someone interacts with the asset such as a click or form fill. Pardot Admins and Marketing Users can configure which actions they want Pardot to trigger after the fact. 

Completion actions include:

  • Add Tags
  • Add To List
  • Add to Salesforce Campaign
  • Adjust Score
  • Adjust Score For Scoring Category
  • Assign Prospect via Salesforce Active Assignment Rule
  • Assign To Queue
  • Change prospect custom field value
  • Change prospect default field value
  • Create Salesforce task
  • Increment prospect field value
  • Notify assigned user
  • Notify user
  • Notify user via Twilio (phone)
  • Register for webinar
  • Remove from list
  • Remove tags
  • Send autoresponder email
  • Set profile
  • Set prospect’s first touch campaign

Currently, you can add as many of these as you see necessary. But keep in mind, they trigger on ALL Prospects that interact with the asset. Conditional completion actions are changing that. 

As Pardot stands today, other automation features, such as Engagement Studios and Automation Rules, can provide ways to conditionally process prospects. However, these automations have limits, and using multiple assets per form fill, link click, etc., can bog down your system. 

With Conditional Completion actions, you will be able to perform all the desired actions right from the asset setup page.  

What are Pardot conditional completion actions?

Welcome conditional completion actions! 

Conditional completion actions add complex logic to your existing or new completion actions on your Pardot assets.

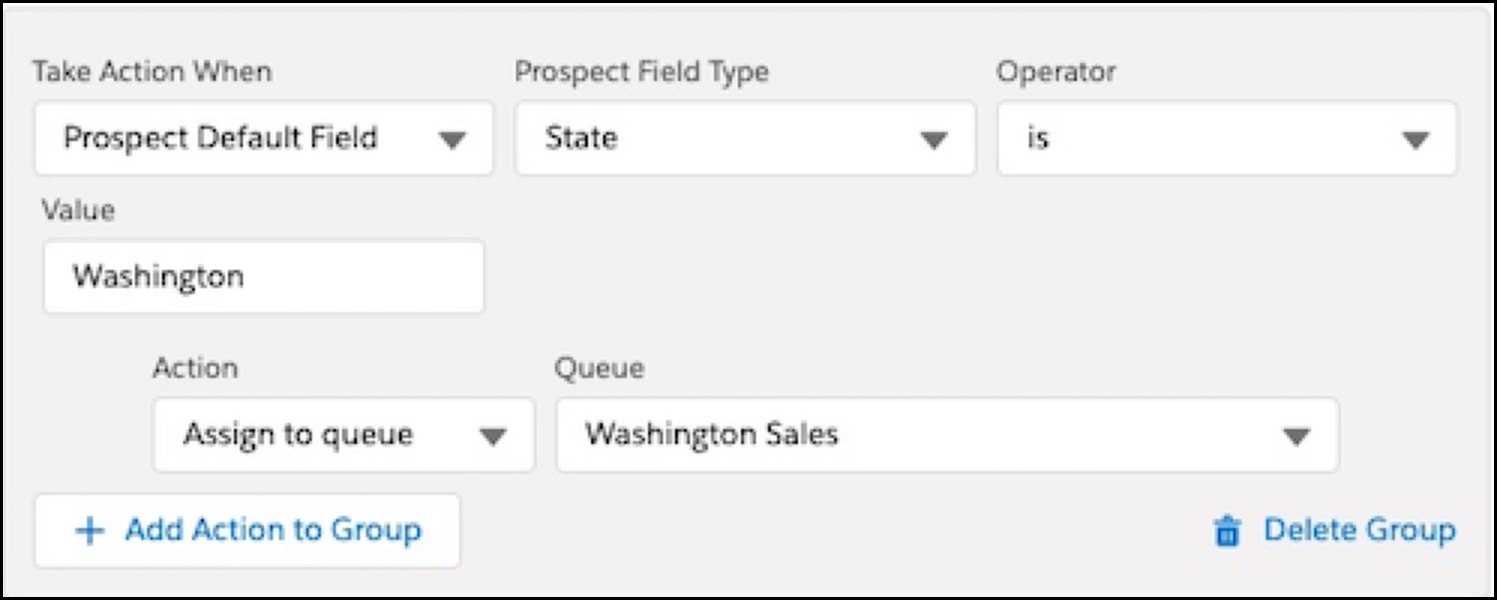
Essentially, you are able to create logic similar to dynamic lists or automations rules (or Salesforce Reports) that follow this pattern:

Before: Upon engagement (click/form fill), then trigger Y
New: Upon engagement (click/form fill) look to see if X = Value; then trigger Y


You can still do regular completion actions that apply to ALL Prospects who engage with the asset in specific ways, but now we will be able to create conditional actions as well. 

Below is an example of what you can expect to see in your account when the feature is released later this summer:

This feature will be available on Lightning list emails, forms, form handlers, files, custom redirects and page actions.

You can read more about it here and watch a quick demo, courtesy of Salesforce, here.

How are conditional completion actions different from normal completion actions?

In terms of functionality, there isn’t much of a difference between regular and conditional completion actions — they look at an action and then apply the necessary follow-up actions. 

However, in terms of usage, conditional completion actions add complexity to the existing completion actions by allowing for criteria in addition to a click or form fill to decide if the action should be completed or not. 

This allows marketers to create branches and manage different types of Prospects differently in Pardot.

Are there any limits or requirements to conditional completion actions?

Lucky for everyone, these actions will be available to everyone upon its release date.

We have identified the following limitations (that could change with further releases):

  • No conditional actions based on list membership
  • No conditional actions on classic email builder list emails (only available in the new Email Lightning Builder)
  • Limit of up to 6 conditional groups per asset (plus your standard completion actions)
  • Limit of up to 15 conditional group actions across all conditional groups per asset

We won’t have a concrete list of limits until this feature goes live, so stay tuned for updates!

What Pardot conditional completion use cases that I can look forward to?

First things first, this particular section will be updated post-release with additional information and screenshots. For now, we are basing these scenarios on existing completion action functionality. So, proceed with caution!

UTM-Based Lead Sources

Reporting on where your online website traffic is coming from is more important now than ever. For many organizations, being able to distinguish between sources of ads and beyond continues to be a hot topic. 

At Sercante, we support our customer’s UTM tracking via custom hidden fields on their forms. Now with conditional completion actions, leveraging these UTM’s real-time to update Lead Source should be easier than ever!

Standard Lead Routing

Nothing magical here, aside from the fact that you can fit multiple territories/region/product assignment criteria into a single form. Previously, this would require multiple automations or a little support from Salesforce to route accordingly. 

If you are interested in learning about how to manage Lead Routing in Pardot, check out my presentation from ParDreamin’!

Block Competitors

For those in industry segments with few players (we know everyone in the ocean), you may find it difficult to exclude competitors currently in Pardot (before they enter Pardot). 

If you have a field that identifies your Prospects as a competitor (email or company for example) you can decide not to send them the email with your latest e-book or asset. This would save you time and effort from setting up individual automation or even using JavaScript.

Streamlined Campaign Management

During ParDreamin 2021, I discussed how you can streamline your asset delivery processes by creating custom fields and leveraging HML, Dynamic Content, and Snippets in the process. Although this is great to reduce the number of assets in the overall process of delivering content, you still need 1 automation rule per asset to update campaign membership. 

By capturing the page title or asset name into a hidden field, you can then leverage this field to add the person to the correct Salesforce Campaign on each form — up to 6 branches (conditional groups). 

This would reduce the number of forms you need to set up overall. 

Multiple Link Click Options For List Emails

One of the most frustrating experiences currently is having an email with more than one CTA and having to pick between “any link” or “specific link” clicks. This feature would allow you to do this with up to 6 different links (we have not seen conditional actions on list emails yet). 

This function would only be available in the Lightning Email Builder and not for the Classic Email Builder. 

Extending The Power of Webinar Connectors

This directly speaks about WebEx and GoToWebinar products. 

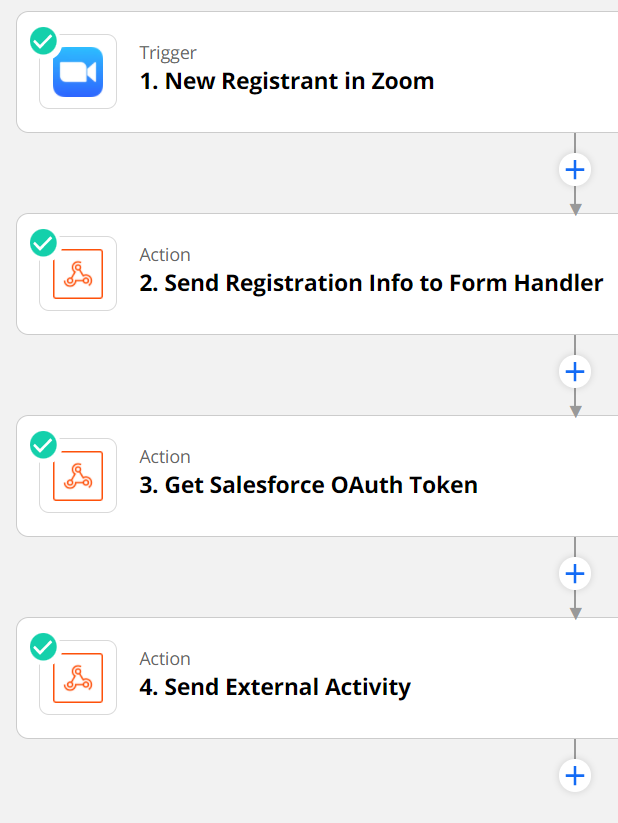
Many B2B organizations have webinar series where they would love for people to register for multiple webinars at the same time. As of today, you either had to use (3) automation rules and a custom field, or (3) separate forms as Pardot does not allow for multiple registrations (using Pardot forms).

An alternative to creating multiple automation rules is to use Javascript here, but the hope is that conditional completion actions provide a no-code alternative. 

With this conditional completion actions feature, you can skip setting up the automation across the platform, thus requiring less work and a central location for it all!

Supercharge Your ABM Strategy

Leverage account types or build a new field called “Account Tier” to signal which accounts need the “white glove treatment.” 

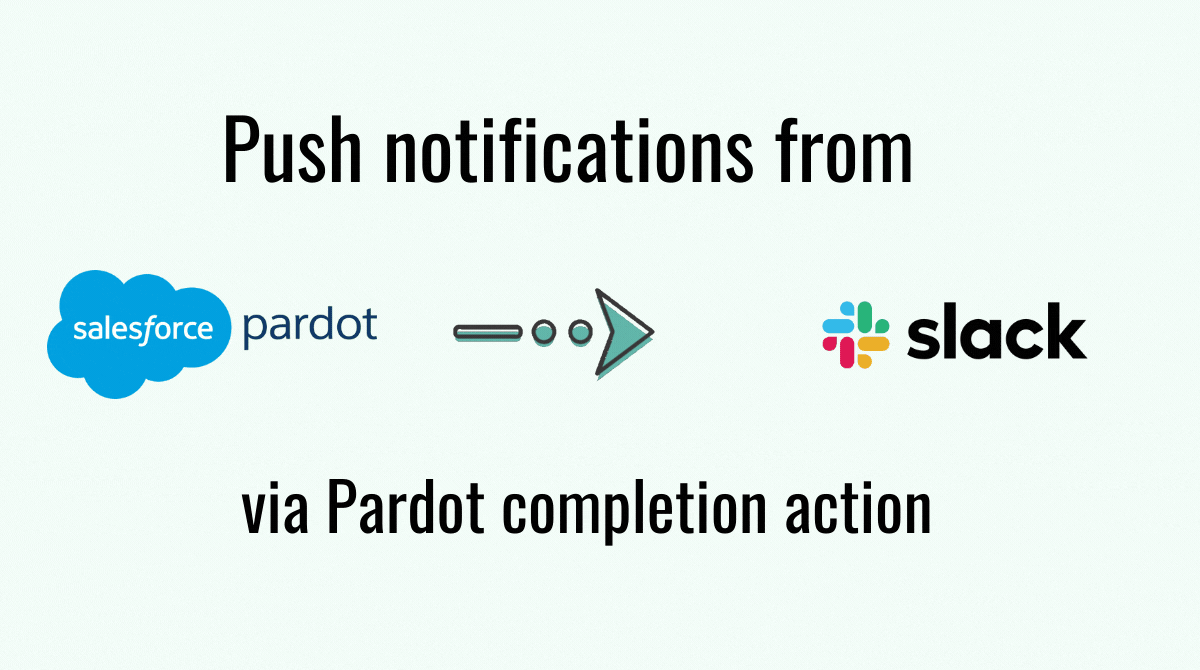
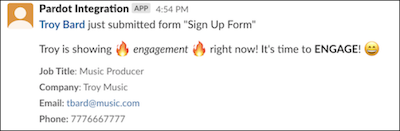
Using conditional completion actions, then create custom Slack notifications, User notifications, or User tasks immediately after these Prospects complete their forms. 

In addition, you can also update a custom field such as “Prioritization”  to increase their prioritization in Views in Salesforce. This would be an excellent companion to the Einstein Key Account Identification feature for those on Pardot’s Advance tier or higher.

Imagine the possibilities for conditional completion actions

As a consultant, I am very much looking forward to streamlining automations for my customers by leveraging conditional completion actions in their organizations in the near future. 

If you need to strategize how to leverage this feature in your organization, or you just want to brainstorm ideas, contact us here!

Included in the Salesforce Winter ‘22 release is a beta feature that highlights the beginning of an integration between Pardot and Slack.

Salesforce officially acquired Slack on July 21, 2021, and the company is already looking to push out new features to integrate Slack with your Salesforce instance. The newest announcement regarding the integration between the two systems went into detail about how every company should have a digital headquarters and what features will soon be available.

Here is what you need to know so you can understand how Slack will work with Pardot.

Connecting Pardot with your company Slack workspace

What does the beta service include?

This beta feature allows your marketing and sales teams to receive updates in their Slack workspace when a prospect engages with your marketing assets. Through a completion action on your marketing asset, a new post will be shared within your Slack workspace informing your team of what asset the prospect interacted with and their basic contact information. When setting up the completion action, you are able to select which Slack channel you want your team to receive the notification.

Push notifications from Pardot to Slack via Pardot completion action

How do I enable the Pardot and Slack integration?

Before enabling the Pardot Slack connector, you will need to create a Slack app that will be installed in your Slack workspace so you can connect Slack to Pardot. If you are like me and have never heard of a Slack app, that’s fine! A Slack app should be created when you need to use Slack APIs to connect your workspace with a third-party service through an integration.

It’s recommended to create an app from an app manifest when setting up the basic Slack app, but it is possible to create your own. The Salesforce documentation for this integration includes JSON code for you to use in the manifest file. 

Slack provides an easy-to-navigate article that helps you create your Slack app for whichever Slack workspace you want to integrate with Pardot. By following the steps shown through the “Create a new Slack app” button, you will be able to create your own app within a couple of minutes.

Once your app is created, you will have to install it in your Slack workspace. This is so the Pardot and Slack integration is connected and ready to be used. Finally, you will have to generate a token and scope through your Slack app to add your workspace to the Slack connector in Pardot.

Enable the Pardot Slack Connector

Now that we have everything set up on the Slack side of the integration, you should navigate to your Pardot settings through the Pardot Lightning App to enable the Pardot Slack connector. Once you have enabled this setting, Slack will be available as a Connector through your connector settings through the Pardot Settings tab.

Enable the Pardot Slack Connector
Pardot Slack Integration create connector

When you choose the Slack connector, you will be prompted to add a Slack workspace to integrate with Pardot. To connect to your workspace, you will have to use the bot token provided when you generated the token and scopes for your Slack app. Once your workspace is added to the Slack connector, you can then choose up to 10 channels from that workspace to connect to Pardot. 

You will need to copy the channel links in order to set them up through the connector. You can find these by right clicking on the designated channel within your Slack workspace.

Configure Slack Notification Completion Actions in Pardot

Now that you have your Slack workspace and channel(s) set up through the Slack connector in Pardot, you can use the “notify Slack channel” Completion Action on your marketing assets. When setting up your completion action, you are able to select which channel you want to post to as well as customize the message that is posted in the Slack channel. With each post, Pardot will also include the following fields for the prospect so your teams can easily identify them in Pardot:

  • Name
  • Job Title
  • Company
  • Email
  • Phone

These fields will show as blank values if they are not populated for the prospect who has completed the particular action you have set up.

Pardot Slack Integration sample message

Upcoming features

Salesforce announced Slack-First Marketing in mid-September and emphasized how the initiative will enable marketing teams to be able to collaborate through a shared digital workspace in Slack. 

Pardot Automation for Slack is the newest feature available for Pardot users to integrate with Slack. Although there is not much information on this new feature yet, we know it is expected to be available with the Spring ‘22 release and provides a shared view of your customer in Slack while streamlining notifications for the sales department.

Important things to know

Here are a few considerations you should keep in mind when you enable the Slack integration in Pardot.

  • You will need to work with your Slack workspace admin to create an app for the workspace you want to integrate with Pardot.
  • The Pardot Slack Connector is a beta feature and is only available in English.
  • The Pardot Slack Connector is not available through Pardot Classic, so you will need to install the Pardot Lighting App to use this feature.
  • You can only create the completion action to notify a Slack channel through a Pardot form, form handler, file download, custom redirect, page action, and Pardot Classic emails.
  • At this time, you are only able to connect one Slack workspace to Pardot and add up to 10 Slack channels for the integration.

Learn more about the Slack integration with Pardot

Remember to reach out to Sercante if you want to know more about setting up these features in your Pardot org. Or, comment below to let us know your thoughts.

Pardot is delivering a whole new way to leverage your prospect data in the Salesforce Winter ‘22 release. Our earlier blog post covers this new feature and how to set up the Pardot External Activity in Salesforce so any third-party service can begin sending these activities to Pardot via API. This post explains what third-party services need to do to send these activities to Salesforce using Salesforce declarative solutions (Flow/Process builder). 

At a high level, we need to:

  • Configure Salesforce to allow our solution to call the Pardot API
  • Implement Salesforce APEX code to handle the Pardot API request
  • Add an action to a Flow to make use of our new code
  • Test

This solution is a little more technical than our post on Zapier. Once you are done, you will end up with a Flow like this:

Start Record-triggered flow

Configure Salesforce

Any time we want to work with the Pardot API, we need to “authenticate” with Salesforce in order to get an Access Token. 

First, follow the steps in our earlier blog post Connecting to Pardot API from APEX. By the end, you should have:

  • A brand new Connected App (to avoid issues, don’t re-use previously created Connected Apps unless they were created using the instructions above) 
  • Named Credential for connecting to the API 

Salesforce APEX code

To build this capability, we need to create an @InvocableMethod so that our Salesforce declarative automations can see it and call it to do our bidding.As with any code solution, there are a variety of ways that we can tackle this. The code sample below will work for readers with one Pardot Business Unit. The original code file (and APEX Tests) can be found in our GitHub repository: external-activities-sfdx

public with sharing class PardotExternalActivityPublisher {
    public static final Integer HTTP_REQUESTS_PER_BATCH = 50;
    public static final String ONLY_ONE_BUSINESS_UNIT_ID = '0UvB00000004000AAA';
    public static final String NAMED_CREDENTIAL = 'APEX_Pardot_Credential';

    public class ExternalActivity {
        // @InvocableVariable(label='Business Unit Id')
        // public String businessUnitId;
        @InvocableVariable(label='Extension' required=true)
        public String extension;
        @InvocableVariable(label='Type' required=true)
        public String type;
        @InvocableVariable(label='Value' required=true)
        public String value;
        @InvocableVariable(label='Prospect Email' required=true)
        public String email;
    }

    @InvocableMethod(label='Send Activity to Pardot')
    public static void sendActivityToPardot(List<ExternalActivity> activities) {
        //Very quickly pass this request into the ASYNC Queue, eliminating delays for Users
        System.enqueueJob(new QueueablePardotCall(activities));
    }

    /**
     * Handles Asynchronously firing each Activity to Pardot
     */
    public class QueueablePardotCall implements System.Queueable, Database.AllowsCallouts {
        private List<ExternalActivity> activities;

        public QueueablePardotCall(List<ExternalActivity> activities) {
            this.activities = activities;
        }

        public void execute(System.QueueableContext ctx) {
            //depending on how many Activities we are processing, 
            //we might hit the APEX limit of 100 Web Callouts
            List<ExternalActivity> remainingActivities = new List<ExternalActivity>();
            Integer processedCount = 0;

            for(ExternalActivity activity : activities) {
                if(processedCount < HTTP_REQUESTS_PER_BATCH ) {
                    HttpRequest req = new HttpRequest();
                    req.setHeader('Pardot-Business-Unit-Id', ONLY_ONE_BUSINESS_UNIT_ID);
                    req.setHeader('Content-Type', 'application/json');
                    // req.setHeader('Pardot-Business-Unit-Id', activity.businessUnitId);
                    // activity.businessUnitId=null;

                    req.setEndpoint('callout:'+NAMED_CREDENTIAL+'/v5/external-activities');
                    req.setMethod('POST');
                    String body = System.JSON.serialize(activity, true);
                    System.debug('Submitting: ' + body);
                    req.setBody(body);
                    Http http = new Http();
                    try {
                        http.send(req);
                    }
                    catch(Exception e) {
                        //we fire it off and don't do anything if there's an error
                        //probably not the best approach for Production, though it will
                        //be up to you how to handle it
                        System.debug('There was an error submitting the External activity');
                        System.debug('Message: ' + e.getMessage() + '\n' +
                                        'Cause: ' + e.getCause() + '\n' +
                                        'Stack trace: ' + e.getStackTraceString());
                    }
                    processedCount++;
                }
                else {
                    //we will process this in the next batch of Payloads
                    remainingActivities.add(activity);
                }
            }
            if(!remainingActivities.isEmpty()) {
                System.enqueueJob(new QueueablePardotCall (remainingActivities));
            }
        }
    }
}

To use this code, make sure you replace the Business Unit ID at the top of the code with your Business unit ID (to find this, navigate to Salesforce Setup > Pardot Account Setup).

For readers with multiple Pardot Business Units, remove the constant ONLY_ONE_BUSINESS_UNIT_ID and then uncomment the businessUnit lines throughout. You will need to either specify the Business Unit ID in your Flow, or you could write additional APEX to iterate through your Pardot Business Units by working with the PardotTenant object in Salesforce.

You might also want to specify how you want to handle any exceptions you get from making the Pardot API call. In our example, we simply write exceptions to the debug log.

Our APEX code does assume that the Contact has synced over to Pardot already. If you can’t make this assumption, you may consider calling a Pardot Form Handler to make sure that the prospect is in Pardot already. We have an APEX example for that too (which follows a very similar pattern, so it should be easy to merge them).

Adding an Action to a Flow

Once the APEX has been deployed, you will now be able to use it declaratively.

In our example, we have a Zoom Webinar Member (which is a Junction Object between a Zoom Webinar and a Contact).

To set this up in a Flow:

  1. Navigate to Setup > Flows
  2. Select “New Flow” or edit an existing Flow
  3. Select the + symbol to add a new Element, select “Action”
  4. In the “Search all actions” window, locate “Send Activity to Pardot”
  5. Provide a meaningful Label and Description
  6. Set your input values
    • Extension: Enter the name of the Marketing App Extension you created in Salesforce
    • Prospect Email: Source the email from one of the fields/variables in your flow
    • Type: Enter one of the activities you set up and associated with your Marketing App Extension in Salesforce
    • Value: Enter (or source from a field/variable) the unique value to identify this Activity, event IDs work great here
  7. Click “Done”
Send activity to pardot

Test

Once all elements of your Flow are ready, testing can begin. Activate your Flow and perform the action you are using to trigger the Flow. After a couple of moments, check the Pardot prospect you are testing with, and you should now see all the information you passed through.

prospect activities

Testing is a little bit tricky, for two reasons:

  1. We are executing this functionality asynchronously, meaning a problem won’t show up in Salesforce like you are used to seeing. Debug logs will be your friend here. But don’t worry, there isn’t too much to sort through.
  2. If the Named Credential or anything else isn’t quite set up right (from step 1), Salesforce and debug logs aren’t very helpful in troubleshooting. You will have to painstakingly go through the instructions again to make sure that nothing was missed / done incorrectly.

Considerations

  • The Export Activity API call only works for known prospects, and it will not work if the email address is not already associated with a prospect in your Pardot Business Unit (this is why we have the form handler in our example).
  • If you have multiple Pardot Business Units, there is no intelligence of “choosing the right one.” You need to target the right one with your APEX solution, which assumes all prospects going through this code are from the same Pardot Business Unit. As we mentioned in the APEX section, you have the flexibility to code whatever you need to handle your business case. 

 For assistance with this or other Pardot External Activities, reach out to Sercante!

The Salesforce Winter ‘22 release made the Pardot Prospect Mailability upgrade permanent for all orgs. And it also introduced four new user abilities that allow for more control over which Pardot user roles can edit the new Prospect Mailability fields.

New Fields

  1. Update Opted Out Field
    • Allows the user to edit the “Opted Out” field from the Prospect Overview page
    • Replaces “Toggle Opt-In Status” 
  2. Update Do Not Email Field
    • Allows the user to edit the “Do Not Email” field from the Prospect Overview page
  3. Reset soft bounce count
    • Allows the user to reset the soft bounce count for a prospect. When soft bounces are detected, a “reset” option will appear.
  4. Reset hard bounce count
    • Allows the user to reset a hard bounce for a prospect. 

“Update Opted Out Field” will be enabled for the Pardot Administrator role by default. The other three abilities will be enabled for the Administrator role and the Marketing role by default. Users will only be able to manually toggle these abilities on and off within a Custom User Role

When should you reset soft and hard bounces?

You should reset a prospect’s soft or hard bounce if the bounce(s) only resulted from a system issue, such as:

  1. The mailbox is temporarily unavailable or busy
  2. The mailbox is full
  3. An issue similar to when Barracuda incorrectly blocked vendor IPs including Pardot 

If the bounce(s) resulted from the email address not existing, the email or sender being blocked, or due to a bad sending reputation, you should not reset the bounce(s). Continuing to email prospects who have received a hard bounce for these reasons can have a severe impact on your send reputation! You can learn more about bounce codes and meanings here

What to watch out for

Removing a user role’s permission to “Update Do Not Email Field” and/or “Update Opted Out Field” only removes the ability to update these fields on the Prospect Overview page. Users will still be able to edit these fields via Automation Rules, Completion Actions, and Engagement Studio Programs. Due to this, I would highly recommend you read the “Ensure these new features are used correctly” section of our first Mailability Upgrade post as well as Lindsey Mark’s post about how to align your data after the upgrade.

What questions do you have about the new Mailability Upgrade? Tell us in the comments!

Pardot is delivering a whole new way to leverage your prospect data in The Salesforce Winter ‘22 release. Similar to webhooks, the new Pardot External Activities feature allows users to receive data from third-party systems and use the data in automations and Engagement Studio Programs. For instance, you could record when a prospect registers for a webinar, completes a survey, or watches a video.

In an earlier blog post, we describe how to set up the External Activity in Salesforce so a third party can begin sending activities to Pardot via API. This post will detail how to actually send the activities with Zapier. Similar approaches can be done with other meta-services. If you want hands-on help, we’d love to work with you.

Pardot External Activities Zapier Solution

Before we get started, it is important to note that Zapier doesn’t actually support this Pardot API request. Zapier only supports four of the many API requests possible, so we will be taking advantage of the Zapier Webhook capability to build our solution.

At a high level, we need to:

  • Configure Salesforce to allow our Zap to make API requests to Salesforce and Pardot
  • Create a new Zap which listens for a third-party event (such as registering for a Webinar)
  • Enhance the Zap to submit prospect information to a Pardot Form Handler
  • Enhance the Zap to get an OAuth token from Salesforce
  • Enhance the Zap to publish the External Activity (which works well as the Form Handler has ensured the Prospect exists already)
  • Test

Now I realize this is a lot, but don’t worry, we’ll walk through it all. Once you are done building this Zap, you’ll end up with something like this:

Configure the Salesforce Connected App

Anytime we want to work with the Pardot API, we first need to “authenticate” with Salesforce to receive an Access Token that can be used with the Pardot API. To do so, create a new Salesforce Connected App for Zapier. We highly recommend creating and testing this new Connected App by following the steps in our earlier blog post, Pardot API and Getting Ready with Salesforce SSO Users.

Once you have created your new Connected App, you should have a new Salesforce and Pardot User for the Zapier connection. Keep the user’s username, password, and security token handy for later.

In our example, we will be creating a Zap for a Zoom Webinar Registration. Due to the way Zoom Webinars are integrated with Zapier, you will need to create a Zap for each webinar, as well as creating automations in Pardot for each webinar. This may vary depending on which App you are using in Zapier.

Create a new Zap in Zapier

  1. Log in to your Zapier Account
  2. Create a new Zap and give it a name
  3. Find the third-party app that will trigger this Zap. For our example, we’ve chosen Zoom.

  4. Select your Trigger event. For our example, we have chosen “New Registrant”.
  5. Choose the Zoom account for your connection. If you haven’t already connected the app, now will be your chance!
  6. Next, (and this might differ based on your app), select the upcoming webinar you wish to integrate.
  7. Click “Test trigger”
    • This often works best if you have a recent “event.” For Zoom webinars, it helps if you have at least 1 person who has already registered for the webinar via the Zoom registration page. In doing so, you will see sample fields and values, making the process a bit easier. 
  8. Finally, click “Continue” and you should have a nice clean “trigger.” Zapier will prompt you to make your first Action.

Enhance Zap to submit the Pardot Form Handler

Zapier now has a handle on prospects registering for the selected webinar, now we need to send this information to Pardot. 

In this first Action, we are going to send details about the person who registered for the Zoom webinar to a Pardot Form Handler. This allows us to create/update a Pardot prospect with the right field values.

Why are we using a Form Handler instead of API calls? 

  1. This approach greatly simplifies the integration by natively handling new prospect creation.
    • Reduces sync errors for new prospects who have not interacted with a Pardot form yet
    • More cost effective and efficient than using the Read API to create new prospects
    • Ensures duplicates are not accidentally created
  2. The action that the person took will actually show up as Prospect Activity. This is good since they took real action and submitted a form.
  3. You can apply Completion Actions, which are not available in the API.

Make sure you have the Pardot Form Handler created and that you have the field names and the https URL handy.

  1. Continuing from the previous section, create a new Webhook Action by selecting “Webhooks by Zapier.”
    • This step is important to establish who is registering and to make sure we associate the External Activity with a prospect. 
  1. For the Action Event, choose POST.
  2. Set up the action by filling in the following fields:
    • URL: The https URL of your Pardot Form Handler
    • Payload Type: form
    • Data: Enter the Pardot Form Handler field name, and the values coming from the trigger setup earlier. Add new “rows” for each field you wish to populate in the Pardot Form Handler based on your trigger data available.
  3. Once you have finished setting up the Action, test the action, check that the Pardot Form Handler was called, and verify that the data is where it should be.
  4. Rename the Action to “Send Registration Info to Form Handler” so that it’s clear what this Action is accomplishing. 

Enhance Zap to get OAuth token from Salesforce

Now things start to get a bit tricky. Since we can’t leverage the Pardot app in Zapier, we need to do things manually. This is where we will use the Salesforce and Pardot User we set up with the Connected app in the first section.

  1. Create a new Webhook Action by selecting “Webhooks by Zapier”
  2. For the Action Event, choose POST
  3. Set up the action by filling in the fields:
    • URL: https://login.salesforce.com/services/oauth2/token
    • Payload Type: form
    • Data -> grant_type: password
    • Data -> client_id: Enter the Consumer Key from your Connected App
    • Data -> client_secret: Enter the Consumer Secret from your Connected App
    • Data -> username: Enter the Salesforce Username of the Pardot user we will use for API calls
    • Data -> password:  Enter your Salesforce user’s password followed by the Security Token
  4. Once you’ve provided all the values above, Test and Review. A successful request should show values like access_token and instance_url for your Salesforce org.
  5. Rename this Action to “Get Salesforce OAuth Token” so that it’s clear what this Action is accomplishing. 

Enhance Zap to publish Pardot External Activity

Finally, we will send the External Activity to Pardot

  1. Create a new Webhook Action by selecting “Webhooks by Zapier”
  2. For the Action Event, choose POST
  3. Set up the action by filling in the fields:
    • URL: https://pi.pardot.com/api/v5/external-activities
    • Payload Type: json
    • Data -> extension: Enter the name of the Marketing App Extension you created in Salesforce
    • Data -> type: Enter one of the Activities you set up and associated with your Marketing App Extension in Salesforce
    • Data -> value: Enter a unique value to identify this Activity, event IDs work great here
    • Data -> email: Enter the email address that was used in step 3 of the “Enhance Zap to submit the Pardot Form Handler” section
    • Headers -> Authorization: This one is a bit tricky to fill out. First, when you click in the text box, type “Bearer “ (with the space) and then select the Access Token.
    • Headers -> Pardot-Business-Unit-Id: Enter the ID of the Pardot Business Unit that is associated with the Marketing App Extension. You can find the Pardot Business Unit ID by navigating to Salesforce Setup >Pardot Account Setup. (Detailed instructions here).
  4. Once you’ve provided all the values above, Test and Review. Check the Pardot Prospect for the new Activity record. This activity will appear between the Prospect Activities and Custom Fields section of the prospect page.
  1. Rename this Action to “Send External Activity” so that it’s clear what this Action is accomplishing. 

Test

Now it’s time to test our Zap end-to-end. 

Activate your Zap and perform the action that you are capturing in the Zap’s Trigger (i.e. register for the Zoom webinar). After a couple of moments, check the Pardot prospect that you are testing with. You should now see all the information you passed through the Zap!

Considerations

  • The Export Activity API call only works for known prospects, and it will not work if the email address is not already associated with a prospect in your Pardot Business Unit. This is why we have the form handler in our example.
  • If you have multiple Pardot Business Units, there is no intelligence of “choosing the right one.” You need to target the right one with your Zap, which assumes all prospects going through this trigger are from the same Business Unit. Proceed with caution and test rigorously when attempting more advanced solutions with business units.
  • Salesforce only allows five access tokens to be issued at a time. With high volumes of a triggering event, it is possible that Zaps may fail due to Salesforce Access tokens getting recycled before they can be used in the following actions (this is due to us manually getting an Access Token with the second Action).
  • Any time the user’s password and/or security token changes in Salesforce, each ZAP that uses it will also need to be updated.

These considerations are best addressed by writing your own code, which can properly address the edge cases, etc. For assistance with this or other Pardot External Activities, reach out to Sercante!

No more posts to show