
This post was originally published on February 2, 2021. After this post was published, Salesforce released the ability to check if a field has been changed. Previously, the solution to capture every UTM touchpoint in Salesforce was to clear out the UTM field values after the flow ran. The new solution is to use the is changed feature instead of clearing out field values.
Refreshed and republished on September 10, 2021
The Concept
If a lead or a contact’s fields for UTM Source, UTM Medium and UTM Campaign have a value, run a Salesforce Flow to create a record in a custom object. The process will run again whenever the UTM information is updated.
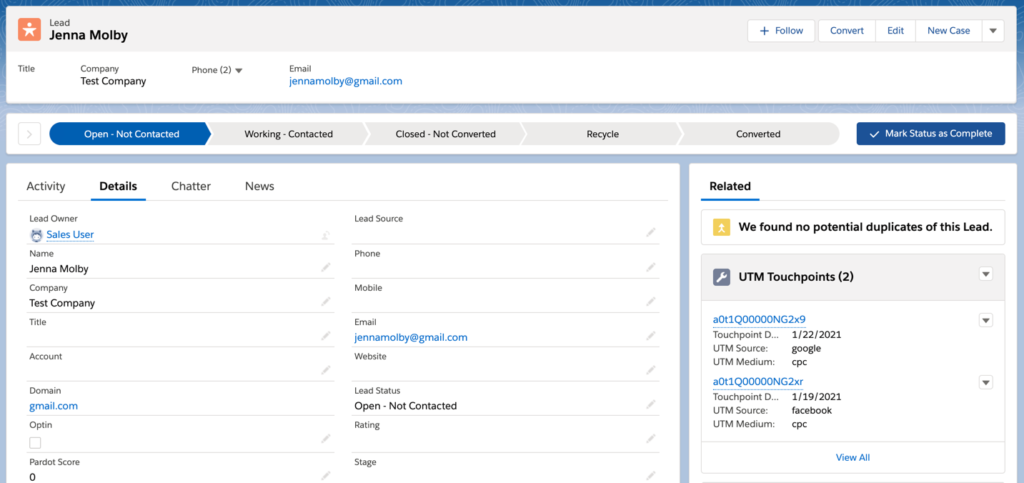
UTM touchpoints displayed on the lead layout
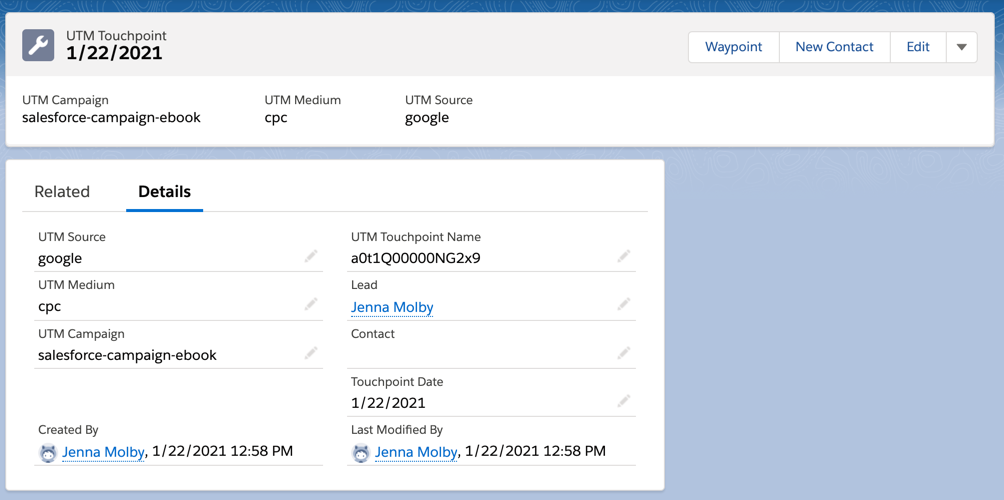
Record detail page for a UTM touchpoint
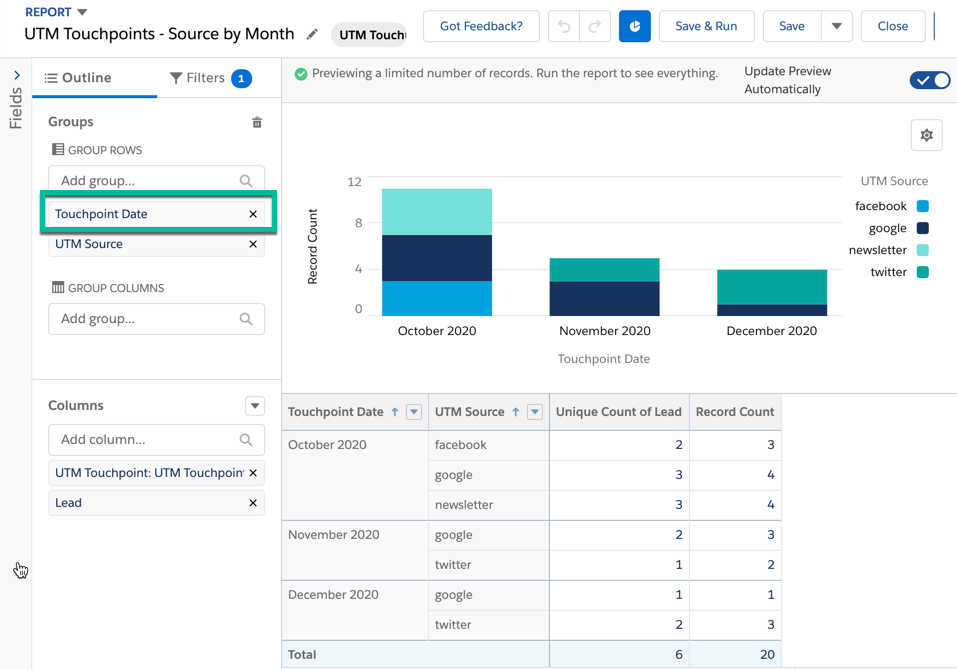
Report preview
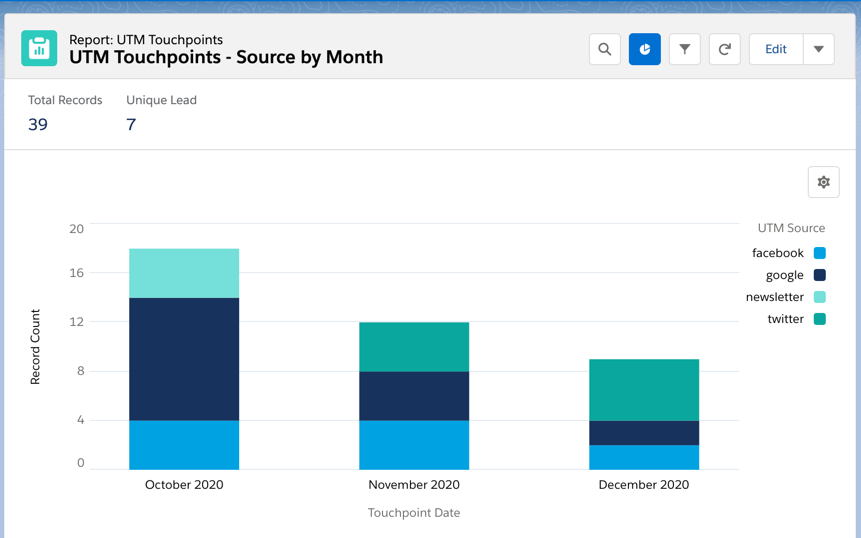
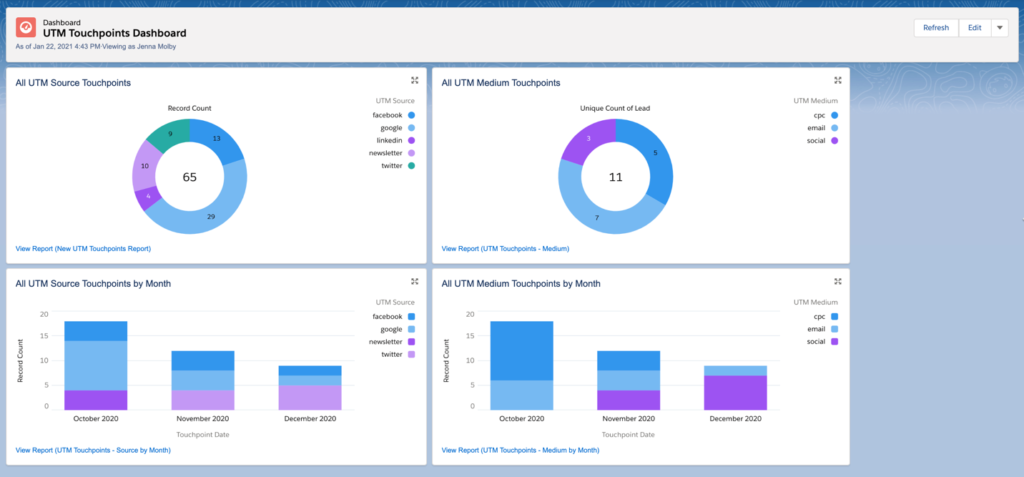
Dashboard preview

Planning
In order for this approach to work, there are 2 things you need to plan for:
- UTM fields for the Lead and Contact MUST be set up to be overwritten every time.
- What to do if there’s EXISTING UTM data in these fields to prevent data loss.
I recommend you review how your UTM fields are currently populated, what data currently exists in these fields and what reports/automations, etc rely on these fields. You should be able to answer these questions before getting started:
- How are the UTM fields populated?
- Do the UTM fields get overwritten?
- What are we going to do with existing data?
What to do if you have existing data
There are plenty of options on how to get this to work if you have existing data in your UTM fields. It all depends on your current setup. Here are some ideas:
- Create new fields named “First UTM Source”, “First UTM Medium”, etc. Rename your CURRENT UTM field labels (not API names) as “Last UTM Source, “Last UTM Medium”, etc. Populate the “First UTM” fields with your current data and use the “Last UTM” fields in your Flow.
- Once the UTM custom object is set up, use DataLoader.io to create records using all the existing UTM values.
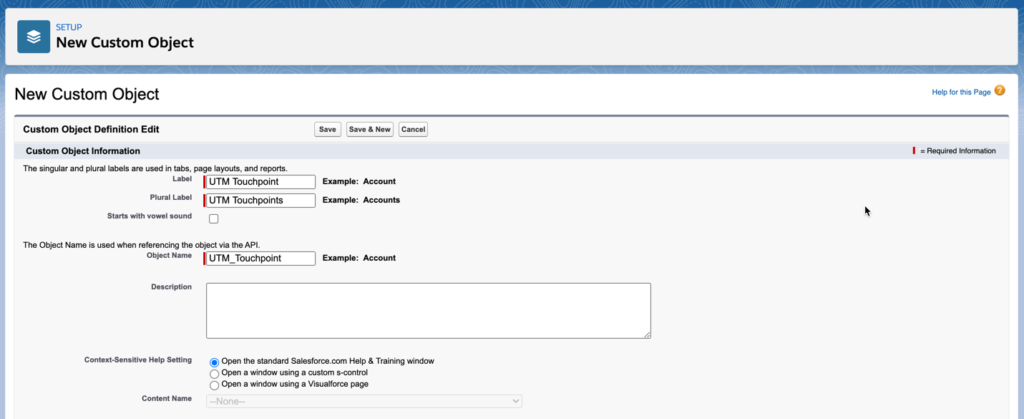
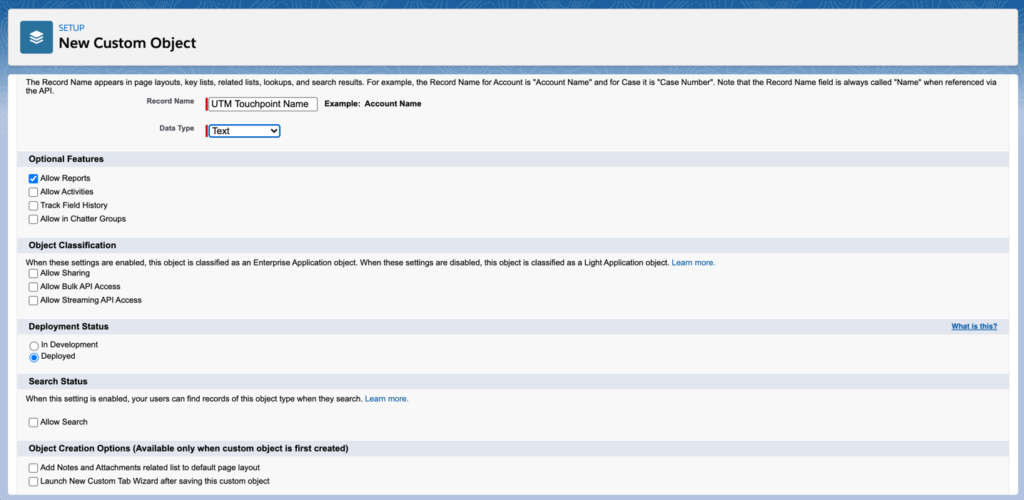
Create the custom object
Create the custom object. I named by object “UTM Touchpoint”.
Create your fields
Next, create the custom fields for your custom object.
| Field name | Field type |
|---|---|
| Lead | Lookup (Lead) |
| Contact | Lookup (Contact) |
| UTM Source | Text |
| UTM Campaign | Text |
| UTM Medium | Text |
| Touchpoint Date | Date |
You can also create any other fields you want to track using this object. For example, UTM Term or UTM Content.
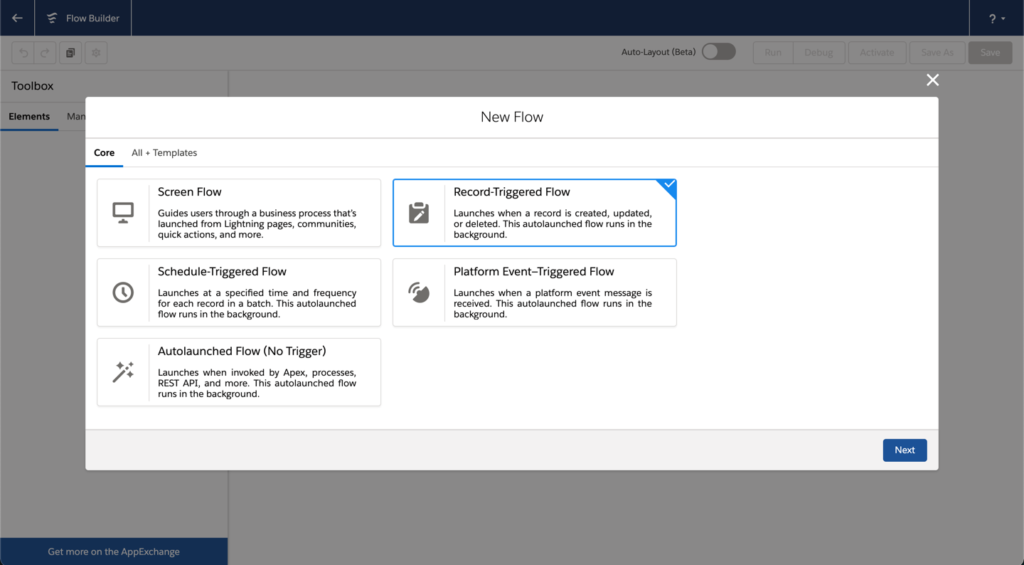
Create the Flow for Leads
Navigate to the Flow builder and create a new Flow. Select Record-Triggered Flow as your Flow type.
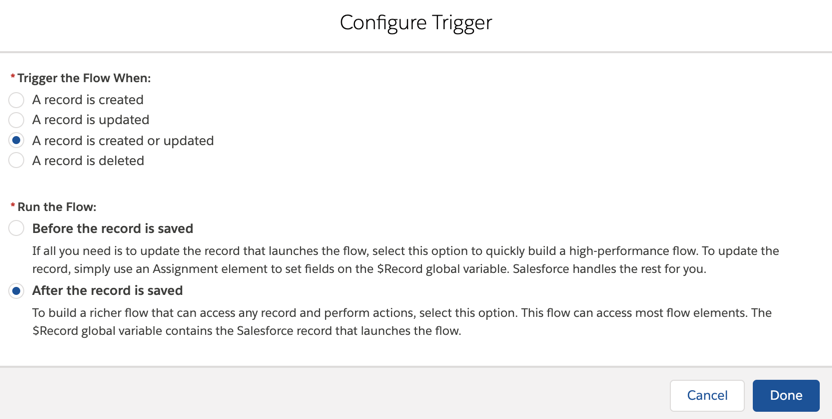
Configure the trigger to run when a a record is created or updated and after the record is saved
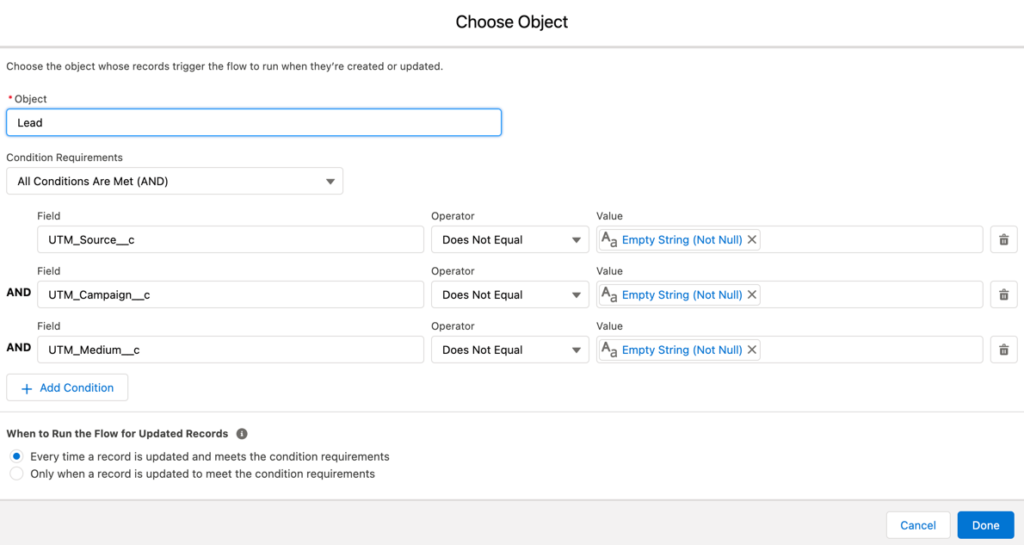
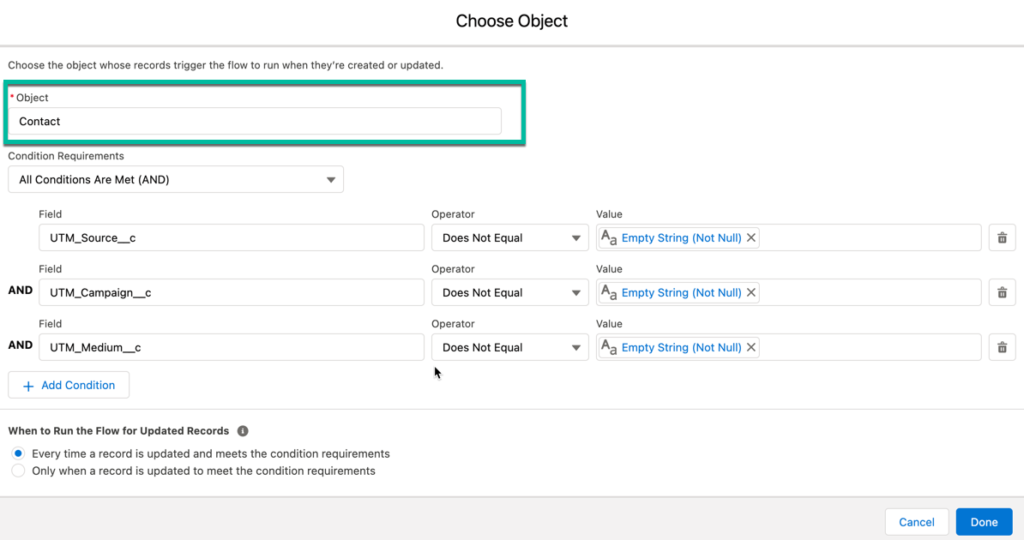
Select the Lead object as the starting object and add in the filters that will trigger your flow. For this example, I want to trigger the flow when UTM Source, UTM Medium AND UTM Campaign have values.
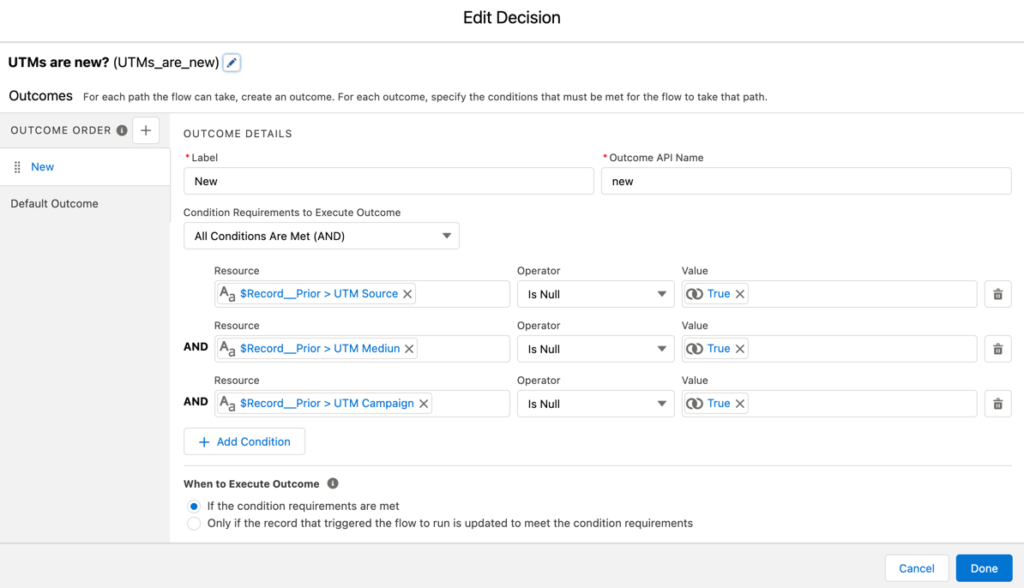
Add a decision element to the flow that will check if the UTM values are set.
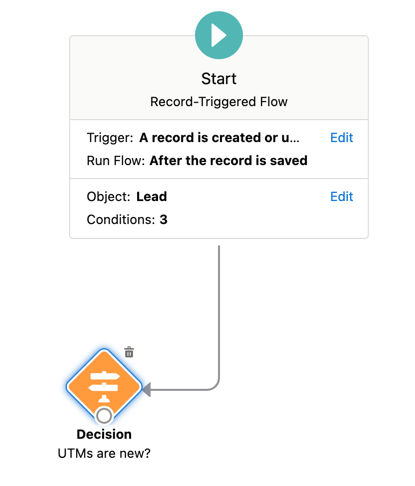
Now your flow should look like this.
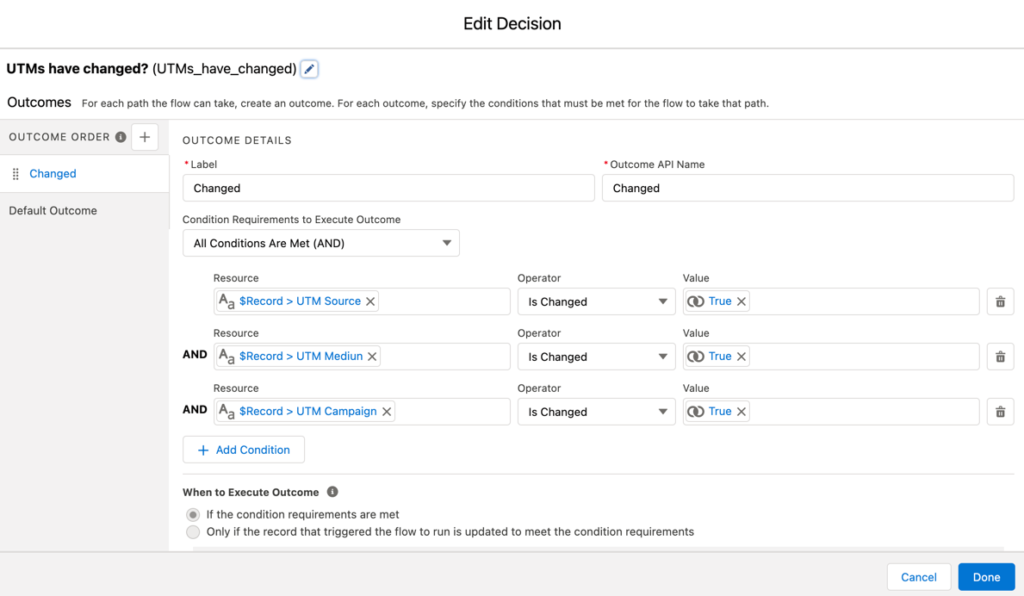
Add another decision element that will check if the UTM fields are updated.
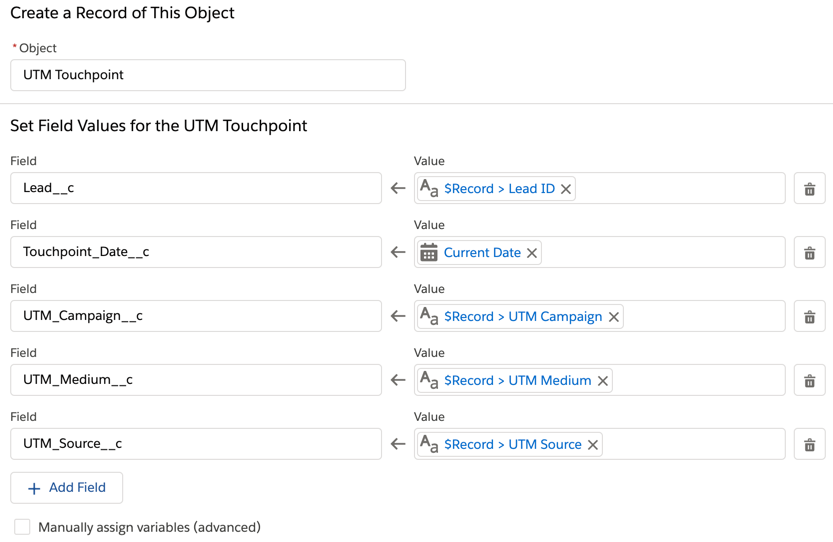
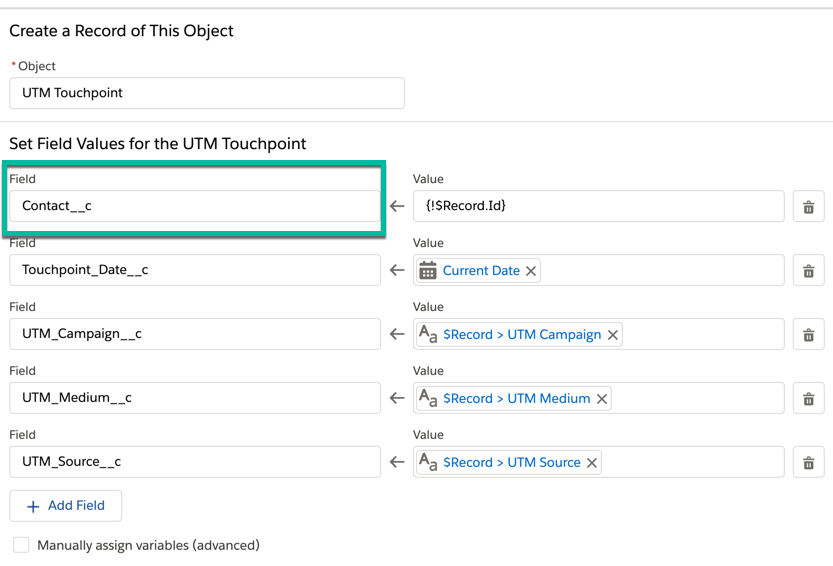
Add a create records element to the Flow that will take the UTM values from the lead and set the values for the UTM Touchpoint object.
Connect the decision elements and the create records element. The final flow should look like this.

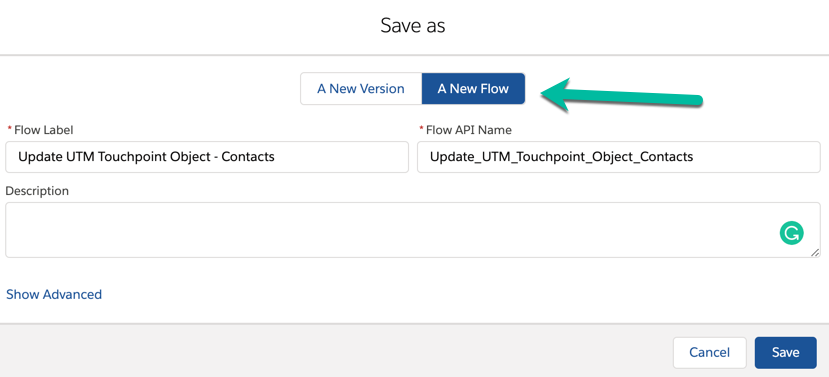
Create the flow for contacts
To create the flow for contacts, click save as on the lead flow and select save as new flow.
Edit the flow to start on the contact object instead of the lead object.
Edit the create records step to update the contact rather than the lead.
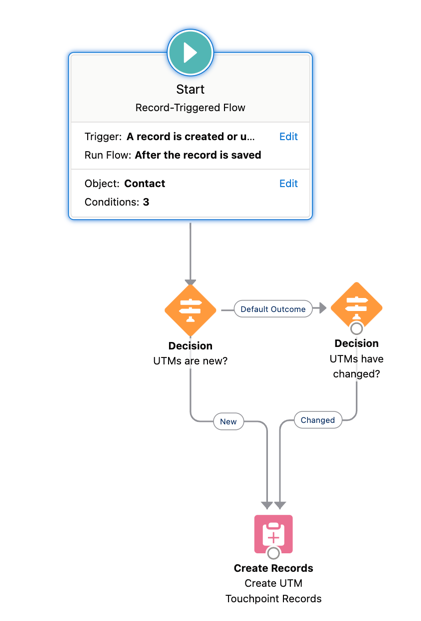
Here’s what my completed flow looks like for contacts.
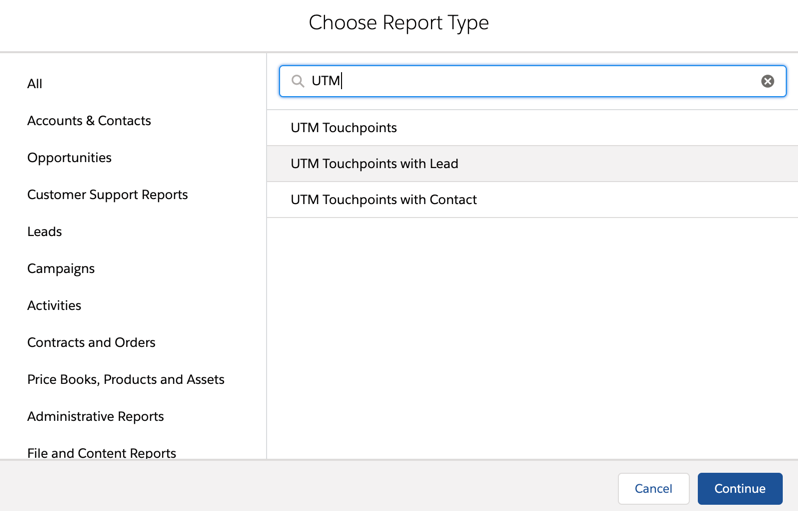
Creating reports
You can create reports by using one of the predefined UTM report types. The report type “UTM Touchpoints” will allow you to pull a report of ALL UTM touchpoints for both leads and contacts.
You can group by UTM Touchpoint Date to view all the touchpoints for a specific month, day, quarter, year, etc.
Questions?
Send me a tweet @jennamolby, or contact the Sercante team for help.