If you run virtual or in-person events, including an ‘add to calendar’ link in your emails and landing pages can be a great way to ensure your guests actually show up. While there is currently no feature in Pardot to create ‘add to calendar’ links within the editor, there are two options to add them yourself. The first option is to create the files manually and link to them within your Pardot assets. The second option is to use a tool to generate the links, files and buttons for you. In this post, I’ll show you how to use each one of these options to create ‘add to calendar’ functionality within your Pardot emails and landing pages.
Choose which calendars to target
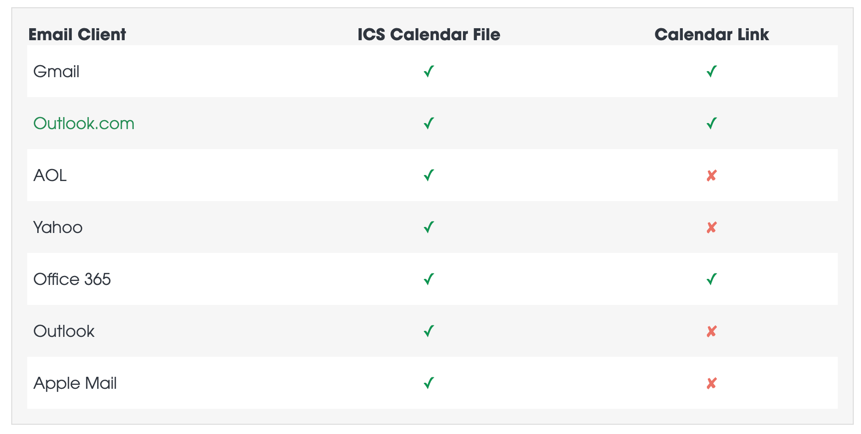
There are two common calendar file types; a calendar link and a calendar (ICS) file. The first step is to figure out which calendars you want to target. That way, you know what files need to be generated to add them to your Pardot email or landing page.
Here’s the breakdown of which email client accepts which ‘add to calendar’ method.
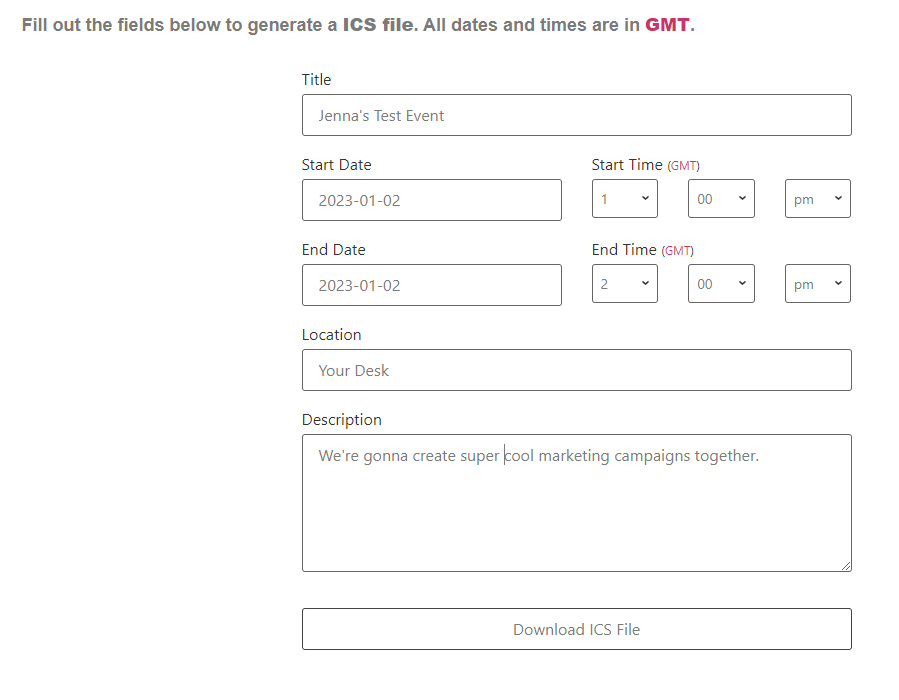
Enter the information for your event, select the email client you want to target and add the link to your email or landing page.
This is an example from the ICS calendar link generator.
Upload the calendar link to Pardot
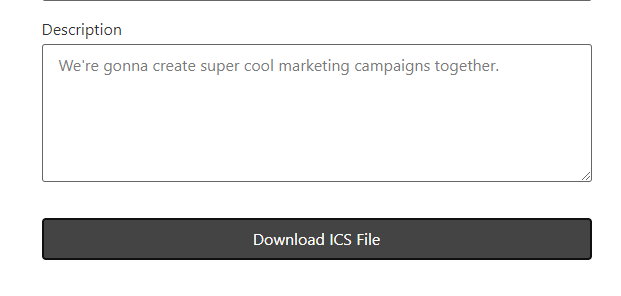
If you want to target an email client that supports ICS files, you will need to generate the file and upload it into Pardot. Using the same generator, click on the download ICS button to download the file. Upload the file into Pardot (Marketing > Content > Files).
Link to the ICS file within your Pardot landing page or Pardot email.
Example
Here’s an example of a button that will work within an email and a landing page.
The second option is to use a tool that will create the files, links and buttons for you. My favourite tool is the AddEvent.com, which has a free ‘hobby plan’ that will allow you to generate up to 50 calendar links a month. With this method, the ICS file is hosted for you, so you don’t need to upload any files into Pardot.
Email example
Here’s an example of what an ‘add to calendar’ button looks like in an email.
Add event to calendar
Landing page example
Here’s an example of what an ‘add to calendar’ button looks like on a landing page.
If you are up for a challenge, you can try to show/hide different calendar links based on what email client the prospect is using. Find out more in this article by Litmus.
Your website is one of your most important demand generation assets and a blog is a great way to increase your online presence by making you more visible on Google. It’s also a great way to bring prospects into your database to expand the top of your funnel.
In this tutorial, I’ll show you how to set up your blog with a Marketing Cloud Account Engagement (Pardot) form, how to create a blog welcome email, and tips to automate blog digest emails.
How do you want your blog readers to subscribe?
There are many ways you can get your readers to subscribe to your blog. Some companies use a popup form when you visit a blog post, which has proven to be effective and other companies make it more subtle. Here are some different methods which will give you inspiration on how you should add the form to your blog.
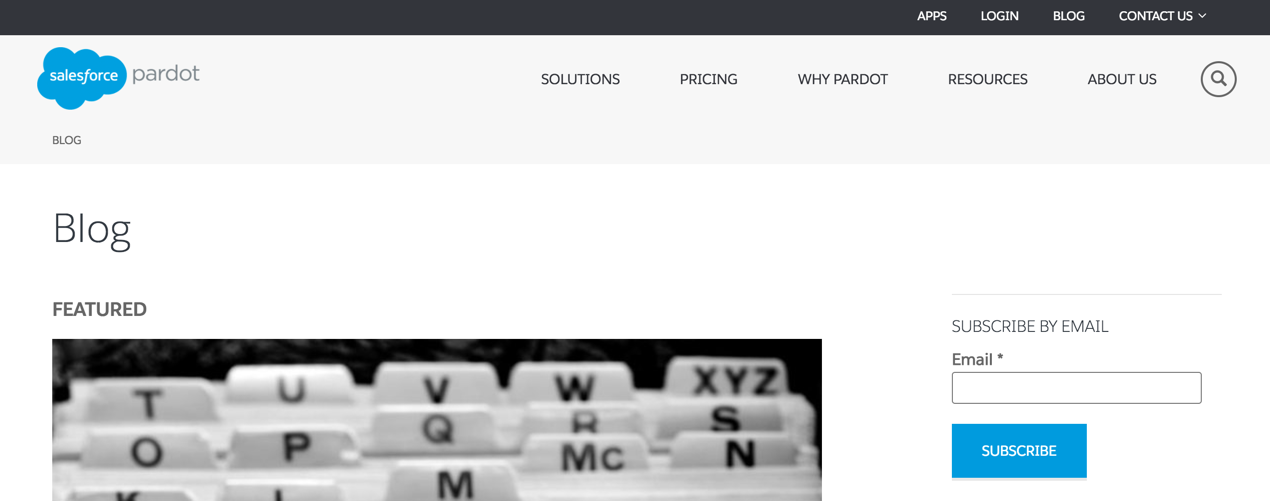
Example 1: In a sidebar
Pardot lets you subscribe to their blog by entering in your email address in the sidebar.
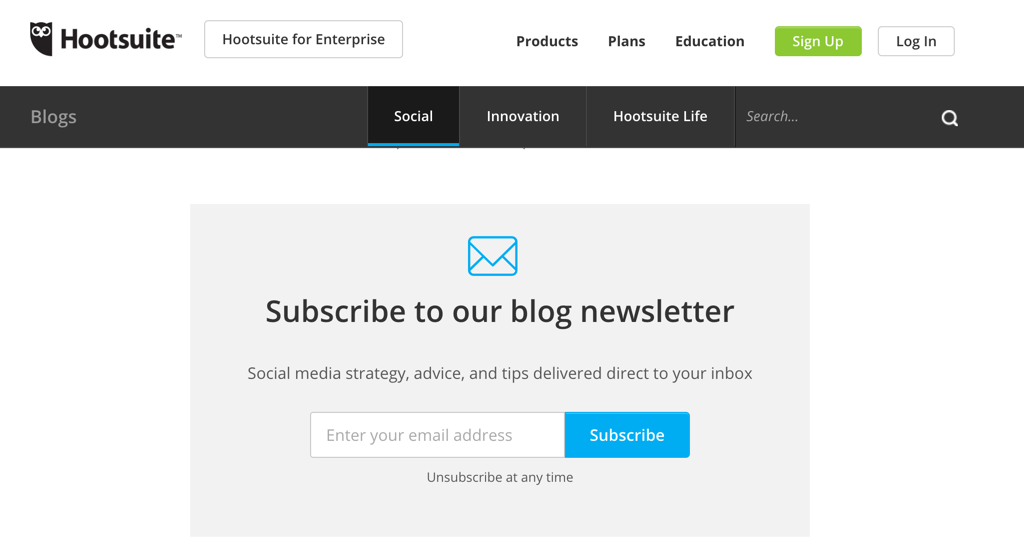
Example 2: At the end of each blog
Hootsuite adds their blog subscription form to the bottom of each blog post. They also only ask for your email address and have some nice icons, so it’s clear what you’re signing up for.
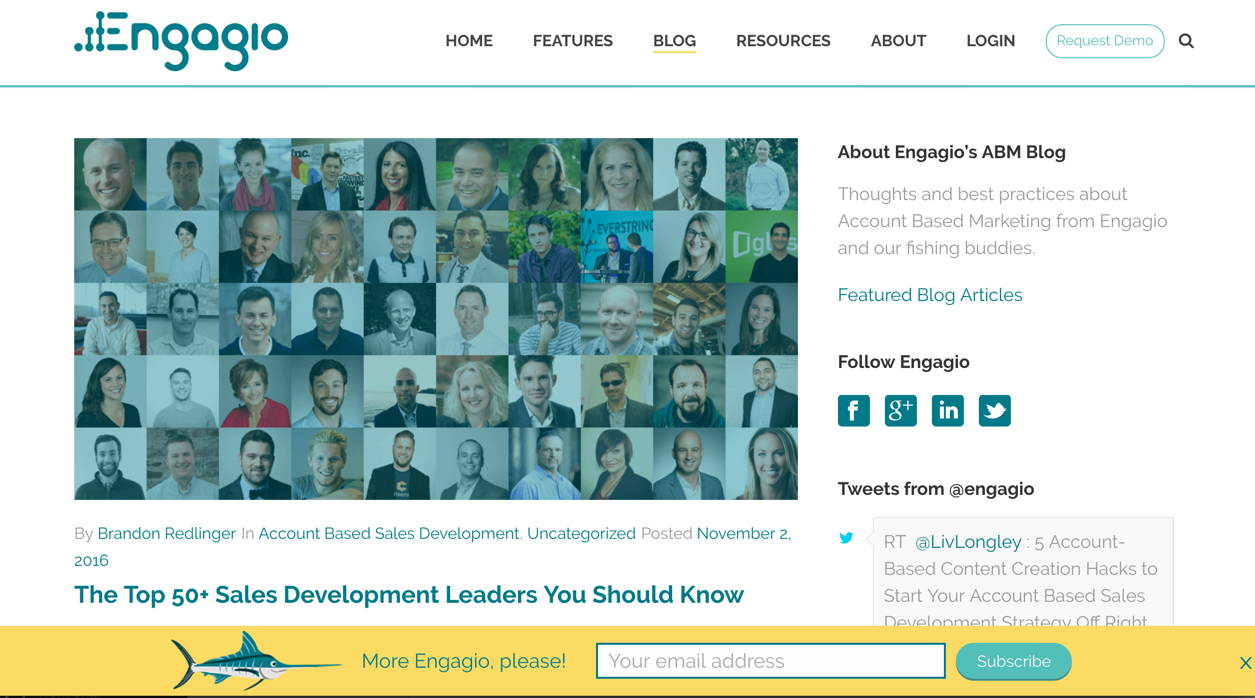
Example 3: In the footer
Engagio has a “sticky footer” at the bottom of their blog page, as well as on each blog post to get readers to subscribe. The bold yellow color also draws your attention to the subscription form without being too invasive and they provide you with a close button to hide the form.
Example 4: With an automation
Asana uses a subscription form that slides out at the bottom when you scroll down about 80%. I like how the animation captures the attention of the readers and how they incorporate Facebook and Twitter buttons beneath the email sign up.
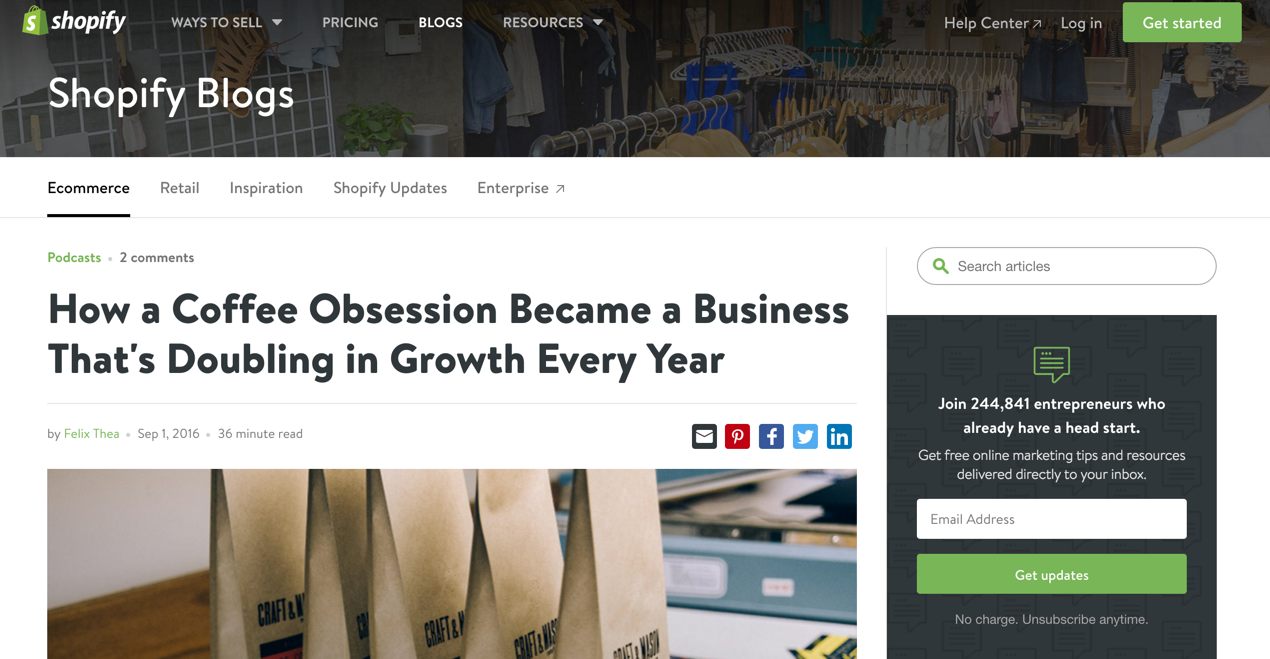
Example 5: In multiple spots
Shopify uses two slightly different methods for capturing their blog subscribers. When you visit their main blog page you can subscribe right from their header.
They also have a subscription form in the sidebar of each post. I like that they include some social proof in the subscription form in the sidebar and it’s clear what I can expect them to send me if I give them my email address.
What fields should you capture?
Standard fields
The shorter the form the more likely you will get your readers to subscribe to your blog. Most blogs only ask for an email address, but some also will ask you for your first and last name for more personalized blog digest emails.
Hidden fields
Your standard source fields should be on your blog subscription form, just like every Pardot form you create.
If you opt to have a subscription form on every blog post, I also like to add hidden fields for blog post title and blog post category. With my blog, for example, I have a subscription form at the bottom of each post and I use custom code in WordPress to automatically populate the hidden fields with the post title and post category. This way I can pull reports in Pardot to see what type of content is generating more blog subscribers and what posts have generated the most blog subscribers.
Here’s an example of populating hidden fields with WordPress blog information. Note: This method is only possible while using Pardot Form Handlers.
Now that I’ve given you some examples of what form fields to include in your form and some methods for blog subscription forms, it’s time to show you how to build it out in Pardot.
Pardot Form Handlers vs. Pardot Form embed
There are some advantages and disadvantages for each form method. Embedded Pardot forms allow you to update the form directly in the Pardot form editor and the changes are live on your site as soon as you save the form. However, they also are embedded on your site using an iFrame, which means that certain functionality might not be available. Pardot form handlers are much more flexible and allow you to use your own HTML code to send data to Pardot.
When integrating your blog with Pardot the best form method to use, in my opinion, is Pardot form handlers, for a couple of reasons:
Changes don’t need to be made to the blog form regularly
It’s easier to have the form match your website/blog
Many blogging platforms have plugins you can use for blog subscription forms that will work well with Pardot form handlers
Create a campaign dedicated to blog subscribers
Create a campaign to attribute your blog as a lead source for any new subscribers. Your form and new subscribers should be assigned to the campaign in Pardot and/or Salesforce, depending on your lead attribution processes.
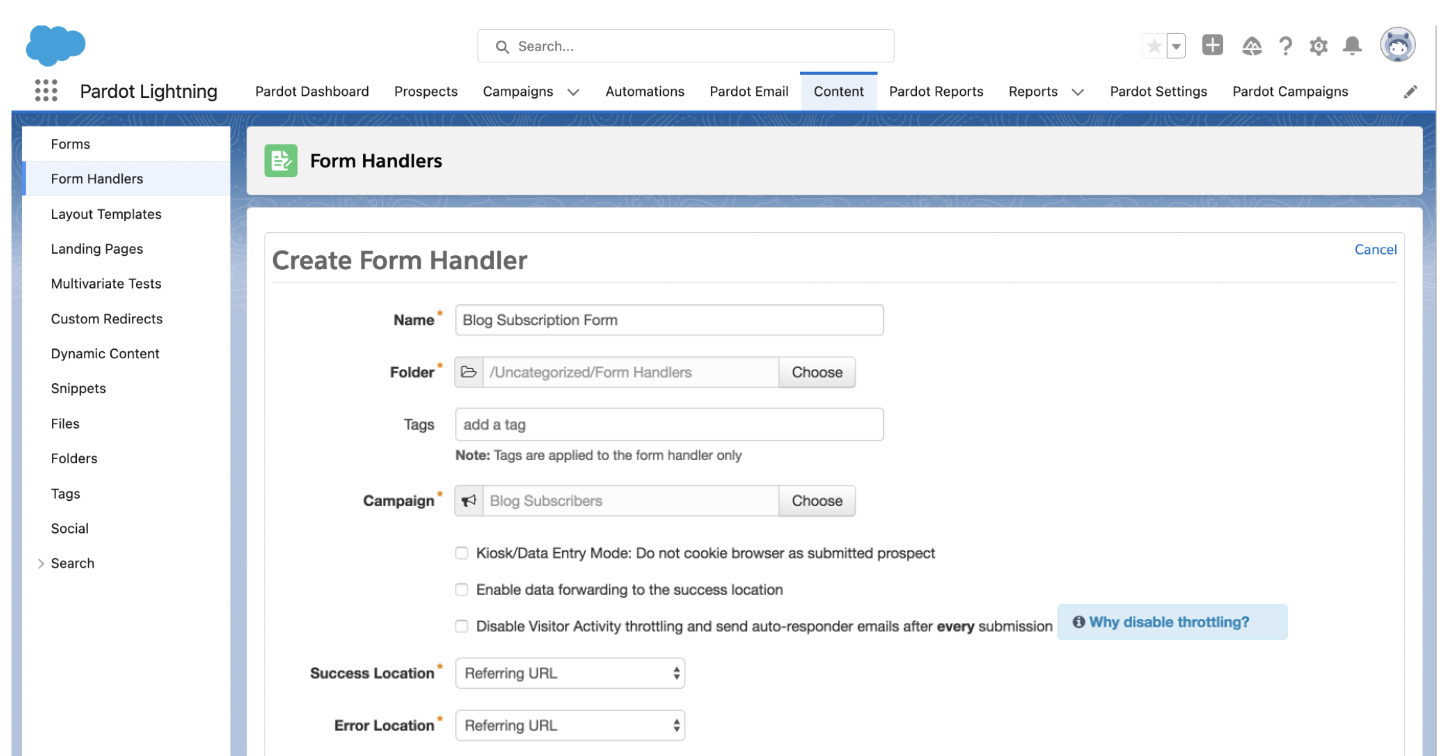
Create a Pardot Form or a Form Handler
In this tutorial, I will be using a Pardot form handler. You can also use a regular Pardot form if you prefer.
Create a Pardot form handler with a descriptive name. I called mine “Blog Subscription Form.” Select your new campaign, map the fields that you want to add to the form and click save. Note: Completion Actions and some other settings will be updated later on.
Add the form to your blog
There are many tools that allow you to add forms to your blog, but it depends what platform you use. Here’s a list of some popular plugins that will help you add your Pardot form to your blog.
PopUp Domination can be used to create a popup subscription form on your blog. You can use any HTML you want, which means it will work perfectly with your Pardot form handler.
Sumo is another option that will work on any type of blog platform. They also offer many different ways to display the subscription form on your blog.
While I’m a big fan of these tools, if you have a developer available the best option is to get them to implement your Pardot form on your blog using custom code. Depending on the method you choose it should be pretty easy for a developer to implement your form and it means you don’t have to pay a monthly subscription fee for using these tools.
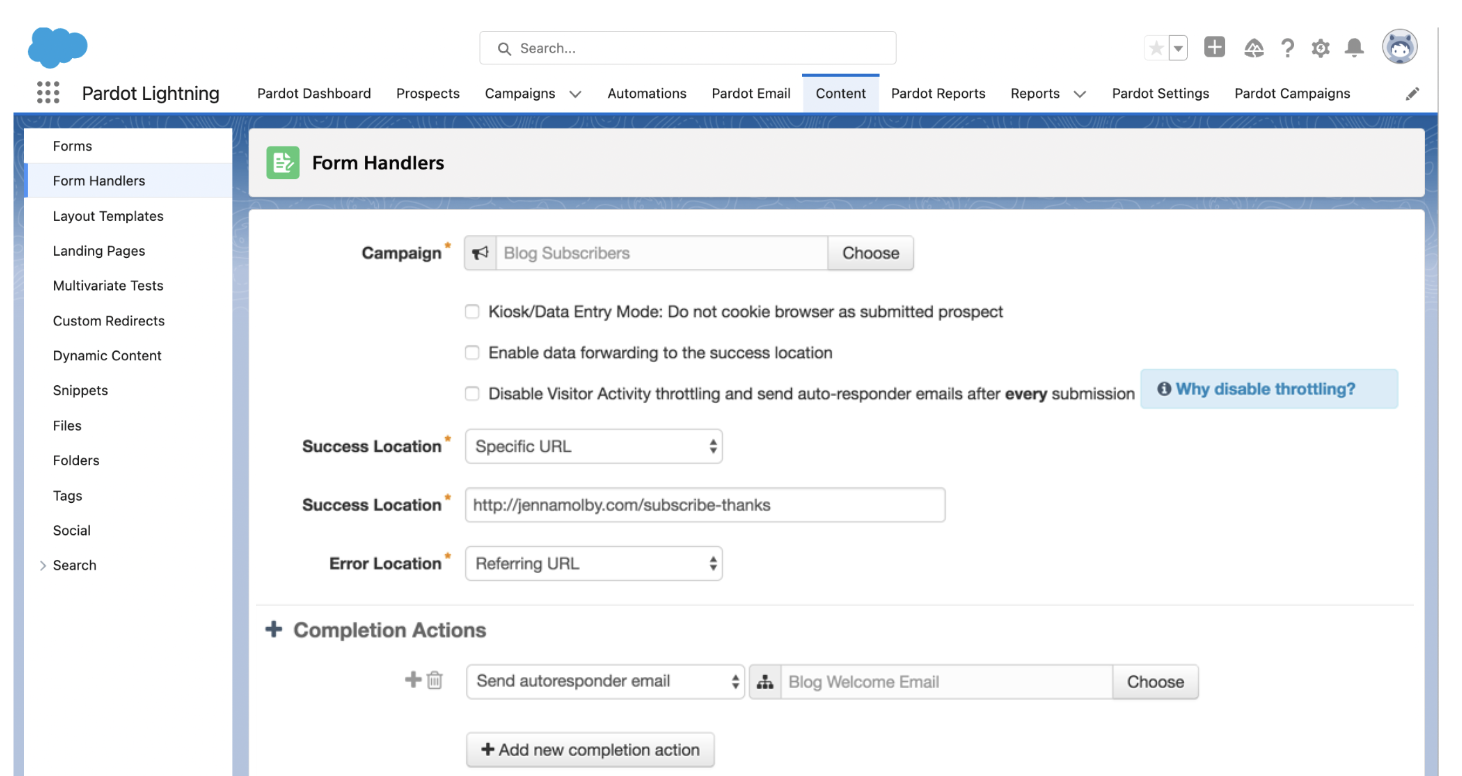
Create a Thank You page
The next step is to create a Thank You page that the form will direct to when someone subscribes to the blog. I recommend that you create it on your website (instead of a Pardot landing page), to ensure it has the same look as your blog.
Once your Thank You page is created, copy and paste the URL into the Success location in the Pardot form handler.
Create a blog welcome email
A blog welcome email is a great way to promote more of your blog content. Choose a couple of your popular posts or create a digest of curated content your readers might be interested in.
When a reader subscribes to my blog, I send them a welcome email with some of my top Pardot blog posts. Click here to see what it looks like (and feel free to copy and paste the HTML to create your own welcome email).
Once you have your blog welcome email created add a completion action to your Pardot form to send an autoresponder email.
Emailing subscribers: Automated vs. Manual
Now that your form is set up on your site and your welcome email is ready, it’s time to figure out how you’re going to send notification emails when there’s a new blog post. There are two ways you can send out blog posts:
Automatically using a third-party application, or
Manually, since Pardot doesn’t have an RSS feed integration.
For my blog, I send out all my blog digest emails manually, since I like to have control over what’s sent. However, I only post about once or twice a week, so it’s pretty manageable.
Automated blog posts using Feed Otter
If you opt to go with the automated route, Feed Otter provides a full RSS integration with Pardot. You can quickly build, schedule, and email your blog subscribers notifying them of a new post, a weekly digest, or a monthly newsletter.
Manual blog post emails
Manual blog post emails require you to create an email each time there is a new blog post, or if you post a lot during the week, you can do a digest of all the new posts, once a week. It can be time-consuming, but if you have a good email template setup and a defined process the whole thing doesn’t take very long. If you’re going to go the manual route, here are some tips:
Create a simple, one-column email template, so you don’t have to spend time messing with formatting. This is the template I use for my blog posts.
Create an email that you can copy each time you need to send a blog email. This will contain all the settings (from address, list, etc.) you need to send the blog email.
Questions?
Send me a tweet @jennamolby or leave a comment below.
Note: This post was originally written in November 2016 and updated January 2023.
I’ve seen more than a few great marketing campaigns fail due to the lack of a clear call-to-action (CTA). Some campaigns have multiple CTAs that confuse the prospect while others don’t have a CTA at all. In both cases the end result is the same, a lot of work for very few responses.
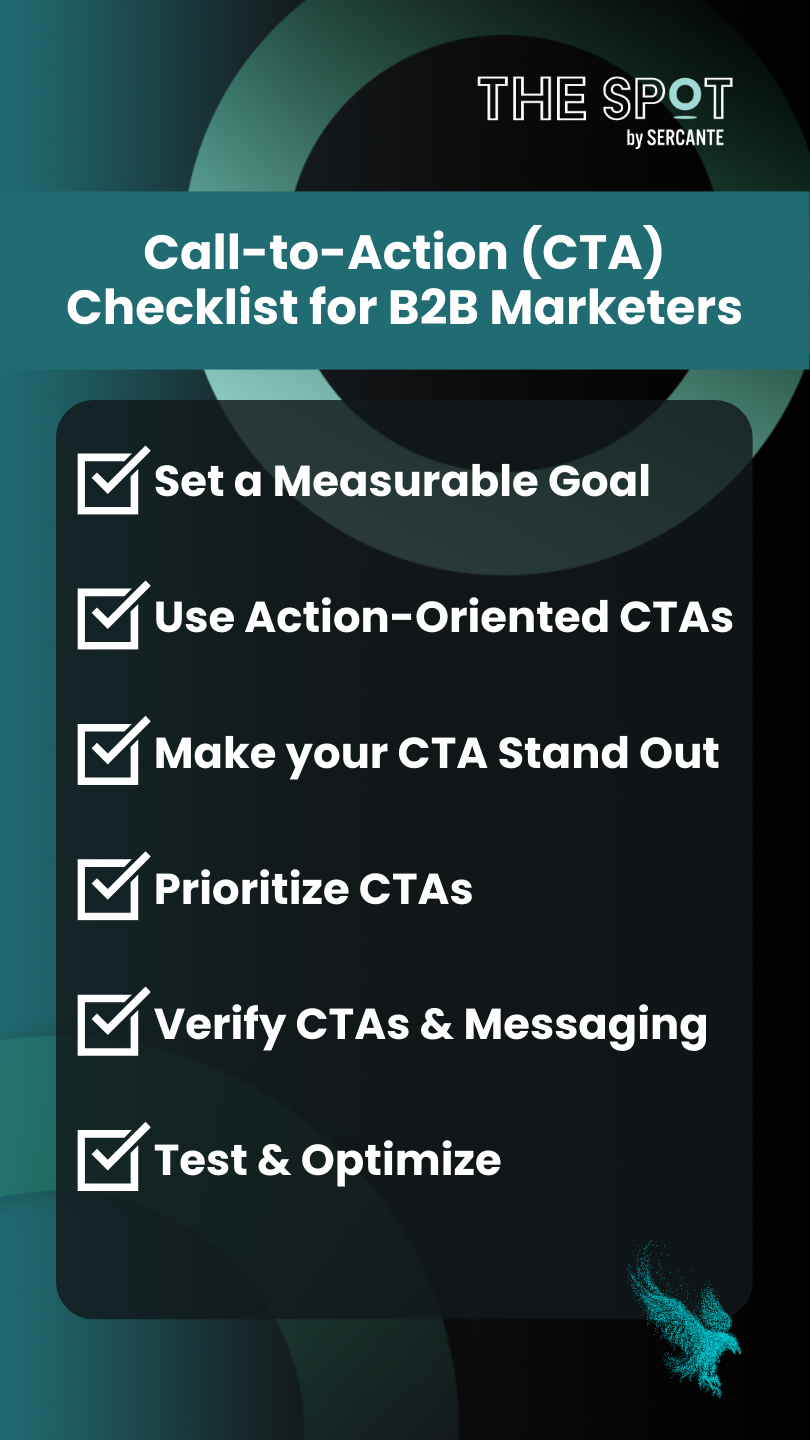
In this post, we’ll provide a CTA checklist that will help ensure the success of your B2B marketing campaigns.
Set a Measurable Goal
I know this one seems super obvious, but this step is all too often ignored. Before executing any campaign, a measurable goal needs to be defined. What are you trying to accomplish with your CTA? You can’t measure the success of a campaign if it does not have a clear goal. Write down your goal as the first step — the clearer the better.
Goal Example:
Get 50 registrations for next month’s webinar.
Use an Action-Oriented CTA
Avoid generic terms like “submit” or “click here,” and don’t be bossy. Action-oriented words and phrases that describe the end result or value the prospect will receive are less demanding, convey greater value, and ultimately result in more responses.
Generic
Action-Oriented
Register
Save My Spot
Submit
Start My Free Trial
Make your CTA Stand Out
How many times have you seen the word “here” linked in the text of an email? As often as you’ve seen it, I bet there are just as many times that you’ve read over it and not seen it. It’s also not great for email accessibility, as Cara Weese points out in this blog post about email accessibility.
When using hyperlinks in the body of text, avoid single words like “here,” “click,” and “more.” Make your CTA stand out by linking phrases that describe what the reader will receive.
Bad Example:
The Spot is a community resource for marketers whose tech stacks include Salesforce clouds and tools. Click here to view our latest tips, tricks, and solutions.
The best advice that I can give you is to provide a single CTA when possible. The easier you can make it for prospects to understand what you are asking them to do, the better.
However, anybody who has spent any time in marketing has fallen victim to the manager who wants to add “just one more thing” to your well-thought-out email moments before it goes out. While this often has the intent of optimizing communications being sent, the reality is that it often detracts from the message, muddies the water, and reduces the overall number of responses.
When this happens, make sure your primary CTA is the most visible action and is displayed in the most prominent location — above the fold.
Verify CTAs & Messaging
Before your campaign is released into the wild, be sure to double check your CTAs and related landing pages. The first step is to ensure that your CTA link is live and going to the correct destination. Equally important is the content on the destination page.
Make sure your destination page delivers on the promise made by the CTA. If you are linking to a landing page or form, make sure that it’s consistent and builds upon the story.
Keep in mind that the content on the destination page should not be exactly the same as the message that was sent. Instead, it should be used to continue the conversation by providing additional details and information that supports and enhances the original message.
Test & Optimize
You’ve mulled over multiple ideas and CTAs in your head and finally came up with the option that you know will knock your goal out of the park. Now’s the time to deploy!
Wrong – Now is the time to test.
Before fully deploying your campaign, perform an A/B test to optimize your CTA. Test variables like CTA text, button color, page layout, and location. The results might surprise you!
Don’t Settle for a Lackluster CTA
The CTA is one of the most important components of a successful campaign. Failing to put in the time and effort when developing your CTA can make the difference between achieving or falling short of your goals. Use the checklist from this post to ensure the success of your marketing campaigns.
When it comes to email marketing, creating beautiful emails with riveting content is only half the battle. Sending emails to the right prospects at the right time is just as critical as crafting the right message. Marketing Cloud Account Engagement’s (Pardot) segmentation tools take the guesswork out of finding the right prospects at the right time, but there are infinite ways to go about segmenting your database.
First, Why is Pardot List Segmentation Important?
Segmenting your database can help you identify prospects based on interest, activities, lifecycle stage, etc., so you can send them relevant, personalized information right when they need it. This kind of personalized experience not only helps build brand loyalty between you and your prospects, but it also increases email engagement because your prospects will actually use the information you are sending them.
When done correctly, Pardot list segmentation is a win for all parties involved. Read this blog post about creating a Pardot Email Preference Center for an example of segmentation done right.
Winning Pardot Segmentation Strategies
Below are just some of the ways you can segment your prospects for personalized emails. Make sure you share your other segmentation strategies in the comments!
Tip 1. Follow up with event registrants
Segmentation should be used both before and after events. Before events, you can thank prospects for registering, send them related content to the event, and send them reminders of where/when the event will be held. After the event, send them recap information, direct them to next steps, or introduce them to their Account team.
Tip 2. Nurture based on product interest
If you’re using Scoring Categories to gauge prospect interest in your different offerings, nurturing them based on their interest is a great way to speak to their needs. For these types of nurtures, I like to use a dynamic list to locate prospects who have a score over 100 in a scoring category, but do not have an open opportunity and have not yet scheduled a demo.
Tip 3. Send region-specific content
If your org regularly hosts events or webinars, segmenting your prospects by region is a great way to invite prospects to events in their area or webinars in their time zone. If your sales team is also divided by region, sales users can use these lists to zero in on their prospects. For these segmentation lists, I typically focus on the prospect’s Country and State fields and use the free Creuz Your Data tool to easily compile my lists of states/countries in each region.
Tip 4. Keep your partners up to date
Segmenting your partners into their own list is a great way to easily send them special newsletters and updates. But the best part is that this list can be used to suppress partners from prospect-specific marketing efforts, such as product nurtures.
Tip 5. Stay in touch with lost opportunities
Just because your prospect didn’t buy right now doesn’t mean they won’t become a customer in the future! Creating a Pardot segmentation list for prospects with lost opportunities is a great strategy to nurture them. That’s because they already know about your company and product offerings. They’re also more likely to already be subscribed to your marketing materials.
For prospects with lost opportunities, I like to use a more lengthy nurture that highlights new product offerings and customer use cases. These nurtures ensure our company stays top-of-mind so the prospect can reach out when they are ready to re-enter the sales funnel.
Tip 6. Exclude non-prospects from marketing efforts
Finally, another great way to segment your database is to build a primary suppression list that collects all the prospects you want to exclude from marketing emails, nurtures, “hot lead” lists etc. Building one list that all your Pardot users can reference takes the guesswork out of which prospects to suppress. Read more about Primary Suppression lists in this blog post.
Looking for an easier way to migrate email templates as you prepare to move into a Salesforce marketing automation platform (MAP) from a legacy system?
You’ve already decided to migrate to a Salesforce Marketing Cloud Engagement or Marketing Cloud Account Engagement (Pardot). It took countless hours of analysis and planning — involving practically everyone on your marketing team — to get to this point. And it’ll take months more to get it done.
You explored and evaluated several MAPs and selected the ideal one from Salesforce. It’s one that can deliver incredible value for your organization. And it’s the most intelligent decision you could have made.
Or have you?
If your MAP migration happens without a Stensul™ email creation platform added simultaneously to your marketing automation technology stack, this critical initiative will take more time and money than even your sharpest projections suggest.
Here’s how an email creation platform makes migration to a Salesforce MAP faster and more cost effective.
Eliminate the need to recheck or recreate all of your email templates
A Stensul email creation platform lets you reuse your templates regardless of which MAP or email service provider (ESP) you’ve been using. This lets you avoid the cost of paying developers to do that work.
With Stensul, the chance for code to break during the recreation process is zero.
Decrease dependence on external resources for email creation
Because the Stensul email creation platform lets non-technical people create quality, on-brand emails, there’s no need to outsource email creation to an external agency.
If you opt not to handle any email creation, you can still leverage an agency, having them create emails in Stensul in a fraction of the time. With fewer billable hours applied to email creation, you can use the agency for other services — like strategy development.
Even if the agency is miles away from your marketing operation, Stensul gives you visibility into the entire process, at every step for real-time collaboration and instant feedback.
Reduce email creation training time and cost drastically
When your team is exposed to new software and faced with a new, complex system, like a MAP, there’s typically training involved. And lots of it at a hefty cost.
Let’s say the hourly cost rate of a marketer who handles email creation is $100. It generally takes 10 hours to get them comfortable building emails in a new MAP. That’s a minimum of $1,000 per team member.
Now multiply that across your entire team. It will add up fast.
Beyond that, there are inevitable glitches and fumbles when using a new MAP to create emails. When that happens, it’s a bottleneck that causes everything associated with the MAP to grind to a halt. And that’s an additional cost of consequence.
Cut time in half when migrating email to a new MAP
It takes half the time to get marketers up to speed using a new MAP — regardless of brand — when using an email creation platform like Stensul. Consider that most email migrations take two to three months to get set up in a new MAP when Stensul isn’t in place. That makes your return on your investment in the new Salesforce MAP take that much longer, and it will cost more.
If you’re looking to move to a new MAP, like Salesforce Marketing Cloud or Pardot, then consider incorporating a Stensul email creation platform into the process. It will simplify, speed up, and save costs associated with the migration process. What’s more, is it will make email creation far more efficient. Get your copy of “An Introduction to Email Creation Platforms” to learn more.
Salesforce Engage is awesome because it lets marketing teams share content with sales teams. Sales reps can use marketing-approved email templates to contact prospects at the right moment and track the effectiveness of the messages in Salesforce.
In a nutshell, Salesforce Engage allows marketing teams to keep things consistent across divisions. And sales teams deliver powerful content while gaining insights into their hottest prospects. Then, they can magically reach out at the perfect time.
In this blog post, we’ll show you all the things Pardot admin users will want to know about Salesforce Engage and steps to getting sales users started.
Getting Started with Salesforce Engage
So you’ve bought Salesforce Engage licenses, and your sales team is basically begging for access.
(And if they’re not begging for access, here are tips from Celine Newsome to get them more excited about Salesforce Engage.)
Well, let’s get into it!
Before we get started, there are some considerations to keep in mind.
You must have a verified Salesforce-Pardot connection.
Salesforce Engage isn’t supported in sandbox.
Do not add legacy Custom Permissions for Pardot to your Salesforce profiles.
Salesforce Engage users must also be Pardot users.
Click here to check out the official Salesforce Engage implementation guide.
Provisioning Access to Salesforce Engage
Giving users access to Engage is simple. We’ll give access through permission sets, update page layouts, and configure sending settings in Marketing Cloud Account Engagement (Pardot).
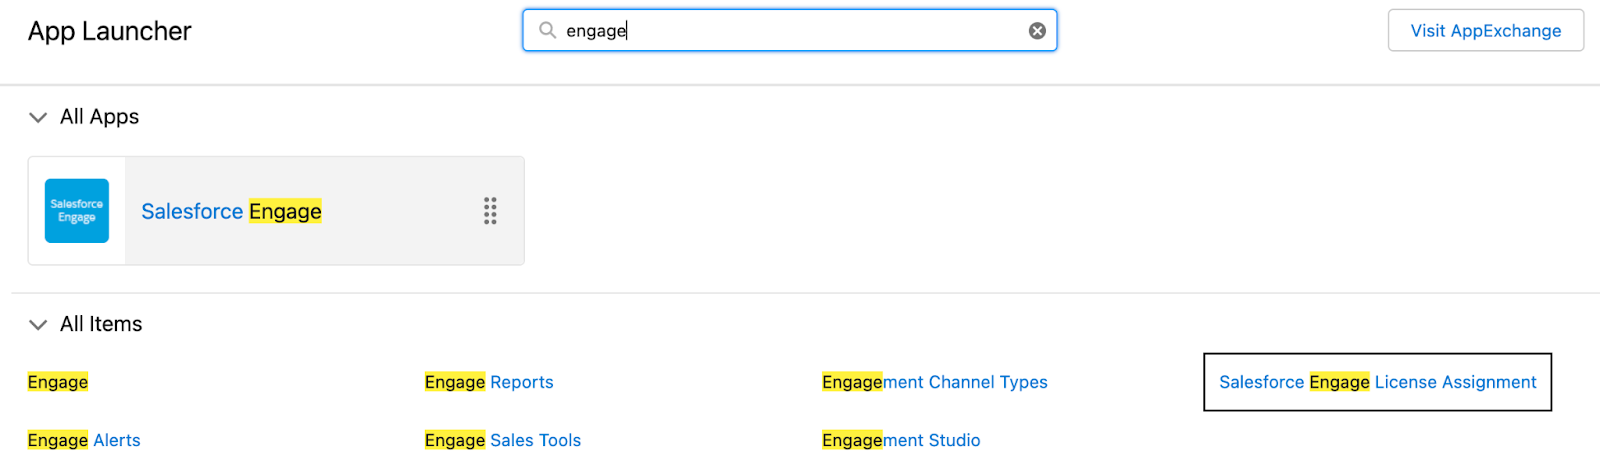
1. Give your users the correct permission sets.
We can assign Engage to users in bulk. First we’ll search the app launcher for Salesforce Engage License Assignment.
We can select users with the CRM User, Sales Cloud User, or Service Cloud User permission set to assign the Salesforce Engage permission set license. Click “Add License(s)” when all users have been selected.
Optional: Users can also attach files to Engage email templates. To unlock this feature, enable Public Links and Set Up Content Deliveries.
2. Customize your page layouts.
There are several buttons that we can add to page layouts to give users access to send Engage emails straight from a List View of the record itself.
The buttons I recommend using are:
Send Engage Email
Add to Nurture List
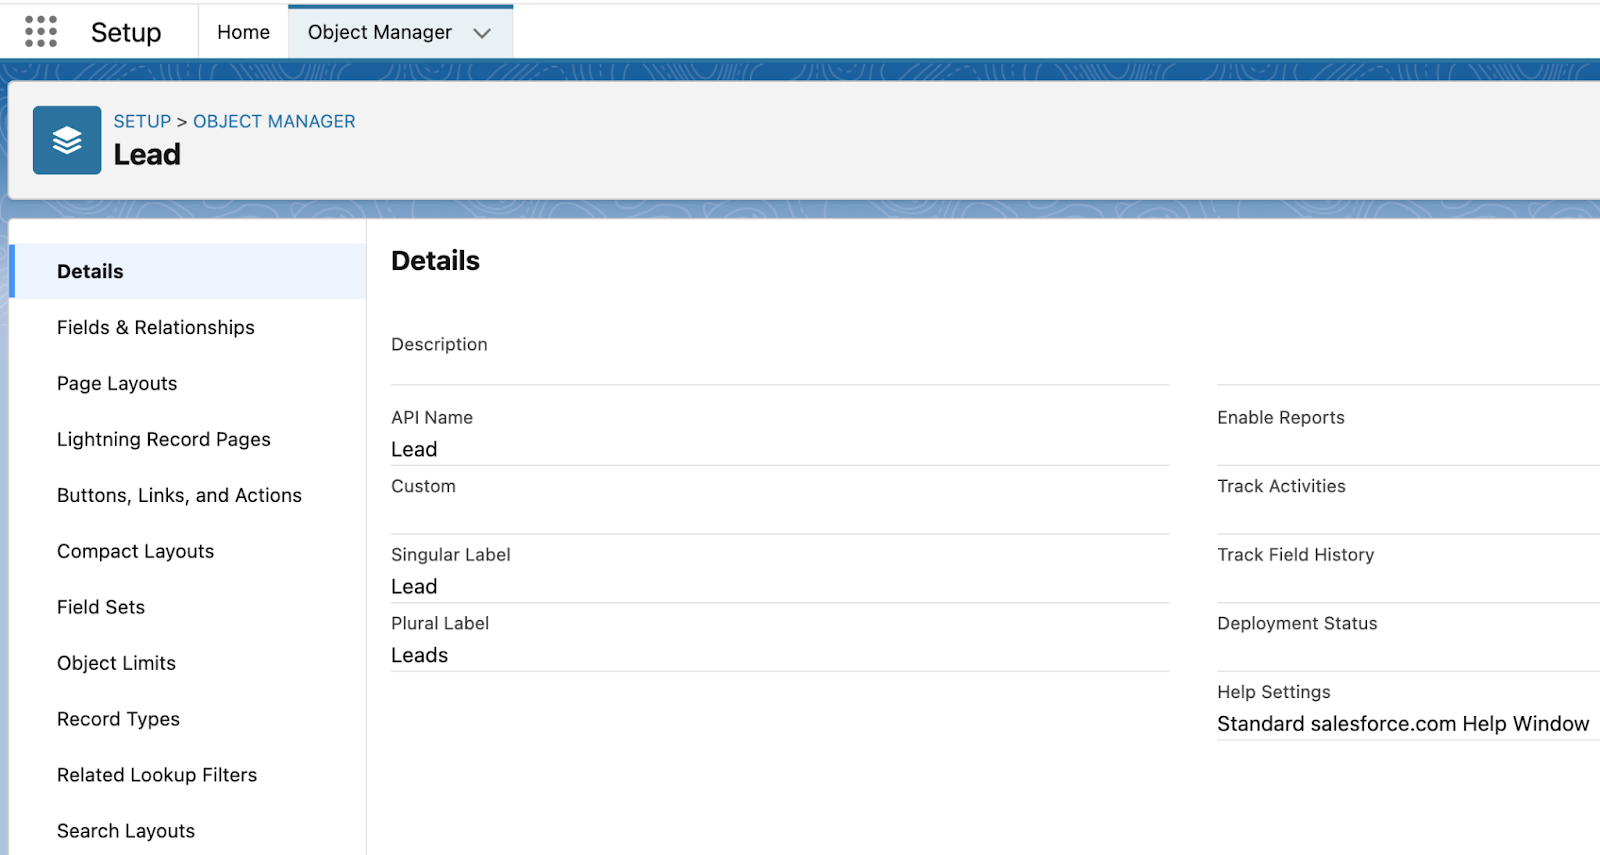
Let’s navigate to Settings and Object Manager. In this example, we’re going to work from the Leads object. These buttons should be added to both Leads and Contacts.
From the Leads page, we will click on Page Layouts. Update all page layouts that your team will send Engage emails from.
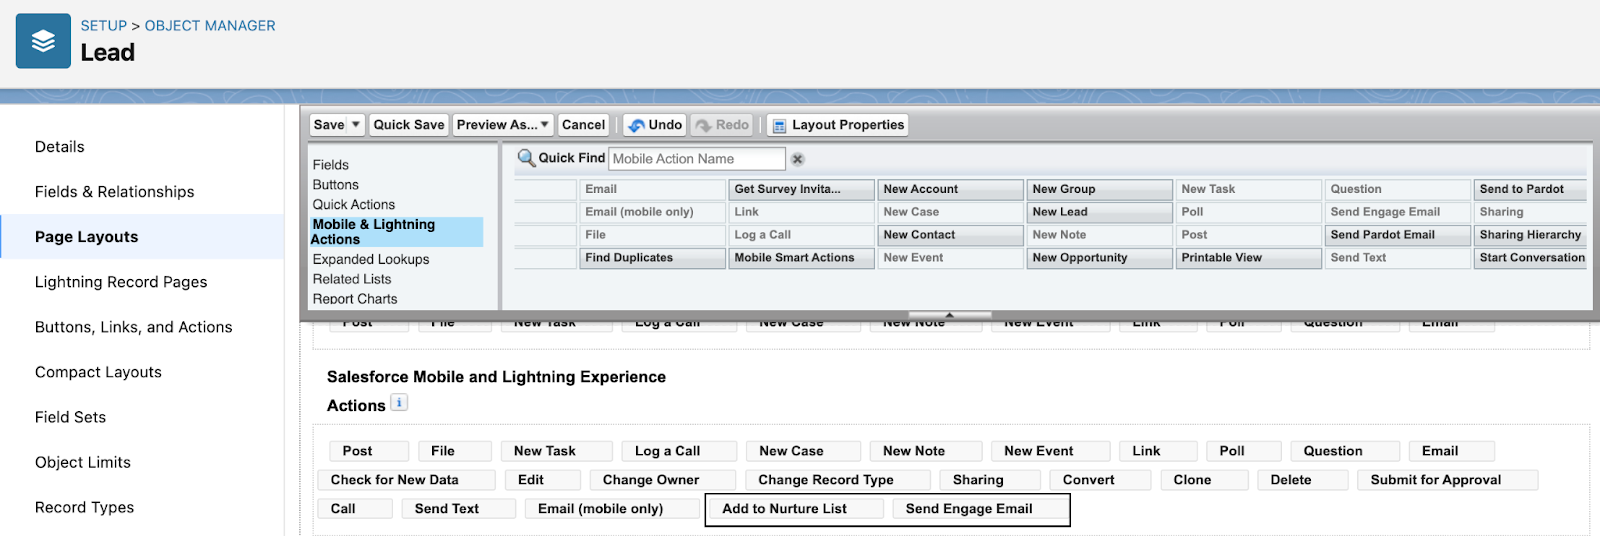
Select Mobile & Lightning Actions. Drag the two buttons onto the page layout.
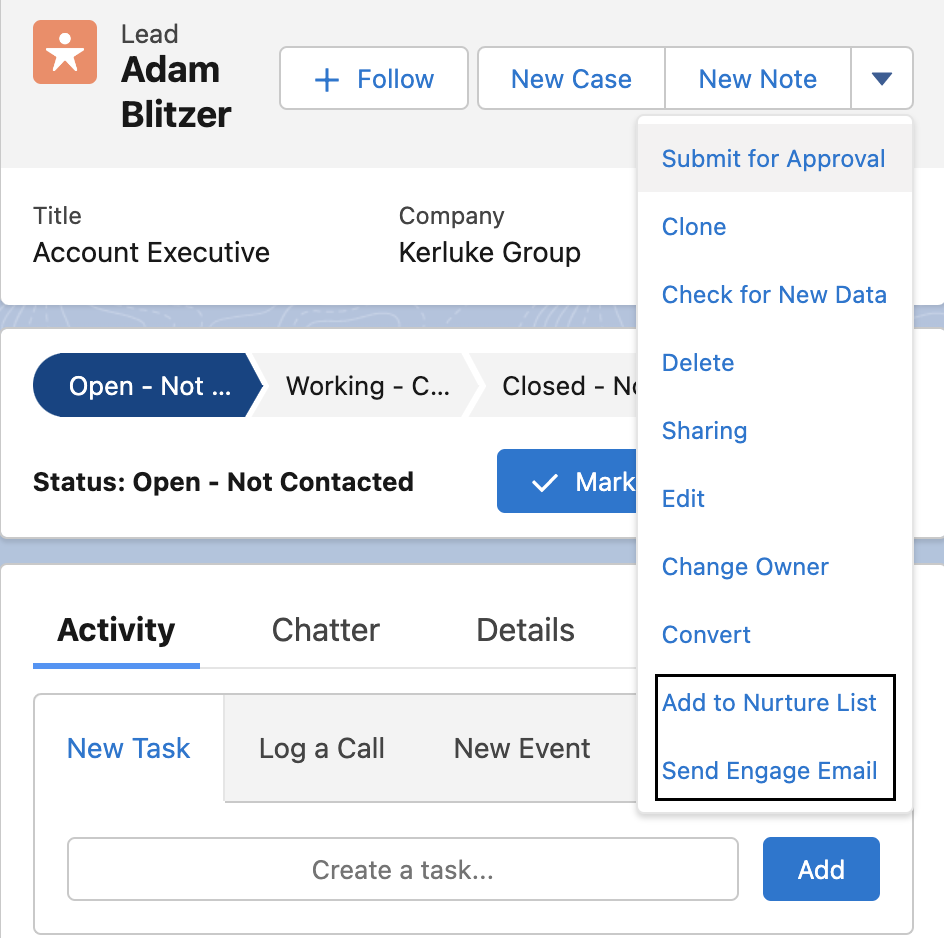
The record page will look similar to the image below.
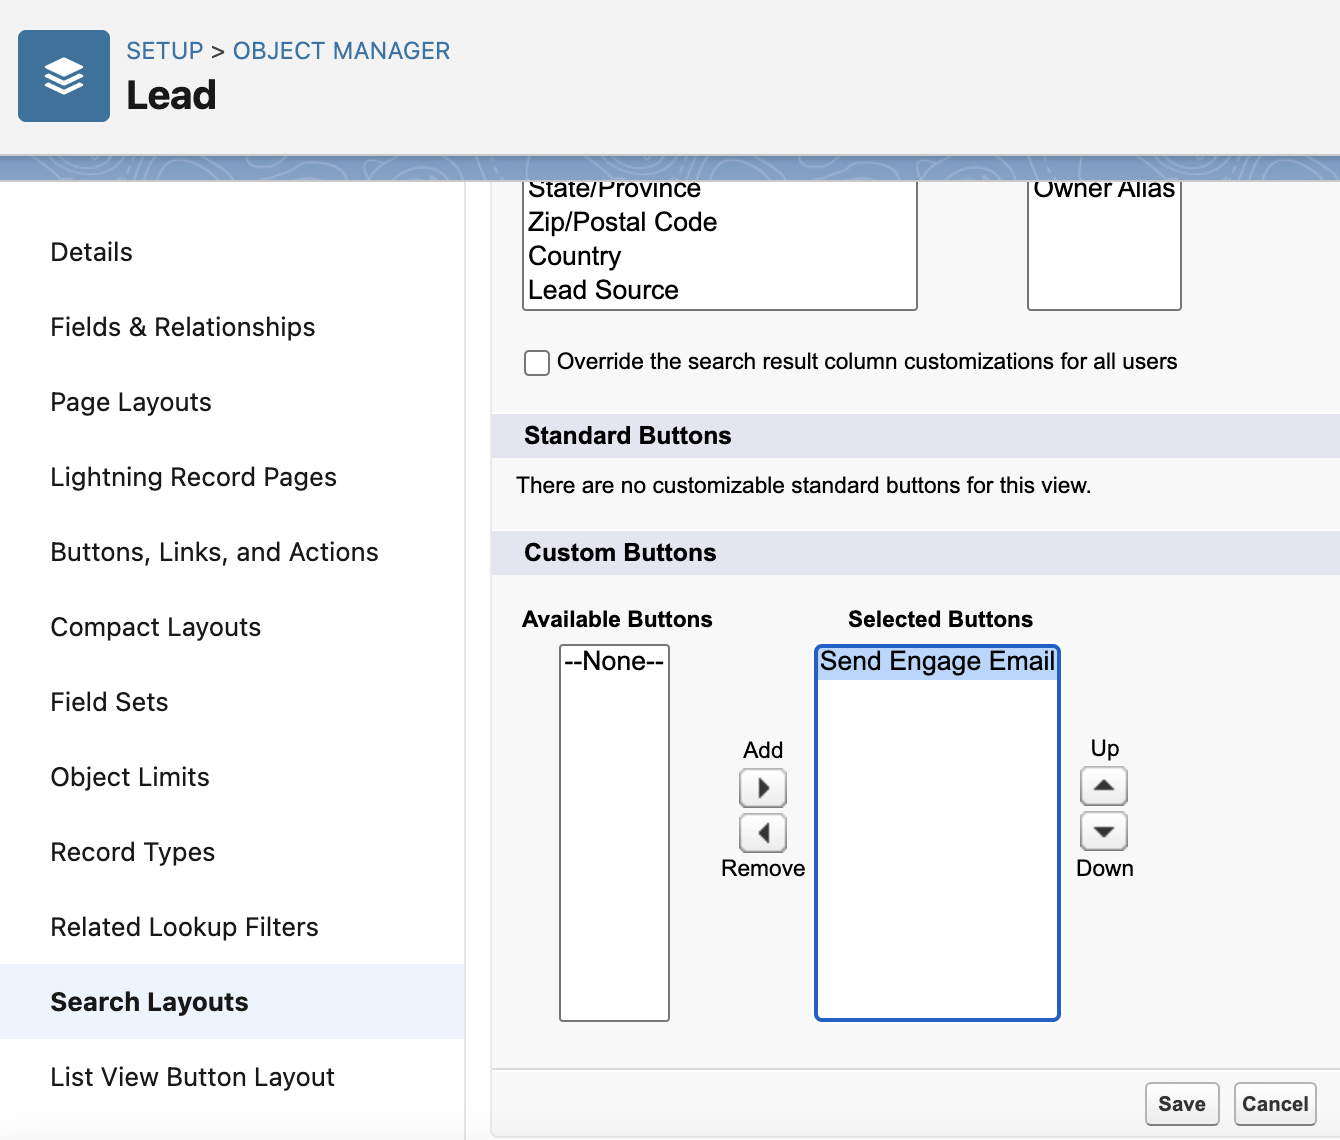
We can also add these buttons to the Search Layout. Doing this will allow users to send Engage Campaigns or 1-to-many emails in Engage. Back on the Leads object in Object Manager, select Search Layouts. Scroll to Custom Button, and select Send Engage Email. Move this to the Selected Buttons table, and click Save.
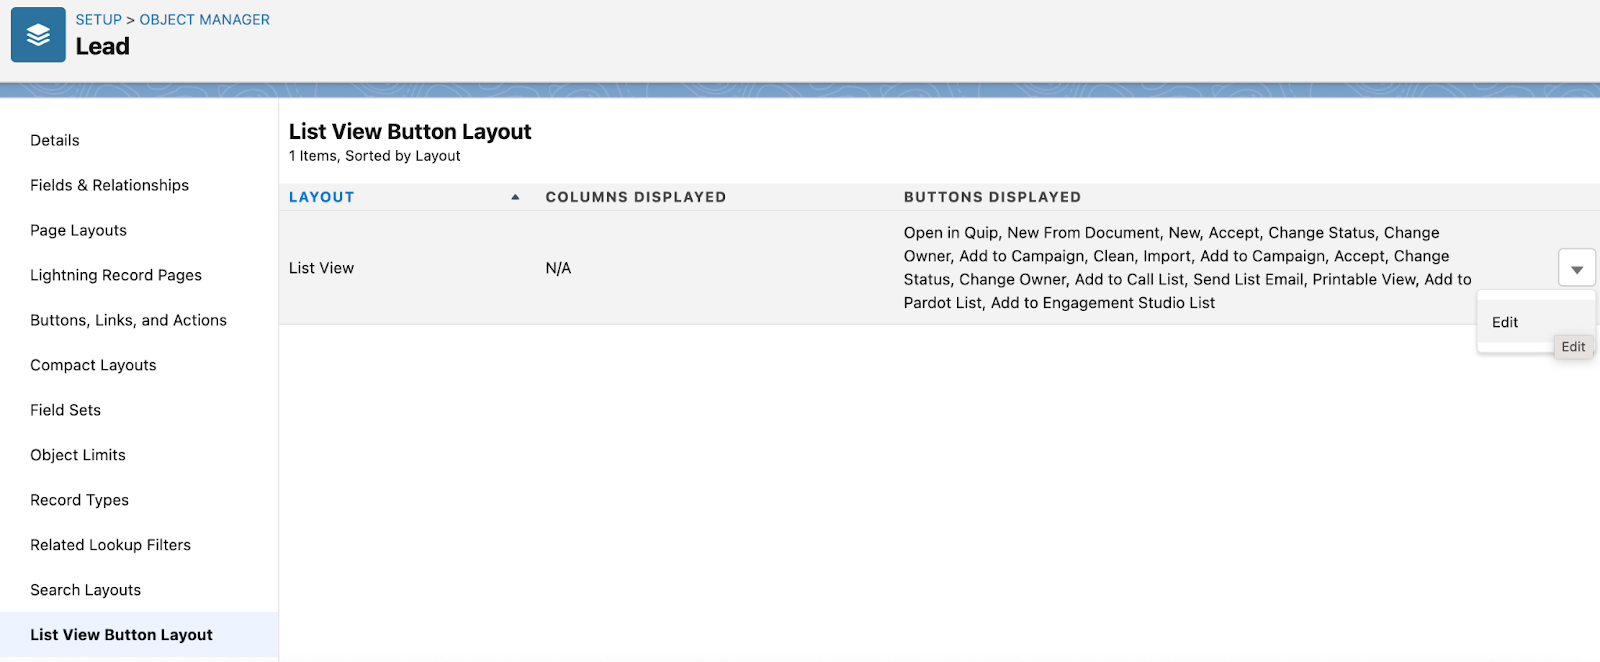
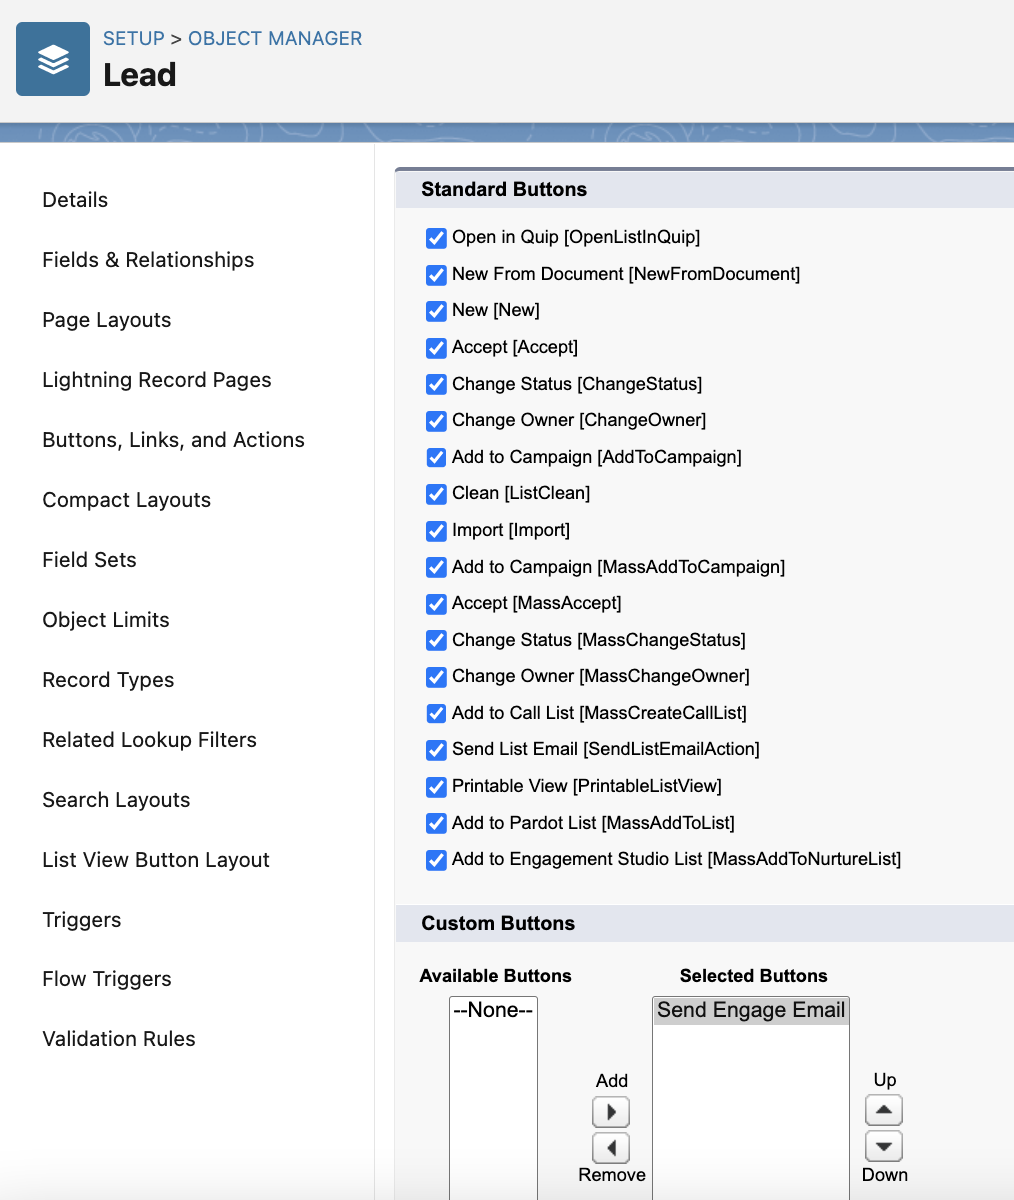
Next click on List View Button Layout in the left-hand navigation bar. Click to edit the buttons displayed.
Select or deselect all of the standard buttons you would like to display. Move the Send Engage Email button from Available to Selected. Click Save.
The List View will look something like this.
Now any Salesforce Engage users can send Engage emails from individual records or from a list view.
3. Maintain Salesforce Engage in Pardot
Our job as admins doesn’t stop at providing access. There are also some maintenance tasks we need to follow in Pardot.
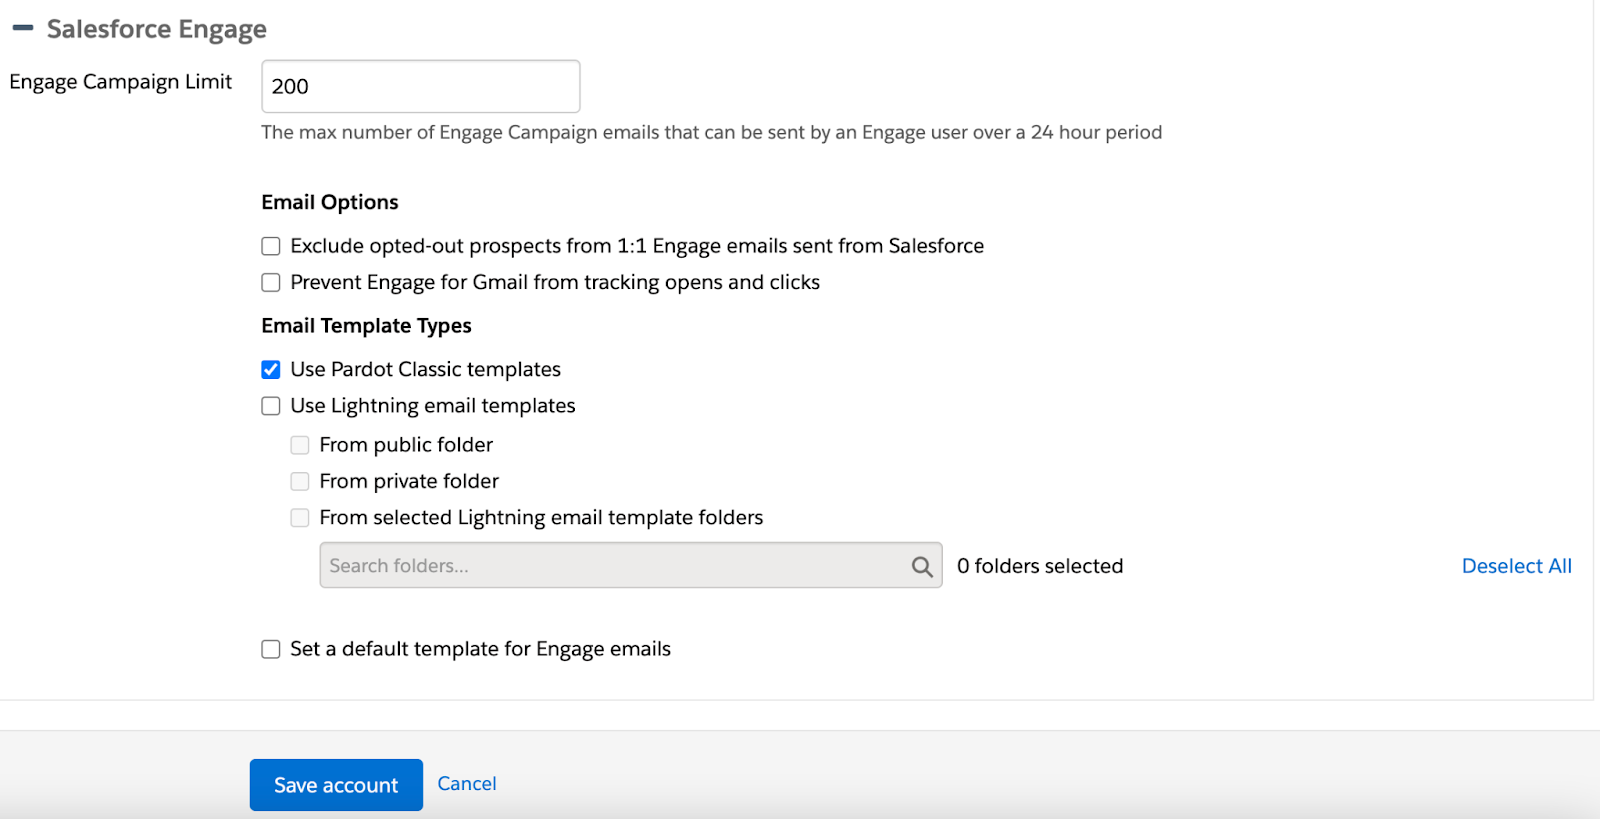
In Pardot Settings, we can manage how many Engage email sends per user can be sent each day as well as how to manage unsubscribes. Click Edit and scroll down to Salesforce Engage. These are the options you will see.
The Engage Campaign Limit is set at 200 by default. This could be any number from 0 to 500. Keep in mind, this is the limit per Engage user and not for all Engage users.
If you are using the Lightning Email Builder in Pardot, you can enable those templates to be used in Engage as well. Setting a default template for Engage emails is highly recommended. This will provide a template for users who do not select one when prompted.
More Pardot Maintenance Tips for Engage
It’s important to keep your email templates well organized in Pardot. Your Pardot organization will reflect in the Engage interface.
One key detail to remember is that any email template published as a 1-to-1 template can be sent through Engage — even if you didn’t want it to be sent. Complete a regular template review to make sure only approved content is available for our Engage users to access.
One last organization tip is to create a folder structure for the Engage templates that works well for Engage users. They will see the folders templates are placed in, and it’s best practice to make them end-user friendly.
Note: Ever accidentally build a list email that you need as a template for Salesforce Engage? Here’s an easy solution for that dilemma from Joanna Rotter.
4. Measure adoption and template performance.
The last step to ensure a successful implementation is reporting. Salesforce Engage has individual reporting for each user and the emails they have sent. Salesforce also offers Engage Team Reports. This is a free managed package that allows users to view Engage performance as a whole based on role hierarchy.
These steps take you through the Engage implementation as a Salesforce/Pardot admin. Once you’ve completed the setup, you’re ready to get going with training and onboarding. Let us know how you did in the comments section. Or drop us a line if you need help!