
Back in June, Salesforce announced that the way we work with the Pardot API will be changing and that, beginning in early 2021, all Pardot users will be required to use Salesforce single sign-on. In preparation for this change, some services have started rolling out their updates, but how do you as a Pardot admin actually get ready?
This blog post will provide step-by-step instructions on how to prepare, where to gather all the critical information you need, and a quick guide on testing that you are prepared for these changes.
IMPORTANT: There are a bunch of different ways to set up a Connected App, and the integration you will be working with MAY require different steps. This blog is specifically written to enable success within the steps of this blog and may differ from the steps to enable your own integration. Be sure to check out Part 3a: JWT with APEX and Part 3b: JWT with Custom Code.
Before we dive in, there is something you might need to consider: You have the option of having a single Salesforce User with multiple Connected Apps (one for each integration).You also have the option of a single Connected App with multiple Salesforce Users (one for each integration) as well as any combination of the two options.
Our recommendation is to have a single Connected App and multiple Salesforce Users (with CRM identity licenses from the bundle provided by Pardot). This option creates a direct connection between the Pardot user and the app and allows Pardot admins to easily identify which API connection made changes to Pardot if an issue ever arises.
If you don’t have the available license count to make this work, try to segment your integrations into something that makes sense. Just make sure that the combination of Connected App and User is different for each integration (especially if 3rd party).
Ok, let’s dive in. Here are the steps to set up Pardot users with Salesforce single sign-on.
Step 1: Set up a Salesforce User
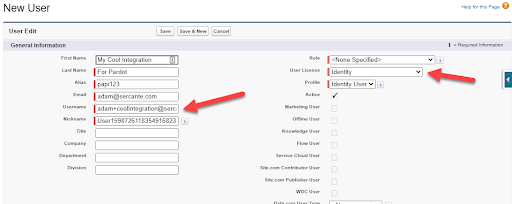
- In Salesforce Setup, search for Users and click New User

- For this user, try to keep it integration specific. If you have 5 integrations, plan to create 5 users. Use a unique username which indicates the purpose of this integration, and be sure to select the Identity User License. (If you pick another license by mistake, you can’t downgrade the license to Identity, so be careful!)
- Save the new user, and then activate the account from the email that Salesforce sent out (I usually do this in a new Private Browser / Incognito Mode).
- As part of activating the account, pick a new, very strong password.
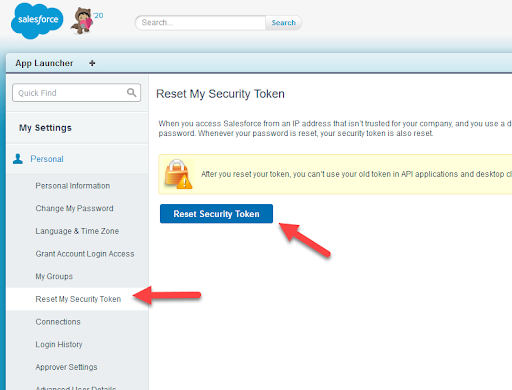
- Now that you are in, you will need to generate a security token. Click on your user at the top right, and then go to My Settings.
- Go to Reset My Security Token, then click the button.
- You should get a token in your email. Keep this, you will need it later. You can now close your private/incognito browser, as the rest of the steps will be done with your main accounts.


Step 2: Setup Pardot User
Now that our Salesforce User has been set up, we need to create a Pardot User that it will be synced with.
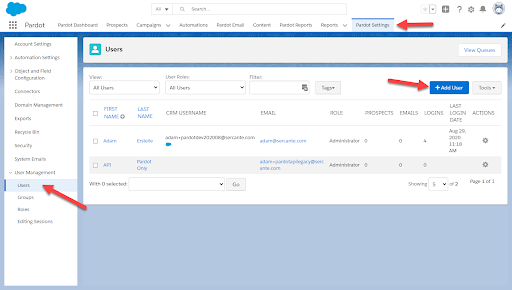
- In Salesforce, launch the Pardot app, go to Pardot Settings, Users and Add User
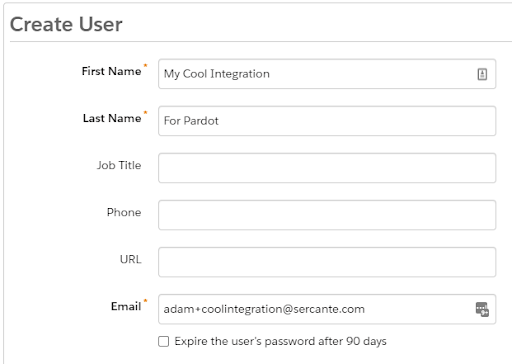
- Provide the name and email address you used for the Salesforce User
- Optional, but recommended: note the time zone, or maybe adjust it to match the time zone that the Integration is running in. If these don’t match, you might get some really weird results later when you use the API because of the differences in day boundaries if you use datetime based queries.
- Pick the CRM Username that you just created in Salesforce (you will likely need to refresh the list of users). Also, pick the Role. Sales Manager will give you access to Prospect data, and not much for Pardot assets, Marketing will likely give you what most Pardot API integrations need for access, but if you need to create custom fields, you will need to grant the Admin role. Custom roles for API access control is also supported and recommended if you have access to them.
- Optional, but recommended: Disable all emails that will be sent to the integration user’s mailbox.
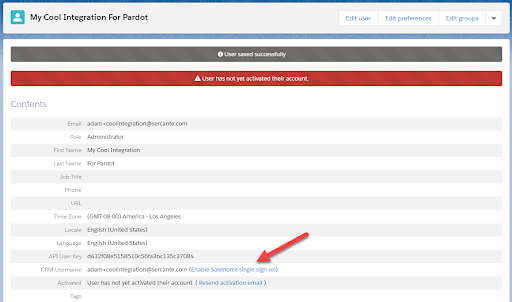
- Click Create User
- Click the Enable Salesforce single sign-on link to complete this process.

Step 3: Create Salesforce Connected App
If you have been following along, you will note that almost all the previous steps were pretty standard for any SSO user, and you are right! Besides the Security Token this stuff is pretty straightforward.
The next bit is where the Pardot Authentication docs don’t really give much guidance, but we got ya.
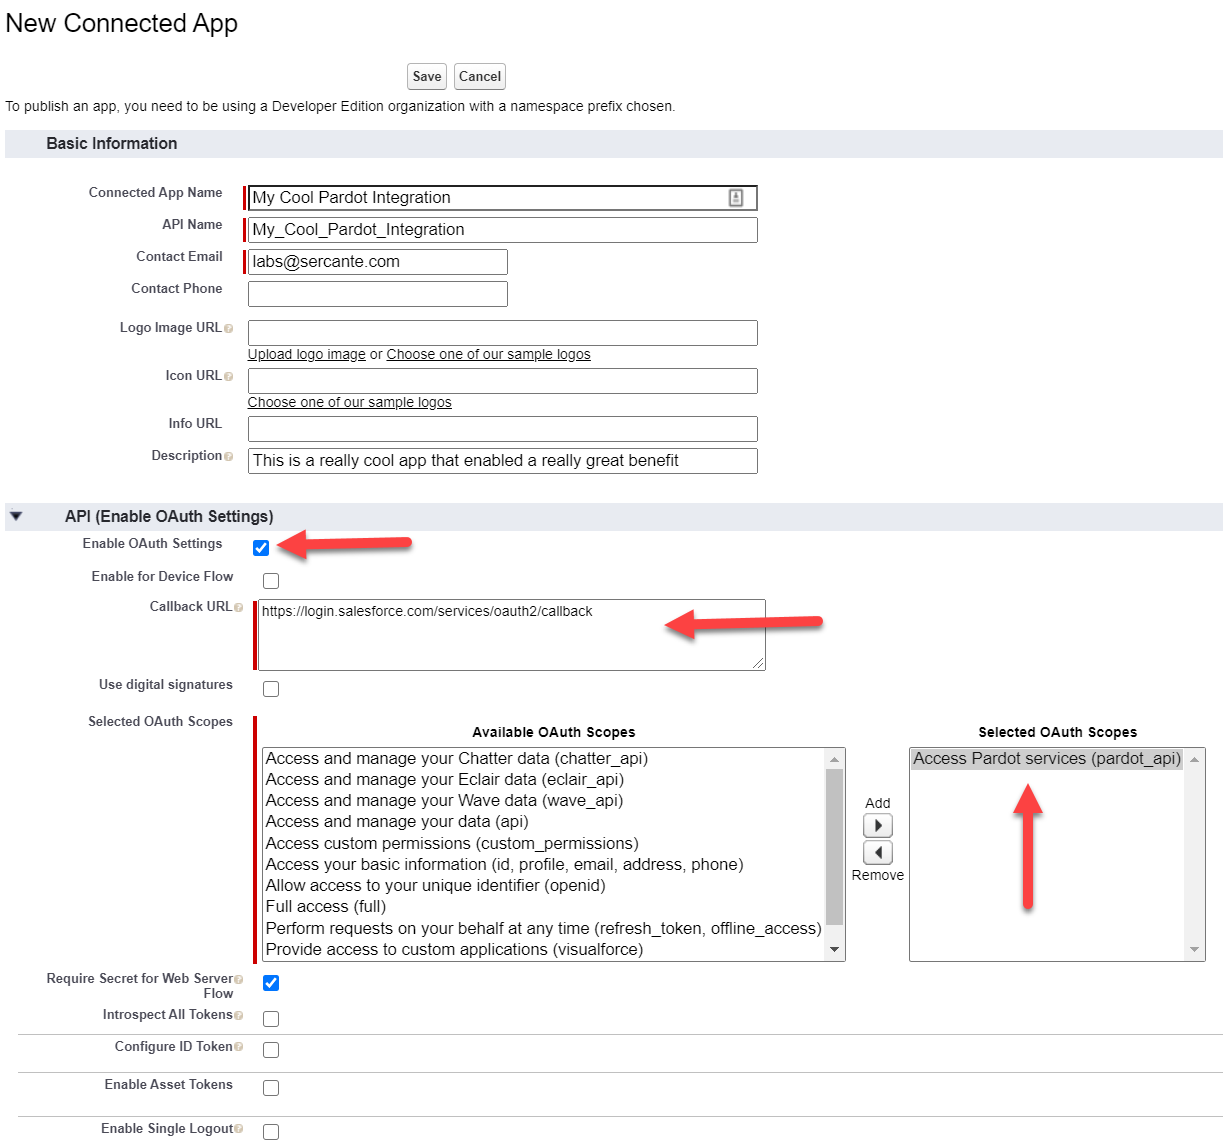
- In Salesforce Setup, go to App Manager, click New Connected App
- Fill in the Basic information, Enable OAuth Settings, specify the Callback URL and select the Access Pardot services OAuth Scope. Some integrations may ask you to include the Perform requests on your behalf at any time, so you may need to include that one as well.
- You do not need to put anything in for the other sections (Web App Settings, Custom Connected App Handler, Mobile App Settings, Canvas App Settings). Click Save
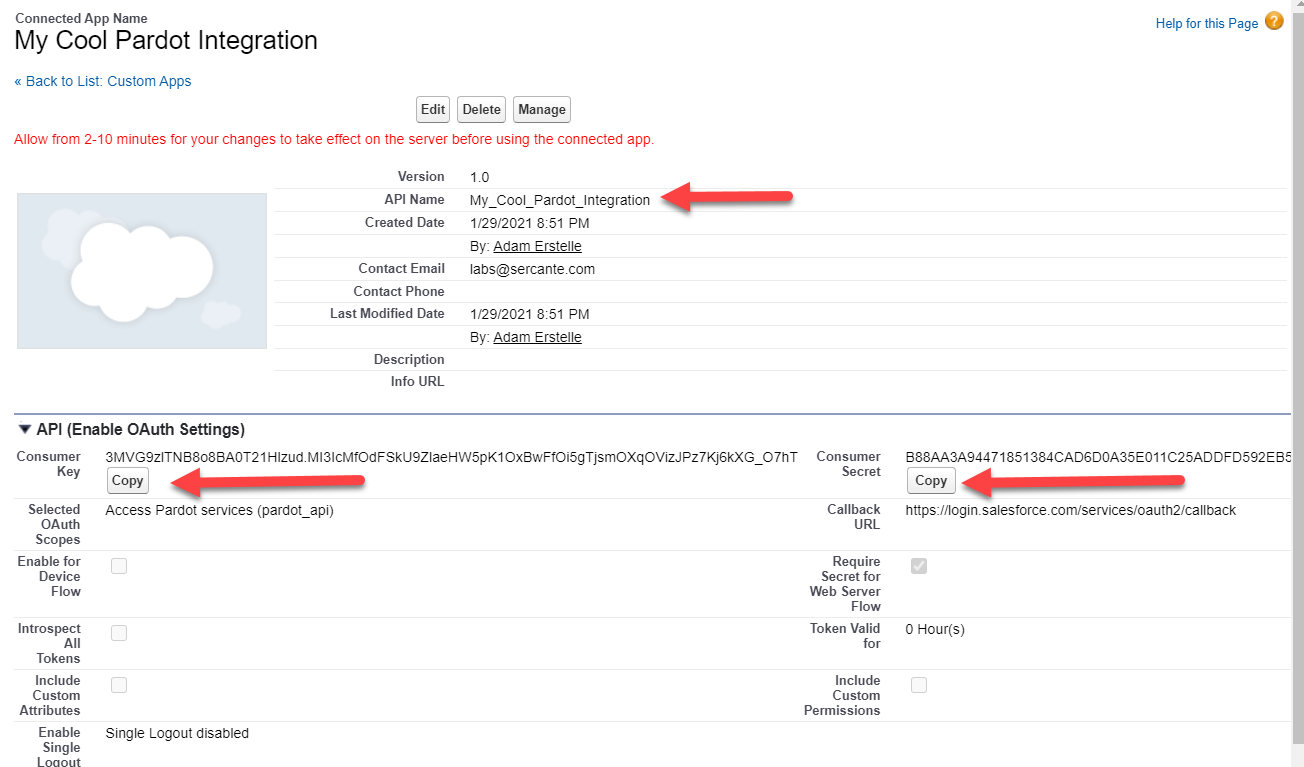
- You may get a prompt to wait for a while before using this app. Click Continue
- Once saved, you should be looking at the details of the App you just created. Be sure to copy the Consumer Key and the Consumer Secret, as you will need it later.

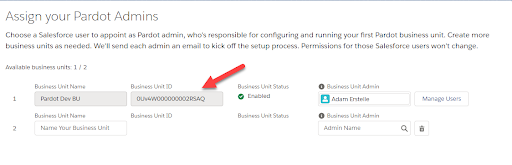
Step 4: Get the Pardot Business Unit
One last piece of information needed, the Pardot Business Unit Id that you will be using the API with. You need to do this step even if you are not using the “Multiple Business Units” feature. The steps are the same for a single Pardot account, just follow along.
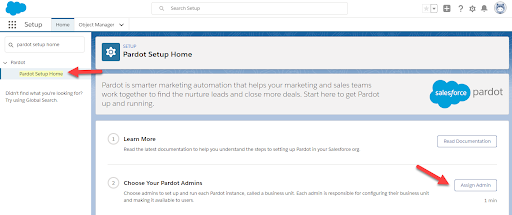
- Switch back to Lightning Experience, launch Setup
- Search for Pardot Setup Home, click Assign Admin to get to the list of Business Units
- Grab your Business Unit ID.
Step 5: Testing it all
Ok great, now that we have all the information, let’s test it out. Our favorite tool for testing APIs is Postman, and we have created a Postman Collection for Pardot that should help you get started.
- Install Postman and Import our collection.
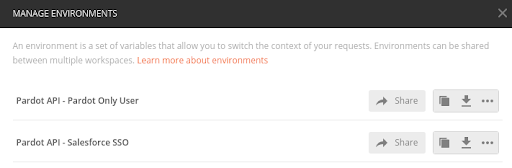
- Click the Environment Setup button so that you can provide the information we built in all the previous steps.
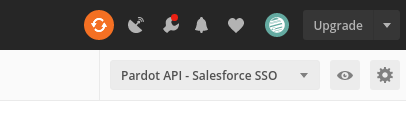
- Click Pardot API – Salesforce SSO to configure that environment
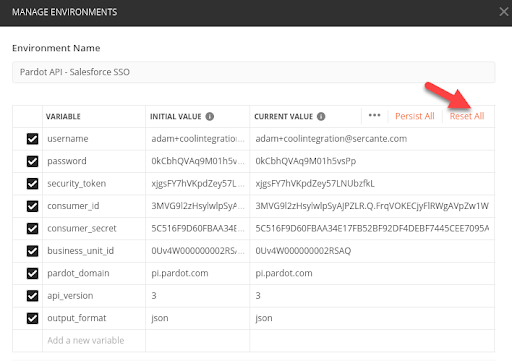
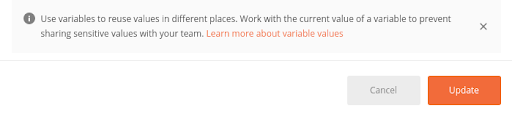
- Provide all the relevant information, click the Reset All link, then scroll down to click Update
- If you are using the Pardot feature “Allow Multiple Prospects with Same Email Address” you need to specify api_version 4.
- If you are using a demo instance of Pardot, you need to change the pardot_domain to pi.demo.pardot.com
- If you prefer / need XML as output instead of JSON, replace the value for output_format to “xml”
- Close out of Manage Environments, then make sure that Postman is using it
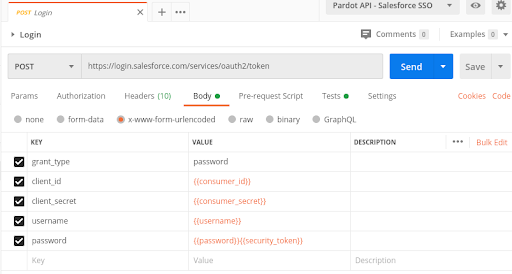
- In the Pardot API – Salesforce SSO collection, expand Getting Started and click the Login Request. Click Send.
- Optional: Check out the Body of the request to see how the information is being passed to Salesforce to complete the login request. Note how the Password is actually a concatenation of the Salesforce Password with the Salesforce Security Token
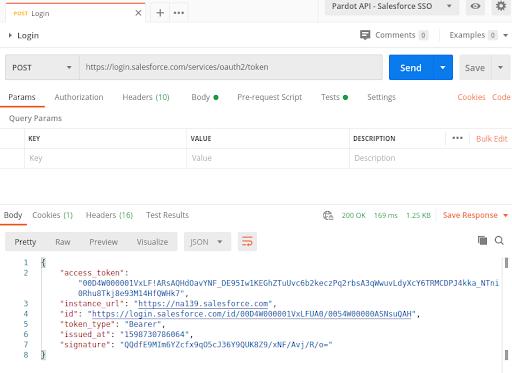
- With a successful login, you should get a response that has an Access Token. This is 1 of the 2 pieces that Pardot needs.
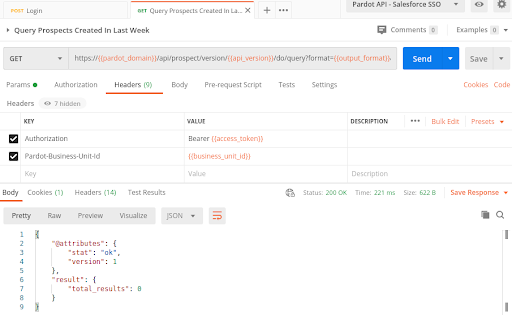
- Now that you have an access token, you can start experimenting with other Pardot API requests. If you check out the other requests in the Getting Started section, you can start to see how things are tied together. Note the Headers for any of the requests, they all have the Authorization and Pardot-Business-Unit-Id headers.


Getting Ready for Salesforce Winter ‘21 Release
Hopefully, by following the steps above, you feel more prepared for the API and single sign-on updates coming early next year. What are you doing to prepare for upcoming Pardot and Salesforce releases? Let us know in the comments. Want some help getting ahead of the curve? Give us a shout and we’ll hook you up.