Did you know you can create a calendar based on any custom object in Salesforce – without using an app? Yes, this applies to the campaigns object as well. While there are a couple of limitations to using this feature, it’s a great way to get a view of all your campaigns in a campaign view without purchasing an app from the Salesforce App Exchange.
Limitations
Before diving into how to create a campaign calendar, there is one big limitation when it comes to using this feature… the calendar can not be made shareable without using the API. If you want to use this feature, each user will need to create their own calendar. With that being said, there is an idea open to allow sharing via the UI.
If you are looking for more robust calendar functionality, take a look at these apps on the Salesforce AppExchange.
How to create a campaign calendar (without installing an App)
Search for “Calendar” in the App Launcher to find the calendar app.

Under My Calendars, click on the gear icon to create a new calendar.

Select the Campaign object from the drop-down and click next.
Give your calendar a name and select the start date (required) and the end date (optional). You can use the standard Salesforce campaign fields for the start date and end date, or you can select a custom field. For example, if you have a “go live” date field, you can use that as your start date instead.

You also have the option to add a filter to your calendar. The filter has to be a list view using the campaign object. For example, if you want to have a separate campaign calendar for webinars only, this is what your list view would look like.


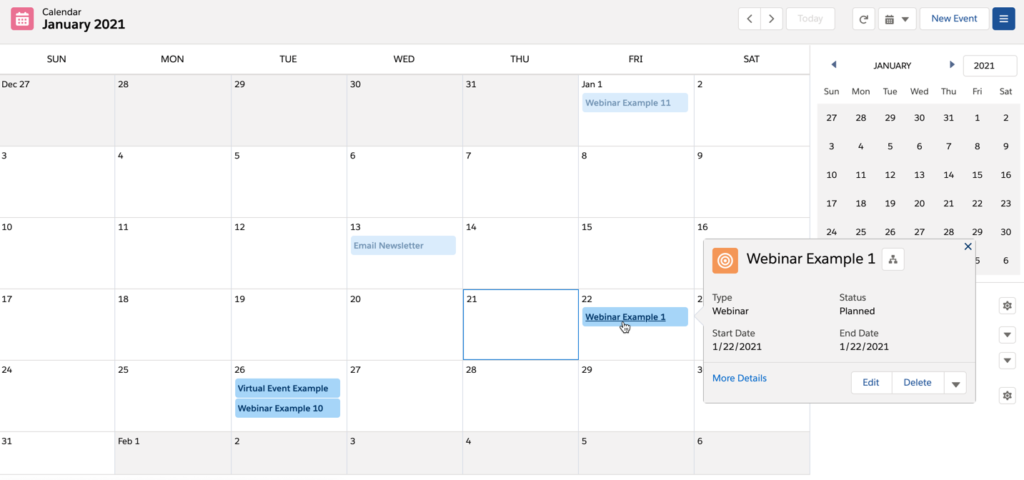
Here’s what my calendar looks like:
Click on the gear icon next to your calendar name to change the colour of the campaigns displayed in the calendar.

Hover over the campaign name within the calendar to view more information about the campaign.

Questions?
Send me a tweet @jennamolby, or contact the Sercante team for help.


