
Handling multiple languages with Account Engagement (Pardot) forms has always been complex — especially when it comes to reporting. But there is a way to multi-language Account Engagement forms.
The traditional solution — one form per language — has its drawbacks. But it’s something that’s super important for companies that use Account Engagement on a global scale to do in a logical and user-friendly way.
Today, we’ll explore a new, more efficient method that improves reporting and streamlines the translation process.
Challenges with traditional solutions for creating multi-language Account Engagement forms
There are a few ripple effects that we have to handle when we use multiple forms to realistically capture one set of data.
First, we need a way of figuring out which form we want to display. Commonly this is done as a piece of dynamic content driven off a known Prospect field.
Next, we need to handle submissions for a single goal across multiple forms. The approach we take can vary depending on how complex our Automations and Reporting strategies are, and it all can add up.
A new solution for handling multiple languages
We can still work within the constraints of Account Engagement (Pardot) and leverage a common web development pattern of internationalization (or i18n for short). With the power of JavaScript, we can have one Account Engagement form and feel confident that our visitors will be able to have it in their language.
JavaScript and Handlebars.js
Before we dive into the actual code (honestly my favorite), it might be helpful to talk about what we are going to use. We have a mix of a little bit of custom JavaScript with a common JavaScript library called HandlebarsJS, not to be confused with Account Engagement Handlebars Merge Language (HML).
The custom JavaScript takes the HTML that Account Engagement will render, look for the i18n placeholders and do a real-time replacement with the translations you have set up. This gives you full control over the wording and design in each language for every page.
Both HML and HandlebarsJS (by default) use double curly braces for wrapping placeholders. We’ve chosen to help differentiate between the two easily by specifying square brackets.
Getting into the details
So as a super simple example, you can use the label [[i18n.firstname]] to have English, French, Spanish (or any other language you want) for the value {{Recipient.first_name}}.
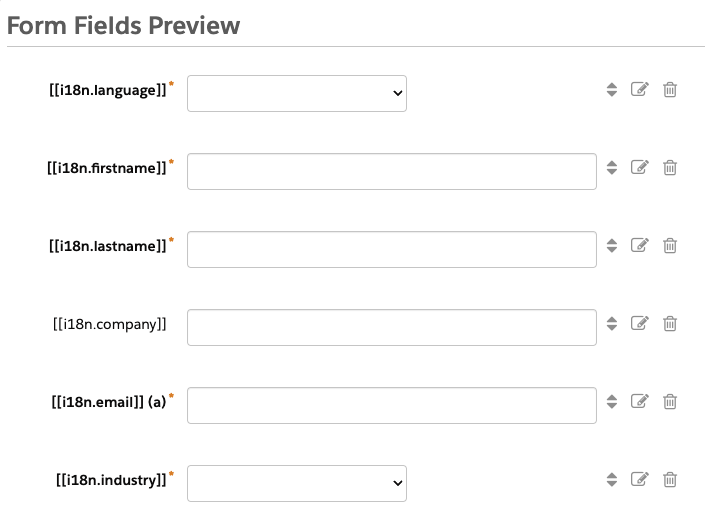
Example of single Account Engagement form supporting 3 languages
Ok, let’s show what this can look like. Here we have a demo form that supports three languages.
Pre-work to do for your multi-language Account Engagement forms
If you’ve previously filled out the form, we will render the form in the language you specified. If you haven’t, we’ll try to use your browser’s language. Form error messages and thank you content are all translated.
Back in Account Engagement, there are a few things that need to be done.
Here’s what to do:
Step 1: Edit form fields – Each Form Field needs to be edited to use a label in the format [[i18n.TOKEN]] (where the TOKEN can be a field name or anything you like
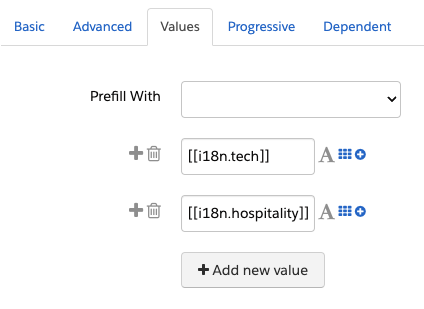
Step 2: Edit dropdown field values – Each Dropdown field value needs to be edited to use a label in a similar format
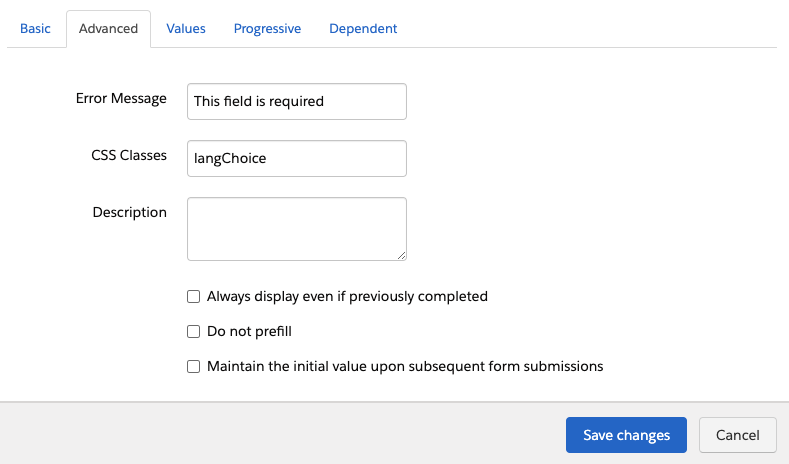
Step 3: Ensure dropdown fields store language code – The Form should have a Language dropdown field that stores the language code. Language choice labels should use a label in a slightly different format. It should use [[lang.CODE]].

You’ll also need to add the CSS Class langChoice to this field:
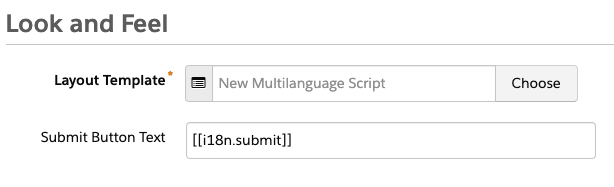
Step 4: Update the submit button text – Submit button text should be edited to use [[i18n.submit]].
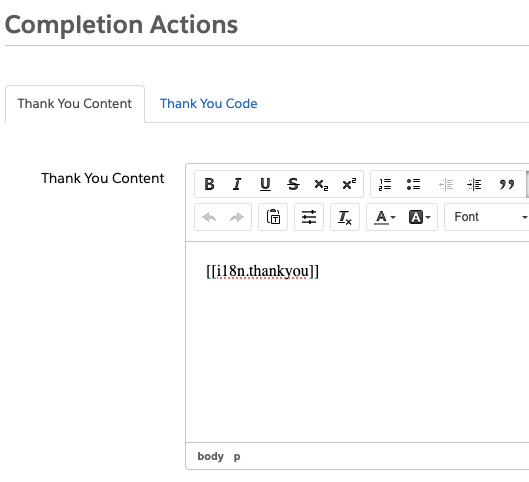
Step 5: Check thank you content – Thank you content should be edited to use [[i18n.thankyou]].
Add JavaScript to the form
Once you have all your labels set up, we need to actually add the JavaScript to the form. There are a few ways you can do this and the approach will depend on just how reusable (and large) you want your JavaScript to be.
In our example, we’ve placed the JavaScript in the Layout Template, which provides a balance of re-usability (can be used by multiple forms) and maintenance (common, but not all translations for the entire site).
Ok, time for the code. I’ve split this JavaScript into three sections, but it can all be copy and pasted into a single <script> block in your Layout Template.
Define languages the form will support
First, we have a JavaScript object that defines the languages that we will be supporting, as well as the label of that language. Feel free to adjust this as necessary, just keep the structure intact.
<script src="https://cdn.jsdelivr.net/npm/handlebars@latest/dist/handlebars.js"></script>
<script>
// the supported languages by this script
const languages = {
    lang: {
        en: 'English',
        fr: 'Français',
        es: 'Español'
    }
};
Add the translations
Next, we have all of the translations
// the translations for each language
const translations = {
  'en': {
    i18n: {
      firstname: "First Name",
      lastname: "Last Name",
      company: "Company",
      email: "Email",
      industry: "Industry",
      hospitality: "Hospitality",
      tech: "Tech",
      submit: "Save now",
      language: "Language",
      formErrors: "Please correct the errors below:",
      fieldError: "This field is required",
      thankyou: "Thanks for submitting!"
    }
  },
  'fr': {
    i18n: {
      firstname: "Prénom",
      lastname: "Nom de famille",
      company: "Société",
      email: "Email",
      industry: "Secteur d'activité",
      hospitality: "Hospitality",
      tech: "Technologie",
      submit: "Enregistrer",
      language: "Langue",
      formErrors: "Corrigez les erreurs ci-dessous:",
      fieldError: "Ce champ est obligatoire",
      thankyou: "Merci d'avoir soumis"
    }
  },
  'es': {
    i18n: {
      firstname: "Primer nombre",
      lastname: "Apellido",
      company: "Compañía",
      email: "Correo electrónico",
      industry: "Industria",
      hospitality: "Hospitalidad",
      tech: "Tecnología",
      submit: "Guardar ahora",
      language: "Idioma",
      formErrors: "Por favor corrija los siguientes errores:",
      fieldError: "Este campo es obligatorio",
      thankyou: "Gracias por enviar"
    }
  }
For each token you want to be translated, you will need to add a translation for each language. Like how languages are set up, you can make any adjustments/additions you want… just keep the structure intact.
Add the main functionality to apply the translations you defined
Next, we have the main functionality. This handles the actual work of applying the translations we have defined already.
function i18nForm(prospectLang) {
    document.addEventListener("DOMContentLoaded", function(event) {
        const brO = '{', brC = '}';
        let formErrors = document.querySelector('#pardot-form p.errors');
        if (formErrors != null) {
            document.querySelector('#pardot-form p.errors').innerHTML = `[[i18n.formErrors]]`;
            [...document.querySelectorAll('#pardot-form p.error.no-label')].forEach(node => {
                node.innerHTML = `[[i18n.fieldError]]`;
            });
        }
        let notYou = document.querySelector('.email span.description');
        if (notYou != null) {
            let origHtml = notYou.innerHTML;
            notYou.innerHTML = origHtml.replace('Not', '[[i18n.notYou]]').replace('Click Here', '[[i18n.notYouClickHere]]');
        }

        // Get the original HTML of the form, replacing [[ with {{ and ]] with }}
        const originalHtml = document.querySelector('#pardot-form').innerHTML
            .replace(/\[\[/g, `${brO + brO}`).replace(/\]\]/g, `${brC + brC}`);
        // Compile the template with Handlebars
        const processTemplate = Handlebars.compile(originalHtml);

        // Get the browser language
        const browserLang = window.navigator.language.substr(0, 2);
        let formLangCode = '';
        let currentLangVal = '';

        // Dynamically map Pardot option values to language codes using innerHTML
        const pardotLanguages = {};
        const langNodes = document.querySelectorAll('.langChoice select option');
        langNodes.forEach(option => {
            let langKey = option.innerHTML.replace(/\[\[lang\.(.*?)\]\]/, '$1');
            pardotLanguages[option.value] = langKey;
        });

        // Determine the selected language in the dropdown
        langNodes.forEach(option => {
            if (option.selected && option.value !== '') {
                currentLangVal = option.value;
                formLangCode = pardotLanguages[option.value];
            }
        });

        // Determine the language to use
        let currentLangCode = formLangCode || prospectLang || browserLang;

        // Function to apply translations
        function applyTranslations() {
            let translatedHtml = processTemplate({ ...translations[currentLangCode], ...languages });
            document.querySelector("#pardot-form").innerHTML = translatedHtml;
            document.querySelector('.langChoice select').value = currentLangVal;

            // Handle language dropdown change event
            document.querySelector('.langChoice select').onchange = function () {
                let selectedLang = pardotLanguages[this.value];
                if (selectedLang in languages.lang) {
                    currentLangCode = selectedLang;
                    currentLangVal = this.value;
                    applyTranslations();
                }
            };
        }
        applyTranslations();
    });
}
i18nForm();
</script>
Test and revise
All that’s left to do is test it out, and then mold this example into what you need.
Considerations
Like any JavaScript examples you might find online, they are opinionated in approach. Making minor changes can sometimes break the code due to assumptions that might not be well documented/understood. I’ve left a bunch of console.log statements commented throughout the code to hopefully help you troubleshoot when things go wrong.
One of those opinions is using the “i18n” and “lang” prefixes. We think this makes the placeholders easier to read, even if it slightly complicates the JavaScript object itself. Feel free to remove this if you want, just know to make the various adjustments.
One Account Engagement form can handle all the languages you need
If your company works with audiences who speak a variety of languages, then this is the perfect solution for you to simplify the way you build forms in Account Engagement. Our new approach simplifies translating Pardot Forms, improves reporting, and offers a better user experience for a multilingual audience.
Still not sure how to approach your global marketing strategy? Then reach out to the team at Sercante for guidance along the way.
Post updated: June 2024