In this blog, I’ll walk you through how to prevent a lead source from being overwritten in Salesforce and how to activate and test it.
Create a validation rule
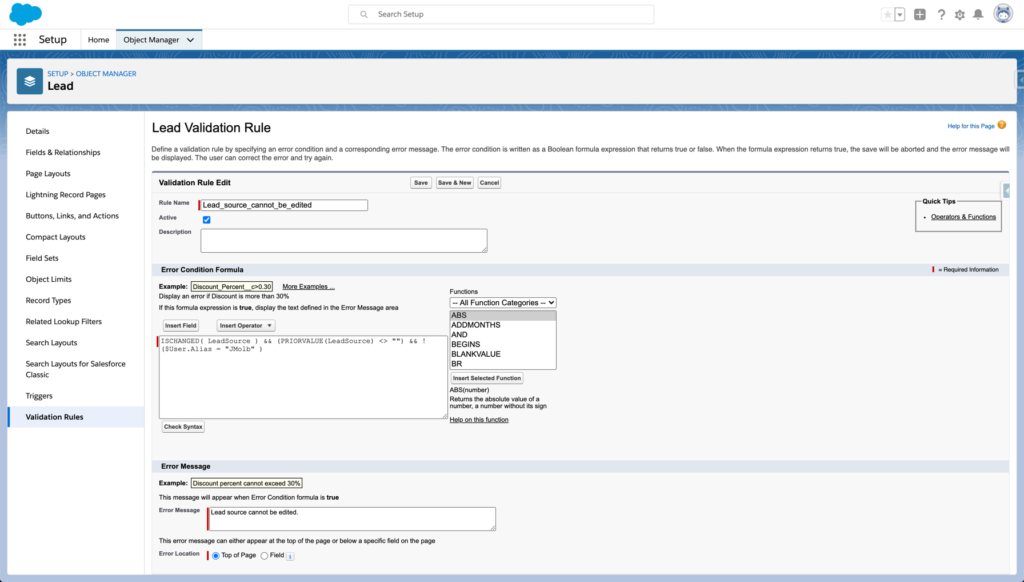
To prevent lead source for being overwritten, create a validation rule in Salesforce. Navigate to the lead object > validation rules > new and enter the required information.
To run the validation rule if the lead source is changed and if the current value is not empty use this as your error condition formula.
ISCHANGED( LeadSource ) && (PRIORVALUE(LeadSource) <> "")
You might want to allow some users to update the lead source field. For example, a marketing manager might need to update this field to correct data. To run the validation rule if the lead source is changed, if the current value is not empty AND allow a particular user alias to bypass the validation rules, use this as your error condition formula.
ISCHANGED( LeadSource ) && (PRIORVALUE(LeadSource) <> "") && !($User.Alias = "JMolb" )
You can also bypass the validation rules by using the user role ID, like this:
ISCHANGED( LeadSource ) && (PRIORVALUE(LeadSource) <> "") && !($User.UserRoleId = "00E36000000EJ8m" )

Activate and test
Activate your validation rule and test it by updating the lead source for a lead that already has a value. You should see an error message when saving the record.

Do another test by creating a new lead. Fill out the lead source field to ensure that you have the ability to update the field.
Questions?
Send me a tweet @jennamolby, or contact the Sercante team for help.


