Salesforce opportunity record pages are great for displaying all of the key information about a particular record. But, what if you need to be working with and updating multiple related records at the same time, without flipping back and forth?
That’s where this hack for displaying account fields on Salesforce opportunity record pages comes into play.
Salesforce Opportunity Record Page Example
Let’s say a sales rep is working on an opportunity, but some of the fields they need to see and update are on the account.
If they only needed to view the information, using custom formula fields on the Opportunity referencing Account fields would have been sufficient. Because they also wanted to update this information while they were on the Opportunity record, an alternative option may be using an Object Specific Action with the Lightning Record Page.
How to Create an Object Specific Action
- From Setup, go to Object Manager > Account > Buttons, Links, and Actions
- Click New Action
- For Action Type select Update a Record
- For Label, enter a label that is appropriate for this purpose. For example ‘Update Account Details’
- Enter a Description outlining the purpose of this action. For example ‘Displays Account details to users from Opportunity record page’
- Click Save.

Edit the Action Layout
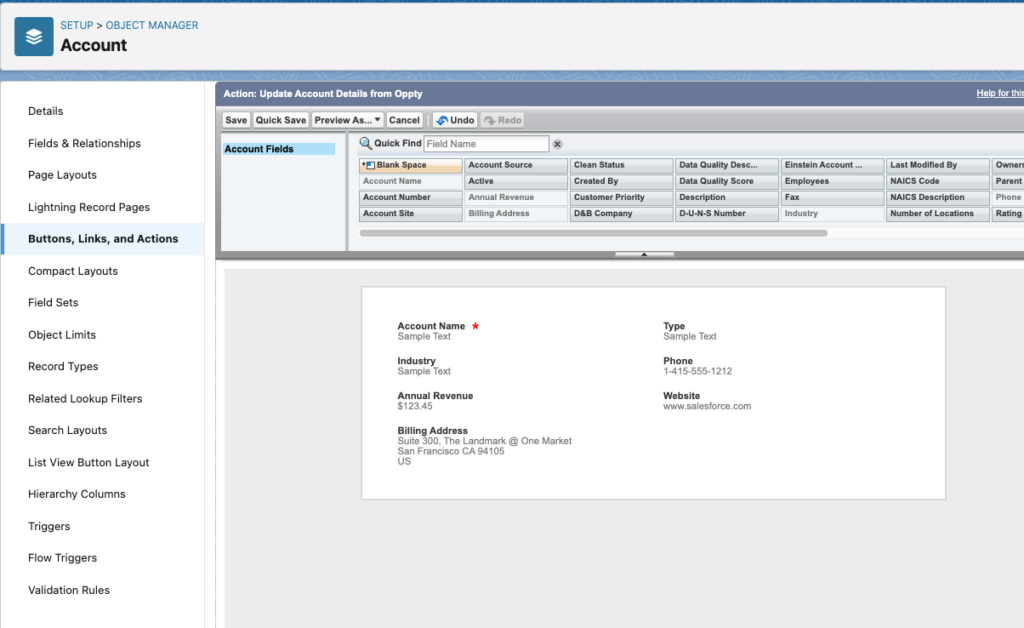
This is the key! This is where we decide what fields to display, and how they will be arranged.
- Once you have saved, you will be looking at the Action layout.
- Note: you can also access this later from the Action page by clicking on the Edit Layout button.
- Just like a page layout, drag and drop the fields that you want to be visible.

- Click Save.
Add the Account Action Layout to the Opportunity record page
Now that we have the Action Layout we want, here’s where we connect it to the Opportunity.
- From Setup, go to Object Manager > Opportunity > Lightning Record Pages.
- Select the Lightning Record Page you want to update.
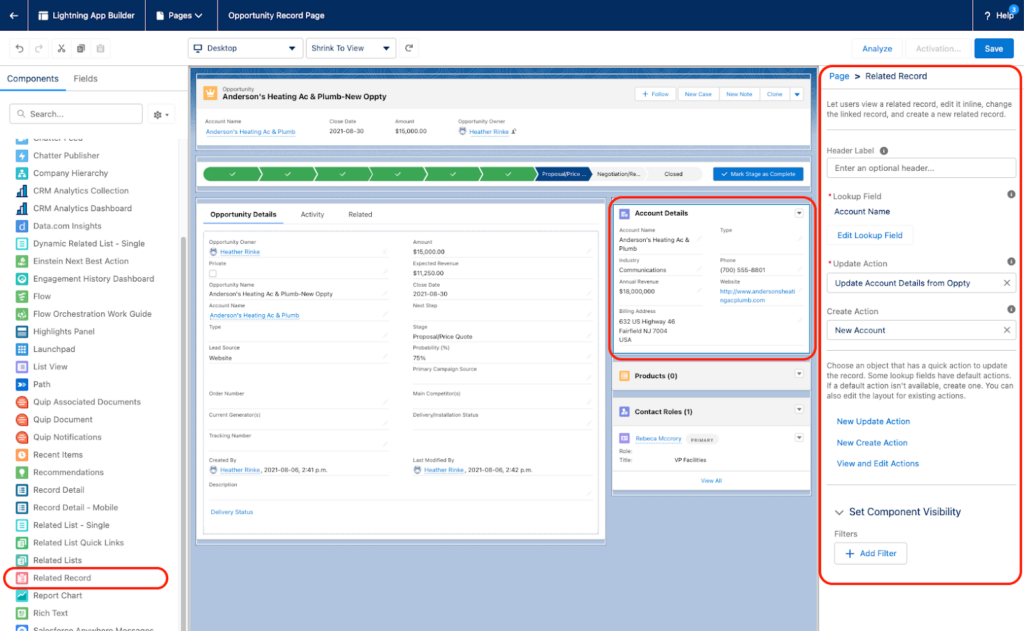
- Drag the ‘Related Record’ component where you want it on the page.
- In the Related Record settings panel on the right, update the following:
- Header Label = the heading that will appear at the top of that layout on the page
- Lookup Field = Account
- Update Action = the name of the action you created above
- Click Save.

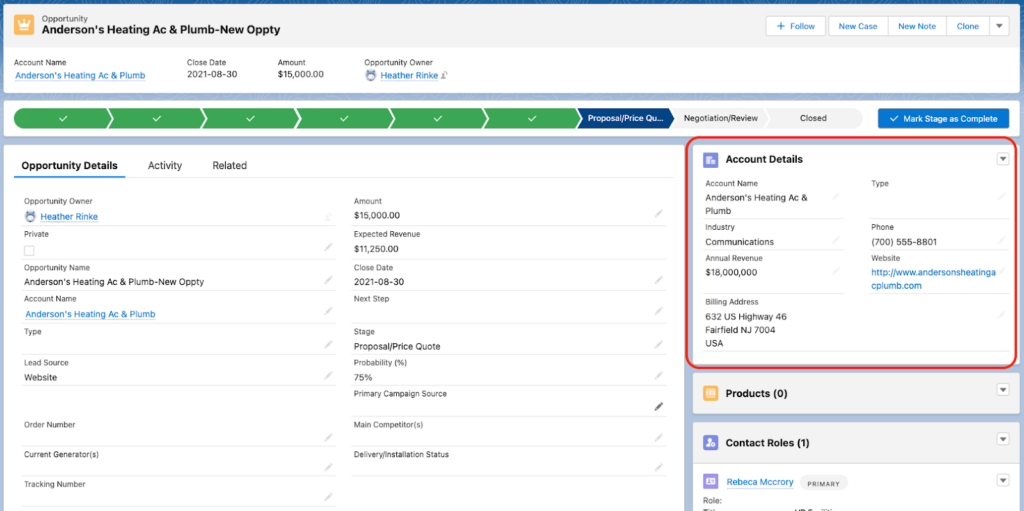
Now when looking at an opportunity, the related Account fields will appear on the Opportunity record page!

Editing Account Fields on the Opportunity Page
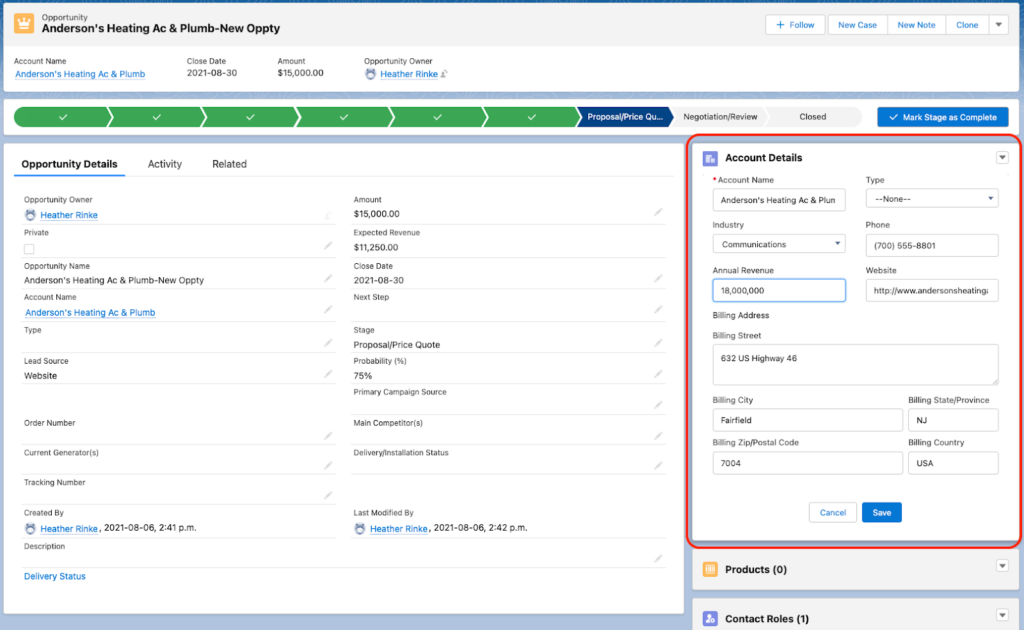
Unlike formula fields, these fields can be edited directly from the Opportunity.
To edit the Account fields, click the pencil icon next to the Account field you want to edit. All of the fields in that section will become editable, and notice that the Opportunity fields are not. When done, click the Save button to save the fields in that section. These fields are edited separately from the Opportunity fields.

Find Key Account Details on the Salesforce Opportunity Record Page
That’s it! Now the sales team can manage the key details on their Account and Opportunity in one place. All with a handy object-specific action layout and the flexibility of a Lightning record page.
Want to know how you can use this tip in your overall technology strategy? Reach out to the team at Sercante to start a conversation.
You can also check out these resources for more ways to make work flow between your sales and marketing teams:


